Step-by-Step Guide to Air Source Heat Pump Installation in New Homes

Estimated Reading Time: 15 minutes

Introduction: The Modern Heating Solution for New Builds

Air source heat pumps represent the future of home heating and cooling, especially for new build properties in London and across the UK. These innovative systems extract heat from the outside air—even in cold weather—and efficiently transfer it into your home. As the UK moves toward more sustainable building practices, air to air heat pump installation has become increasingly common in new construction projects, offering an environmentally friendly alternative to traditional gas boilers.

This comprehensive guide walks you through the entire process of fitting air source heat pump systems in new builds. Whether you’re a self-builder creating your dream home, a developer working on multiple properties, or a homeowner planning a new construction, you’ll find practical, step-by-step advice on everything from initial planning to final commissioning and beyond.

With the Future Homes Standard on the horizon and increasing focus on low-carbon technologies, understanding how a heatpump installed in your new property can enhance comfort, reduce carbon emissions, and potentially lower running costs is more valuable than ever. Let’s explore how to integrate these efficient heating systems into your new build project successfully.

Understanding Air Source Heat Pumps in New Homes

Air source heat pumps (ASHPs) operate on a surprisingly simple principle: they extract heat from the outside air and upgrade it through a refrigerant cycle to provide warmth for your home. Unlike traditional heating systems that burn fuel to generate heat, ASHPs move existing heat from one place to another—making them incredibly efficient. In well-designed systems, they can deliver 2.5-4+ units of heat for every unit of electricity consumed, depending on conditions and system design.

When considering air to air heat pump installation for a new build, it’s important to understand the two main system types:

Air-to-Water Heat Pumps

Air-to-water systems transfer the captured heat to water, which is then circulated through your home. These systems:

  • Heat water for underfloor heating, radiators, and domestic hot water via a cylinder
  • Function as a direct replacement for a traditional boiler in a wet central heating system
  • Represent the most common choice for UK new builds as they align well with Building Regulations and low-carbon targets

Air-to-Air Heat Pumps

Air-to-air systems work more like efficient reverse-cycle air conditioning units:

  • They use an outdoor unit connected to indoor fan-coil units that deliver warm (or cool) air directly into rooms
  • They don’t provide hot water—a separate solution is required
  • They’re particularly attractive for heating and cooling in open-plan or well-zoned homes

New build homes offer the perfect environment for heat pump technology. According to the Self Build Portal, modern construction standards create highly insulated, airtight buildings that allow heat pumps to operate at their most efficient—using lower flow temperatures while maintaining comfortable indoor conditions.

Why New Builds Are Ideal for Heat Pumps

There are several reasons why having a heatpump installed during construction makes perfect sense:

  1. High fabric efficiency – New builds can be designed with excellent insulation and airtightness, allowing heat pumps to run steadily at lower temperatures, maximizing efficiency and minimizing running costs.
  2. Freedom to design optimal systems – Starting from scratch means you can incorporate low-temperature emitters like underfloor heating from the beginning, rather than retrofitting them later.
  3. Design flexibility – New construction allows you to position outdoor units optimally, plan efficient pipe runs, and allocate space for all components without compromises.
  4. Regulatory compliance – Heat pumps help new homes meet increasingly stringent energy and carbon standards, making them attractive for achieving required SAP/EPC ratings.

The Grant UK Heat Pump Guide highlights that new builds with heat pumps often achieve better efficiency than retrofitted systems because the entire heating system can be designed specifically for low-temperature operation from day one.

Did You Know?

The Future Homes Standard, due to be implemented in the mid-2020s, aims for 75-80% lower carbon emissions compared to 2013 standards. Industry experts anticipate that heat pumps will effectively replace fossil fuel boilers in most new homes as a result of these changes.

Planning Stage: Preparing for Installation in London

Successful air source heat pump installation begins long before the first component is fitted. In London’s competitive property market, where space comes at a premium and building regulations can be stringent, early planning is absolutely essential.

The Importance of Early Planning in London Projects

Heat pump performance depends heavily on whole-house design considerations, including fabric efficiency, emitter selection, plant space allocation, and electrical infrastructure. For London properties, where space optimization is crucial, decisions about system type, plant room location, outdoor unit positioning, and heat distribution methods should be made at the concept or planning stage—not left until first fix.

Integrating these decisions early in your London project ensures that your architect can incorporate necessary spaces and access points into the design, potentially saving costly revisions later.

Assessing Heating and Cooling Needs

Before choosing specific equipment, you’ll need to consider several factors about your new London home:

  • Size, orientation, and overall design of the property
  • Insulation strategy and glazing performance
  • Whether cooling will be required (particularly relevant in London’s urban heat island)
  • Hot water requirements based on occupancy

While detailed heat-loss calculations will be performed later by your installer, having a conceptual understanding of these factors helps guide early decisions. According to the Royal Institution of Chartered Surveyors, properly sizing a heat pump is critical to its performance—undersized units struggle to heat the property, while oversized ones may cycle inefficiently and cost more than necessary.

Choosing Between Air-to-Air and Air-to-Water Systems for London Properties

For London new builds, your choice between system types should consider:

Choose air-to-water if:

  • You want hot water and space heating from a single system
  • You’re already planning underfloor heating or radiators
  • Meeting SAP calculations and Building Regulations is a priority
  • You prefer a more traditional heating approach with modern efficiency

Choose air-to-air if:

  • You want integrated cooling capability (valuable in London summers)
  • You’re comfortable having a separate hot water solution
  • Your London property has an open-plan layout well-suited to fan-coil placement
  • You want rapid response times for heating and cooling

Positioning Indoor and Outdoor Units in London Properties

Location planning is particularly critical in London, where outdoor space may be limited and neighbor considerations important:

Outdoor unit placement should consider:

  • Clear airflow access and adequate clearances for performance and maintenance
  • Proximity to the plant room to minimize pipe runs and heat losses
  • Noise implications for neighboring properties (especially important in London’s dense urban environment)
  • Visual impact on the property’s appearance and any planning sensitivities
  • Security and protection from debris or damage in urban settings

Indoor component location planning should include:

  • Space allocation for hot water cylinders, buffer tanks, and manifolds (for air-to-water)
  • Optimal positioning of fan-coil units for effective air distribution (for air-to-air)
  • Access for maintenance and future component replacement
London ASHP Planning
Space Constraints
Noise Considerations
System Integration
Planning Requirements
Efficiency Optimization
Aesthetic Impact

Coordination between your architect, builder, and mechanical/electrical designers is essential. Your ASHP specialist should be involved early to ensure that your London property’s plans incorporate:

  • ASHP plant space requirements in floor plans
  • Outdoor unit position on elevations and site plan
  • Routing for pipework, cable runs, and condensate drainage before structural and services drawings are finalized

This collaborative approach ensures that your fitting air source heat pump project is seamlessly integrated into the overall building design, reducing the risk of complications during construction.

Compliance, Permissions and Standards in London

Navigating London’s regulatory landscape for air source heat pump installation requires careful attention to both national regulations and local planning considerations. Understanding what permissions you need—and when you don’t—can save valuable time in your project timeline.

Planning Permission vs. Permitted Development in London

In most cases across England, including London, domestic air source heat pumps are classified as “permitted development,” meaning specific planning permission is often not required if the installation meets certain criteria. According to Rise Retrofit, these criteria typically include:

  • The unit is at least one meter from the property boundary
  • The installation complies with MCS Planning Standards or equivalent
  • The external unit volume is less than 0.6 cubic meters
  • The unit is not installed on a pitched roof or within 1 meter of a flat roof edge
  • The unit meets noise requirements (typically 42 decibels at neighboring property boundaries)

However, in London’s complex urban environment, you may still need planning permission if:

  • Your property is in a Conservation Area or Area of Outstanding Natural Beauty
  • You’re working with a listed building
  • The property is a flat rather than a house
  • Your installation doesn’t meet all permitted development criteria

As of May 2025, new regulations have simplified and expanded permitted development rights for heat pumps, making installations “simpler and more flexible” according to Navien UK. This is particularly beneficial for London homeowners looking to adopt this technology.

Building Regulations and Energy Standards for London New Builds

All new London homes must comply with current Building Regulations, with several sections particularly relevant to heat pump installations:

  • Part L (Conservation of fuel and power) – Sets standards for energy efficiency and carbon performance; heat pumps help meet low CO₂ targets and primary energy limits
  • Part F (Ventilation) – Important when designing airtight homes with MVHR systems alongside heat pumps
  • Part P (Electrical safety) – Covers electrical work associated with heat pump installation

Additionally, the London Plan includes policies that encourage sustainable design and construction, often making heat pumps an attractive option for meeting local planning requirements alongside national Building Regulations.

Certification and Competence Requirements

When selecting an installer for your London project, look for these important credentials:

  • MCS (Microgeneration Certification Scheme) – This UK certification covers both products and installers, and is typically required for accessing incentives like the Boiler Upgrade Scheme. It also provides quality assurance that’s particularly valuable in London’s high-end property market.
  • Professional body memberships – Affiliations with organizations like NICEIC (for electrical work) or relevant heating and ventilation associations indicate competence and adherence to industry standards.

Essential Documentation for London Heat Pump Projects

As a London property owner or developer, you should expect to receive a comprehensive documentation package including:

  • System design specifications and heat-loss calculation summary
  • MCS certificate (if applicable) and installer credentials
  • Manufacturer documentation including user and installation manuals
  • Commissioning sheets showing key settings, test results, and sign-off
  • Warranty and guarantee details
  • Maintenance schedule and service contact information

This documentation isn’t just for compliance—it’s valuable for future property sales and helps ensure your system operates efficiently for years to come.

Selecting the Right System and Installer

Choosing the appropriate heat pump system and a qualified installer is crucial for ensuring your London new build benefits from efficient, reliable heating and cooling. This section guides you through the evaluation process.

Evaluating Heat Pump Systems for London New Builds

When assessing heat pump options for your project, consider these key factors:

Capacity Range

Correct sizing is critical for system performance. Installers should calculate the required output based on the specific heat loss characteristics of your new build—not on general rules of thumb. According to the Greenmatch installation guide, an accurately sized system will provide optimal comfort while maintaining efficiency.

Efficiency Ratings

Look for high seasonal efficiency (SCOP) values and good energy-label ratings specifically for low-temperature operation, which is typical in well-insulated new homes. Higher efficiency ratings translate directly to lower running costs—particularly important in London where energy costs can be significant.

Brand Reliability

Prioritize established manufacturers with strong UK support networks, long-term parts availability, and proven track records. This is especially important in London’s premium property market, where system reliability directly impacts property value.

System Compatibility

Ensure the system can integrate effectively with other planned features of your home, such as:

  • Underfloor heating systems
  • Smart home controls
  • Solar PV or other renewable technologies
  • Cooling capabilities (if required)

Choosing a Professional Installer in London

London’s competitive construction market offers many installation companies, but quality varies significantly. Look for these qualifications when selecting your installer:

  • Relevant certification – MCS accreditation and proof of training on your chosen system brand
  • New build experience – Specific experience with heat pump installation in new construction rather than just retrofits
  • Local knowledge – Familiarity with London’s unique building stock and regulatory requirements
  • Comprehensive design approach – Willingness to provide detailed heat-loss calculations and system design documentation
  • Clear quotation process – Transparent pricing with scope, exclusions, and assumptions clearly stated
  • Verifiable references – Case studies or references from similar London projects

Essential Questions for Your Installer

Before committing to an installer for your air to air heat pump installation or air-to-water system, ask these important questions:

  1. “How have you sized the system for my specific new build design?”
  2. “What flow temperatures are you designing to, and how does that affect my choice of underfloor heating or radiators?”
  3. “How will the hot water system be configured, and what are the expected reheat times?”
  4. “What’s included in your commissioning and handover process?”
  5. “What warranties apply to both equipment and workmanship, and what servicing is required to maintain them?”
  6. “How will you integrate the heat pump with other systems like PV, MVHR, or smart controls?”
  7. “What experience do you have with similar London properties?”

Understanding Heat Pump Installation Quotations

A professional quotation for your London heat pump installation should include:

Component What to Expect
System Description Clear details of system type, model, capacity, and main components
Installation Scope Overview of pipework, electrical works, and any builder’s work required
Programme Timeline showing first-fix, second-fix, and commissioning dates aligned with build stages
Cost Breakdown Itemized equipment, labor, and ancillary costs including VAT
Terms Warranty information, service agreements, and payment schedule

Be wary of quotations that lack detail or seem unusually low—quality heat pump installation requires proper design and premium components to deliver long-term performance.

Site Preparation for New Builds

Proper site preparation is fundamental to successful heat pump integration in your London new build. This phase ensures that all the necessary groundwork is in place before equipment installation begins.

Integrating Heat Pump Installation into Your London Build Schedule

Heat pump installation isn’t a single event but a process that spans several stages of construction. For efficient project management, your London build schedule should accommodate:

  • Early shell stages: Installation of concrete pad/bracket and creation of external wall penetrations
  • First fix: Installation of pipework and cable routes before walls and floors are closed
  • Second fix: Mounting of equipment, final connections, and system filling
  • Commissioning: Final setup and testing near completion once power and water are available

This phased approach aligns with typical London construction sequencing and ensures that heat pump installation doesn’t create delays or require disruptive remedial work.

Preparing Foundations for the Outdoor Unit

The outdoor unit of your heat pump requires proper structural support. In London properties where space is often at a premium, careful preparation of this area is essential:

Concrete pad or slabs:

  • Must provide a stable, level base
  • Should be slightly raised to prevent issues with standing water or snow
  • Typically needs to be at least 100mm thick for domestic units

Wall brackets (common in London where ground space is limited):

  • Must be rated for the weight of your specific unit
  • Should include vibration isolation to prevent noise transmission through the building structure
  • Require adequate clearance for service access

Your installer should provide specific requirements for your chosen system, but discussing these needs with your builder early prevents misunderstandings or delays.

Planning Service Routes in London New Builds

Early planning of service routes is particularly important in London’s often complex building designs:

  • Refrigerant or flow/return pipe routes between outdoor unit and indoor components should be planned before insulation, plasterboarding, and floor screeds are completed
  • Electrical supply cables and control wiring paths need to be incorporated into first-fix electrical works
  • Condensate drainage routes must be established with adequate fall and frost protection

The Samphire Homes ASHP guide emphasizes that minimizing pipe and cable runs not only reduces heat loss and installation costs but also improves system efficiency—particularly valuable in premium London developments where energy performance is a selling point.

Ensuring Proper Ventilation and Drainage

For optimal performance of your outdoor unit in London’s variable climate:

  • Maintain clear space around the unit according to manufacturer specifications (typically 300-500mm at sides and 1000mm at front)
  • Ensure good air circulation to prevent the unit from recycling its own cold exhaust air
  • Provide proper drainage for condensate and defrost water to prevent ice formation on paths and patios during winter
  • Consider London’s microclimate—units in sheltered urban locations may perform differently than those in exposed areas

Coordinating Between Trades in London Projects

Effective coordination between different trades is crucial for smooth heat pump installation, especially in London’s fast-paced construction environment:

  • Builder: Responsible for pad/bracket installation, wall penetrations, structural openings, and making good
  • Plumber/ASHP installer: Handles primary pipework, cylinder installation, manifold fitting, and system flushing
  • Electrician: Provides electrical supplies, isolators, consumer unit modifications, and control system wiring

Regular coordination meetings should align heat pump installation tasks with other building services to avoid clashes and ensure efficient workflow—particularly important in London’s typically tight construction timelines.

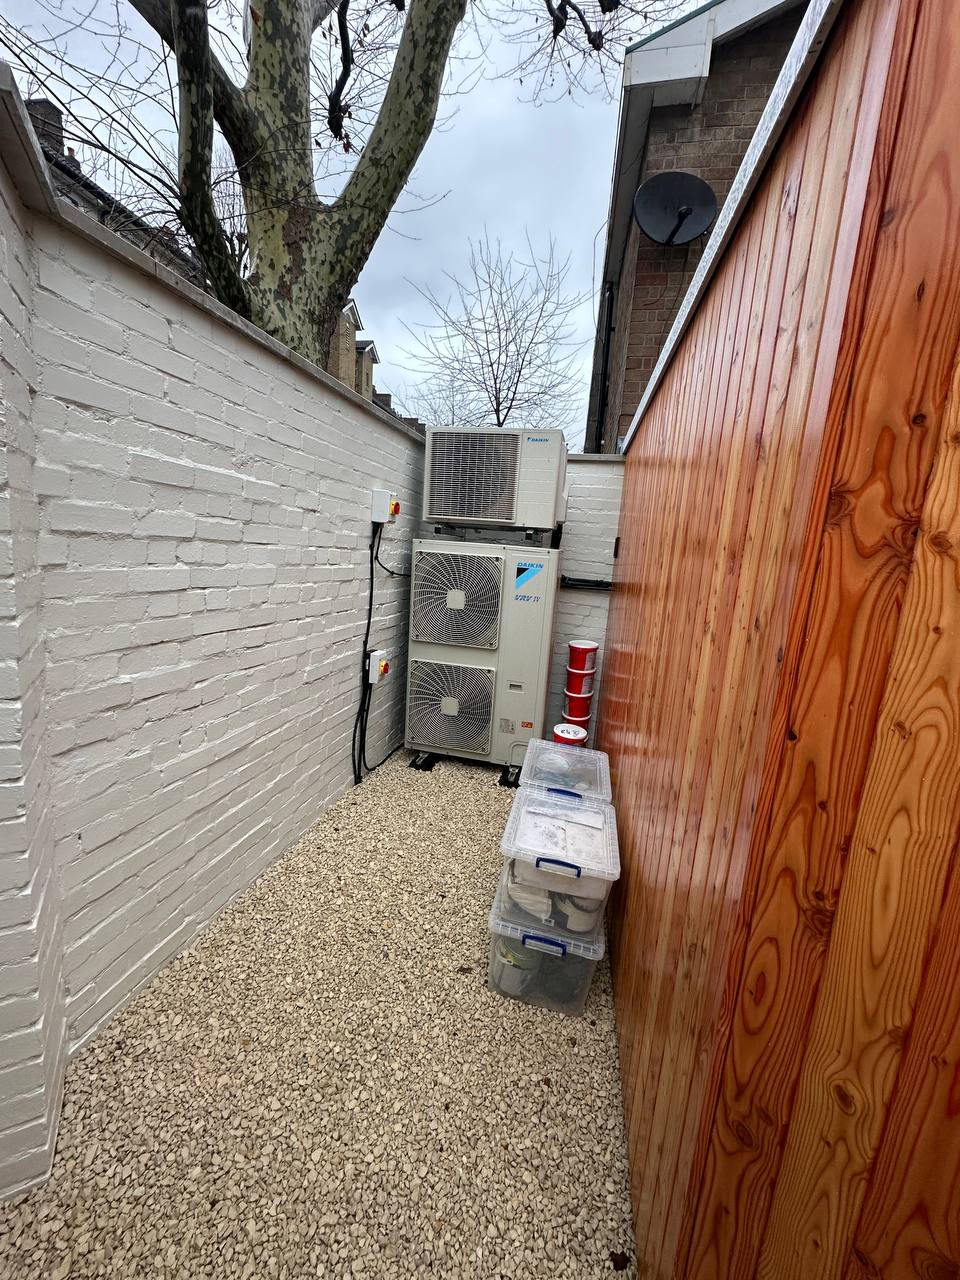
Outdoor Unit Installation: Step-by-Step

The outdoor unit is the heart of your air source heat pump system. Its proper installation is crucial for system efficiency, longevity, and compliance with London’s noise regulations and aesthetic considerations.

Finalizing the Outdoor Unit Position

Before installation begins, confirm the final position based on:

  • Required clearances for airflow and maintenance access (typically 300-500mm at sides, 1000mm at front)
  • Noise implications for neighboring properties—particularly important in London’s dense urban environment
  • Aesthetic impact on the property’s appearance
  • Optimal pipe run distance to indoor components
  • Protection from falling debris, especially in London’s tree-lined streets

According to Navien UK’s installation guide, positioning the outdoor unit correctly not only ensures optimal performance but also helps comply with the noise limits required under permitted development rules—crucial for avoiding planning issues in London.

Installation Sequence for Outdoor Units

The typical installation process follows these steps:

  1. Install base or brackets: Secure the concrete pad or wall-mounting brackets, ensuring they’re level and stable. For wall mounts, verify the wall construction can support the unit’s weight.
  2. Position anti-vibration mounts: These reduce noise transmission and are particularly important in London’s terraced or semi-detached properties where noise could affect neighbors.
  3. Lift and secure the outdoor unit: Carefully position the unit on its mounting system, ensuring it’s level and firmly fixed. This often requires at least two people due to the unit’s weight.
  4. Connect service routes: Attach pipework (refrigerant lines for air-to-air systems or flow/return water pipes for air-to-water systems) and electrical connections according to the manufacturer’s specifications.
  5. Install condensate drainage: Connect and test the condensate drain to ensure proper water discharge away from the building’s foundations.
  6. Verify clearances: Confirm that the installed unit maintains all required clearances for airflow and future maintenance access.

Weather and Debris Protection in London Conditions

London’s urban environment presents specific challenges for outdoor heat pump units:

  • Position the unit to avoid overhead gutters or roof edges that could drip directly onto it
  • Consider simple guards or covers to protect from falling leaves in London’s leafy neighborhoods
  • Ensure the unit is elevated enough to prevent issues during heavy rain or potential flooding
  • In areas with high pollution or dust levels (common in central London), allow for more frequent coil cleaning

These precautions help maintain system efficiency and extend equipment life despite London’s variable weather conditions and urban environment.

Professional Tip

In London’s premium property market, consider acoustic enclosures or decorative screens that reduce noise while enhancing aesthetics. These must be carefully designed to maintain proper airflow while addressing both visual impact and sound concerns—particularly valuable in high-end developments where external appearance affects property value.

Differences Between Air-to-Air and Air-to-Water Outdoor Installations

While the outdoor units for both system types look similar, there are important differences in their connections:

  • Air-to-water systems: Connect to water flow and return pipes, typically with insulation to prevent heat loss and often located close to the internal plant room housing the hot water cylinder
  • Air-to-air systems: Connect to refrigerant lines that branch to multiple indoor fan-coil units throughout the property, requiring careful planning of refrigerant pipe routes

Your installation team should be experienced with your specific system type to ensure proper setup and compliance with refrigerant handling regulations where applicable.

Indoor Components and Distribution Systems

The indoor elements of your heat pump system are crucial for effectively distributing warmth (and potentially cooling) throughout your London property. This section explains the installation considerations for these components.

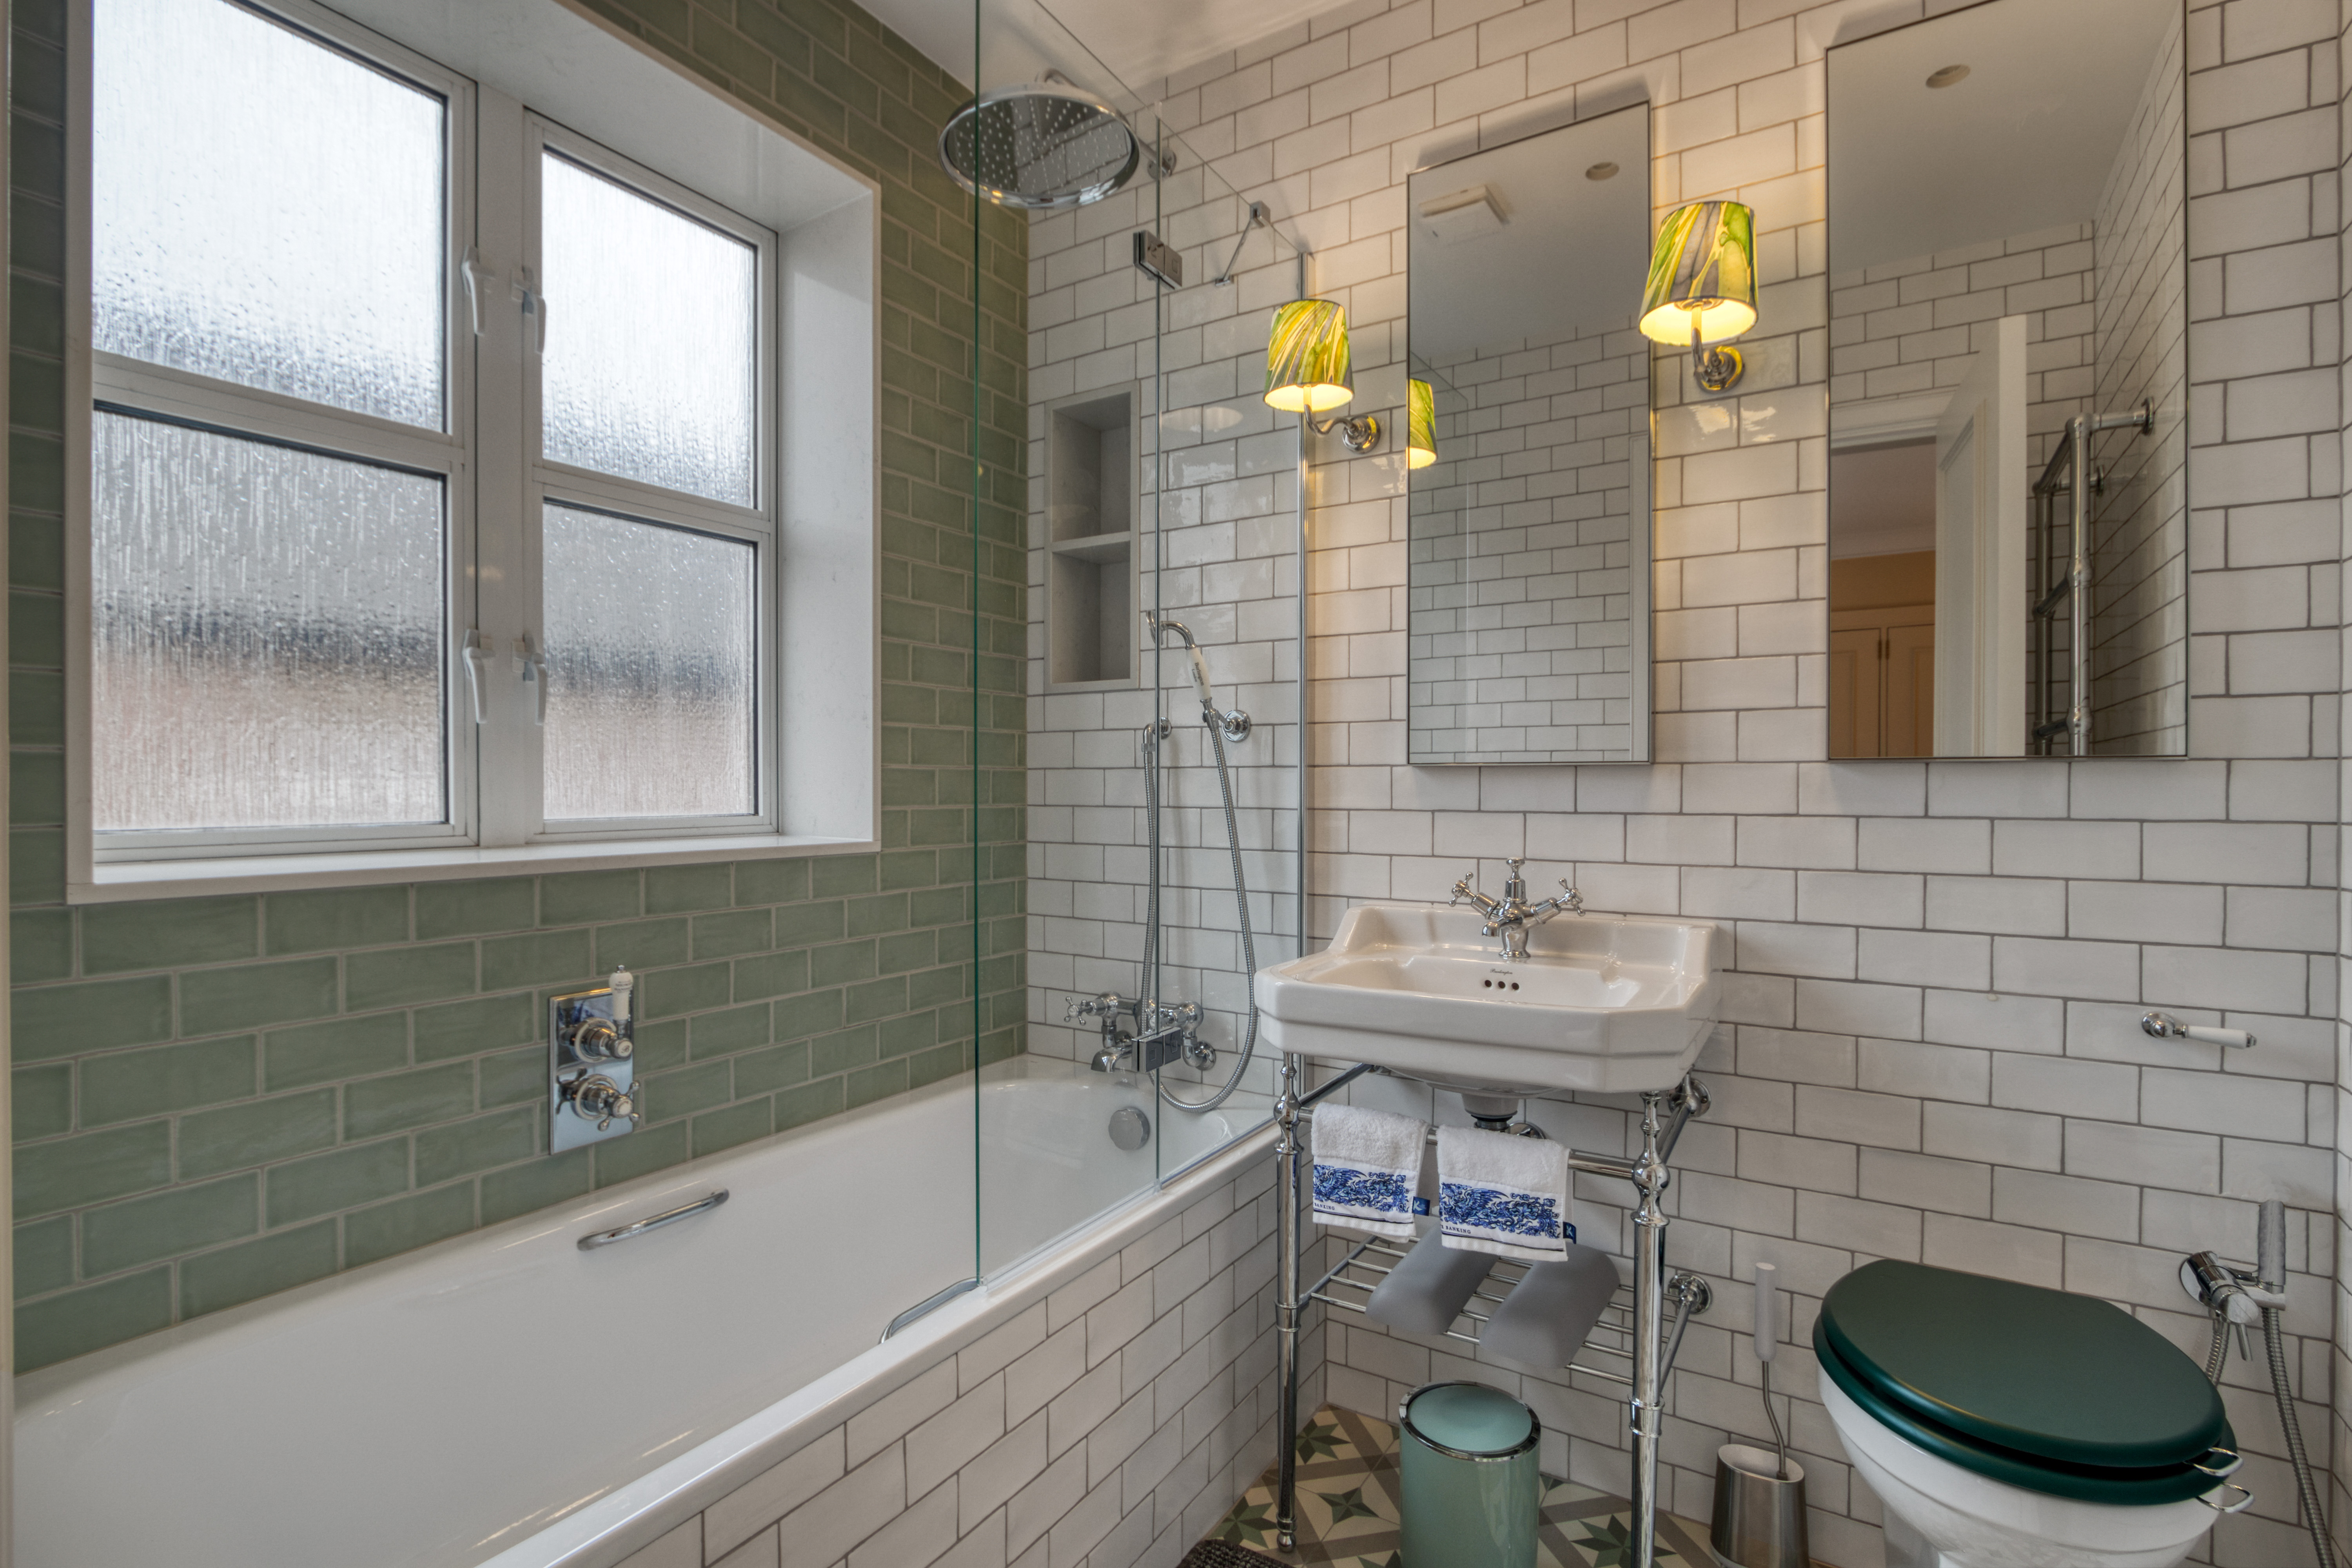
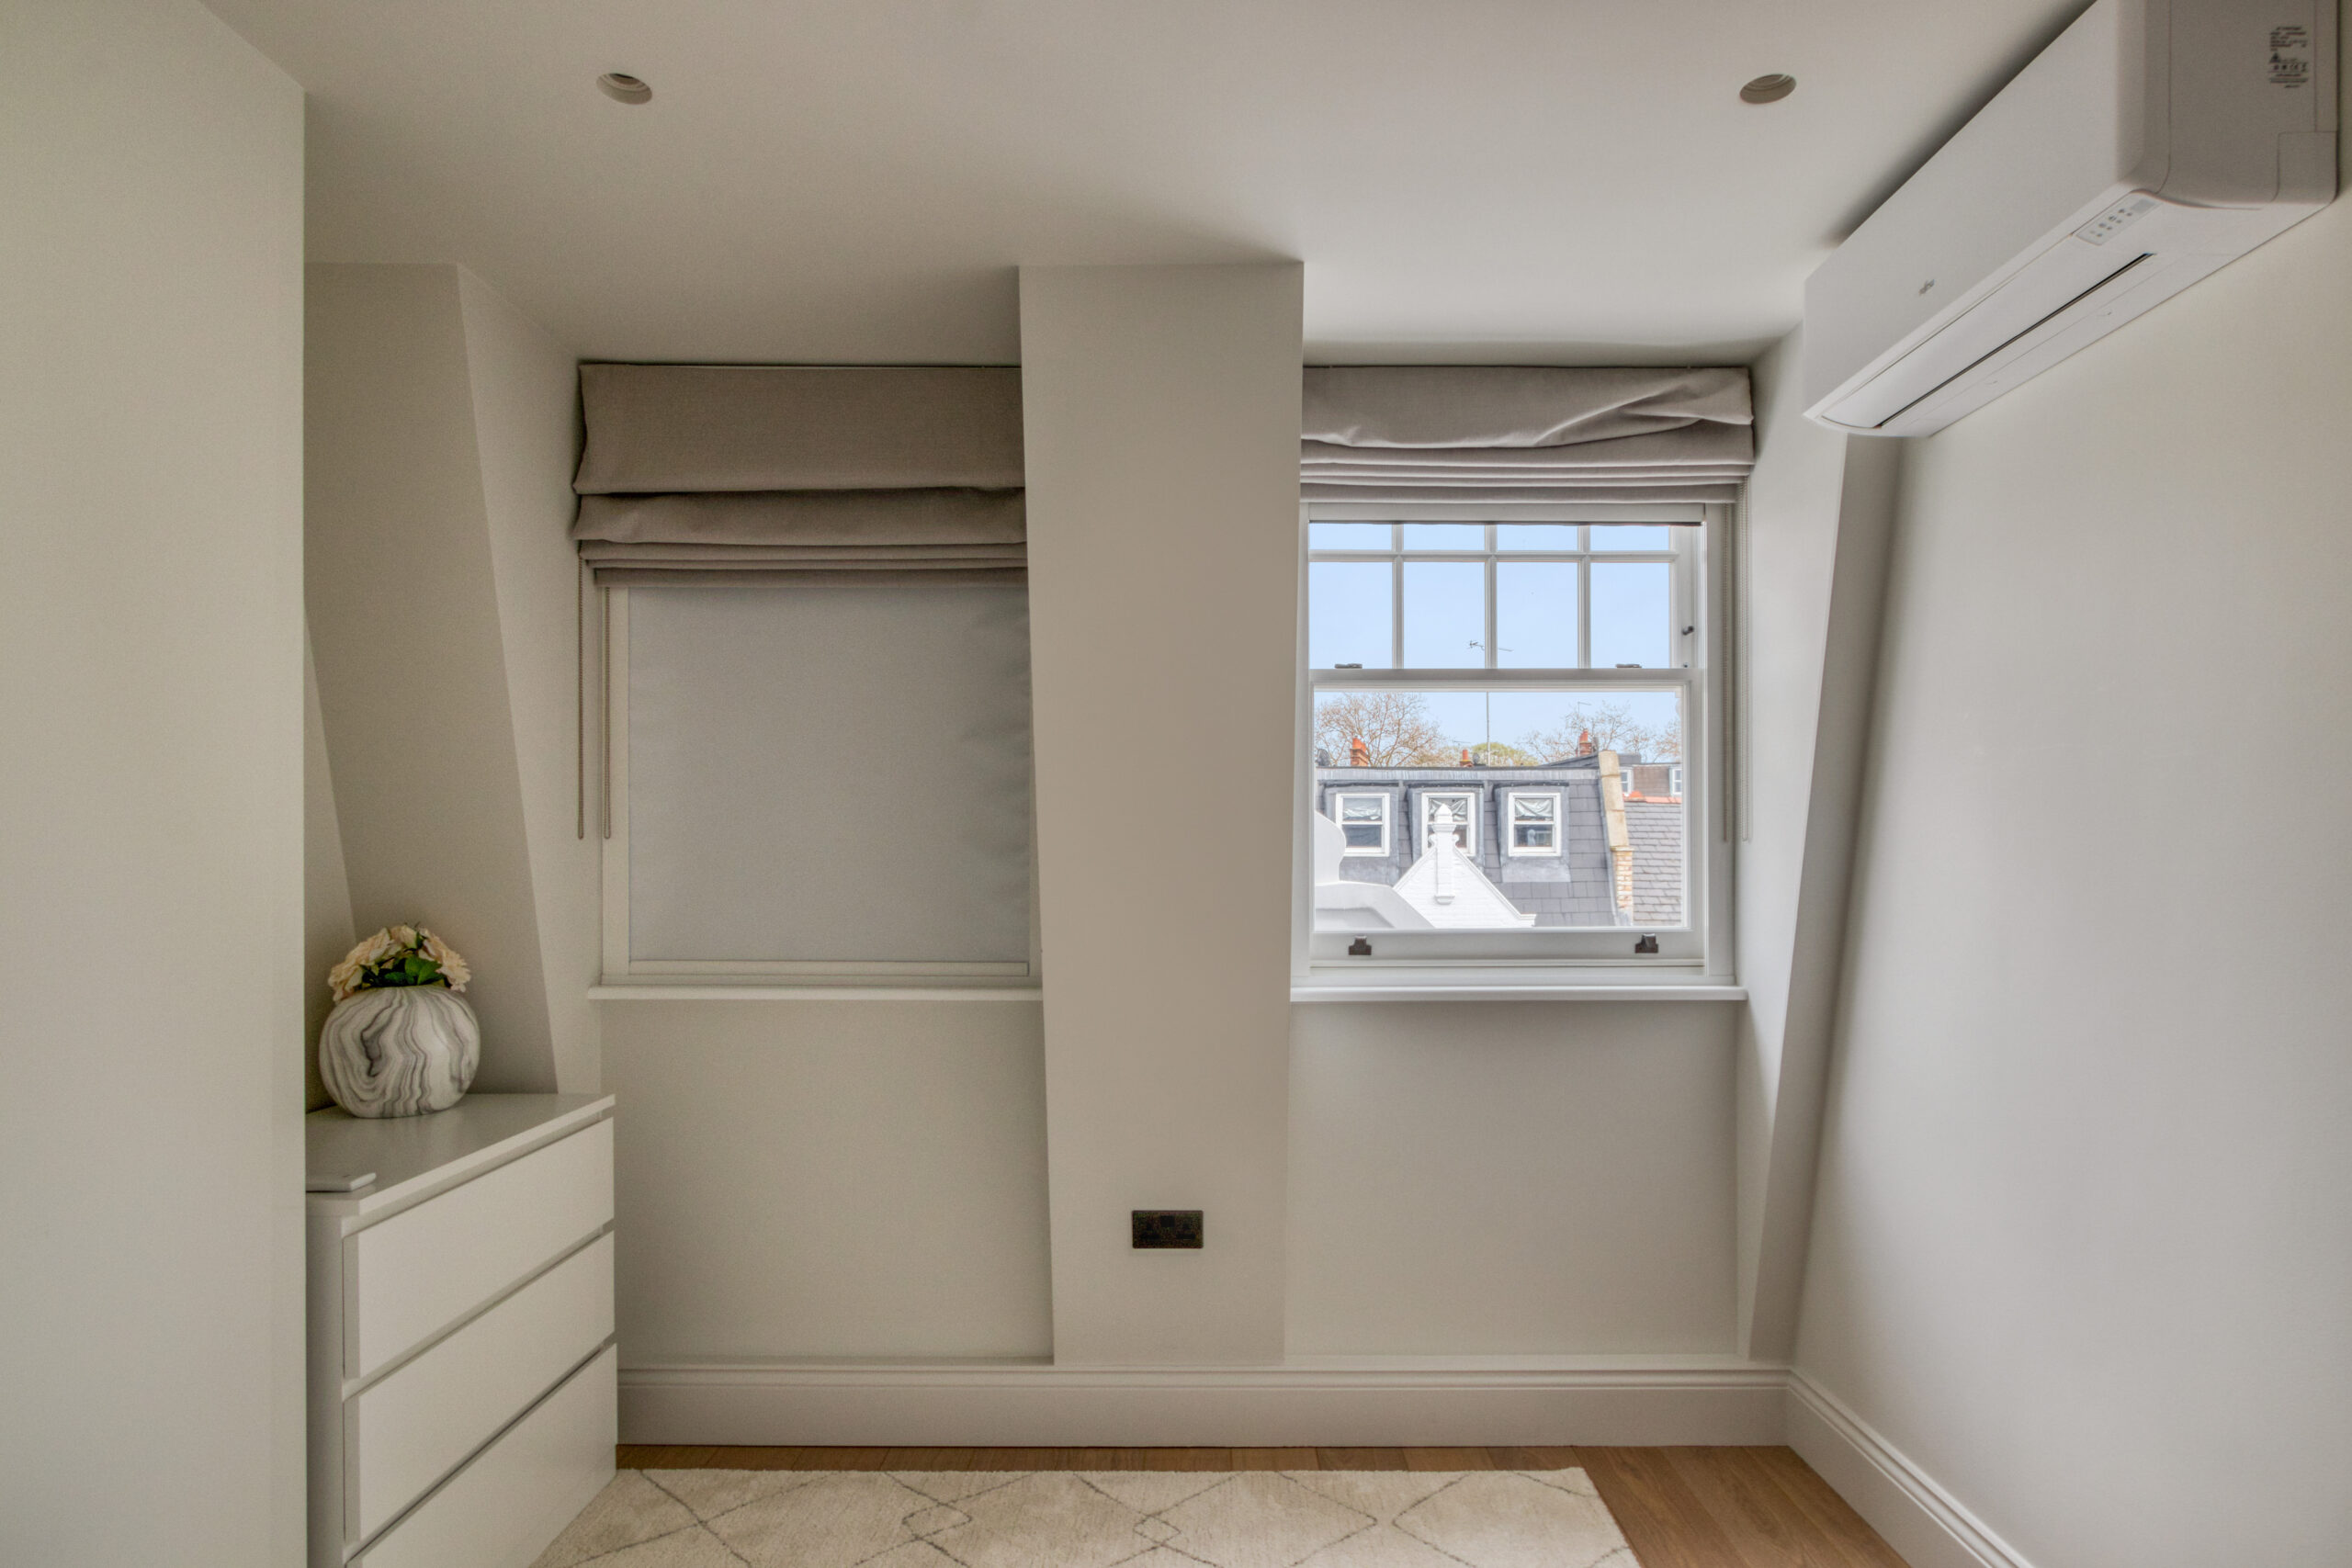
Installing Indoor Units for Air-to-Air Systems in London Homes

Air-to-air heat pump systems use indoor fan units to distribute conditioned air directly into your living spaces:

Positioning considerations:

  • High-wall units are typically installed 2.1-2.4m above floor level for optimal air distribution
  • Ceiling cassettes provide discreet installation in rooms with suspended ceilings
  • Floor-standing units may be preferred in rooms with limited wall space
  • All units should be positioned to avoid direct airflow onto seating areas or beds

Zoning strategy for London properties:

  • Separate indoor units allow independent temperature control in different zones
  • Common configurations include separate units for living areas and bedroom zones
  • For London’s open-plan apartments, strategic unit placement ensures even coverage

Condensate management:

  • Each indoor unit requires condensate drainage (especially important when using cooling mode)
  • Drain lines must have sufficient fall (minimum 1:50) to prevent water pooling
  • Condensate pumps may be required where gravity drainage isn’t possible

Air-to-Water Indoor Components for London New Builds

Air-to-water systems require several indoor components to distribute heat via water:

Hot water cylinder installation:

  • Typically located in a dedicated plant room, utility room, or purpose-built cupboard
  • Must be properly sized based on household hot water demand
  • Requires sufficient access space for maintenance and potential future replacement

Space heating distribution options:

  • Underfloor heating: Ideal for heat pumps due to its large surface area that works efficiently with lower flow temperatures. According to Nu-Heat Northeast, underfloor heating paired with heat pumps can deliver superior comfort while maintaining high efficiency.
  • Low-temperature radiators: Larger than conventional radiators to work effectively with the lower flow temperatures typical of heat pump systems

Controls integration:

  • Central control panel for the heat pump system
  • Room thermostats and zone controllers for temperature management throughout the property
  • Weather compensation controls that adjust system operation based on outdoor temperature

Pipework and Cabling Installation

Proper installation of distribution networks is critical for system efficiency:

  • All pipework and cable routes should be planned and installed before walls and floors are closed to avoid surface-mounting later
  • Pipework must be properly insulated to minimize heat loss during distribution
  • Refrigerant pipes for air-to-air systems require careful installation with proper bending techniques and joint sealing
  • For air-to-water systems, heating circuits should be pressure-tested before final connections

Integration with Other Building Systems

Modern London properties often incorporate multiple systems that should work harmoniously with your heat pump:

  • MVHR (Mechanical Ventilation with Heat Recovery): Supply and extract locations should be coordinated with your heating distribution to avoid cold spots or interfering with airflow patterns
  • Solar PV: Controls can be configured to optimize heat pump operation during periods of solar generation, maximizing self-consumption of generated electricity
  • Smart home systems: Integration with property-wide automation can enhance comfort while optimizing energy use

In London’s premium property market, seamless integration of these systems can significantly enhance both comfort and property value.

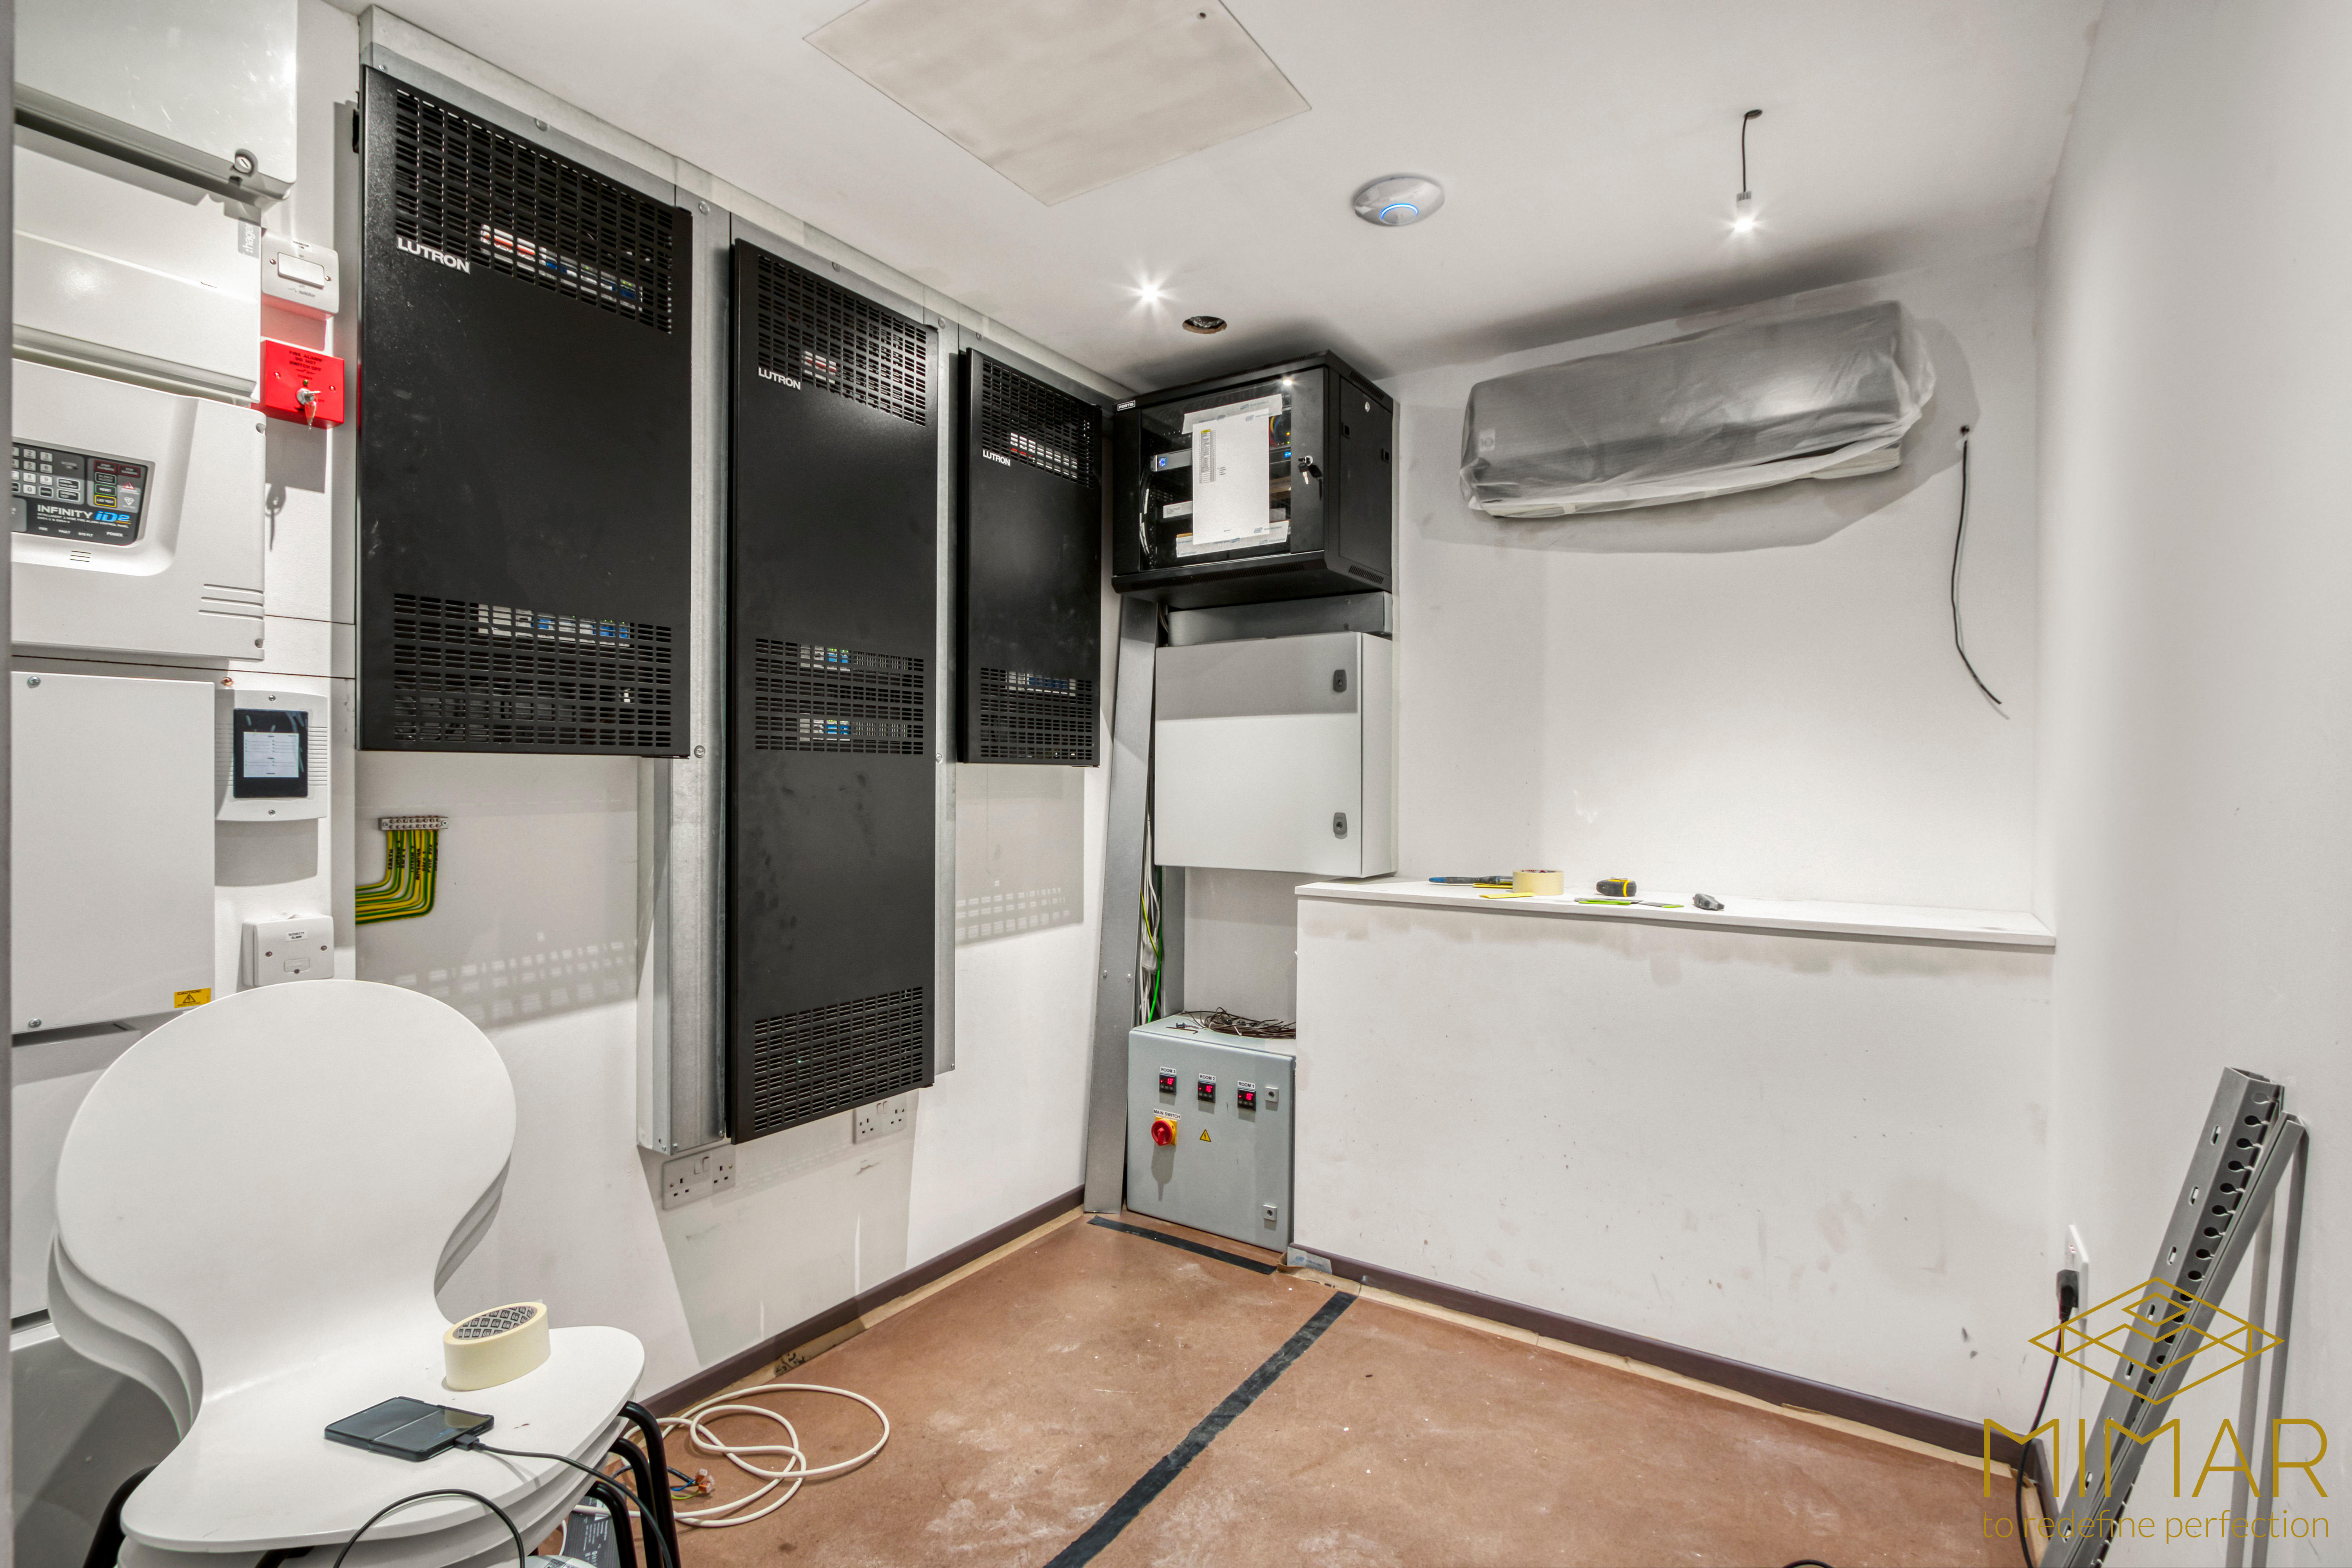
Electrical and Control System Integration

The electrical infrastructure and control systems are critical components of your heat pump installation. In London’s high-value property market, sophisticated control systems are increasingly expected as standard in new builds.

The Electrician’s Role in London Heat Pump Installations

A qualified electrician is essential to your installation team and will be responsible for:

  • Providing a properly sized dedicated circuit for the heat pump with appropriate protection devices
  • Installing isolators for safe maintenance access
  • Running power supplies to both outdoor and indoor units
  • Installing control wiring between system components
  • Testing all electrical connections for safety and compliance with regulations

In London’s complex regulatory environment, using NICEIC-registered electricians helps ensure compliance with both Building Regulations and specific local requirements.

Connecting to Your Home’s Electrical System

Heat pumps require proper integration with your property’s electrical infrastructure:

  • The system connects to the consumer unit via a dedicated circuit breaker (typically 20-40 amps depending on system size)
  • Protection devices including RCDs/RCBOs must be installed according to current regulations
  • An external weatherproof isolator is installed near the outdoor unit for maintenance safety
  • For larger systems, your electrician may need to verify that your property’s incoming supply capacity is sufficient

The Greenmatch installation guide notes that electrical work for heat pump installation should always be performed by qualified electricians who understand the specific requirements of these systems.

Control Systems for London Heat Pumps

Modern heat pump installations in London typically include sophisticated control systems:

Basic control components:

  • Heat pump controller managing overall operation
  • Room thermostats for temperature monitoring and adjustment
  • Zone controllers for managing different areas independently
  • Hot water temperature and timing controls

Advanced control options:

  • Weather compensation systems that adjust operation based on outdoor temperature
  • Smart controls allowing remote operation via smartphone apps
  • Integration with home automation systems
  • Energy monitoring to track system performance

For London properties, where owners often expect cutting-edge technology, these advanced control options can be a significant selling point.

Setting Up User-Friendly Controls

During commissioning, your installer should:

  • Configure basic schedules and temperature set-points based on your lifestyle and preferences
  • Program appropriate set-back temperatures for periods when spaces are unoccupied
  • Ensure all controls are intuitively labeled and easy to understand
  • Set up any smartphone apps or remote access systems

This setup process is crucial for ensuring that your system operates efficiently from day one. According to the Samphire Homes ASHP guide, proper control setup can significantly impact both comfort levels and running costs.

London Energy Savings Tip

If your London property has solar PV installed or you’re on a time-of-use electricity tariff, ask your installer about configuring your heat pump controls to prioritize operation during low-cost periods or when solar generation is at its peak. This can substantially reduce running costs in London’s expensive energy market.

Commissioning and Testing Your Heat Pump

Commissioning is the critical final stage that transforms your installed components into a functioning, efficient heating system. This process ensures your London property’s heat pump will deliver optimal performance from day one.

What Commissioning Involves

In simple terms, commissioning includes:

  • System checks: Verifying that all components are installed correctly and operating as intended
  • Settings adjustment: Fine-tuning flow temperatures, weather compensation curves, and operating schedules
  • Performance testing: Confirming the system can effectively heat your space and provide hot water as designed
  • Safety verification: Testing all safety devices and protective functions

Commissioning should always be performed by qualified technicians who understand both the technical requirements of the system and the specific needs of your London property.

The Installer’s Commissioning Process

After the physical installation is complete, your installer will follow a structured commissioning sequence:

  1. System preparation: Filling and flushing the heating system to remove air and debris
  2. Initial power-up: Carefully activating the system and performing initial checks
  3. Configuration: Programming the heat pump controller with appropriate settings
  4. Test cycles: Running the system through heating, cooling (if applicable), and hot water cycles
  5. Performance verification: Measuring key parameters like flow temperatures, return temperatures, and pressure
  6. Control testing: Ensuring all thermostats, zones, and schedules function correctly
  7. Documentation: Recording all commissioning data on a formal commissioning sheet

This process typically takes several hours to complete properly and should not be rushed. According to the Greenmatch installation guide, thorough commissioning is essential for ensuring both efficiency and reliability.

Documentation and Demonstration for London Homeowners

At the end of commissioning, your installer should provide:

  • Comprehensive user guides and equipment manuals
  • A summary of key system settings and their purpose
  • A detailed maintenance schedule outlining required service intervals
  • Warranty documentation for all major components
  • Contact information for ongoing support and service

Additionally, they should conduct a thorough demonstration showing you:

  • How to adjust room temperatures and hot water settings
  • How to switch between operating modes
  • How to set schedules and timers
  • What to do if you notice any warning indicators

This handover process is particularly important in London’s premium property market, where clients expect comprehensive support and clear documentation.

Performance and Efficiency Verification

Before signing off on the installation, your commissioning engineer should verify:

  • That all rooms can reach and maintain their set-point temperatures
  • That hot water is delivered at the correct temperature and with appropriate recovery times
  • That the system is operating within the efficiency parameters promised during design

Some installers may also set up ongoing monitoring to track system performance over time, allowing for future optimization based on actual usage patterns.

Handover: Living With Your New Heat Pump

The handover marks the transition from installation to everyday use of your heat pump system. Understanding how to operate and interact with your new heating system is essential for maximizing comfort and efficiency in your London home.

Essential Knowledge for New Heat Pump Owners

On handover day, ensure you understand:

  • The basics of turning your system on and off safely
  • How to select between heating, hot water, and cooling modes (if applicable)
  • Methods for adjusting room temperatures and hot water settings
  • Programming schedules for different times of day or days of the week
  • Special functions like “holiday mode” for periods of absence
  • How to identify and respond to any warning indicators

Take notes during the demonstration and don’t hesitate to ask questions—this is your opportunity to gain confidence with the system.

The Settling-In Period for London Heat Pump Systems

New heat pump systems typically require an adjustment period:

  • During the first few weeks, you may need minor adjustments to schedules and set-points as you learn how the system behaves in your specific property
  • The installer might need to fine-tune weather compensation settings if some rooms are slightly over or under-heated
  • In new builds, there’s often a “drying out” period where the building fabric releases moisture, which can affect heating behavior
  • Your usage patterns may evolve as you become familiar with the system, leading to further optimization opportunities

This settling-in phase is normal and doesn’t indicate any problem with the installation—it’s simply part of adapting the system to your specific needs and property characteristics.

Seasonal Operation in London’s Climate

Understanding how your system operates throughout London’s seasonal changes helps maximize comfort and efficiency:

Air-to-air systems:

  • Switching between heating and cooling modes requires a simple controller adjustment
  • Set appropriate temperatures—avoid excessively low cooling settings in summer (around 23-24°C is typically comfortable while remaining efficient)
  • Be aware that performance can vary with outdoor temperature, particularly in London’s occasional temperature extremes

Air-to-water systems:

  • Space heating typically runs more in winter months while hot water production continues year-round
  • Some systems have different settings for the heating season versus summer mode
  • Weather compensation automatically adjusts operation based on outdoor conditions, optimizing efficiency

Adapting to Heat Pump Living

Heat pumps operate differently from traditional heating systems, and adapting your habits can enhance comfort and efficiency:

  • Heat pumps typically work best when maintaining steady temperatures rather than with large setbacks and recovery periods
  • In well-insulated London new builds, minor temperature setbacks (1-2°C) overnight or during absences are more efficient than turning the system off completely
  • Be patient with temperature changes—heat pumps often heat rooms more gradually than gas boilers but maintain more consistent comfort
  • Take advantage of zoning capabilities to heat only the areas you’re using, particularly valuable in larger London properties

With proper understanding and small adjustments to your heating habits, your heat pump will deliver exceptional comfort while maintaining energy efficiency.

Maintenance, Servicing and Long-Term Care

Proper maintenance ensures your London heat pump installation continues to operate efficiently throughout its expected 15-20 year lifespan. This section outlines essential care practices for heat pump owners.

Routine Homeowner Maintenance

As a heat pump owner, several simple maintenance tasks will help maintain peak performance:

  • Regularly check that the outdoor unit remains clear of leaves, debris, and snow—particularly important in London’s leafy suburbs and during autumn
  • Ensure vegetation around the outdoor unit is trimmed back to maintain proper airflow (typically at least 300-500mm clearance)
  • Periodically check indoor components for any signs of water leakage or unusual operation
  • If you have an air-to-air system, clean or replace indoor unit filters according to manufacturer recommendations (typically every 1-3 months)

According to the Rise Retrofit quick guide, keeping the outdoor unit clean and unobstructed is one of the most important maintenance tasks and can significantly impact system efficiency.

Professional Servicing Requirements

To maintain warranty coverage and ensure optimal performance, professional servicing is essential:

  • Most manufacturers recommend annual servicing by a qualified technician
  • Professional service typically includes:
    • Visual inspection of outdoor and indoor units
    • Checking refrigerant levels and pressures
    • Examination of electrical connections and components
    • Cleaning of heat exchangers and filters
    • Verification of control system operation
    • Testing of safety devices
  • For London properties, consider setting up a service agreement with your installer or a reputable local maintenance company

Regular professional servicing not only maintains efficiency but can identify potential issues before they develop into costly problems.

The Impact of Good Maintenance on Performance

Investing in proper maintenance delivers significant benefits:

  • Sustained efficiency: Well-maintained systems maintain their efficiency ratings, keeping running costs low—particularly important with London’s high energy prices
  • Enhanced reliability: Regular checks reduce the risk of unexpected breakdowns and extend system lifespan
  • Warranty protection: Most manufacturers require documented annual servicing to maintain warranty coverage
  • Optimal comfort: Properly maintained systems deliver more consistent heating and cooling performance

The Royal Institution of Chartered Surveyors notes that well-maintained heat pumps can maintain their efficiency levels throughout their operational life, making maintenance a worthwhile investment.

Recognizing Warning Signs

Being alert to potential issues allows for early intervention. Contact your service provider if you notice:

  • A noticeable drop in heating performance or hot water temperature
  • Unusual noises from either outdoor or indoor units
  • Error codes or warning lights on your controller display
  • Significant ice buildup on the outdoor unit outside of normal defrost cycles
  • Unexpected increases in electricity consumption

Prompt attention to these warning signs can prevent minor issues from developing into major problems requiring costly repairs.

London Property Management Tip

For London investment properties or high-end homes, consider remote monitoring systems that alert both you and your maintenance provider to performance issues in real-time. These systems can be particularly valuable for properties that aren’t continuously occupied, providing peace of mind and protecting your investment.

Costs, Timelines and Avoiding Common Pitfalls

Understanding the financial and scheduling aspects of heat pump installation helps ensure your London project proceeds smoothly and delivers value for money.

Heat Pump Installation Timeline in London New Builds

Heat pump installation integrates with your construction schedule at several key points:

  • Design stage (pre-construction): System selection, layout planning, and plant space allocation
  • Shell and first fix: Installation of outdoor unit base, wall penetrations, and preliminary pipe/cable runs
  • Second fix: Equipment mounting, final connections, and system filling
  • Pre-completion: Commissioning, testing, and handover

For most London residential properties, the actual on-site installation work typically spans 2-5 days, depending on system complexity and property size. However, these days are spread across the construction timeline rather than occurring consecutively.

According to Nu-Heat Northeast, coordinating heat pump installation with other construction activities is essential for efficiency and cost control, particularly in London’s fast-paced building environment.

Cost Components for London Heat Pump Projects

While specific prices vary based on property size, system type, and London location, understanding the main cost categories helps with budgeting:

Equipment costs:

  • Outdoor unit(s)
  • Indoor components (cylinder, manifolds, fan coils)
  • Control systems
  • Distribution system (underfloor heating, radiators, or fan coils)

Installation labor:

  • ASHP specialist/heating engineer
  • Electrician
  • Commissioning engineer

Additional works:

  • Groundworks for outdoor unit base
  • Electrical supply upgrades if required
  • Any decorative screening or acoustic treatment

In London’s premium construction market, high-quality heat pump installations typically represent a significant but worthwhile investment in long-term comfort and energy efficiency.

Common Installation Mistakes and How to Avoid Them

Being aware of typical pitfalls helps ensure your project runs smoothly:

Late decision-making: Selecting a heat pump after the design is finalized often leads to compromised locations and inefficient layouts. Solution: Integrate heat pump planning from the earliest design stages.

Poor outdoor unit positioning: Inadequate attention to noise, airflow, or access can cause neighbor complaints and performance issues. Solution: Carefully consider all aspects of outdoor unit location, particularly in London’s dense urban environment.

Undersized distribution systems: Conventional radiators or underfloor heating not designed for heat pump operation can lead to poor comfort and efficiency. Solution: Ensure all emitters are specifically designed for low-temperature operation.

Weak coordination between trades: Miscommunication often results in missing or misrouted services. Solution: Establish clear drawings, specifications, and regular site coordination meetings.

Insufficient user training: Inadequate handover can lead to inefficient operation. Solution: Ensure comprehensive demonstration and documentation are provided.

The Navien UK installation guide emphasizes that proper planning and communication between all parties involved is the key to avoiding these common issues.

Maximizing Value from Your London Heat Pump Investment

To ensure the best return on your investment:

  • Select a system with high seasonal efficiency ratings (SCOP)
  • Prioritize quality installation over lowest upfront cost
  • Consider the total cost of ownership (initial investment plus running costs) rather than just purchase price
  • Ensure your system is properly sized—neither oversized nor undersized
  • Choose a reliable manufacturer with good warranty coverage and UK support

In London’s property market, a well-designed and properly installed heat pump system can add significant value to your property while delivering long-term operating cost benefits.

Integration with Your Home’s Energy Strategy

Heat pumps work most effectively as part of a comprehensive energy strategy. For London new builds, integrating your heat pump with other systems and approaches maximizes both comfort and efficiency.

Heat Pumps in Low-Carbon London Homes

Your air source heat pump forms a central component in a low-carbon home strategy:

  • It provides efficient electric heating, aligning with the UK’s increasingly renewable electricity grid
  • It supports London’s sustainability goals and helps meet building regulations
  • When paired with other technologies, it creates a comprehensive approach to reducing carbon emissions and energy costs

The Grant UK guide to heat pumps in new builds notes that heat pumps are increasingly becoming the standard heating solution for new properties as the UK moves toward its net-zero carbon goals.

Complementary Building Approaches

Several design and construction approaches work synergistically with heat pumps:

Insulation and airtightness:

  • High-performance insulation reduces heat loss, allowing smaller heat pump systems
  • Excellent airtightness minimizes infiltration losses, improving overall efficiency
  • Together, these “fabric first” measures can reduce heating demand by 50-80% compared to older construction methods

According to Self Build Portal, better fabric efficiency translates directly into smaller, more affordable heat pump systems and significantly lower running costs—particularly valuable in London where both construction and energy costs are high.

Low-temperature emitters:

  • Underfloor heating provides large surface areas ideal for the lower flow temperatures of heat pumps
  • Oversized or low-temperature radiators deliver effective warmth without requiring high water temperatures
  • These emitters enable heat pumps to operate at their most efficient flow temperatures (typically 35-45°C)

Technology Integration for London Smart Homes

Modern London properties often incorporate multiple technologies that can work together with heat pumps:

Solar PV integration:

  • Heat pumps can be programmed to prioritize operation during periods of solar generation
  • This “self-consumption” approach maximizes the value of your solar electricity
  • Some systems can automatically heat water when excess solar power is available

Smart tariffs and controls:

  • Time-of-use electricity tariffs allow heat pumps to operate when electricity is cheapest
  • Smart controls can optimize operation based on electricity prices, weather forecasts, and occupancy patterns
  • These approaches can significantly reduce running costs in London’s expensive energy market

Home battery systems:

  • Battery storage can further enhance self-consumption of solar energy
  • Some advanced systems can store cheap off-peak electricity specifically for heat pump use
  • This approach is particularly valuable for maximizing energy independence

Future-Proofing Your London Property

Installing a heat pump in your new London property offers significant future benefits:

  • Regulatory readiness: Your property will already meet increasingly stringent energy regulations
  • Energy price protection: As electricity continues to decarbonize while gas prices potentially rise, heat pumps offer long-term cost stability
  • Market appeal: Energy-efficient properties command premium prices in London’s environmentally-conscious market
  • Upgrade pathways: A well-designed system can accommodate future technological improvements in controls and integration

By viewing your heat pump as part of an integrated energy strategy rather than just a heating appliance, you maximize both its immediate benefits and its long-term value to your London property.

Conclusion: Your Path to Efficient Heating

Installing an air source heat pump in your London new build represents a forward-thinking approach to home heating and cooling. From initial planning through design, installation, commissioning, and ongoing operation, the journey requires careful consideration and expert implementation—but the rewards are substantial.

A properly designed and installed heat pump system delivers multiple benefits for London properties:

  • Efficient, low-carbon heating that aligns with both national and London-specific environmental goals
  • Potential for cooling capability—increasingly valuable in London’s warming climate
  • Integration with smart home technologies and renewable energy sources
  • Long-term energy cost stability in an uncertain market
  • Enhanced property value in London’s premium real estate market

A modern and sleek hallway with wooden flooring, recessed lighting, and a view leading to a dining area with large glass doors.

The key to success lies in approaching air to air heat pump installation as an integral part of your overall building design rather than an afterthought. By planning early, selecting qualified professionals, and ensuring proper integration with your building’s fabric and other systems, you’ll create a home that delivers exceptional comfort while minimizing environmental impact.

For the best results with fitting air source heat pump systems in your London new build, remember these essential principles:

  • Engage with heat pump specialists during the earliest design phases
  • Prioritize building fabric efficiency alongside your heating system design
  • Select appropriately sized systems and components designed specifically for heat pump operation
  • Choose qualified, experienced installers with relevant certification
  • Ensure comprehensive commissioning and handover
  • Maintain your system regularly to preserve efficiency and reliability

With these considerations in mind, your heatpump installed in your new London property will provide years of efficient, comfortable, and sustainable heating—representing a wise investment in both your home’s immediate livability and its long-term value.

Ready to explore how an air source heat pump could enhance your London new build project? Contact our team of specialists for a consultation tailored to your specific requirements and property design.

Understanding EICR Certificate Cost and Importance

A close-up view of modern light switch panels installed on a wall, featuring a sleek metallic design with multiple buttons.
Estimated Reading Time: 9 minutes

Understanding EICR Certificates and Their Costs

An Electrical Installation Condition Report (EICR) is a comprehensive assessment document that evaluates the safety and condition of the electrical systems within a property. This detailed inspection examines all fixed wiring, distribution boards, socket outlets, and other electrical installations to ensure they meet current safety standards. The EICR certificate cost represents the investment property owners make to confirm their electrical systems are safe for continued use and compliant with regulations.

A close-up view of modern light switch panels installed on a wall, featuring a sleek metallic design with multiple buttons.

For property owners in London and across the UK, understanding EICR cost factors has become increasingly important as electrical safety regulations have tightened. An EICR isn’t just a document—it’s a crucial safety measure that identifies potential hazards before they become dangerous, protecting both property and lives. The certificate provides documented evidence that electrical systems have been professionally assessed and either approved as safe or identified as requiring remedial work.

EICR Certificate
Safety Assessment
Legal Compliance
Defect Identification
Recommendations
Risk Mitigation
Professional Verification

The legal landscape around electrical safety has evolved significantly in recent years, particularly for rental properties. EICR certificates are no longer optional for many property owners—they’re mandatory. For landlords in England, the Electrical Safety Standards in the Private Rented Sector Regulations 2020 require an EICR before any new tenancy begins and at least every five years thereafter. Failure to comply can result in fines of up to £30,000, making the EICR certificate cost a necessary expense rather than an optional outlay.

Beyond legal compliance, EICRs serve several practical purposes:

  • They identify potential fire risks from faulty wiring or overloaded circuits
  • They prevent electric shock hazards by ensuring proper earthing and bonding
  • They document the condition of electrical installations for property transactions
  • They provide peace of mind that a property’s electrical systems are safe

For homeowners or those considering improvements such as adding a basement apartment, while not legally mandated, an EICR is recommended every 10 years or when buying or selling a property. The Electrical Safety First organization advises that regular electrical inspections are a prudent safety measure for all properties, regardless of legal requirements.

Legal Requirement Note

Landlords must provide a copy of the EICR to existing tenants within 28 days of inspection, to new tenants before they move in, and to local authorities within 7 days if requested. This documentation requirement makes the EICR cost an essential part of a landlord’s compliance budget.

Who Needs an EICR and When?

Different property owners and managers have varying obligations regarding electrical safety reports. Understanding when an EICR is required helps to plan for the associated costs effectively. For extensive property refurbishments in London or when selecting the right construction and refurbishment partner, it is critical to schedule EICRs at the appropriate project phases.

London Landlords

For private landlords in London and across England, EICRs are mandatory. The National Residential Landlords Association confirms that landlords must:

  • Obtain a valid EICR before the start of new tenancies
  • Ensure existing tenancies have a valid EICR (this requirement came into force in April 2021)
  • Renew the EICR at least every five years, or more frequently if the previous report recommends it
  • Arrange for a new EICR following significant electrical modifications

Homeowners

While not legally required, homeowners are advised to arrange an EICR:

  • Every 10 years for owner-occupied properties
  • When purchasing a property (to verify the condition of electrical installations)
  • Before selling a property (to reassure potential buyers)
  • After major renovations or electrical work

Commercial Property Owners

Business premises have their own requirements under the Electricity at Work Regulations 1989:

  • Regular EICRs are essential to meet health and safety obligations
  • The frequency depends on the type of business and risk assessment
  • High-risk environments may require annual inspections
  • Insurance policies often require up-to-date electrical safety documentation

Factors Influencing EICR Cost in London

The cost of an EICR certificate varies considerably based on several key factors. In London’s diverse property market, these variables can significantly impact the final price you’ll pay.

Property Size and Complexity

Larger properties naturally require more time to inspect thoroughly, directly affecting the EICR cost. A studio flat might take 2-3 hours to inspect, while a 5-bedroom house could require a full day. Each additional circuit, distribution board, and electrical fixture adds to the inspection time and, consequently, the cost.

Room with electrical panels and wiring installations, featuring control boxes and ventilation system.

Property Type

Different property types present varying levels of complexity:

  • Residential flats typically have the lowest EICR costs
  • Houses with more extensive wiring systems cost more to inspect
  • Houses in Multiple Occupation (HMOs) require particularly thorough inspections due to their higher risk profile and regulatory requirements
  • Commercial properties often have complex electrical systems that command premium inspection rates

London Location Premium

London’s geographical factor significantly impacts EICR certificate costs. Central London postcodes typically command a 15-25% premium over outer boroughs due to higher overhead costs for electrical contractors, parking challenges, and congestion charge considerations. This “London premium” is a consistent factor across all property services.

Age and Condition of Electrical Installations

Older properties or those with outdated electrical installations require more extensive testing and often take longer to inspect thoroughly:

  • Properties with older wiring systems (pre-1980s) typically incur higher inspection costs
  • Installations with obvious signs of wear or previous DIY modifications need more careful examination
  • Newer properties with modern consumer units and wiring generally require less intensive inspection

According to professional electricians, these factors combine to create a wide range of potential costs, making it essential to get a property-specific quote rather than relying on general pricing guidelines. If you’re planning a construction or refurbishment project, ensure that building and planning permissions, insurance, and key certifications are in place, as these can affect both compliance and cost.

What’s Included in Your EICR Cost?

Understanding what services are covered in the EICR certificate cost helps property owners evaluate quotes and ensure they’re receiving a thorough inspection. A comprehensive EICR typically includes:

Visual Inspection

The electrician will visually examine all accessible electrical installations, including:

  • Consumer units/fuse boards
  • Wiring systems and their enclosures
  • Socket outlets and switches
  • Light fittings
  • Fixed appliances and their connections

Technical Testing

Beyond visual inspection, the EICR involves a series of technical tests:

  • Continuity testing of protective conductors
  • Insulation resistance measurements
  • Earth fault loop impedance testing
  • RCD operation verification
  • Polarity checks

Comprehensive Reporting

The final component of the EICR cost covers the creation of a detailed report that includes:

  • Details of the property and inspection
  • Description of the electrical installation
  • Any limitations of the inspection
  • Observations and recommendations coded by severity
  • Overall assessment of the installation’s condition

The reporting system uses standardized codes to classify findings:

  • C1: Danger present – immediate action required
  • C2: Potentially dangerous – urgent remedial attention needed
  • C3: Improvement recommended (not dangerous but advisable)
  • FI: Further investigation required

A “satisfactory” EICR certificate indicates no C1, C2, or FI observations were found. If any of these codes appear, remedial work will be necessary before a satisfactory certificate can be issued.

EICR Cost Comparison: Residential vs. Commercial

The cost of obtaining an EICR certificate varies significantly depending on property type, with distinct price brackets for residential and commercial properties in London.

Property Type Typical EICR Cost Range (London, 2024)
Studio/1-bedroom Flat £120–£180
2-3 Bedroom House £180–£280
4-5 Bedroom House £250–£350
HMO (up to 5 bedrooms) £280–£400
Small Commercial Unit £250–£400
Medium Commercial Premises £350–£600
Large Commercial Building £500–£1,500+

These price ranges reflect the London market specifically, where costs tend to be 15-25% higher than the national average. Several factors explain the cost differential between residential and commercial EICRs:

Why Commercial EICRs Cost More

  • Complexity: Commercial installations often feature 3-phase power supplies, advanced distribution systems, and specialized equipment
  • Size: Commercial premises typically have more extensive electrical systems with multiple distribution boards
  • Accessibility: Testing may need to be scheduled outside business hours, incurring premium rates
  • Documentation: Commercial reports often require more detailed documentation for insurance and regulatory compliance

It’s worth noting that these costs represent the inspection and certificate only—they do not include remedial work that might be required if safety issues are identified. To make your project more sustainable or energy efficient, learn more about eco-friendly refurbishments and energy-saving installations.

Cost-Saving Tip

Some London electricians offer discounted rates for multiple properties or combined services. Landlords with several rental units can often negotiate better rates by arranging inspections for multiple properties simultaneously.

Understanding Ongoing EICR Costs

When budgeting for electrical safety compliance, property owners should consider that the initial EICR certificate cost may be just the beginning of their financial commitment. Several factors can lead to additional expenses:

Re-inspection Costs After Failed EICRs

If an EICR results in an “unsatisfactory” verdict due to C1, C2, or FI codes, remedial work must be completed before a satisfactory certificate can be issued. After the necessary repairs, a re-inspection is required, which typically costs between £80-£150 in London. Some electricians offer reduced re-inspection rates if they performed the original EICR and subsequent remedial work.

Remedial Work Expenses

The cost of addressing issues identified in an EICR can vary dramatically:

  • Minor issues like replacing a socket or switch: £60-£120
  • Upgrading a consumer unit: £350-£600
  • Rewiring a room: £600-£1,000
  • Full property rewire: £3,000-£10,000+ depending on property size

Given these potential costs, many property owners in London are opting for bundled services where the same contractor performs the EICR and any necessary remedial work, often at a package rate.

Regular Renewal Requirements

Remember that EICRs have fixed validity periods:

  • Rental properties: Every 5 years (minimum)
  • Homeowner properties: Every 10 years (recommended)
  • Commercial properties: Varies by risk assessment, typically 1-5 years

This means the EICR cost becomes a recurring expense that should be factored into long-term property maintenance budgets.

Emergency Inspection Scenarios

Certain situations may necessitate an unscheduled EICR outside the regular renewal cycle:

  • After flood or fire damage
  • Following major renovation work
  • When purchasing a property with unknown electrical history
  • If tenants report electrical issues or concerns

Emergency or rush EICRs in London often command a premium of 25-50% above standard rates, particularly if weekend or evening appointments are required. During time-sensitive construction or refurbishment projects, maintaining effective communication between all parties ensures that compliance milestones—like timely EICRs—are met reliably.

Why the EICR Certificate Cost is a Worthwhile Investment

While the EICR cost may initially seem like just another property expense, it represents a valuable investment for several compelling reasons:

Legal Protection and Compliance

For landlords, the cost of an EICR certificate is minimal compared to the potential penalties for non-compliance. With fines of up to £30,000 possible under current regulations, the investment in proper electrical certification is clearly justified. Additionally, insurance policies may be invalidated if required electrical safety checks aren’t maintained, potentially leading to significant financial exposure in the event of an electrical fire or accident.

Enhanced Safety for Occupants

Electrical faults are a leading cause of domestic fires in the UK. The National Residential Landlords Association highlights that regular electrical inspections help identify potential hazards before they cause harm. The EICR cost essentially purchases peace of mind that a property’s electrical systems don’t pose a risk to its occupants or to value-adding home improvements such as basement apartments.

Property Value Protection

A current, satisfactory EICR certificate demonstrates responsible ownership and maintenance, which can positively influence property valuation. For sellers, having an up-to-date EICR available during viewings signals transparency and attention to safety details—qualities that increasingly matter to today’s buyers, particularly in London’s competitive property market. If you are building your dream home in London, factoring in electrical compliance from the planning stage is crucial for long-term value and saleability.

Preventative Economics

Regular electrical inspections often identify minor issues before they develop into major problems. The EICR cost can be viewed as preventative maintenance that helps avoid more expensive emergency repairs. Early detection of issues like overloaded circuits or deteriorating insulation prevents more costly damage and system failures.

Tips for Getting Value When Arranging Your EICR

To ensure you receive quality service at a fair price when arranging an EICR in London, consider these practical recommendations:

Selecting a Qualified Provider

The quality and validity of your EICR depend entirely on the competence of the electrician performing it. To ensure value for money:

  • Verify that the electrician is registered with a recognized competent person scheme such as NICEIC, NAPIT, or ELECSA
  • Request proof of qualifications and specific experience with EICRs
  • Check online reviews and ask for references from previous clients
  • Confirm they carry professional indemnity insurance

As specialists in high-end construction and refurbishment note, mechanical and electrical services should come from established experts with a track record of compliance.

Comparing Quotes Effectively

When requesting quotes for EICR certificate costs:

  • Obtain at least three detailed quotes specifying exactly what’s included
  • Ask whether re-inspection after remedial work will incur additional costs
  • Clarify if the quote includes provision of digital and physical certificates
  • Inquire about any supplementary services included (e.g., minor repairs during inspection)

For larger or more complex projects, a comprehensive site survey and thorough builder vetting process will help ensure quality and compliance across all trades—not just electrical.

Timing Your EICR Strategically

In London’s seasonal electrical services market:

  • Spring and autumn typically offer better availability and sometimes lower rates
  • Avoid the end-of-month rush when landlords are preparing properties for new tenancies
  • Book well in advance of certificate expiry to avoid emergency rates

Clear and consistent communication with your builder or contractor streamlines the process of scheduling inspections and ensures timely completion of required documentation.

Bundling Services for Savings

Consider combining your EICR with other electrical services:

  • PAT testing (for rental properties with appliances)
  • Energy efficiency assessments
  • Smoke/carbon monoxide alarm installations

You can further improve your property’s energy efficiency and environmental credentials by exploring sustainable refurbishments and energy-saving upgrades during the inspection process.

Record Keeping Tip

Maintain a dedicated file (physical or digital) for all electrical documentation including previous EICRs, remedial work invoices, and warranty information. This organized approach simplifies future inspections and can reduce their duration and cost.

Conclusion: Balancing EICR Cost with Safety and Compliance

The EICR certificate cost represents an essential investment in property safety and regulatory compliance, particularly in London’s dynamic real estate environment. While prices vary based on property characteristics and location, the typical range of £120-£350 for residential properties and £250-£1,500+ for commercial premises reflects the thoroughness of the inspection and the expertise required.

Property owners should view the EICR cost not as a burdensome expense but as a valuable safeguard that protects occupants, preserves property value, and ensures legal compliance. The potential consequences of neglecting electrical safety—from regulatory penalties to insurance invalidation and, most critically, the risk of electrical fires or accidents—far outweigh the investment in regular inspections.

When arranging an EICR, prioritize quality and compliance over finding the absolute lowest price. Working with qualified, accredited professionals ensures your certificate will be valid and the inspection thorough enough to identify genuine safety concerns. For best results, choose a builder or contractor with a proven reputation for compliance and transparency.

For landlords, homeowners, and commercial property managers across London, understanding the factors that influence EICR certificate cost helps in budgeting appropriately and recognizing the value received for this important safety measure. Remember that electrical safety is an ongoing commitment—schedule your next inspection well before your current certificate expires to maintain continuous compliance and protection. If you want your project to be sustainable, consult guides to eco-friendly refurbishments and energy efficiency early in your planning process.

If your property is due for an electrical inspection or you’re unsure about your current compliance status, consider consulting with a qualified electrical contractor who specializes in EICRs. Their expertise will help ensure your property remains safe, legally compliant, and protected against electrical hazards for years to come. And remember, strong communication between all parties—from architect to builder to client is key to a smooth and compliant project journey in London.

Decoding the Average Bathroom Renovation Cost

A luxurious bathroom featuring a white pedestal sink, gold fixtures, a glass-enclosed shower, patterned wallpaper, and tiled flooring.
Estimated Reading Time: 9 minutes

Introduction: Understanding Bathroom Renovation Costs

When planning a bathroom upgrade, understanding the average bathroom remodel cost is crucial for proper financial preparation and project success. The bathroom, despite being one of the smallest rooms in your home, often represents one of the most significant renovation investments. Whether you’re refreshing a tired space, addressing functional issues, or creating a luxurious retreat, having a realistic grasp of the average cost of bathroom renovation helps avoid budget surprises and project delays.

For London homeowners, bathroom renovations present unique considerations due to the city’s premium property market and specific building regulations. While the national typical bathroom remodel cost provides a useful baseline, London prices often reflect the capital’s higher living costs and property values. This guide aims to demystify bathroom renovation costs, breaking down where your money goes and highlighting strategies to achieve your desired results within your budget.

By the end of this article, you’ll understand not only the average bath remodel cost but also how various factors influence your specific project’s budget. Armed with this knowledge, you’ll be better positioned to make informed decisions about your bathroom transformation and achieve the best possible return on your investment.

A renovated bathroom featuring a white bathtub, green and white tiles, a wall-mounted shower, a mirrored vanity, and a modern sink with stylish fixtures.

Key Factors Influencing Bathroom Renovation Costs in London

The cost of an average bathroom remodel varies significantly based on several key factors. Understanding these elements will help you develop a more accurate budget for your project.

Bathroom Size and Layout: The physical dimensions of your bathroom play a fundamental role in determining costs. Larger spaces require more materials for walls, flooring, and fixtures. In London, where professional installers may charge £100-£120 per square meter for installation work, size becomes a significant cost factor. Additionally, awkward layouts or limited access points common in London’s period properties can increase labor costs due to the extra time and specialized techniques required.

Current Condition and Scope of Changes: Are you making cosmetic updates to a functioning bathroom, or does your space require a complete overhaul with new plumbing? The extent of demolition, structural modifications, and utility relocations can dramatically affect the reno bathroom cost. London’s older housing stock often necessitates more extensive work to address outdated plumbing and electrical systems.

Quality of Materials and Fixtures: The selection of fixtures, tiles, flooring, and accessories presents the widest range of pricing options. Basic white ceramic fixtures cost significantly less than designer brands or custom elements. In London’s luxury market, high-end materials like marble, premium taps, and bespoke cabinetry can elevate costs considerably but may be essential for maintaining property values in premium postcodes.

Labor and Specialist Requirements: Professional installation typically accounts for 40-60% of the total bathroom renovation budget. London’s higher labor rates reflect the city’s cost of living. Specialized work like moving plumbing lines, electrical modifications, or custom tiling increases these costs further. Additionally, London’s conservation areas and listed buildings may require specialized tradespeople with heritage experience, commanding premium rates.

Property Access and Logistics: London’s urban density creates unique logistical challenges. Limited parking, congestion charges, restricted delivery hours, and narrow staircases in townhouses can all impact your bathroom renovation costs through increased labor time and delivery fees.

Bathroom Renovation Cost Factors
Bathroom Size
Materials Quality
Labor Costs
Fixtures & Fittings
Property Access
Existing Condition

Typical Price Range for Bathroom Renovations in London

Understanding the average bathroom remodel cost in London requires acknowledging that the capital’s prices typically exceed the national average. While the UK average bathroom renovation cost falls between £4,000-£8,500 (with approximately £4,500 as the national average), London prices often start at the upper end of this range and can increase substantially depending on the factors previously discussed.

For a complete new bathroom installation in London, homeowners should expect to budget between £7,000-£10,000 at minimum, compared to the national average of around £7,000-£7,200. This London premium reflects higher labor costs, increased material pricing, and the logistical challenges unique to urban renovation projects.

The average cost of bathroom renovation in London typically falls within these ranges:

Renovation Level London Price Range What’s Included
Basic Renovation £3,000-£6,000 Like-for-like replacements, basic fixtures, minimal layout changes
Mid-Range Renovation £6,000-£10,000 Quality fixtures, partial layout changes, better finishes
High-End Renovation £10,000-£20,000+ Premium fixtures, custom solutions, significant layout changes
Luxury Renovation £20,000-£35,000+ Designer brands, bespoke elements, structural modifications

Location within London also influences the average bath remodel cost. Prime central areas like Kensington, Chelsea, and Westminster command the highest premiums, while outer boroughs may align more closely with national averages. The specific building type matters too—period conversions often require more specialized work than newer properties. It’s critical to be aware of building and planning permissions, and to carry out comprehensive site surveys in such areas for a smooth renovation process.

Local Insight

In London’s competitive property market, a well-executed bathroom renovation can yield strong returns on investment. High-quality bathrooms are consistently ranked as one of the most valuable home improvements, potentially adding 4-5% to your property’s value when done to a standard that matches your home’s overall value proposition.

Cost Breakdown: Where Your Money Goes

To better understand the average bathroom remodel cost, it’s helpful to examine how your budget typically gets allocated across different aspects of the project. This breakdown provides a clearer picture of the cost of an average bathroom remodel in London:

Fixtures and Fittings (25-30% of budget): This category includes your toilet, bath, shower, sink, and taps. In London, a standard bathroom suite starts around £500-£700 for basic models, while mid-range options typically cost £1,000-£3,000. Premium and designer fixtures can easily exceed £5,000-£10,000 for a complete set. The average bath installation alone costs approximately £850, while standard shower installations range from £350-£600, and walk-in shower installations can cost between £200-£2,000 depending on complexity.

Labor and Installation (40-50% of budget): Professional installation represents the largest portion of your bathroom renovation budget. London’s skilled tradespeople command higher rates than the national average, with bathroom fitters typically charging £150-£250 per day. A complete bathroom renovation usually requires multiple specialists—plumbers, electricians, tilers, and possibly carpenters—over a 1-3 week period, depending on complexity. Clear and honest communication between you, your architect, and your contractors is crucial to keep labor costs on track and to ensure your expectations are met throughout the project.

Tiles and Flooring (10-15% of budget): The materials and installation for wall and floor coverings vary dramatically based on quality and complexity. Basic ceramic tiles might cost £15-£30 per square meter, while premium porcelain, natural stone, or designer options can range from £50-£150+ per square meter. Installation costs increase with complex patterns, small tiles, or special cutting requirements.

Additional Elements (15-20% of budget): This category covers everything else, including:

  • Lighting fixtures and installation
  • Ventilation upgrades
  • Storage solutions and cabinetry
  • Mirrors and accessories
  • Underfloor heating systems
  • Waterproofing treatments

For a typical London bathroom renovation, you should also budget approximately 10-20% as a contingency for unexpected issues that might arise during the project. This is especially important for older properties where hidden problems are more common. Obtaining all insurance and certification documents before starting, as detailed in this guide, can also protect you against unforeseen costs.

Elegant bathroom with a vintage-style sink, glass shower enclosure, and gold fixtures set against a floral wallpaper and tiled wall.

Comparing Different Renovation Types and Their Costs

The typical bathroom remodel cost varies significantly based on the scope and ambition of your project. Understanding the different levels of renovation can help you align your expectations with your budget.

1. Basic Cosmetic Update (£3,000-£6,000 in London)

This level focuses on refreshing the appearance without major changes to layout or plumbing. It typically includes:

  • Replacing toilet, sink, and possibly bath/shower with standard fixtures
  • New taps and basic accessories
  • Fresh paint or basic new wall coverings
  • Updated flooring with mid-range materials
  • Basic lighting replacements

This approach works well for relatively modern bathrooms that function properly but look dated. The national average for this level starts around £1,500-£4,600, but London prices typically start higher due to increased labor and material costs.

2. Mid-Range Renovation (£6,000-£10,000 in London)

This moderate renovation includes more substantial updates:

  • Complete new bathroom suite with better quality fixtures
  • New wall and floor tiles throughout
  • Upgraded storage solutions
  • Improved lighting scheme
  • Minor plumbing relocations
  • Better quality accessories and finishing touches

Mid-range renovations offer good value for most London homes, balancing quality improvements with reasonable costs. They typically maintain the basic bathroom layout while modernizing all visible elements. Working with an architect can help optimise your design and streamline communication between clients and builders, which is key at this level of complexity.

3. High-End Renovation (£10,000-£20,000+ in London)

High-end renovations deliver significant improvements in both function and aesthetics:

  • Premium fixture brands with advanced features
  • Custom vanity units and storage solutions
  • High-quality natural stone or porcelain tiles
  • Layout reconfiguration with plumbing relocations
  • Upgraded electrical systems
  • Designer lighting schemes
  • Luxury features like digital showers or heated flooring

These renovations often involve altering the room’s layout to optimize space and functionality, requiring more extensive structural and plumbing work. Selecting the right architect and maximizing your communication can help ensure your project comes in on time and on budget.

4. Luxury Renovation (£20,000-£35,000+ in London)

For premium London properties, luxury bathroom renovations include:

  • Bespoke design elements and custom-made fixtures
  • Specialist finishes and materials (marble, natural stone)
  • Smart technology integration
  • Spa-like features (steam showers, jetted tubs)
  • Underfloor heating systems
  • Comprehensive lighting designs with mood settings
  • Built-in entertainment systems

This level of renovation is typically undertaken in high-value properties where the bathroom needs to match the luxury standard throughout the home and where significant return on investment is expected. Be sure to verify builder experience, insurance, and planning requirements for this level of investment.

Feature-Specific Cost Considerations

Understanding the average cost of bathroom renovation requires examining the specific features that contribute to your overall budget. Here’s a breakdown of major bathroom elements and their typical cost ranges in London:

Bathtubs: Standard acrylic baths start from £150-£300, while mid-range options cost £300-£800. Premium freestanding baths can range from £1,000-£5,000+. Installation typically adds £300-£500 for standard baths and £500-£1,000 for freestanding models due to their weight and special plumbing requirements.

Showers: Electric shower units range from £100-£500 installed. Thermostatic mixer showers typically cost £200-£800 plus installation. Walk-in shower enclosures start around £500 for basic models but premium frameless glass systems can exceed £2,000 plus installation. Digital shower systems with multiple jets or steam functions range from £800-£3,000+ before installation.

Toilets: Basic toilets start from £100-£250, while wall-hung models (which require special framework inside the wall) range from £300-£800 plus additional installation costs. Smart toilets with integrated bidets and other features can cost £1,000-£4,000+.

Sinks and Vanities: Pedestal sinks start from £70-£200. Vanity units with storage begin around £200-£500 for basic models and range to £1,000-£3,000+ for bespoke designs. Wall-hung vanities generally cost more than floor-standing units due to the additional structural support needed.

Tiling: Basic ceramic wall tiles range from £15-£30 per square meter, mid-range porcelain tiles cost £30-£60 per square meter, and premium natural stone or designer tiles can cost £60-£150+ per square meter. Labor for tiling typically costs £35-£55 per square meter but increases with complex patterns, small tiles, or difficult-to-work-with materials.

Flooring: Vinyl flooring offers the most economical option at £20-£40 per square meter installed. Porcelain floor tiles range from £30-£100 per square meter plus installation. Natural stone flooring costs £50-£120+ per square meter before installation. For smaller London bathrooms, underfloor heating systems add £100-£150 per square meter.

Lighting: Basic bathroom-rated light fixtures start around £30-£100 each. Mid-range integrated LED lighting systems cost £200-£500, while comprehensive schemes with multiple light sources and controls can range from £500-£1,500+. Installation costs vary based on complexity but typically add £60-£100 per fixture. Choosing energy-efficient LED lighting can help you run a more sustainable and cost-effective bathroom.

When calculating your reno bathroom cost, remember that smaller, luxury bathrooms can sometimes cost more per square meter than larger, standard bathrooms due to the premium materials and bespoke solutions often required to maximize limited space—a common challenge in London properties.

Hidden Costs That Can Impact Your Budget

When planning your bathroom renovation, the average bathroom remodel cost figures provide a useful starting point. However, several hidden or unexpected expenses can significantly impact your final budget, particularly in London properties:

Structural Issues: Removing old fixtures or tiles can reveal water damage, rot, or inadequate support structures that need remediation. In London’s older housing stock, these issues are particularly common and can add £500-£3,000+ to your renovation depending on severity.

Plumbing Upgrades: Older London properties often have outdated plumbing that doesn’t meet current standards or won’t support modern fixtures. Replacing pipes with appropriate materials and dimensions can add £1,000-£3,000 to your project.

Electrical Updates: Bathroom electrical systems must meet strict safety standards. Many older London homes require rewiring and installation of proper extractor fans, GFI outlets, and adequate lighting circuits, potentially adding £500-£1,500 to your costs.

Asbestos Removal: Properties built before 2000 may contain asbestos in floor tiles, insulation, or walls. Professional testing and removal adds £300-£1,500 depending on the extent.

Building Permits and Compliance: Some bathroom renovations require building regulation approval, particularly if you’re altering drainage, ventilation, or electrical systems. Professional drawings and inspections can add £300-£1,000 to your project. For more on navigating local permissions and regulations, see this guide to planning permissions and architectural support in London.

Party Wall Agreements: In London’s terraced houses and flats, bathroom renovations that affect shared walls might require party wall agreements with neighbors, potentially adding £700-£1,500 in surveyor and legal fees.

Waste Disposal: Removing old bathroom fixtures and building materials requires proper disposal. In London, skip hire typically costs £200-£350, while specialized disposal of items containing hazardous materials adds further expense.

Temporary Accommodation: If your property has only one bathroom, you might need alternative arrangements during renovation. In London, even short-term accommodation can significantly impact your overall project budget.

Contingency Planning

Experts consistently recommend setting aside 15-20% of your total bathroom renovation budget as a contingency fund, especially for older London properties where unexpected issues are more likely. This approach helps ensure your project can proceed without compromising on quality when surprises arise.

Smart Budgeting Tips for Bathroom Renovations

Managing the average cost of bathroom renovation requires strategic planning and informed decision-making. Here are practical tips to help London homeowners navigate their renovation budgets effectively:

Prioritize Your Investment Areas: Allocate more of your budget to elements that deliver the greatest impact and longevity. High-quality taps, shower systems, and toilets offer better durability and performance, while you can potentially save on items like accessories or basic tiles that can be easily updated later.

Consider a Phased Approach: If your total budget falls short of your ideal renovation, consider implementing changes in stages. Focus first on essential plumbing and electrical updates, followed by major fixtures, then finishing elements. This approach allows you to spread costs while ensuring critical infrastructure is properly addressed.

Retain Existing Layout Where Possible: Moving plumbing fixtures dramatically increases costs due to new piping, drainage modifications, and additional labor. If your existing bathroom layout functions well, keeping fixtures in their current locations can significantly reduce your typical bathroom remodel cost.

Balance Premium and Standard Elements: Create visual impact by investing in one or two statement pieces—perhaps a stunning vanity or freestanding bath—while selecting more budget-friendly options for less noticeable elements. This creates a high-end impression without the premium price tag.

Explore Ex-Display Options: Many London bathroom showrooms sell ex-display models at substantial discounts. These items are usually in excellent condition and offer significant savings on premium brands.

Consider Refinishing Rather Than Replacing: If your existing bath is structurally sound, professional refinishing costs significantly less than replacement. Similarly, tile refinishing can transform dated surfaces at a fraction of the cost of new tiling.

Research Material Alternatives: Modern materials often provide the aesthetic of premium options at lower cost. Porcelain tiles that mimic marble, wood-effect luxury vinyl flooring, and composite stone countertops offer significant savings over their natural counterparts while providing practical benefits like improved durability and easier maintenance. Sustainable options such as recycled or bamboo products can also reduce your environmental impact and overall cost.

Time Your Renovation Strategically: Some contractors offer discounted rates during slower periods (typically January-February and September-October). Planning your renovation during these times may secure better pricing and more flexible scheduling.

Get Multiple Detailed Quotes: Obtain at least three comprehensive quotes specifying exactly what is included. This helps identify potential savings and ensures you’re comparing like with like. The cheapest quote isn’t always the best value if it excludes important elements that will be added later as “extras.” For further advice on quotations and preparing an efficient project timetable, review these essential bathroom renovation practicalities.

DIY vs. Professional: Cost Implications

When considering the average bath remodel cost, many homeowners contemplate handling some aspects themselves to reduce expenses. While DIY can offer savings, it’s important to understand which elements are suitable for self-execution and which require professional expertise, particularly in London’s complex property landscape.

Suitable DIY Tasks:

  • Decoration: Painting, wallpapering, and installing simple accessories can be handled by competent DIYers, potentially saving £300-£600 in labor costs.
  • Basic fixture replacement: Swapping like-for-like items such as towel rails, toilet seats, and some light fixtures is relatively straightforward if you have basic skills.
  • Demolition: Removing old tiles, fixtures, and flooring can be done yourself with proper safety equipment, potentially saving £500-£800 in labor costs.

Professional-Only Tasks:

  • Plumbing modifications: Any changes to water supply or drainage should be handled by certified plumbers, especially in London where building regulations are strictly enforced.
  • Electrical work: Bathroom electrical installations must meet specific safety standards and typically require certification by a qualified electrician.
  • Structural alterations: Any changes affecting load-bearing elements or requiring building control approval need professional expertise.
  • Waterproofing: Proper tanking and waterproofing are essential to prevent costly water damage and are best left to experienced professionals.

The cost-benefit analysis of DIY versus professional installation should consider not only immediate savings but also long-term implications. In London’s high-value property market, quality workmanship directly impacts resale value. Professional installations typically include warranties and guarantees that protect your investment and provide recourse if problems arise. Effective communication amongst your architect, builder, and client—such as regular site visits and honest discussions—will help assure professional standards and reduce error-related costs.

Additionally, professionals can often complete work more efficiently and obtain materials at trade discounts, partially offsetting their labor costs. They also navigate London’s specific building regulations and permit requirements, helping avoid costly compliance issues. An architect-led process can streamline these coordination issues for a successful outcome.

A balanced approach often yields the best results: hire professionals for critical, technical aspects while taking on simpler cosmetic tasks yourself, potentially reducing your overall cost of an average bathroom remodel by 10-15% without compromising quality or compliance. Remember that construction work is inevitably disruptive, so agree on a timetable, set clear expectations for noise and mess, and work with your contractor to protect your possessions and minimize inconvenience for you and your neighbours.

Conclusion: Planning Your Bathroom Renovation

Understanding the average bathroom remodel cost provides a foundation for successful project planning, but as we’ve explored throughout this guide, bathroom renovations involve numerous variables that influence your final budget. In London’s unique property landscape, careful consideration of these factors is particularly important to achieve both your aesthetic goals and practical requirements.

The average cost of bathroom renovation in London typically ranges from £6,000 for basic updates to £20,000+ for comprehensive, high-quality renovations. However, by strategically allocating your budget, carefully selecting where to invest and where to economize, and planning for contingencies, you can create a beautiful, functional space that enhances both your daily life and your property’s value.

Remember that the reno bathroom cost should be viewed as an investment rather than merely an expense. A well-executed bathroom renovation consistently ranks among the home improvements with the strongest return on investment, particularly in London’s competitive property market where quality bathrooms are highly valued by prospective buyers and tenants.

As you embark on your bathroom renovation journey, consider these final recommendations:

  • Invest time in thorough planning before committing to construction
  • Obtain detailed quotes from reputable contractors with bathroom specialization
  • Allocate a realistic contingency of 15-20%, especially for older properties
  • Prioritize quality for elements you interact with daily (taps, shower controls, toilet)
  • Balance timeless design with contemporary touches for lasting appeal

With careful planning, realistic budgeting, and quality execution, your bathroom renovation can transform not just a functional space but your overall home experience, delivering value that extends far beyond the typical bathroom remodel cost. For further sustainable ideas, explore the benefits of eco-friendly refurbishments and energy-saving upgrades here.

Complete Guide to Home Refurbishment London: Costs, Process & Money-Saving Tips

Modern outdoor patio area with sleek tiled flooring and wooden privacy fencing, surrounded by lush greenery.
Estimated Reading Time: 10 minutes

Introduction: Planning Your Home Refurbishment in London

Embarking on a home refurbishment in London requires meticulous planning, strategic decision-making, and careful budgeting. The unique character of London properties, from Victorian terraces to modern apartments, demands a tailored approach to home refurbishment. London’s distinctive property market, stringent regulations, and higher costs compared to the rest of the UK make proper preparation essential for project success.

Modern dining room with a large table, chairs, decorative chandelier, and large windows with garden view.

Whether you’re refreshing a period property in Islington, modernizing a family home in Greenwich, or upgrading a flat in Hackney, understanding the intricacies of home refurbishment in London will save you time, money, and stress. This comprehensive guide explores everything from initial planning and budgeting to finding reliable contractors and maximizing your property’s value through smart refurbishment choices.

Refurbishment vs Renovation vs Remodeling: Understanding the Differences

While often used interchangeably, these terms have distinct meanings in the context of London’s property market:

  • Home Refurbishment: Typically refers to cosmetic and functional updates that restore or modernize a property without significant structural alterations. This includes painting, new flooring, updating bathrooms or kitchens, and general improvements to the property’s appearance and functionality.
  • Renovation: Involves more substantial improvements, including repairs and upgrades to core systems like wiring or plumbing, or reconfiguring existing layouts without changing the fundamental structure.
  • Remodeling: Encompasses substantial structural changes like removing or adding walls, building extensions, or changing the use of spaces entirely.

In London, these definitions often overlap in practice. Many homeowners undertake projects that combine elements of all three, depending on their property’s needs and their vision. As noted by Power Pillar, refurbishment in London typically focuses on revitalizing interiors, while renovation and remodeling may require additional permissions due to structural work.

Current State of London’s Refurbishment Market

London’s home refurbishment market remains robust in 2025, driven by several factors:

  • High property values making it economically viable to invest in existing homes rather than move
  • A substantial stock of period properties requiring modernization
  • Growing demand for energy-efficient homes amid rising utility costs
  • Changing lifestyle needs, particularly post-pandemic work-from-home requirements
  • Desire to maximize space in a city where square footage comes at a premium

According to Beams Renovation, costs in London remain significantly higher than in other UK regions, with variations across boroughs. Central and North London typically command premium prices for refurbishment work compared to outer boroughs.

Why Londoners Refurbish
Increase Property Value
Improve Energy Efficiency
Adapt to Changing Lifestyles
Update Period Properties
Maximize Limited Space
Avoid Costly Relocations

The Home Refurbishment Process in London

A successful home refurbishment in London follows a structured process:

1. Initial Consultation and Assessment

Begin with a thorough assessment of your property’s current condition and your objectives. This stage helps identify structural issues, potential complications, and opportunities for improvement.

2. Design and Planning

Develop detailed plans, potentially with an architect or designer, especially for complex projects. This stage establishes the scope, aesthetics, materials, and preliminary budget.

3. Obtaining Necessary Permissions

Research and apply for required permissions based on your project scope and property location. This may include planning permission, building regulations approval, or listed building consent.

4. Detailed Quotation and Budgeting

Obtain comprehensive quotes from contractors, itemizing labor, materials, and timeline. Create a detailed budget including contingencies for unexpected issues.

5. Preparation and Site Setup

Prepare the property for work, including protection of existing features, setting up site facilities, and arranging temporary accommodation if needed.

6. Execution Phase

The main refurbishment work begins, following a logical sequence: demolition/stripping out, structural changes, first-fix (electrics, plumbing), second-fix (fitting bathrooms, kitchens), and finishing (decoration, flooring).

7. Snagging and Final Inspection

Identify and address any defects or incomplete items before final sign-off. This ensures everything meets the agreed quality standards.

8. Handover

Receive all documentation including warranties, certificates, and operating instructions for new installations.

Planning Permissions and Regulations in London

London’s complex planning landscape requires careful navigation. Depending on your project, you may need:

  • Planning Permission: Required for major changes like extensions, loft conversions with dormer windows, or significant alterations to external appearance.
  • Building Regulations Approval: Mandatory for structural work, electrical installations, plumbing changes, and energy efficiency upgrades.
  • Listed Building Consent: Essential for any changes to properties with listed status, common in many London boroughs.
  • Conservation Area Consent: May be needed for external alterations in designated conservation areas, which cover substantial parts of London.
  • Party Wall Agreement: Required when work affects shared walls, boundaries, or excavations near neighboring properties.

Power Pillar notes that some London boroughs enforce Article 4 Directions, which restrict permitted development rights. Always check with your local council before proceeding, as regulations vary significantly between boroughs.

Local Authority Insight

Each London borough has slightly different planning policies and application processes. For example, Kensington and Chelsea has stricter controls on basement excavations than some outer boroughs. Research your specific borough’s requirements early in the planning process.

Cost Breakdown of Home Refurbishment in London

Home refurbishment costs in London vary widely depending on several factors, including property size, condition, location, and the quality of finishes desired.

Average Costs by Project Type (2025)

Project Type Typical London Cost Range
Full House Refurbishment (3-bedroom) £56,586–£93,868+
Kitchen Refurbishment £15,000–£30,000
Bathroom Refurbishment £6,000–£12,000
Electrical Rewiring £5,000–£10,000
Plumbing Upgrades £4,000–£8,000
Structural Changes £2,000–£10,000+
Flooring (whole house) £6,000–£12,000

According to Beams Renovation, a full house renovation in London starts from approximately £56,586 for basic specifications, rising to £93,868 or more for premium finishes. BCS Builders London notes that costs in North and Central London are typically higher than in outer boroughs.

Factors Affecting Home Refurbishment Costs in London

  • Property Age and Type: Period properties often require specialist treatments and materials. Victorian and Edwardian homes typically cost more to refurbish than newer properties.
  • Property Location: Central London locations face higher labor costs and logistical challenges (like restricted access and parking).
  • Scope of Work: Comprehensive refurbishments involving structural changes cost significantly more than cosmetic updates.
  • Quality of Materials: Premium fixtures, fittings, and finishes substantially increase costs but may offer better long-term value.
  • Additional Professional Fees: Architect fees (8-15% of project cost), structural engineer fees (£500-£2,500), and planning application costs (£200-£500).

Partial vs Full House Refurbishment

Partial refurbishments focus on specific areas (typically kitchens and bathrooms) and generally range from £15,000-£45,000 depending on the scope. Full house refurbishments address the entire property and start from around £56,000 for a typical London 3-bedroom house with basic specifications, according to Beams Renovation.

Project Timeline Considerations

Realistic timeframes for London refurbishment projects:

  • Kitchen or bathroom refurbishment: 2-6 weeks
  • Partial house refurbishment (2-3 rooms): 6-12 weeks
  • Full house refurbishment without structural changes: 3-5 months
  • Full house refurbishment with structural work: 6-9 months
  • Full house refurbishment of a period property: 6-12 months

These timelines should include planning and permission stages, which can add significant time, especially in conservation areas or for listed buildings. Always factor in potential delays due to weather, supplier issues, or unexpected structural problems.

Creating a Realistic Budget for House Reno Costs

Effective budgeting is critical for refurbishing a house in London:

1. Itemized Cost Breakdown

Create a detailed list of all anticipated works, materials, and finishes. Being specific helps prevent budget overruns.

2. Contingency Allocation

Set aside 10-20% of your total budget for unexpected issues, which are common in London’s aging housing stock.

3. Professional Fees

Include costs for architects, structural engineers, party wall surveyors, and planning consultants where applicable.

4. VAT Consideration

Factor in 20% VAT on labor and materials unless working with a contractor who isn’t VAT-registered (rare for reputable London firms).

5. Phasing Possibility

Consider whether the project can be completed in phases to spread costs over time, especially for larger refurbishments.

Online calculators can provide quick estimates, but consulting with professionals who understand London’s specific market conditions will give you more accurate figures.

Finding the Right Contractors in London

Selecting qualified professionals is crucial for successful home refurbishment in London:

Vetting Process

  • Request detailed quotations from at least three contractors
  • Verify membership in professional bodies like the Federation of Master Builders
  • Check credentials, insurance, and guarantees
  • Ask for references and visit completed projects if possible
  • Search for online reviews and check their company history
  • Ensure they have experience with your property type and in your borough

Red Flags to Watch For

  • Contractors requesting large upfront payments (more than 10-15%)
  • Vague or extremely low quotations
  • Reluctance to provide references or show previous work
  • Pressure to make immediate decisions
  • Lack of proper insurance or professional registrations

DIY vs Professional Approach for Home Refurbishment

While DIY can save money, London properties often present unique challenges:

Suitable for DIY

  • Painting and decorating
  • Simple tiling projects
  • Basic landscaping
  • Assembling flat-pack furniture
  • Cosmetic updates like changing handles or fixtures

Requires Professionals

  • Structural alterations
  • Electrical and plumbing work (legally required to meet building regulations)
  • Gas installations (must be done by Gas Safe registered engineers)
  • Roofing repairs
  • Window replacements (especially in conservation areas)
  • Work on listed buildings or in conservation areas

Power Pillar emphasizes that while DIY can reduce labor costs, professional work ensures compliance with London’s strict building regulations and safety standards, which is especially important when selling your property.

Money-Saving Strategies for London Home Refurbishment

Refurbishing a home in London doesn’t have to break the bank:

Strategic Planning

  • Define a clear scope to avoid costly mid-project changes
  • Retain original layouts where possible to minimize structural costs
  • Schedule work during off-peak seasons when contractors may offer better rates
  • Consider refurbishing room by room to spread costs

Smart Sourcing

  • Source some materials yourself to save on contractor mark-ups
  • Consider ex-display kitchens and bathrooms (available at significant discounts)
  • Mix high-end and budget materials strategically (splurge on visible features, save on hidden elements)
  • Explore architectural salvage yards for period features

Energy Efficiency

  • Investigate government grants and incentives for energy-efficient upgrades
  • Prioritize insulation improvements for long-term savings
  • Consider smart home technology to reduce ongoing utility costs

Cost-Saving Tip

When refurbishing a house in London, consider upcycling existing fixtures where possible. Repainting kitchen cabinets rather than replacing them entirely can save thousands of pounds while still transforming the space.

Maximizing Property Value Through Strategic Refurbishment

Renovated bedroom with elegant chandelier, upholstered headboard, and stylish bedside tables.

Certain refurbishment projects offer better returns on investment in the London market:

High-ROI Improvements

  • Kitchen upgrades: Modern, well-designed kitchens are top priorities for London buyers
  • Bathroom refurbishments: High-quality bathrooms with efficient layouts add significant value
  • Creating open-plan living spaces: Particularly valuable in smaller London properties
  • Adding usable square footage: Loft conversions, basement developments, and extensions
  • Energy efficiency improvements: Increasingly important to environmentally conscious buyers
  • Enhancing curb appeal: First impressions matter in London’s competitive market

For period properties, preserving and enhancing original features while modernizing essentials like heating, plumbing, and electrics offers the best balance between character and contemporary comfort, which commands premium prices in London.

London Home Refurbishment Case Studies

Budget Refurbishment: East London Flat

Property: 1-bedroom flat in Walthamstow
Budget: £35,000
Scope: Kitchen and bathroom refresh, complete redecoration, new flooring throughout
Timeline: 6 weeks
Value Added: Approximately £50,000

This project focused on cosmetic improvements and strategic upgrades to the kitchen and bathroom. The owners saved by retaining the original kitchen layout but installing new cabinet doors, worktops, and appliances. They also project-managed the refurbishment themselves, sourcing materials directly to reduce costs.

Mid-Range Refurbishment: North London Terrace

Property: 3-bedroom Victorian terrace in Islington
Budget: £70,000
Scope: Full house refurbishment including new electrics, plumbing, kitchen, two bathrooms, and bespoke joinery
Timeline: 5 months
Value Added: Approximately £120,000

According to BCS Builders London, this comprehensive refurbishment balanced period features with modern amenities. The owners preserved original fireplaces and cornicing while creating a contemporary open-plan kitchen-dining area and adding a downstairs bathroom.

High-End Refurbishment: Central London Townhouse

Property: Victorian townhouse in Kensington
Budget: £200,000+
Scope: Complete remodel including basement conversion, structural alterations, luxury finishes throughout, and integrated smart home technology
Timeline: 12 months
Value Added: Approximately £500,000

Beams Renovation reports that this project transformed a dated property into a premium home featuring a designer kitchen, marble bathrooms, bespoke joinery, and state-of-the-art home automation. The basement conversion added valuable living space in an area where price per square foot is at a premium.

Financing Your London Home Refurbishment

Several options are available for funding your refurbishment project:

Remortgaging

Releasing equity from your property can be cost-effective for major refurbishments, especially with the added value the work will create.

Home Improvement Loans

Specific loans designed for property improvements, often with competitive interest rates compared to personal loans.

Personal Loans

Suitable for smaller refurbishment projects, typically up to £25,000.

Specialist Refurbishment Finance

For extensive projects, specialist lenders offer products specifically designed for major refurbishments.

Government Schemes

Explore initiatives like the Green Homes Grant or energy efficiency incentives that may partly fund certain improvements.

Conclusion: Your London Home Refurbishment Journey

Home refurbishment in London presents unique challenges but offers significant rewards when executed effectively. From Victorian terraces in Camden to modern apartments in Canary Wharf, each property requires a tailored approach that respects its character while meeting contemporary needs.

Success depends on thorough planning, realistic budgeting, careful contractor selection, and strategic decision-making. By understanding the home refurbishment London landscape—including borough-specific regulations, typical costs, and value-adding improvements—you can transform your property while controlling expenses.

Whether you’re undertaking a cosmetic refresh or a comprehensive remodel, this guide provides the foundation for a successful project. Remember that in London’s premium property market, quality refurbishments consistently deliver returns, both in lifestyle benefits and financial value.

To begin your home refurbishment journey, start by defining your goals, researching local regulations, and consulting with professionals experienced in London’s unique property landscape. With the right preparation, your London home refurbishment can transform your living space while making a sound investment in your property’s future.