Navigating New Home Developments in London

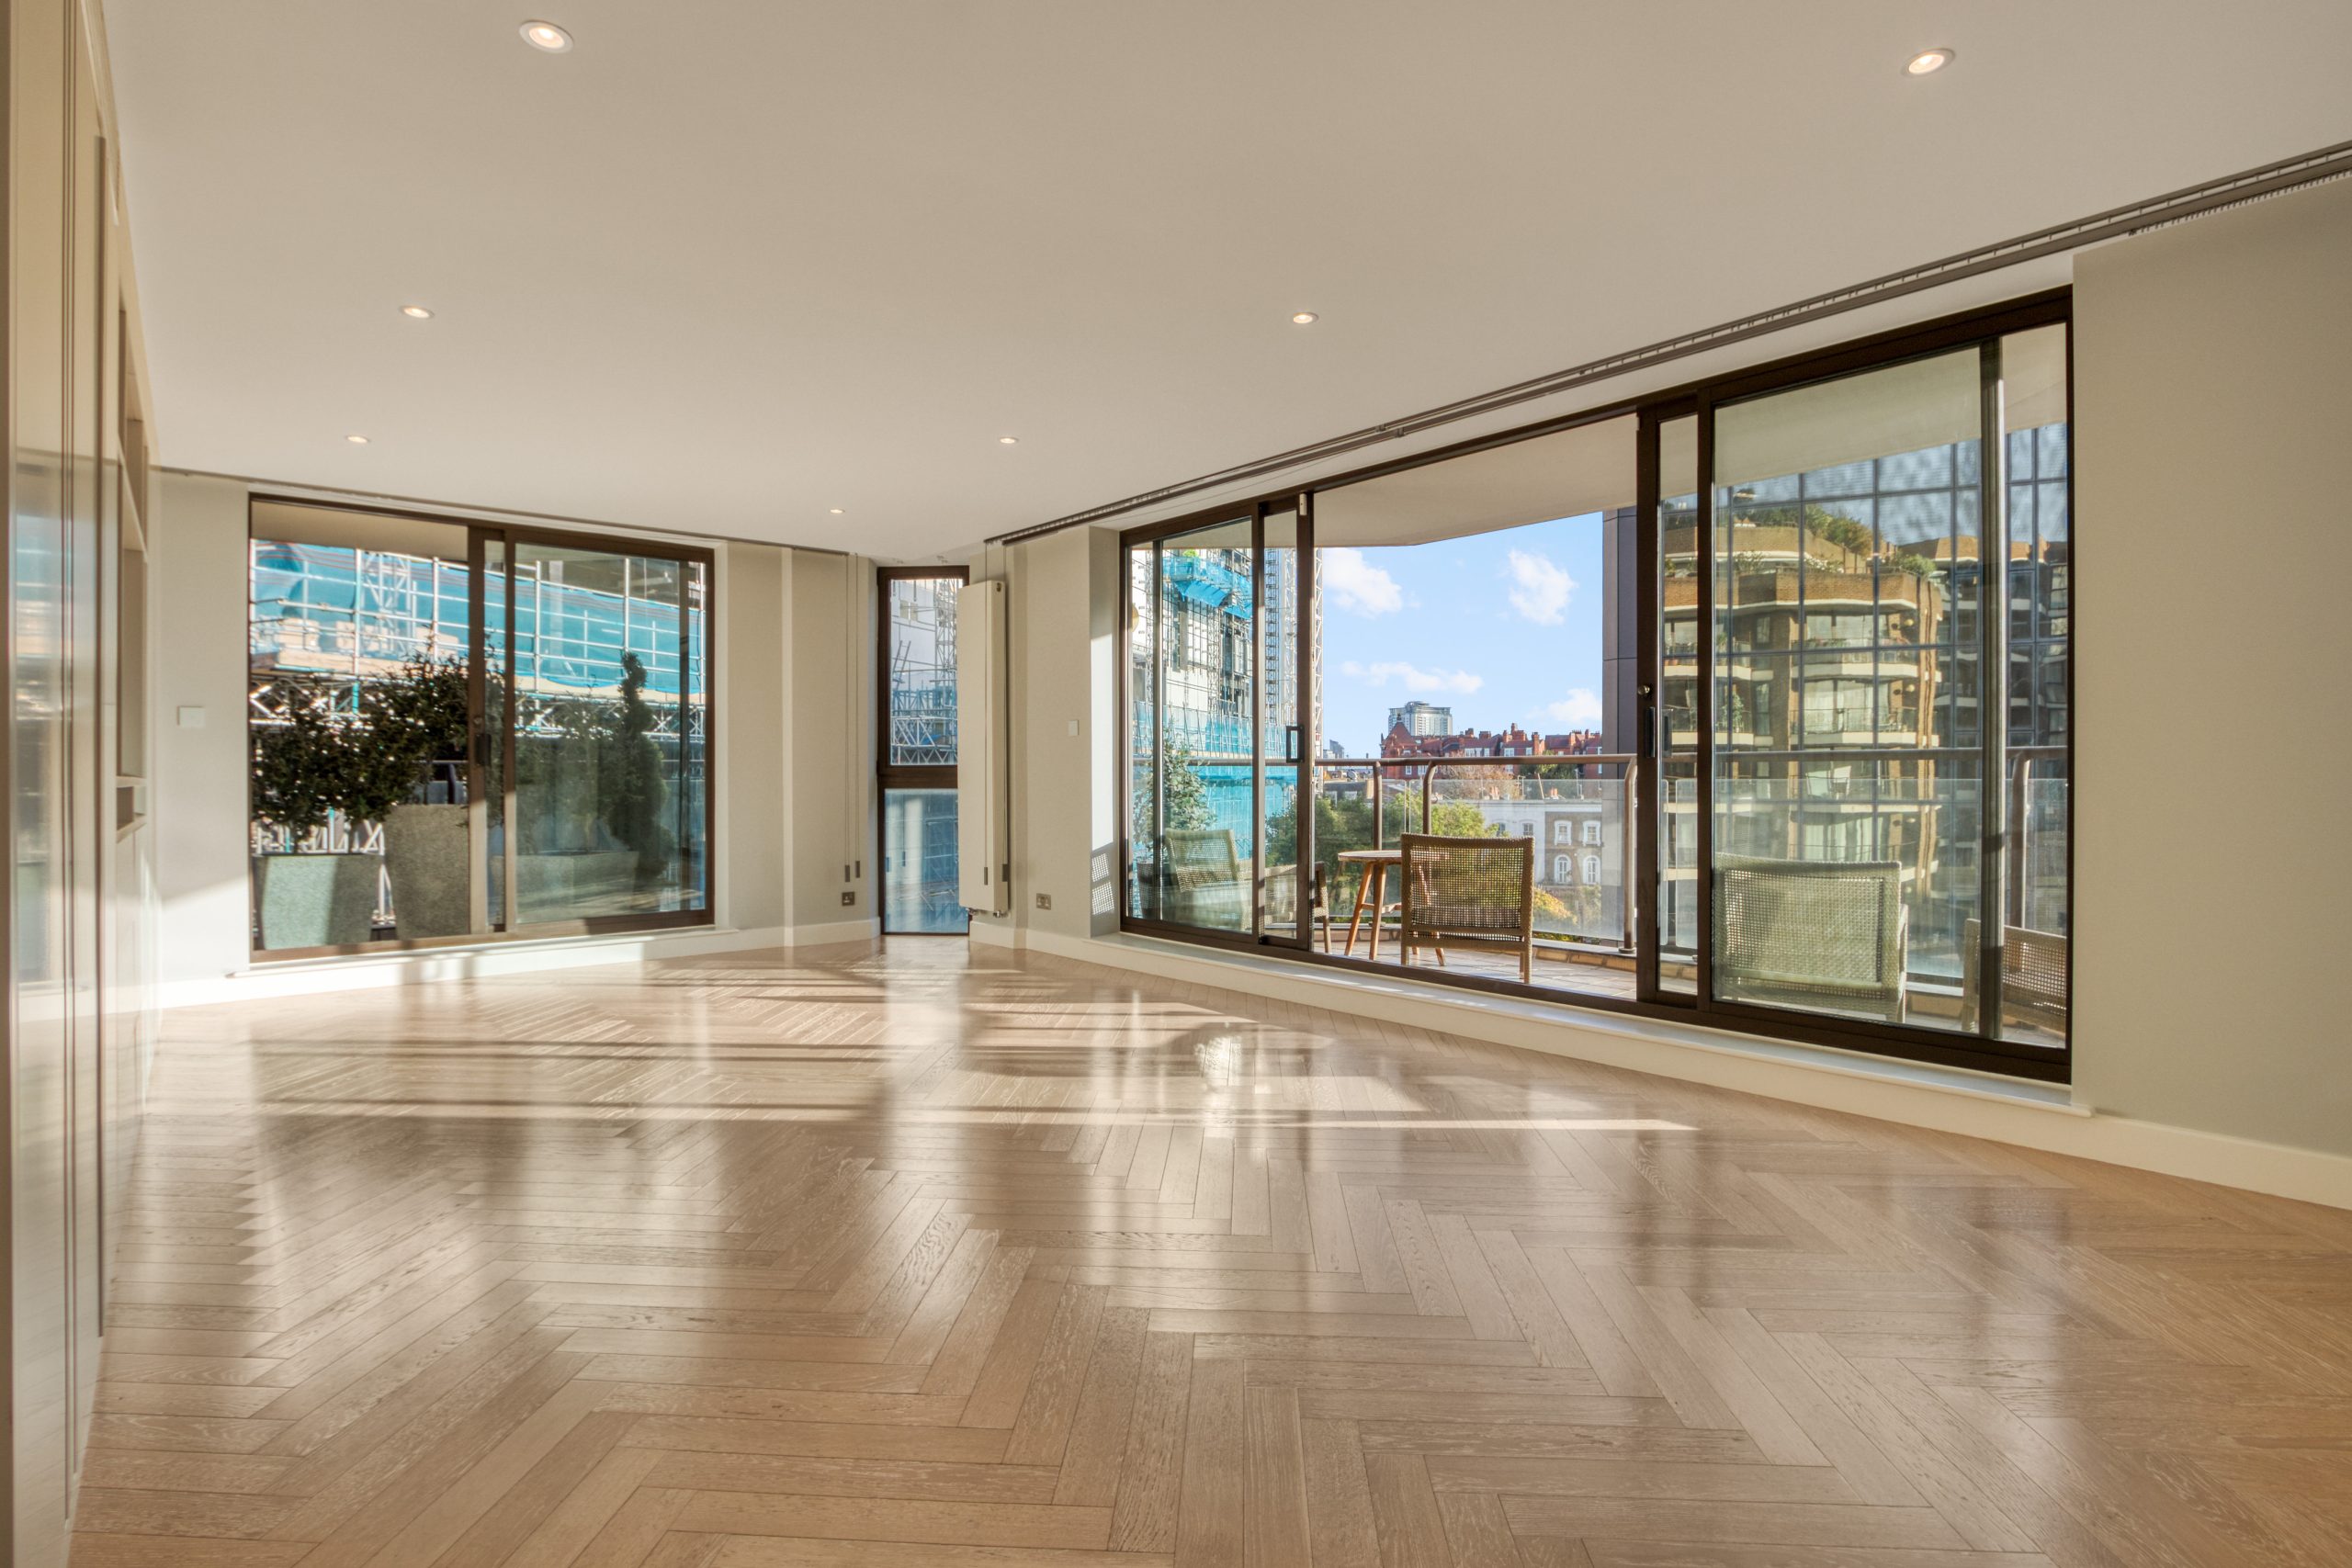
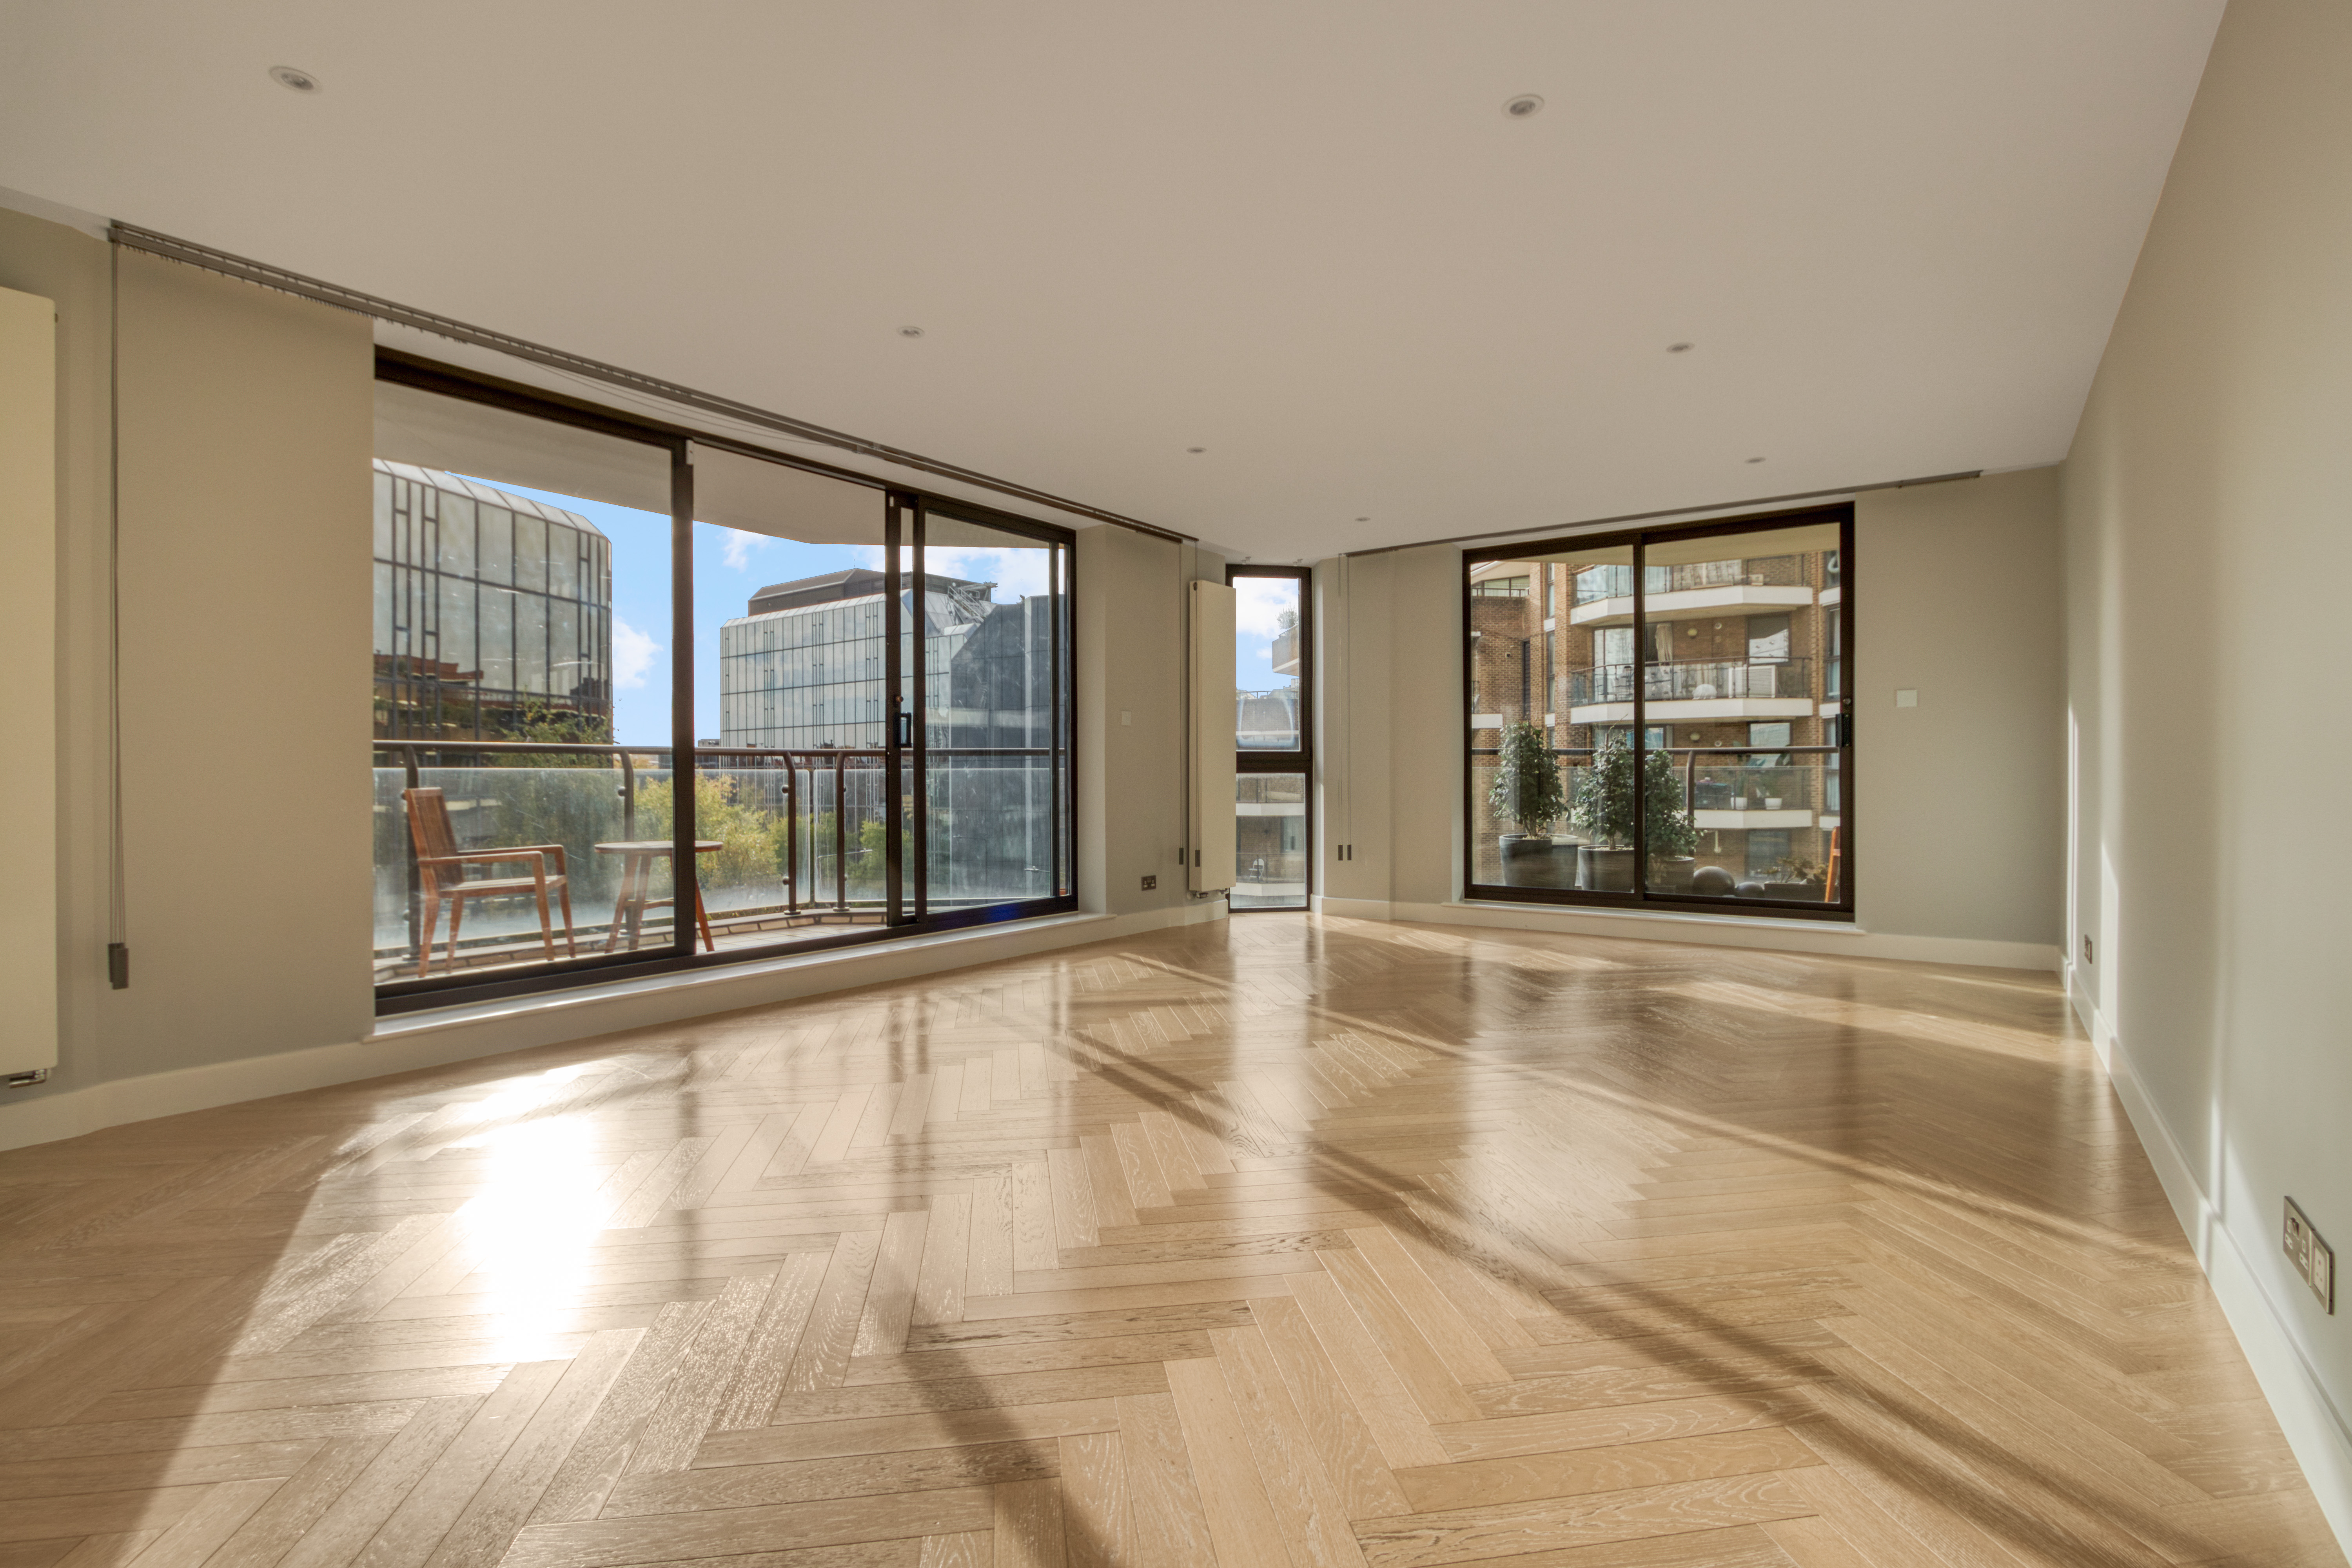
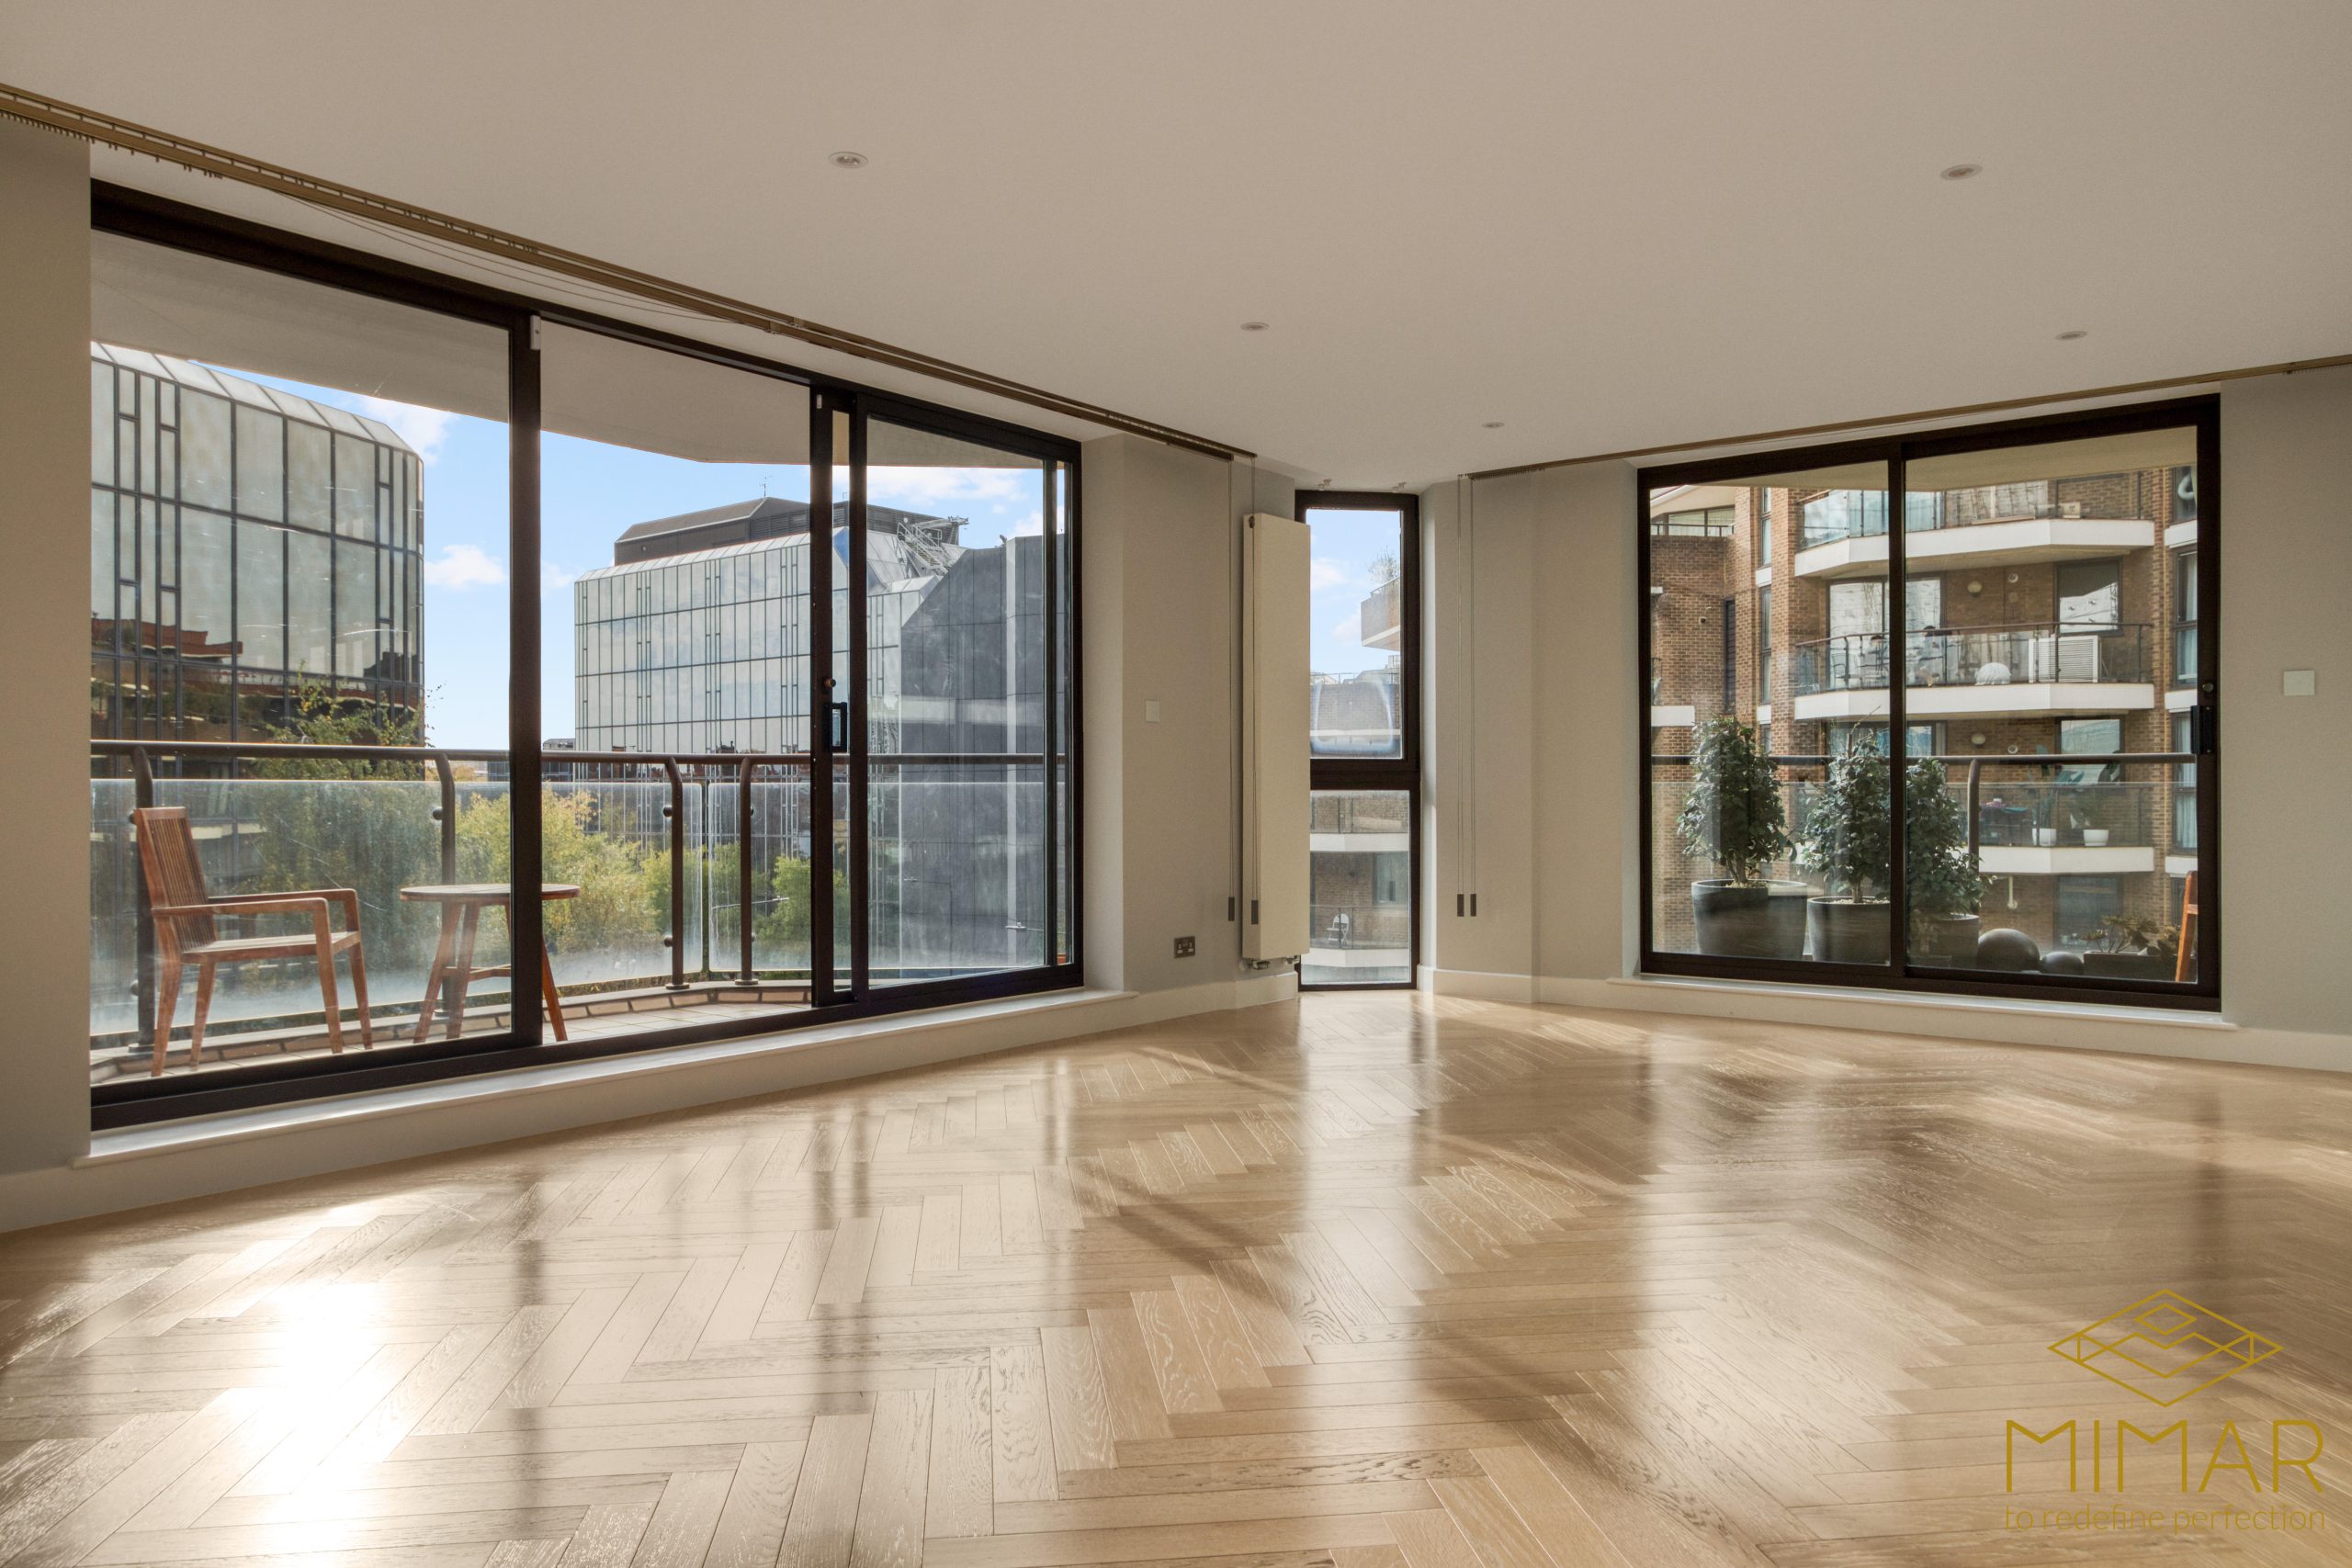
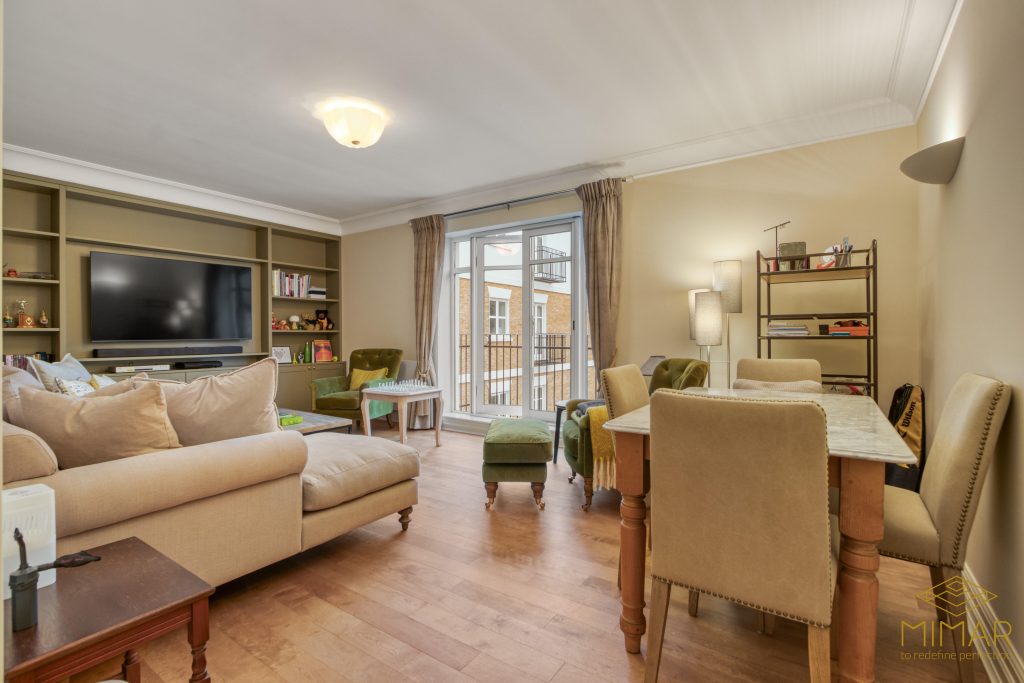
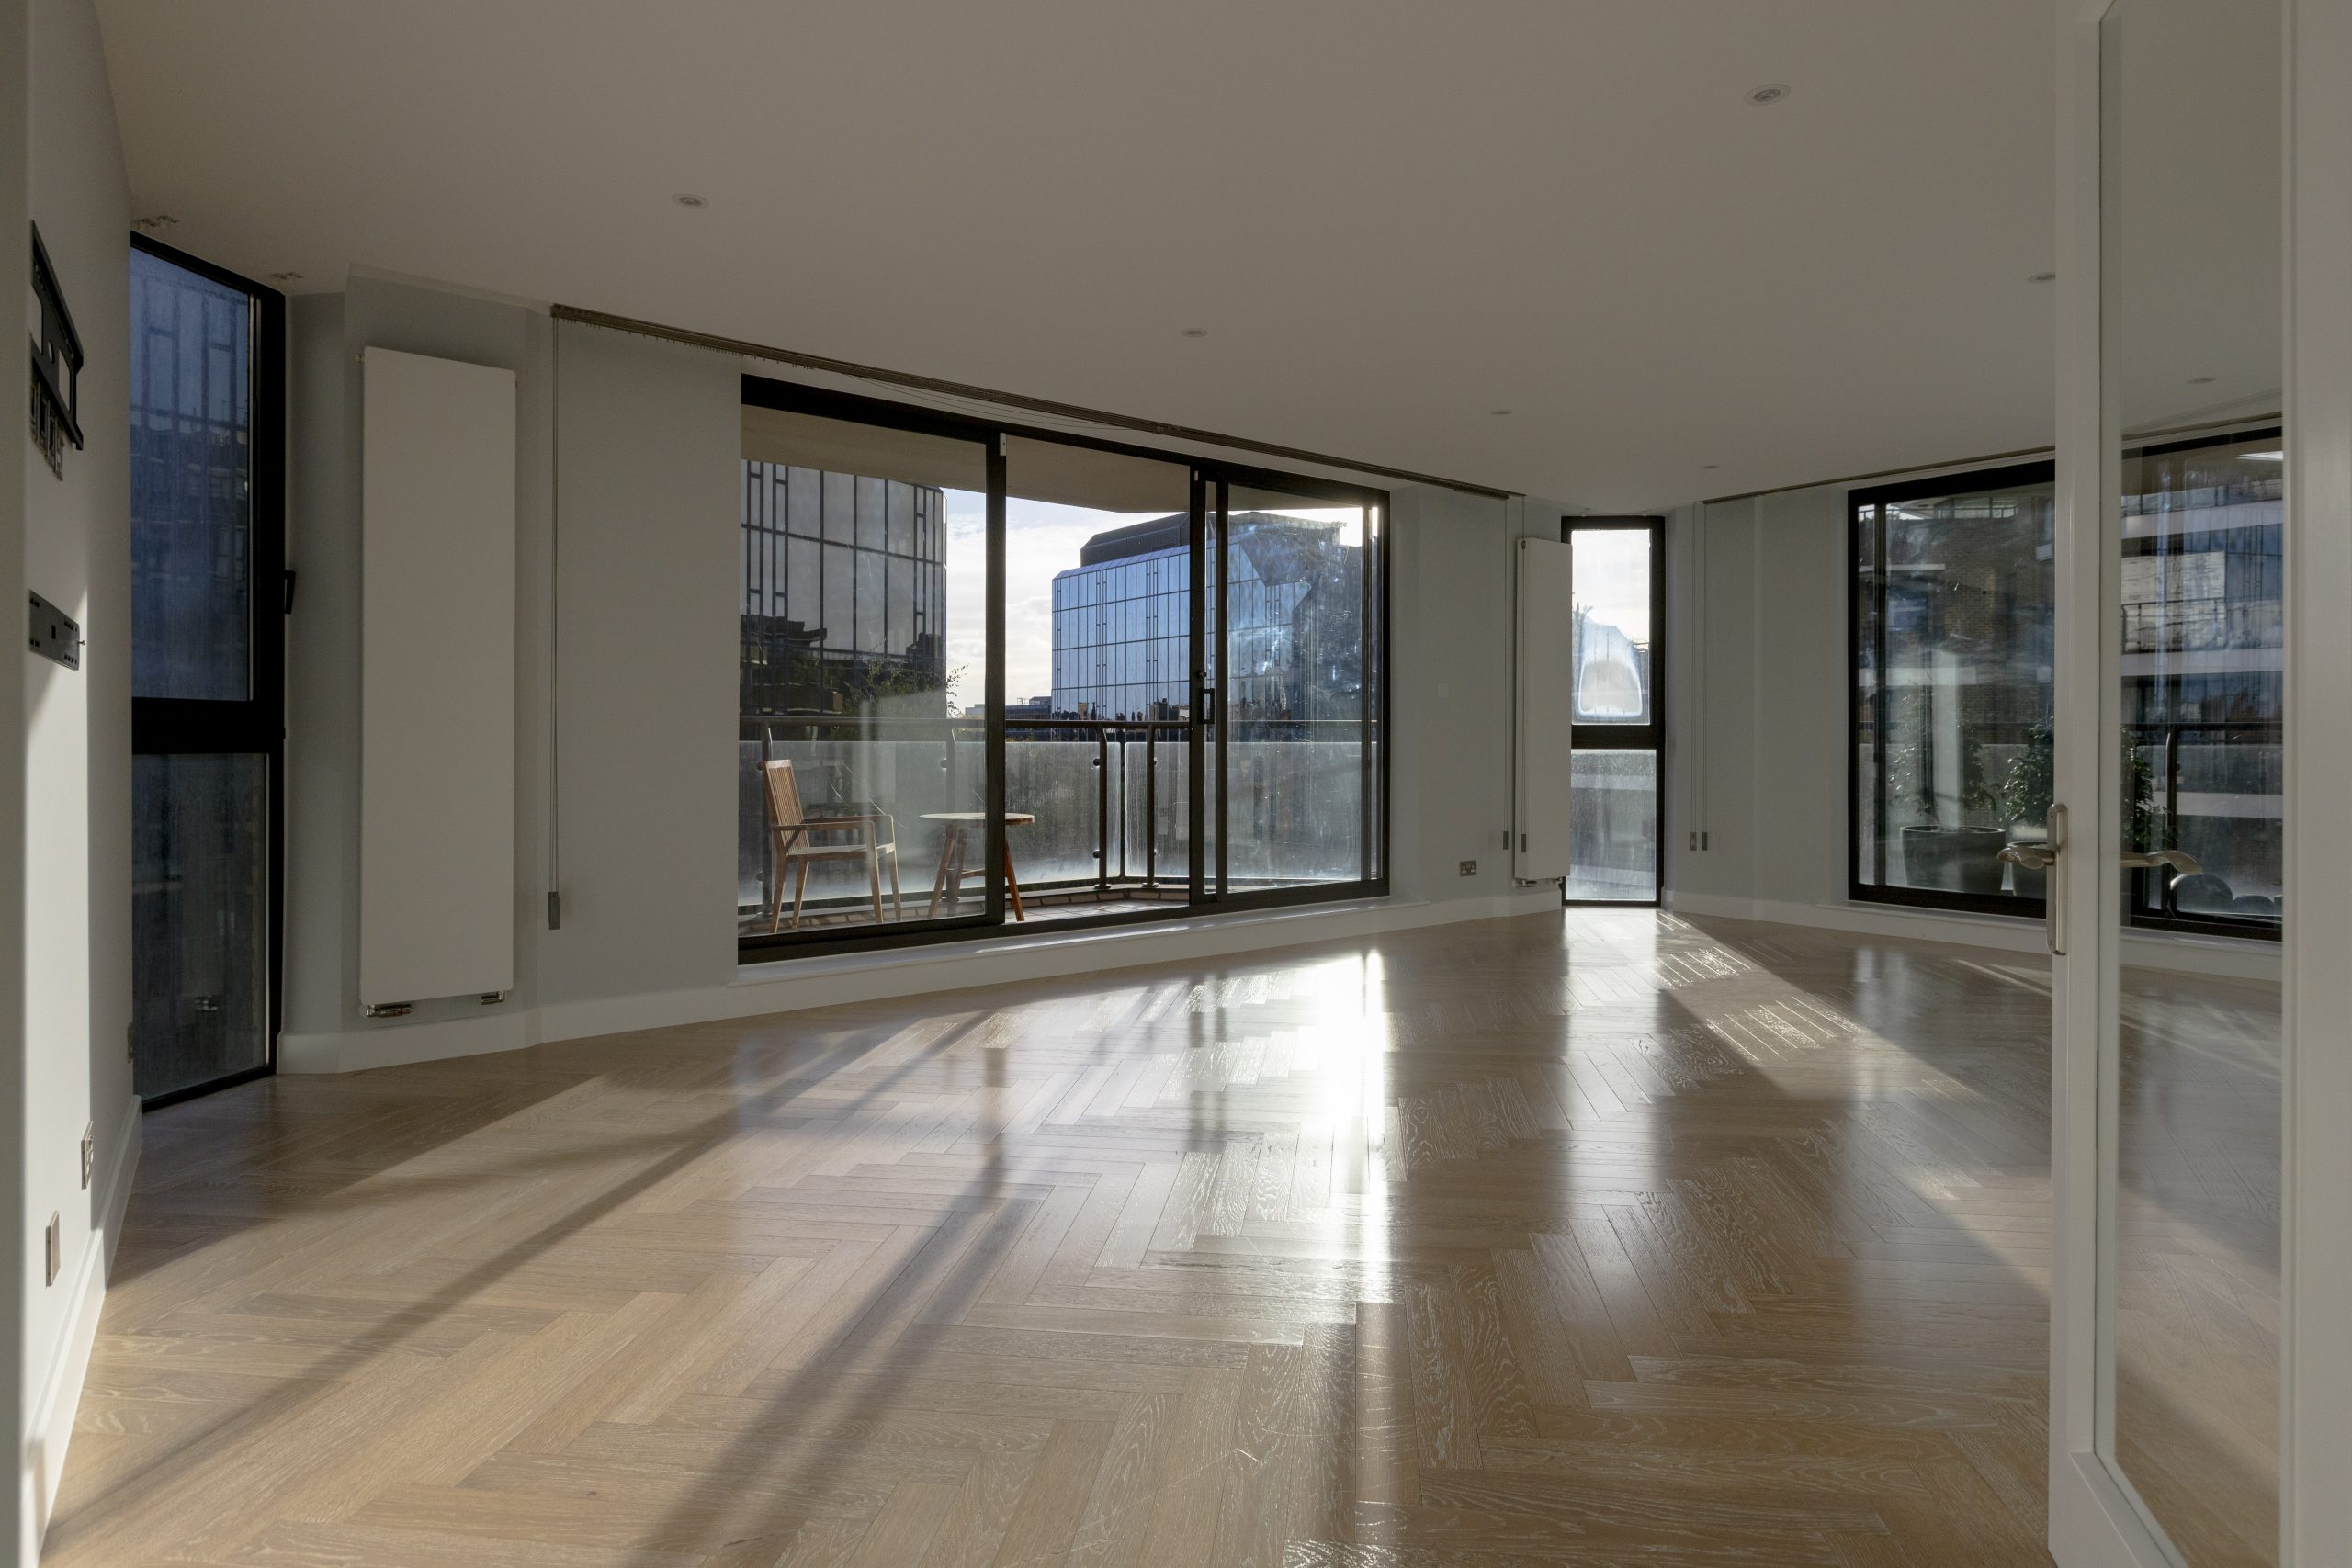
Spacious open-plan living area with large glass windows and wooden flooring, overlooking a balcony with city views.
Estimated Reading Time: 11 minutes

Introduction: Navigating New Home Developments in London

New home developments in London continue to capture the imagination of buyers seeking modern, efficient and well-connected places to live. Despite an ever-shifting property cycle, the capital remains one of the world’s most resilient residential markets, and demand for brand-new homes shows little sign of fading. In fact, London faces a structural undersupply of housing, with CBRE forecasting a shortfall of nearly 170,000 homes by 2027 as construction starts and planning activity slow. For buyers, this constrained-but-confident landscape makes understanding the new build market more important than ever.

This guide is written for anyone exploring a new build purchase in the capital, whether you are a first-time buyer drawn to lower running costs and turnkey living, a family seeking modern layouts near good schools, or an investor focused on rental demand and long-term capital growth. Over the coming sections you will learn what defines a new build, the genuine benefits and risks involved, how the buying process works, and exactly what to check before you commit. By the end, you should feel equipped to navigate your search with clarity and confidence.

Understanding the London New Build Market

To buy wisely, it helps to understand the forces shaping the market. London’s new build supply is currently constrained, with construction starts at their lowest level since 2010 and some boroughs recording no new starts in certain recent quarters. This feeds directly into the forecast 170,000-home shortfall and helps explain why quality schemes attract such competition. At the same time, demand remains robust from both domestic and overseas buyers, and wider London market data points to modest price growth and tentative recovery supported by improved mortgage choice and lower rates than the prior year. In short, this is a high-demand market where limited supply underpins both pricing and competition.

So what actually qualifies as a “new build”? In the UK context, it is generally a brand-new property that has never been occupied before its first sale. Within London, the most common form is the apartment or flat, often found in mid- and high-rise blocks that form part of larger mixed-use schemes incorporating retail, leisure and landscaped public space. These range from studios through to large three- and four-bedroom apartments and penthouses. Townhouses and mews-style homes appear in smaller clusters, frequently in outer boroughs, while regeneration-led masterplans transform former industrial land into entire new neighbourhoods complete with parks, schools and community facilities.

Several factors drive demand for these homes. New properties built to recent standards typically deliver better energy efficiency and lower running costs than older stock. Lifestyle amenities such as gyms, concierge services, co-working spaces and communal gardens appeal to busy professionals and families alike. The promise of low maintenance and comprehensive warranties is reassuring, and the investment narrative remains compelling thanks to strong rental demand in well-connected and regenerating areas. Increased scrutiny under the Building Safety Act has also reassured many buyers, who see heightened safety standards as a clear positive when buying from reputable developers.

Benefits of Buying a New Home Development in London

The advantages of a new build fall broadly into practical, lifestyle and investment categories. On the practical side, new homes offer design-led architecture and thoughtfully planned interiors with open-plan living, generous storage and integrated appliances. High-performance glazing, efficient heating systems and good insulation reduce energy bills and improve day-to-day comfort. Crucially, most new builds come with a 10-year structural warranty from a provider such as the NHBC or LABC, alongside shorter-term guarantees on fixtures and fittings. There is no immediate need for the rewiring, replumbing or refurbishment that can prove so costly in Victorian or Edwardian properties.

The lifestyle appeal is equally strong. Many London schemes provide concierge services, residents’ lounges, roof terraces, landscaped gardens and play areas, while reputable developers emphasise long-term placemaking that creates a genuine sense of neighbourhood. New developments also tend to cluster around transport hubs, riverside locations and regeneration zones, giving residents excellent connectivity and access to services.

Buyer Insight

Resilient demand paired with constrained supply creates a supportive environment for long-term investors. With the new build market expected to move into an upcycle following recent regulatory adjustments, buyers who research carefully now may be well positioned for future growth.

From an investment and buyer-profile perspective, the benefits are tailored to need. First-time buyers benefit from predictable costs, lower maintenance and high energy efficiency, which can make a new build more affordable in practice than an older home. Families gravitate towards larger apartments or townhouses within well-planned communities offering green space and good schools. Investors, meanwhile, look to strong tenant demand for modern, well-located stock, premium rents where amenities and transport links are strong, and capital growth prospects in areas benefiting from transport-led regeneration or chronic undersupply.

New Build Benefits
Energy Efficiency
10-Year Warranty
Low Maintenance
On-Site Amenities
Modern Layouts
Strong Connectivity

Exploring New Build Flats for Sale in London

For many buyers, the search begins and ends with apartments, and new build flats for sale in London represent the largest and most varied segment of the market. Before committing, it is worth scrutinising the layout and internal specification carefully. Compare the usable internal space against local norms, assess storage, natural light, noise insulation and flexibility for working from home. Specification levels vary considerably between schemes, so examine flooring, kitchen and bathroom finishes, smart-home features, and whether upgrades are available and at what cost.

Spacious living room with large windows and wooden herringbone flooring in a refurbished residential apartment.

Service charges deserve particular attention. New build flats often carry higher charges to fund concierge staff, lifts, gyms, gardens and ongoing building management. Always request the full service charge budget, understand how it may rise over time, and compare charges across similar schemes in the same area. Equally important are the lease terms. Most new flats are leasehold, with modern schemes often offering leases of 250 to 999 years. While recent legislation has constrained or removed ground rents on many new leases, you should still confirm the ground rent amount and review mechanism, the lease length, and any restrictions on pets, subletting or alterations.

The quality of the management company, on-site staff, security and communal upkeep will shape both your living experience and the resale value. It is also wise to consider parking and transport, since central schemes often offer limited car parking in favour of public transport, cycling and car clubs.

On value, asking prices date quickly, but relative patterns hold true. Prime central and riverside locations such as Westminster, Kensington and parts of the South Bank command the highest price per square foot thanks to prestige, views and amenity levels. Well-connected Zone 2–3 areas, including Wimbledon, Chiswick and Greenwich, frequently offer better value per square foot while still providing excellent transport links and strong rental demand. Outer and emerging regeneration zones provide more attainable entry prices with genuine growth potential where major transport or town-centre regeneration is underway. The smartest assessment of value balances price per square foot against connectivity, specification, amenities, and local rental and resale demand.

Popular Areas and Spotlight on New Builds in London’s Wimbledon

Across London, the most sought-after new build locations share recurring themes. Transport-led regeneration around Elizabeth line stations and upgraded Overground routes consistently attracts developers and buyers. Riverside schemes along the Thames are marketed heavily for their views and lifestyle. Revitalised town centres and brownfield masterplans in Zones 2–4 create entire new communities, while leafy “village” neighbourhoods continue to appeal to those seeking green space without sacrificing connectivity.

Wimbledon is a standout example of this last category. Parts of the area, particularly Wimbledon Village, retain a distinct village feel with independent shops and direct access to Wimbledon Common and other green spaces. The mix of traditional housing and modern developments appeals to both professionals and families who want a suburban atmosphere within Greater London, and the area’s strong selection of state and independent schools is a powerful draw for families. New builds in Wimbledon typically focus on high-spec interiors, considered parking or cycle storage, and landscaped communal areas carved out of an otherwise built-up urban fabric.

Connectivity is one of Wimbledon’s defining strengths. The area is served by National Rail, the District line and Tramlink, offering fast links into central London and across south-west London, plus good road access towards Surrey. Developers consistently target Wimbledon and similar Zone 3–4 hubs for mid- to high-end apartments and townhouses, reflecting strong local incomes and sustained demand.

Area Key Appeal Typical Buyer Profiles
Wimbledon Village feel, Common, strong schools, rail & Tube Families, professionals, upsizers, downsizers
Chiswick Riverside, high street, prime west London Affluent families, professionals
Greenwich Heritage, river, park, DLR & rail Young professionals, families, investors
Richmond Parks, river, high-end feel, good schools Families, premium downsizers

Wimbledon and its peers appeal particularly to families wanting space, greenery and schools; to professionals who commute but prefer a quieter base; and to investors targeting strong mid- to long-term demand from both renters and buyers.

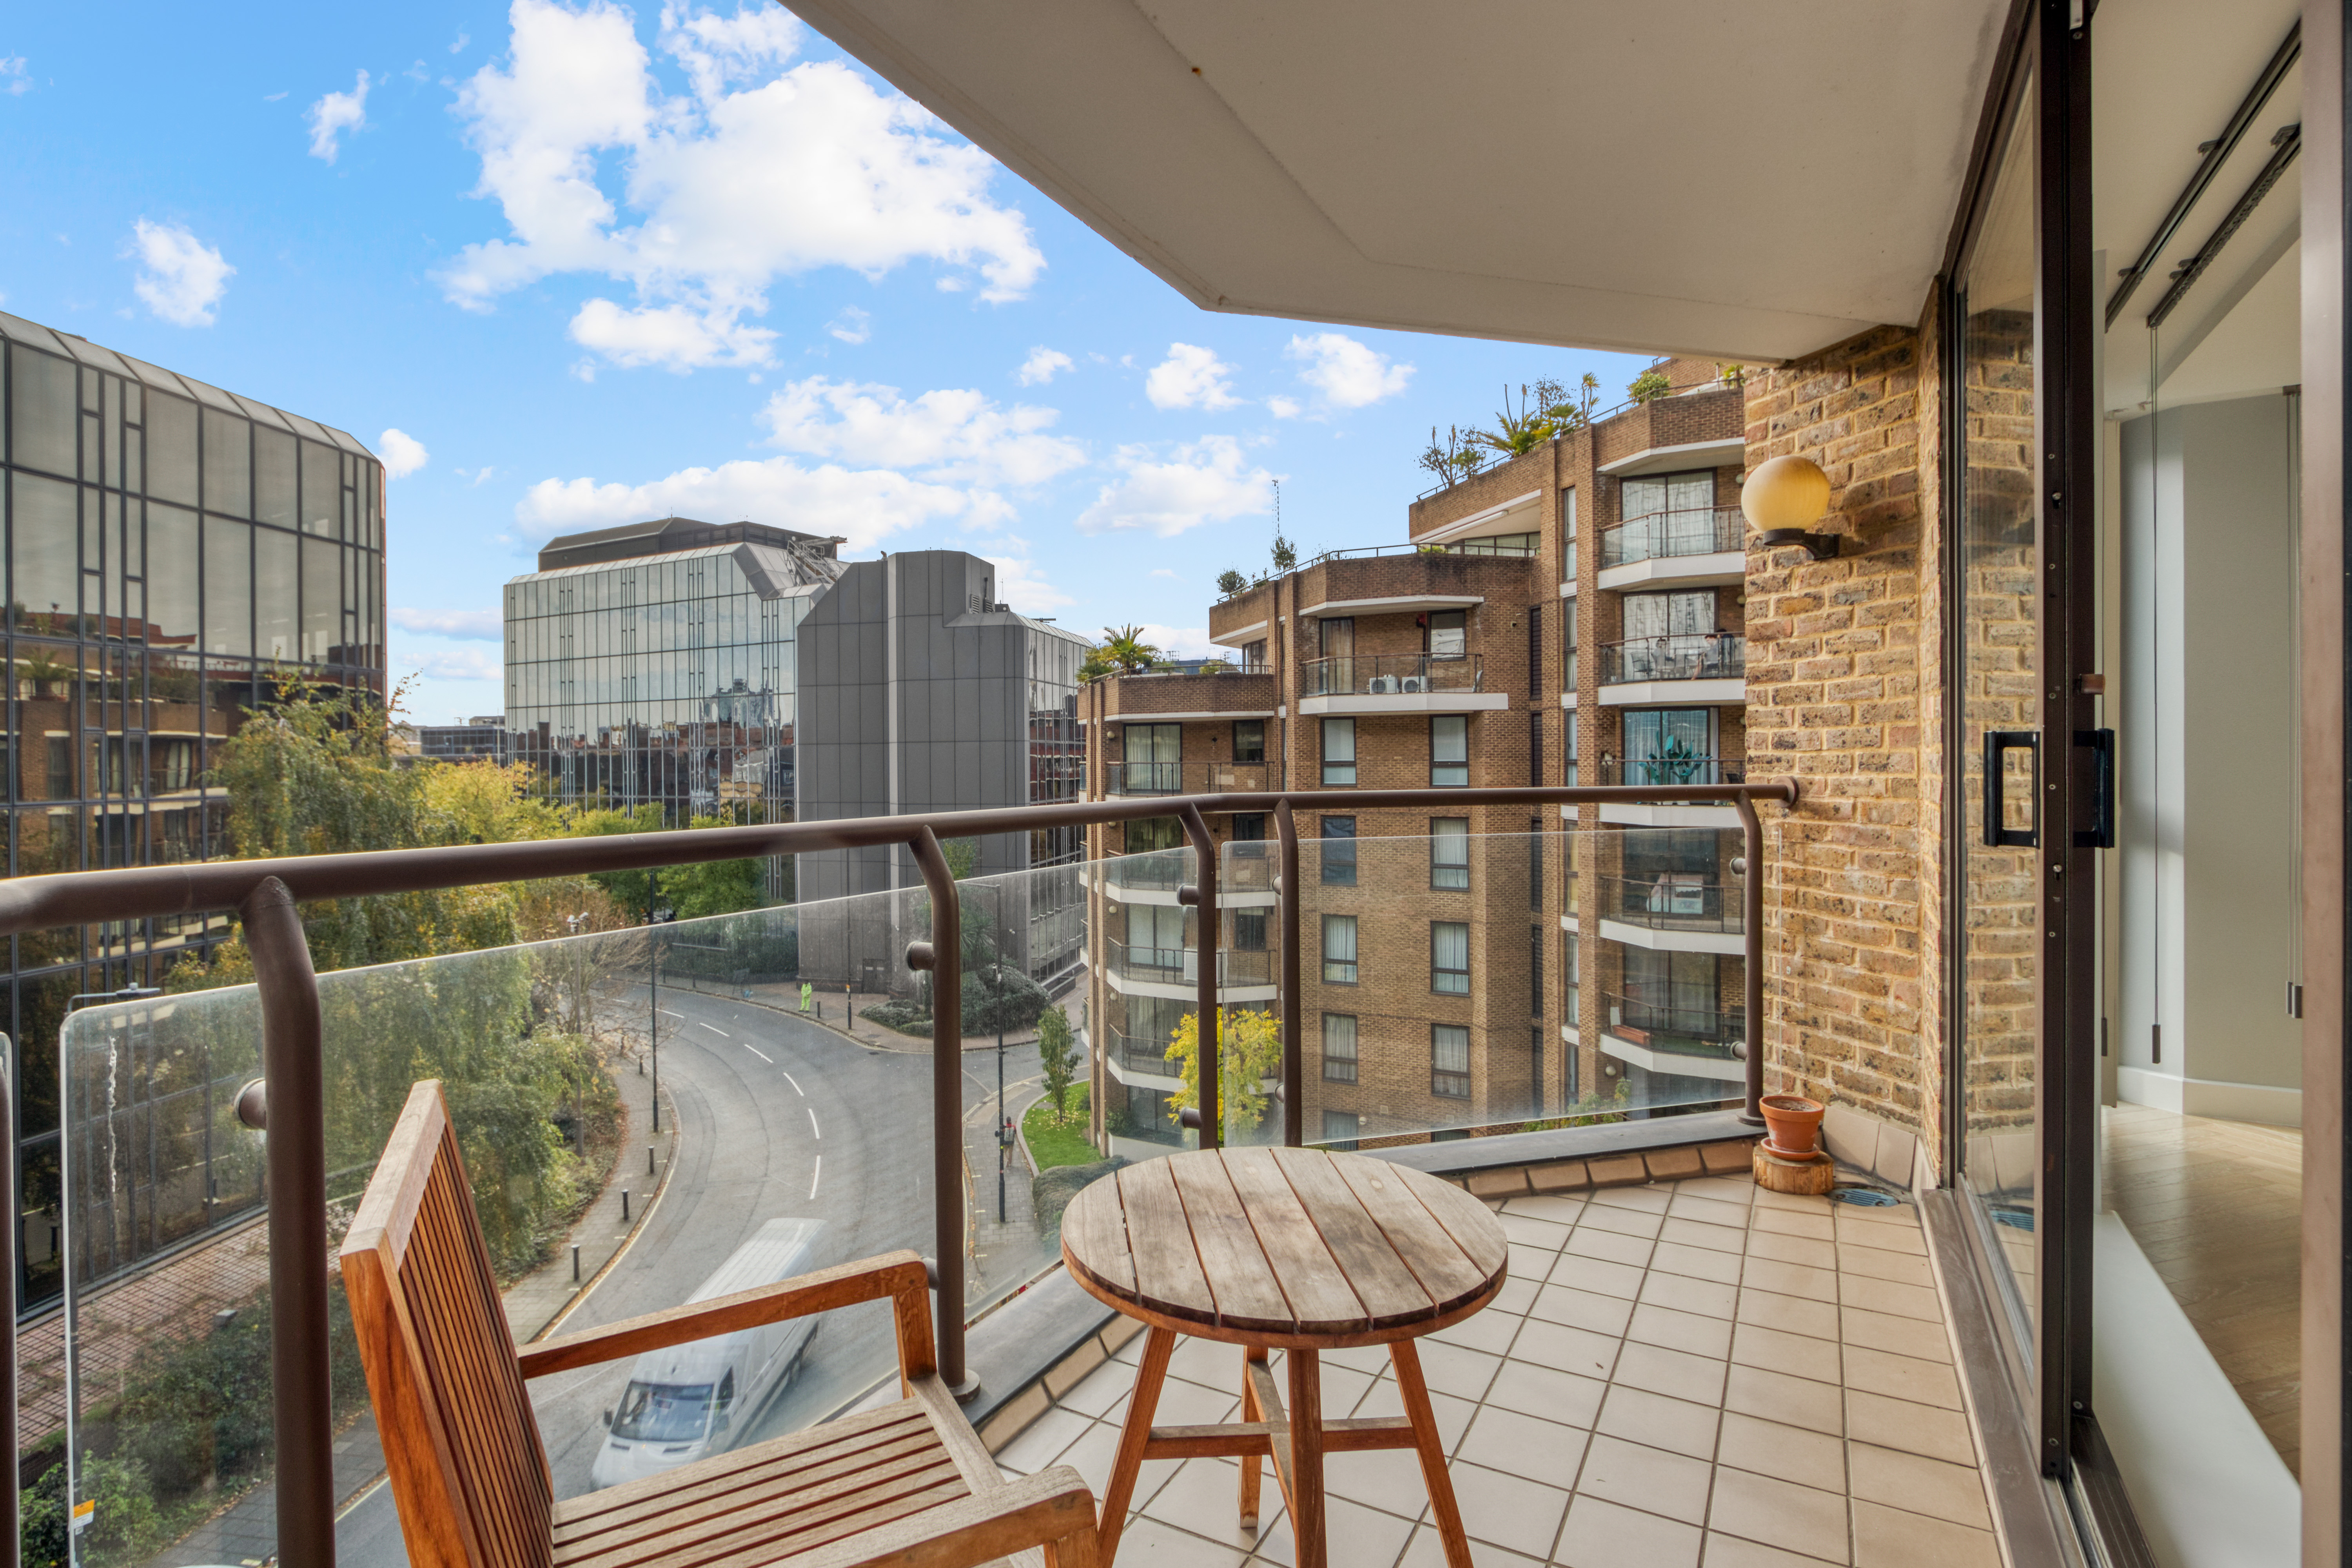
View from a modern balcony overlooking an urban area with surrounding buildings, a wooden chair, and small table.

Key Factors to Consider Before Buying in London

Before committing to any purchase, weigh up location and lifestyle carefully. Consider commute times to key employment hubs such as the City, West End and Canary Wharf, and evaluate night services, bus routes, cycling provision and any planned infrastructure upgrades. Look closely at local amenities, from shops and clinics to parks and restaurants, and for family buyers, examine OFSTED ratings and catchment areas. It is also worth checking local authority planning portals and the Mayor’s London housing reports for upcoming projects that could either enhance an area through regeneration or increase density and competition.

Financial considerations are equally critical. Most lenders require a deposit of at least 5–15% for new builds, and some may ask for more on flats due to perceived risk. Developers sometimes offer incentives such as contributions towards stamp duty, legal fees or furniture packs, which can be helpful but should never overshadow proper due diligence. Government schemes evolve over time, so check the latest options such as shared ownership. Stamp Duty Land Tax applies to new builds as to any residential purchase, with investors and second-home buyers typically facing higher surcharges. Don’t forget ongoing costs either, including service charges, ground rent, buildings insurance, council tax and utilities.

Finally, understand tenure. Flats are usually leasehold, with the freehold held by a third party or collectively by leaseholders. Check the lease length, ground rent and review pattern, service charge structure, reserve funds and any restrictions. Houses can be freehold or leasehold, and because some London new build estates still sell houses on a leasehold basis, you must verify this. In all cases, seek legal advice to understand lease terms and any estate charges that may apply even to freehold homes.

The Buying Process for New Home Developments in London

Purchasing a new build follows a logical sequence. It begins with research and area selection, shortlisting developments based on budget, commute, lifestyle and long-term plans. Next comes financial preparation, where securing a mortgage agreement in principle and setting a clear budget inclusive of fees and stamp duty is essential. You then visit show homes and, where possible, completed phases or earlier schemes by the same developer to gauge quality.

Once you have chosen a plot, considering orientation, floor level, outlook and any future phases that could alter your views, you reserve the property by paying a reservation fee that secures it while legal work proceeds. Instructing a solicitor experienced in new build conveyancing is vital, as they will review contracts, leases, warranties, management structures and planning conditions. Exchange of contracts typically follows within a set period, with the buyer paying a deposit, commonly around 10%. Between exchange and completion, off-plan buyers may face a significant gap while construction finishes, during which the final mortgage offer is arranged. Once the building is signed off, the developer serves notice for legal completion, and the buyer carries out snagging checks before the remaining funds are transferred and keys released.

A key decision is whether to buy off-plan or completed. Buying off-plan offers a wider choice of units, a potential price advantage by purchasing early in a scheme, and sometimes the chance to customise finishes. However, it carries risks of completion delays, shifting market conditions, and the property not quite matching expectations; mortgage offers can also expire if completion slips significantly. Completed properties allow you to see exactly what you are buying, including views, daylight and finish quality, with a faster move-in and far less uncertainty around timing.

Common Pitfalls and How to Avoid Them

Even experienced buyers can stumble. One of the most frequent mistakes is underestimating total costs by focusing solely on the purchase price while overlooking service charges, ground rent, stamp duty and furnishing. Request full cost breakdowns and stress-test your budget accordingly. Another is failing to scrutinise the developer; not all are equal, so research their track record, previous schemes, customer satisfaction and how they handle defects.

Inadequate attention to lease terms is a recurring problem, particularly overlooking ground rent clauses or restrictive covenants. Have your solicitor flag any ground rent escalation or onerous clauses early. Skimping on snagging is another common error; moving in without a thorough inspection can lead to prolonged issues, so conduct a detailed snagging review, or hire a professional, and submit a written list to the developer. Completion delays catch many buyers off guard, so build contingency into your timetable and understand contract clauses around long-stop dates. Finally, never ignore future phases or nearby development, as later construction could block views or cause years of disruption. Always review the full masterplan and check local planning applications.

Tips for Making a Confident Purchase

Confidence comes from preparation. Carry out in-depth area research, comparing at least two or three areas and multiple developments, and visit at different times of day to gauge noise, traffic and atmosphere. Look beyond the individual apartment to evaluate the development as a whole, since management quality, build quality and amenities significantly influence both daily life and future resale. Compare schemes like-for-like using price per square foot and amenity levels, always factoring in service charges and likely increases.

Approach negotiation and incentives thoughtfully. Developers may offer discounts, upgrades or contributions towards costs, but focus on overall value rather than headline incentives, and remain mindful of how incentives can affect a mortgage valuation. Surround yourself with the right professionals, including a mortgage broker with new build experience, a solicitor versed in leasehold matters, and an independent surveyor or snagger where appropriate. Above all, think long-term: transport links, schools, area reputation, lease length and service charges all shape resale appeal and future tenant demand.

Conclusion

New home developments in London offer a compelling blend of modern living, energy efficiency and strong long-term fundamentals, set against a backdrop of chronic undersupply and resilient demand. From sleek new build flats for sale in London’s central districts to family-focused new builds in Wimbledon and the wider south-west, there is genuine choice for every buyer profile, provided you approach the search with clarity and rigour.

The path to a confident purchase lies in clarifying your priorities, whether that is location, space or amenities, seeking professional advice on the financial and legal detail, and taking the time to compare developments rather than being rushed by marketing pressure. With thorough research and the right guidance, you can secure a new build home that fits both your lifestyle and your long-term financial goals. For a discreet conversation about navigating London’s new build landscape, contact Mimar Construction, where design insight meets rigorous delivery to help you move forward with certainty.

Innovative Built-In Wardrobes Design Ideas

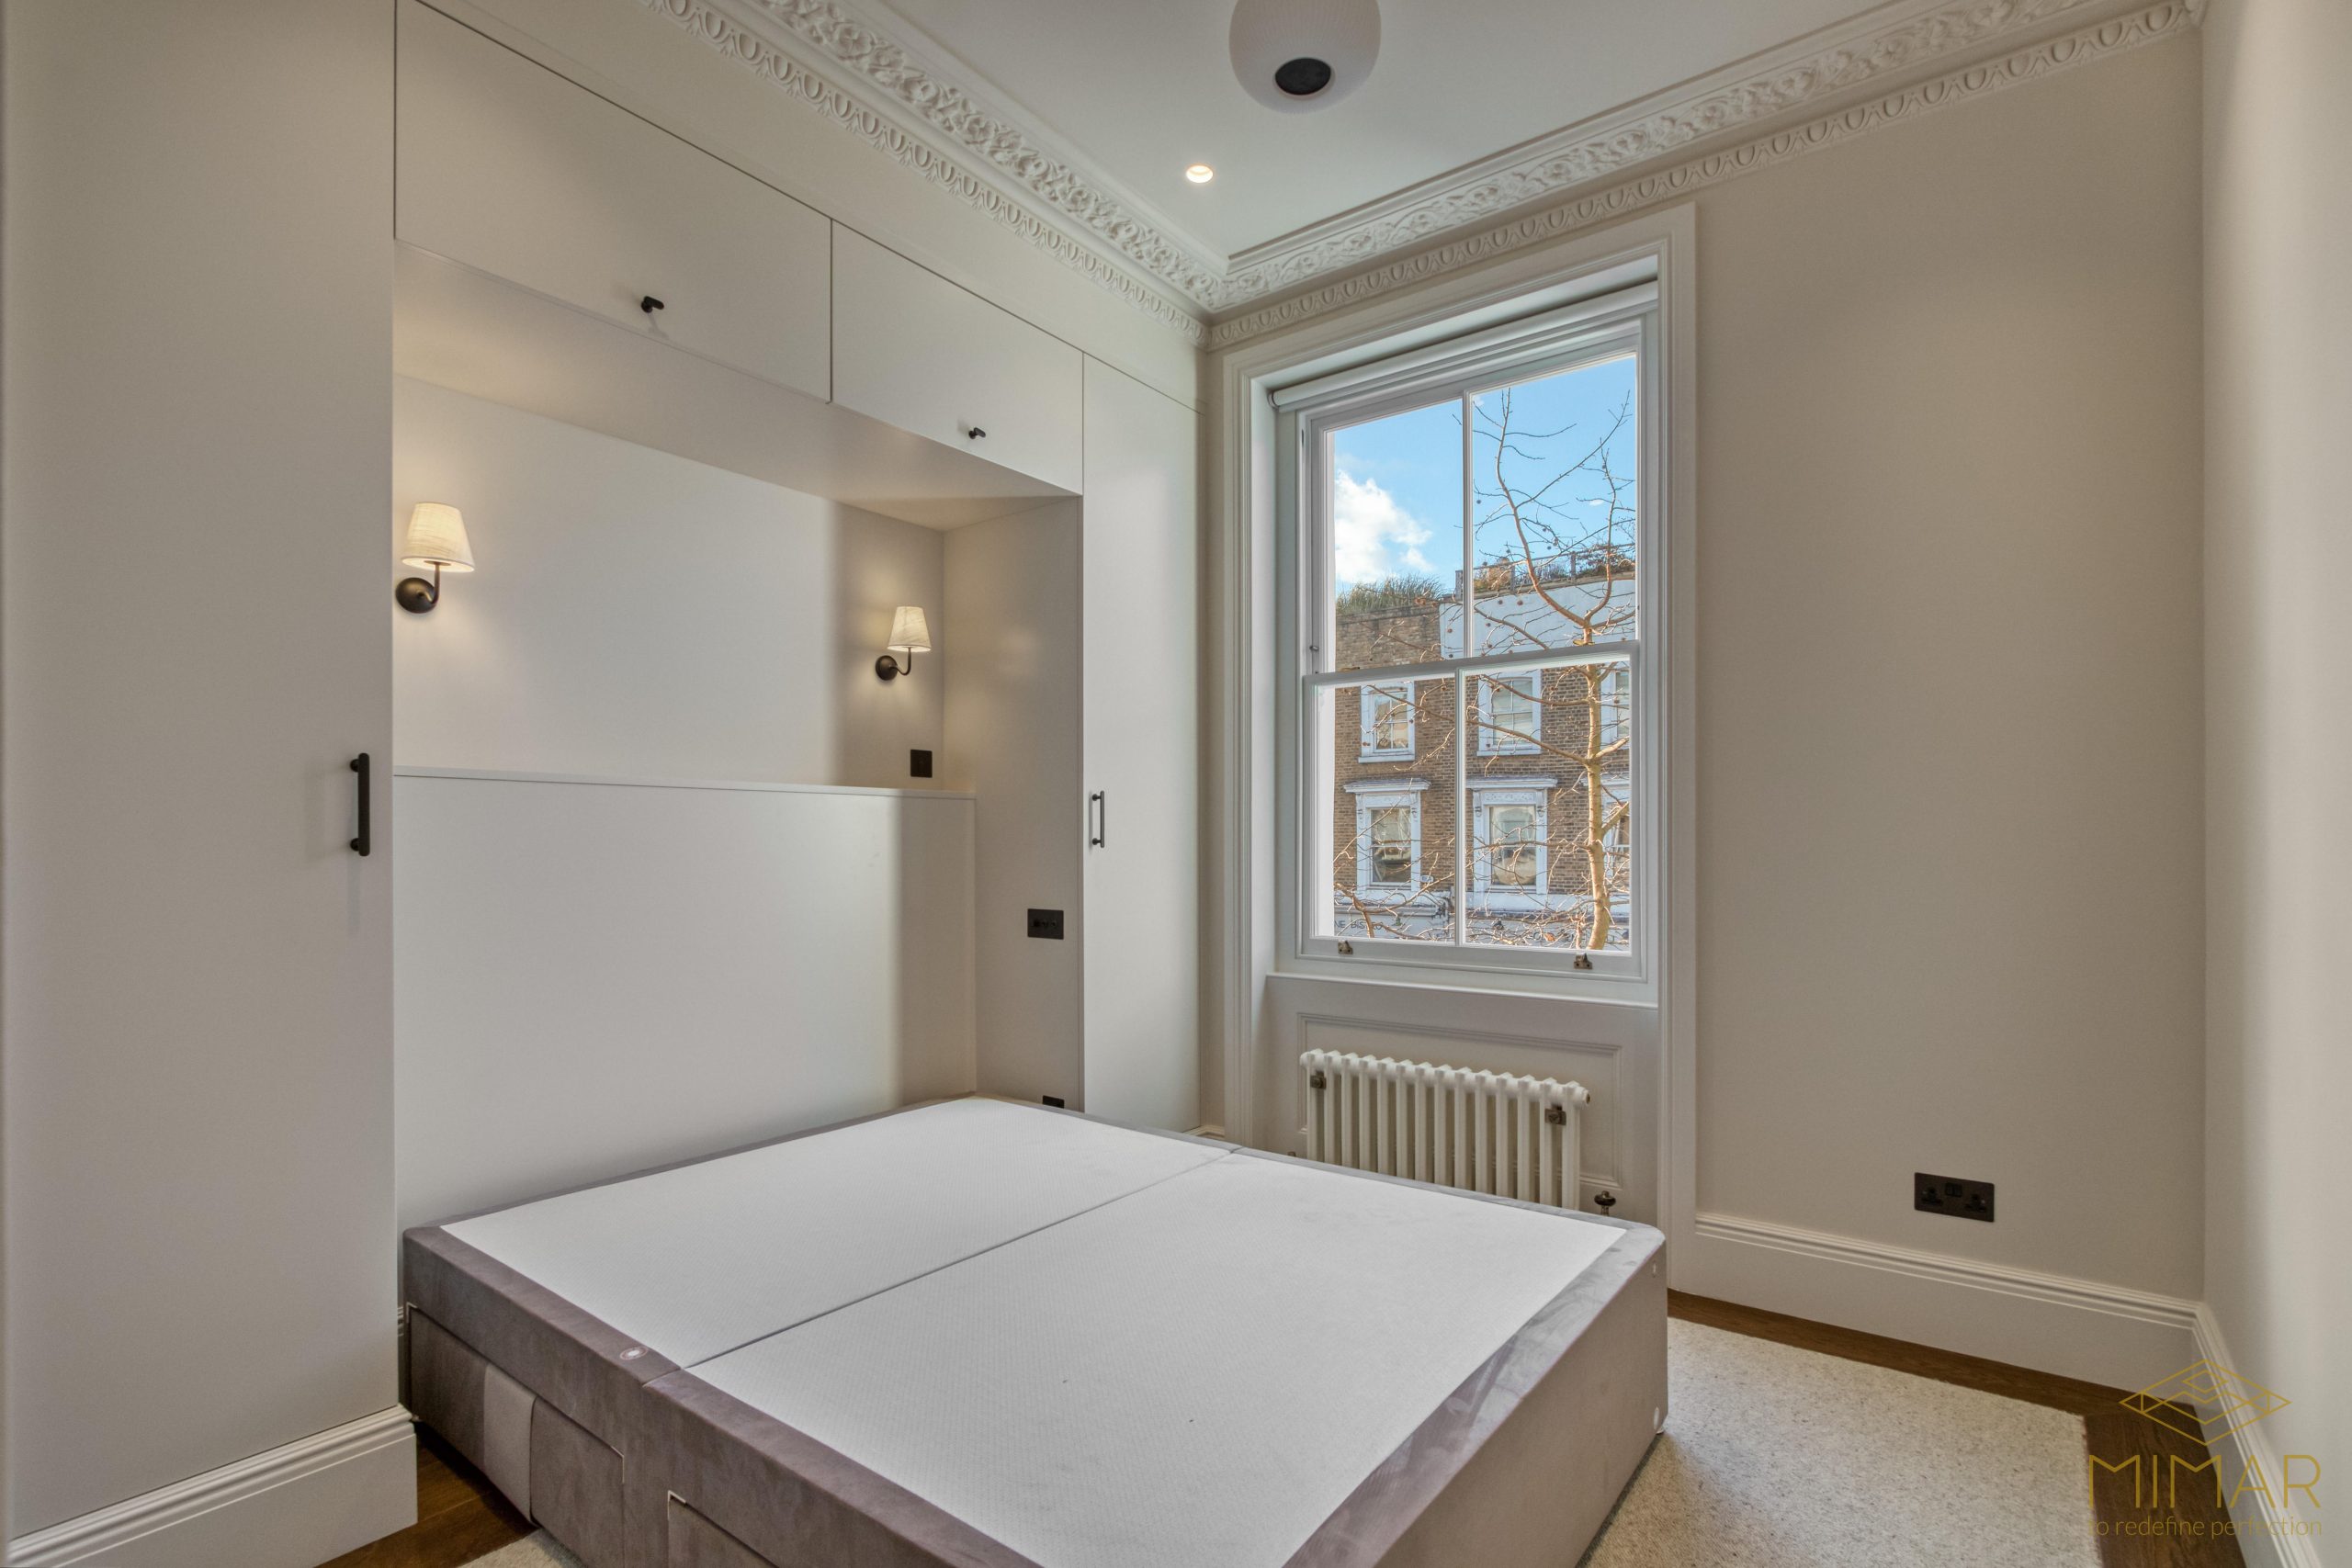
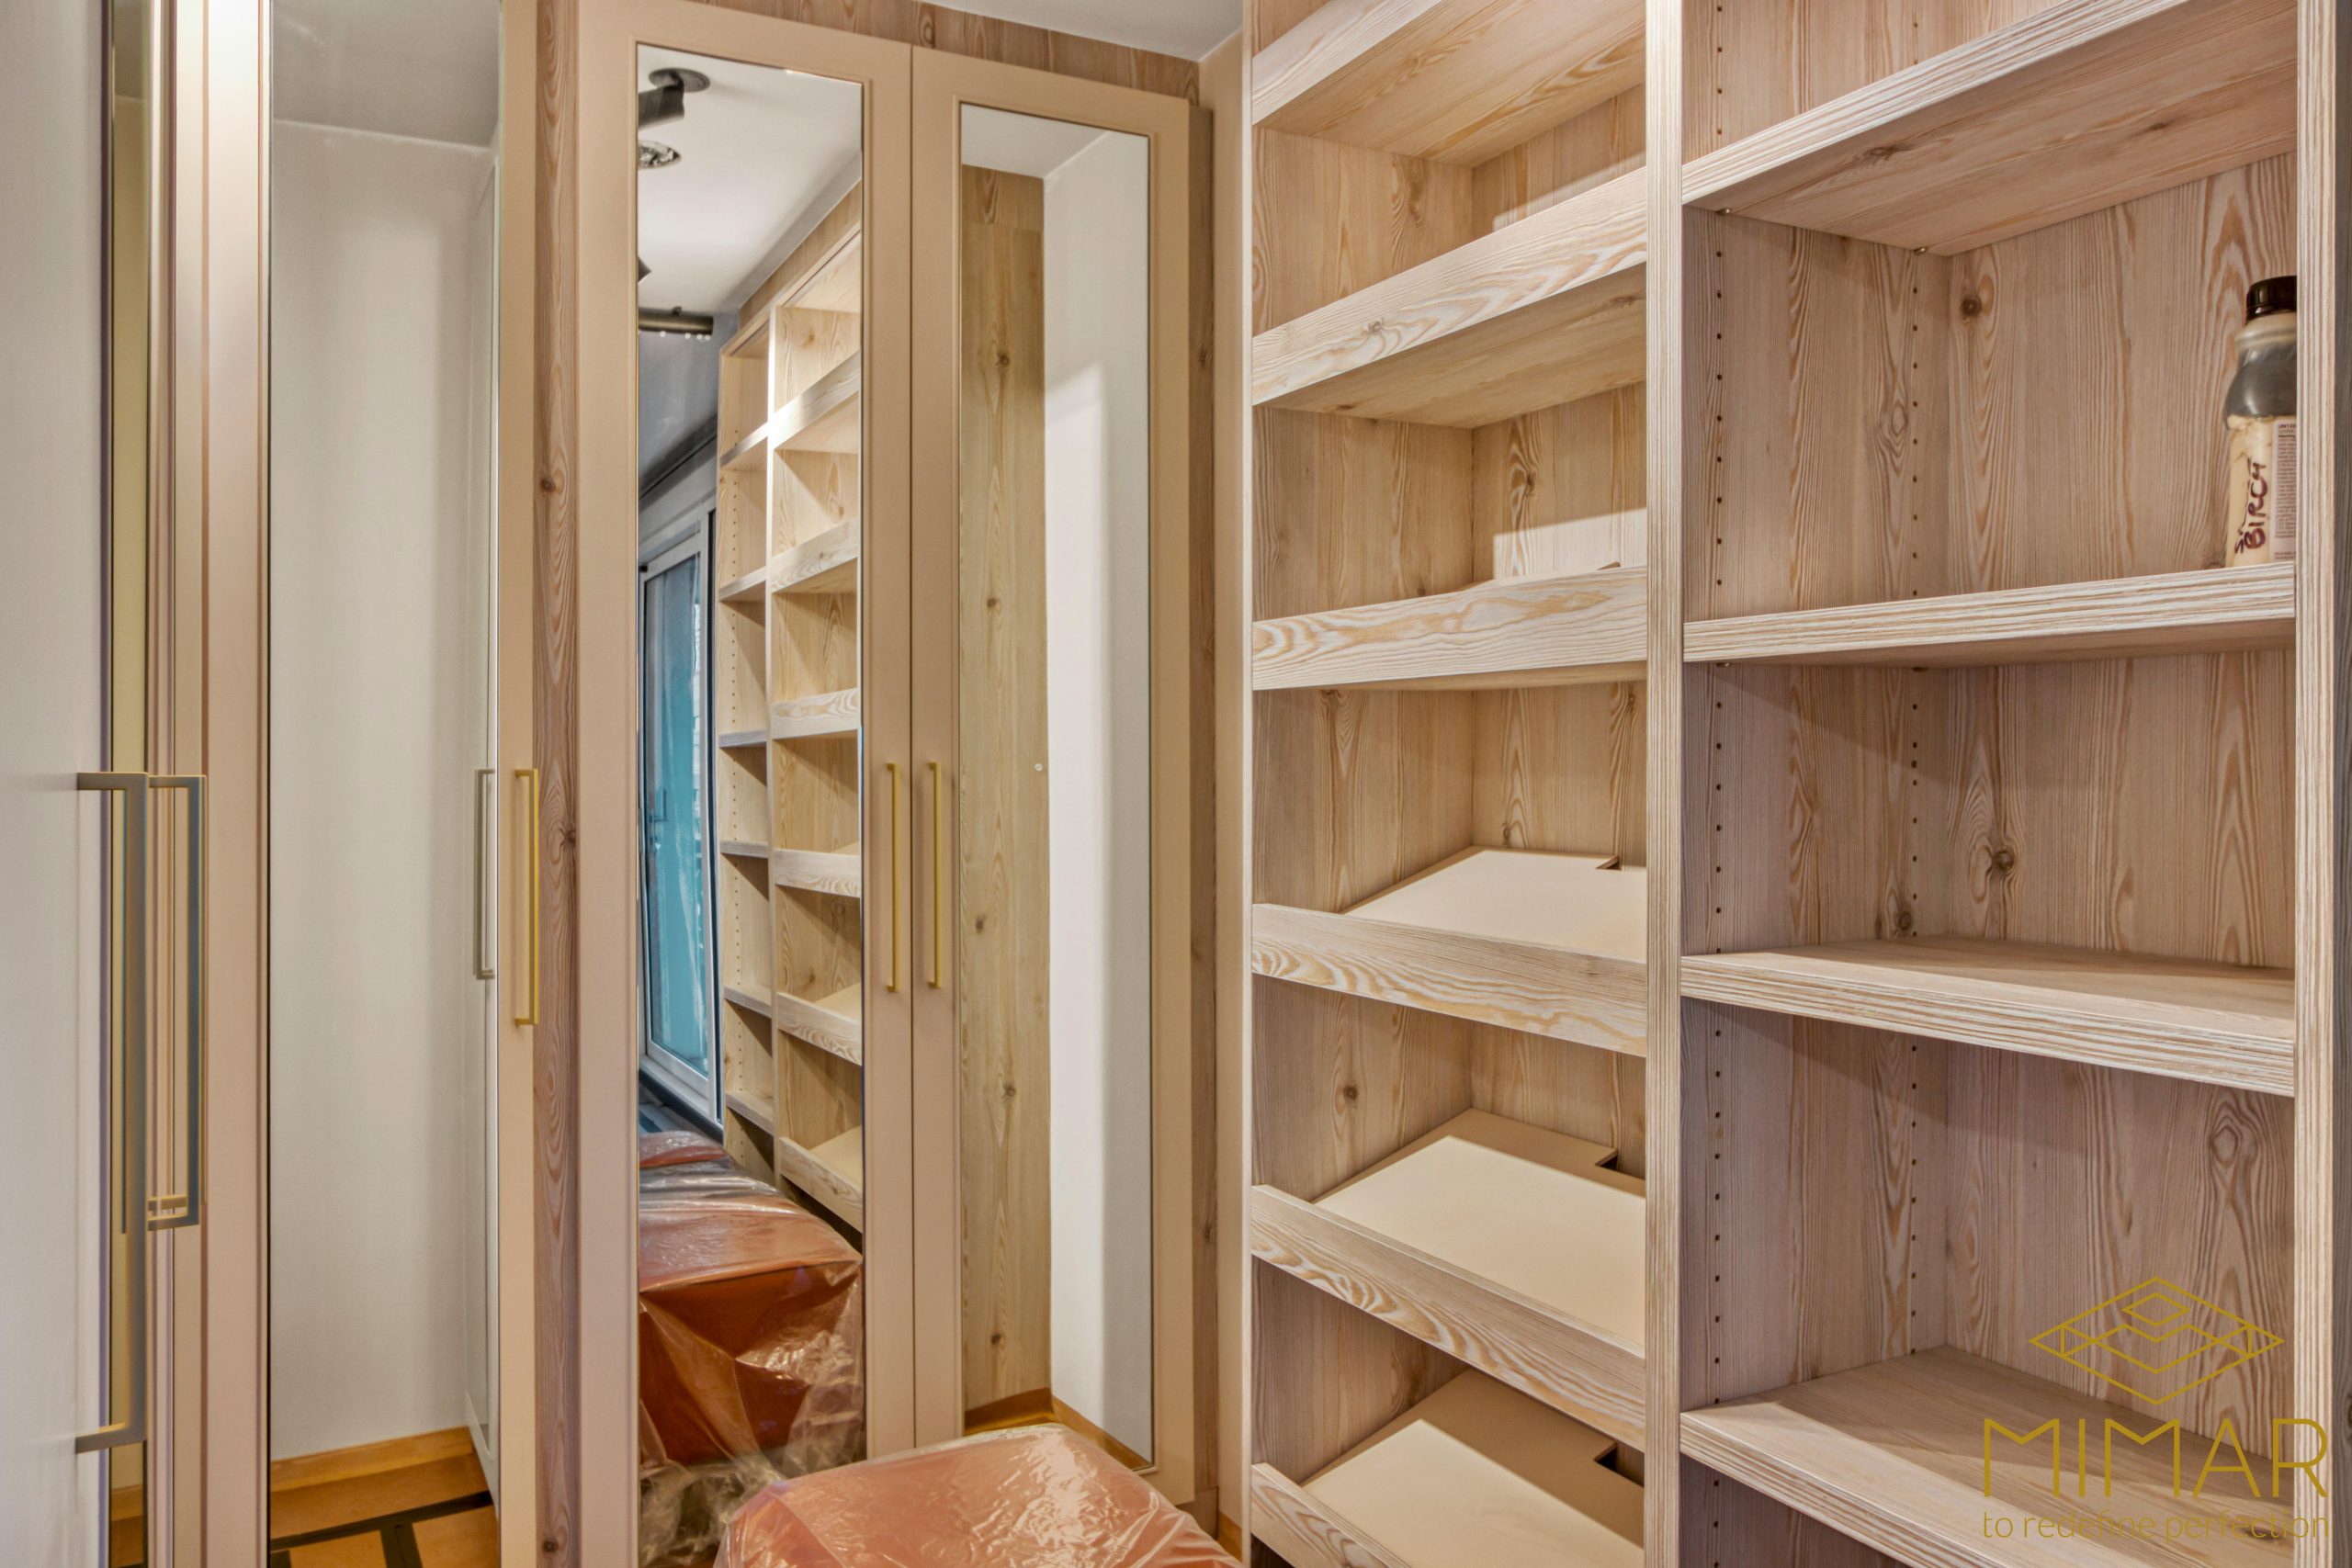
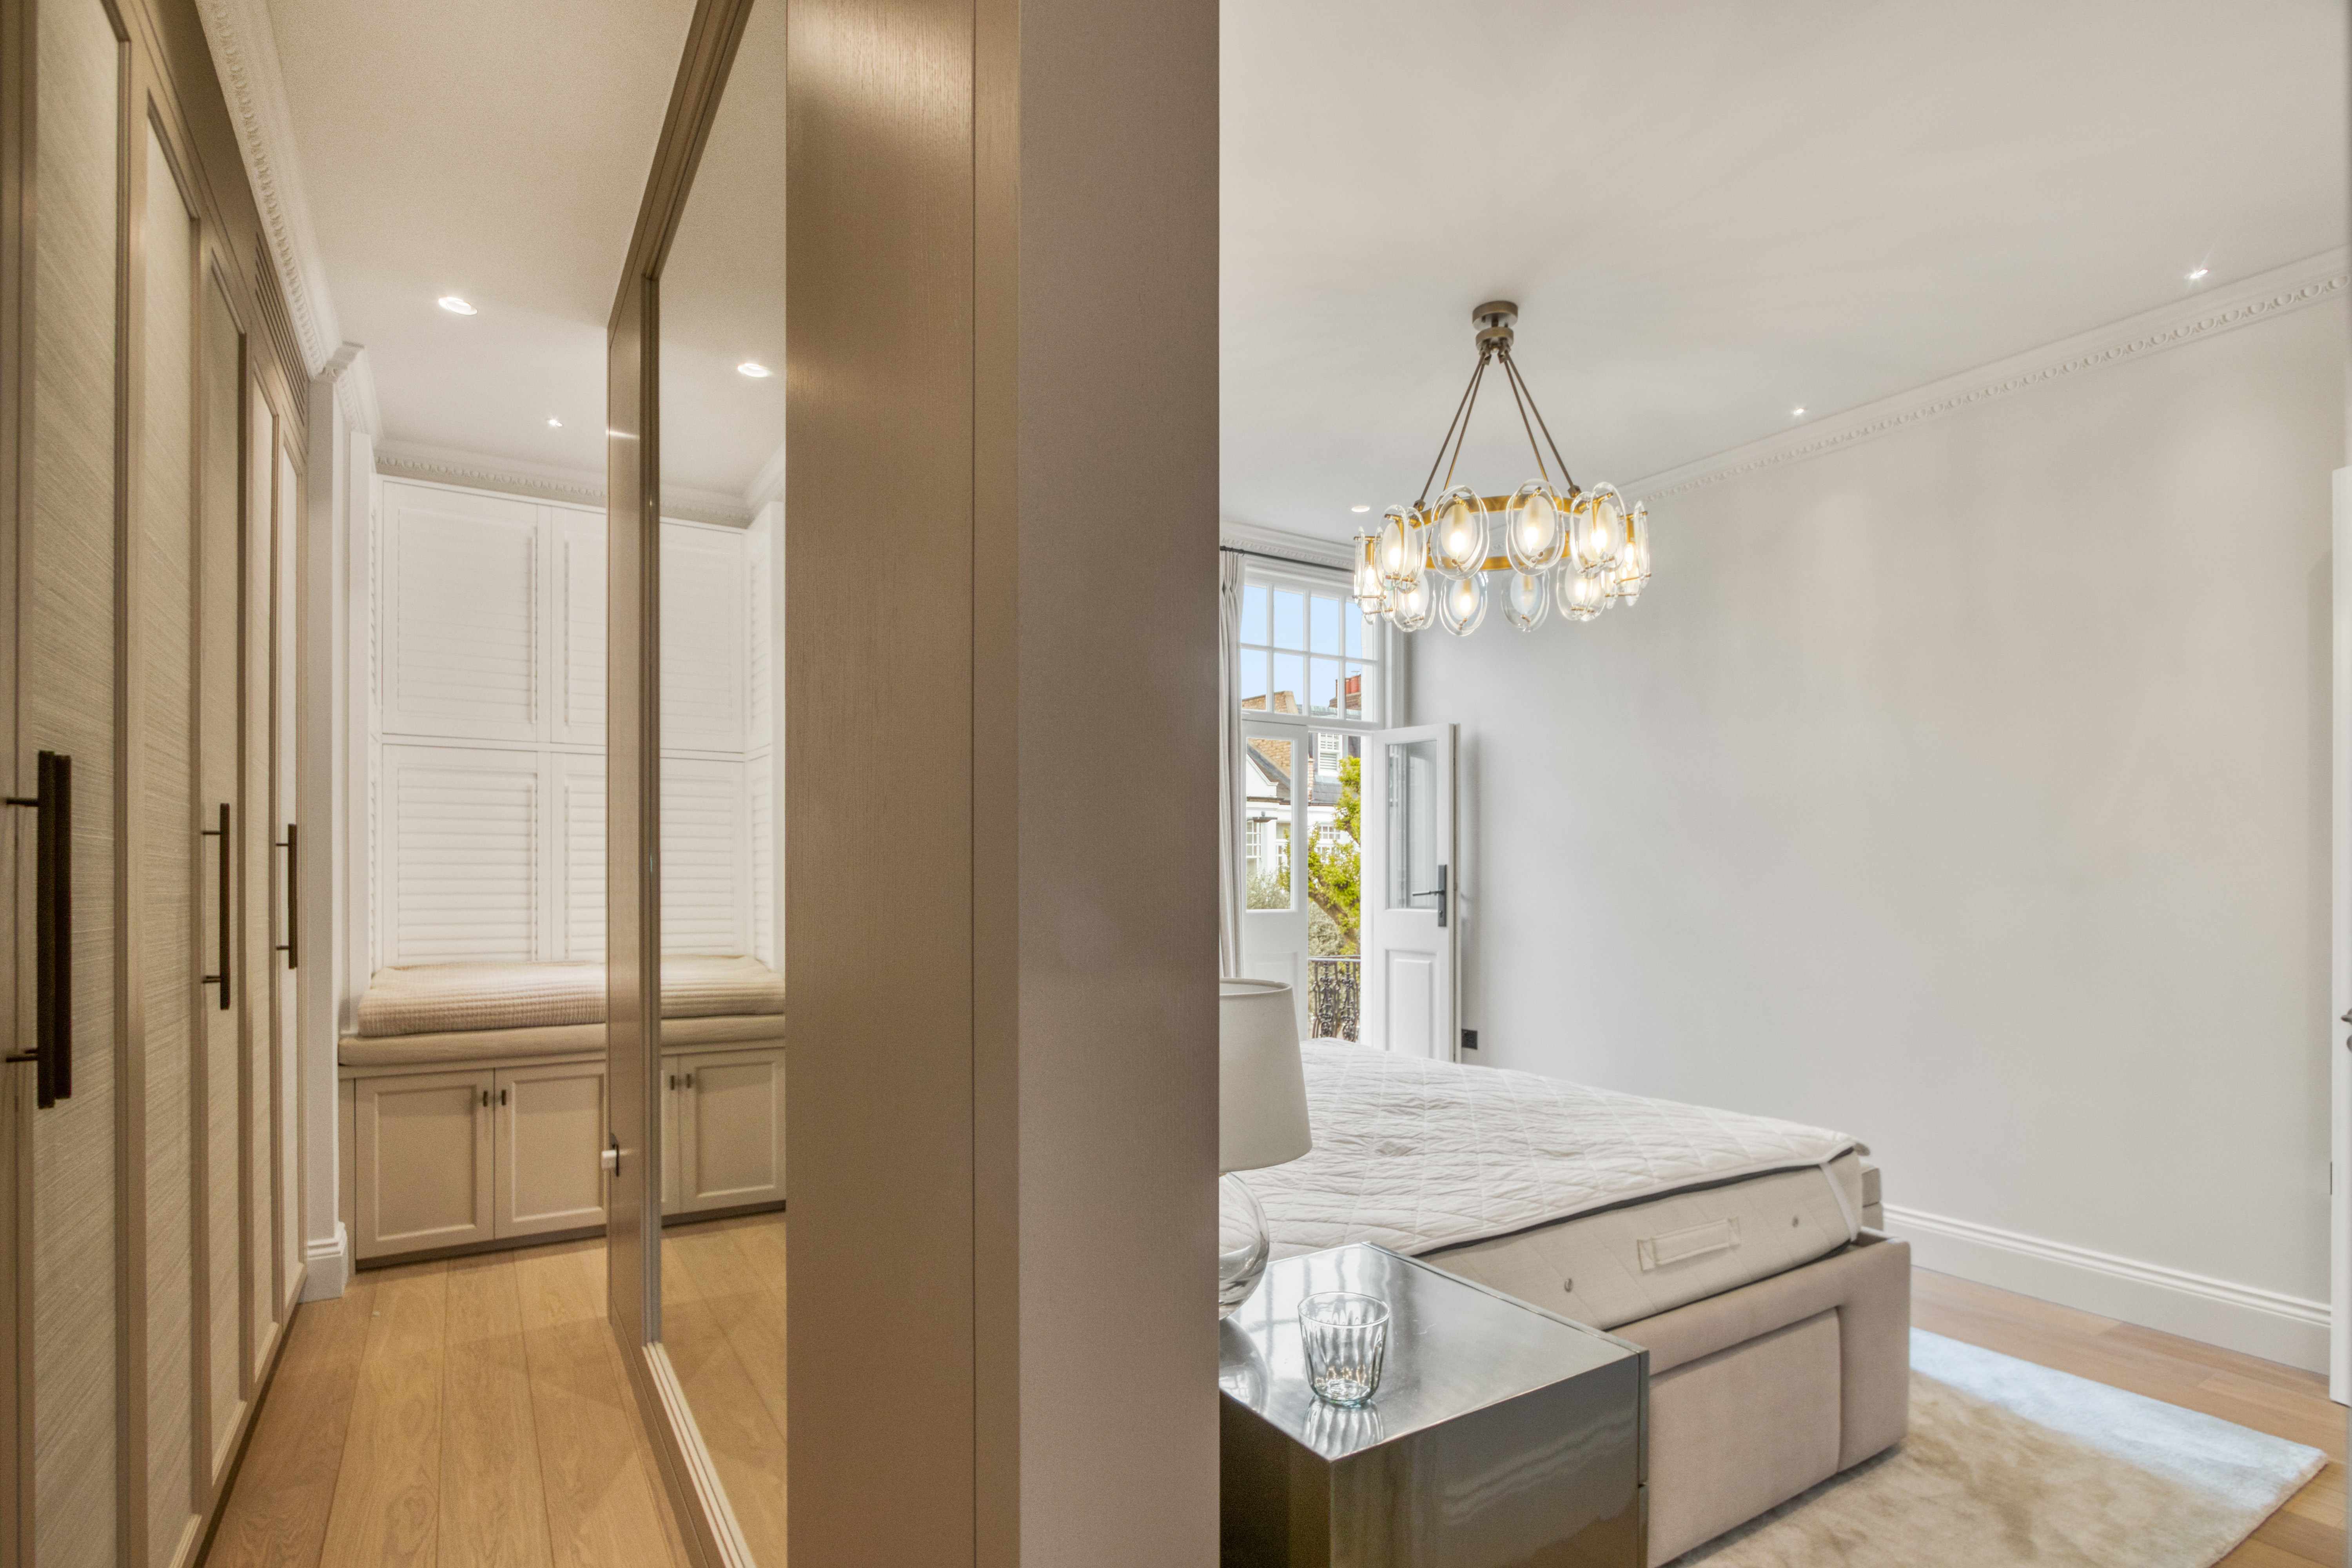
A remodeled bedroom featuring built-in wardrobes, ceiling moldings, a radiator, and a large window with a view of neighboring houses.
Estimated Reading Time: 10 minutes

Introduction: The Appeal of Built-In Wardrobes Design

Thoughtful built in wardrobes design can completely transform a bedroom, especially in compact London homes where every centimetre counts. Rather than settling for bulky freestanding units that leave awkward gaps and gather dust, more and more homeowners are turning to fitted, bespoke wardrobes that work in harmony with the architecture of their rooms. In a city where space is so often at a premium, custom storage is one of the smartest investments you can make.

Beyond practicality, bespoke built-in wardrobes are strongly associated with luxury, organisation and a calm, clutter-free bedroom. They bring a sense of order to daily life while elevating the look and feel of a space. In this guide we explore a wide range of built in wardrobe design ideas — from style inspiration spanning modern, minimalist and luxury schemes, to practical layouts for corners, lofts and walk-in dressing rooms, right through to the smart storage details that make a wardrobe genuinely effortless to live with. Whether you’re working with a small flat, an attic conversion or a generous master suite, there’s an inbuilt wardrobe design here to suit your space, style and needs.

Understanding Built-In Wardrobes

A built-in (or fitted) wardrobe is one that is custom-designed to fit the exact dimensions of a room, typically running from floor to ceiling and frequently from wall to wall. Unlike a freestanding piece of furniture, a built-in wardrobe is fixed to the structure of the home and effectively becomes part of the room’s architecture. This integrated quality is exactly what gives fitted wardrobes their seamless, tailored appearance.

Built-in wardrobes come in several forms. There are full-height fitted runs along a single wall, loft-fitted wardrobes tucked beneath sloping ceilings and into eaves, and walk-in wardrobes or dressing rooms created entirely from bespoke joinery. The key difference from freestanding options is that they are made-to-measure, which means they can be designed to work around awkward layouts, alcoves, chimney breasts and angled rooflines where standard units simply won’t fit neatly.

The benefits of a well-considered inbuilt wardrobe design are considerable:

Space optimisation. By going floor-to-ceiling, built-in wardrobes maximise vertical space and transform otherwise unused areas — such as lofts and alcoves — into valuable storage. This is particularly important in smaller rooms and London flats.

Seamless aesthetics. Fitted wardrobes can be designed to blend with the walls or align with architectural lines, creating a clean, integrated look that suits modern, minimalist interiors. Door styles, colours and handles can all be tailored to complement a home’s existing décor.

Improved organisation. Custom interiors — adjustable shelves, double hanging rails, shoe racks and drawer organisers — make it easier to keep everything tidy and within easy reach.

Added value. High-quality bespoke wardrobes are widely seen as a desirable feature that enhances property appeal, which matters all the more in London’s competitive market.

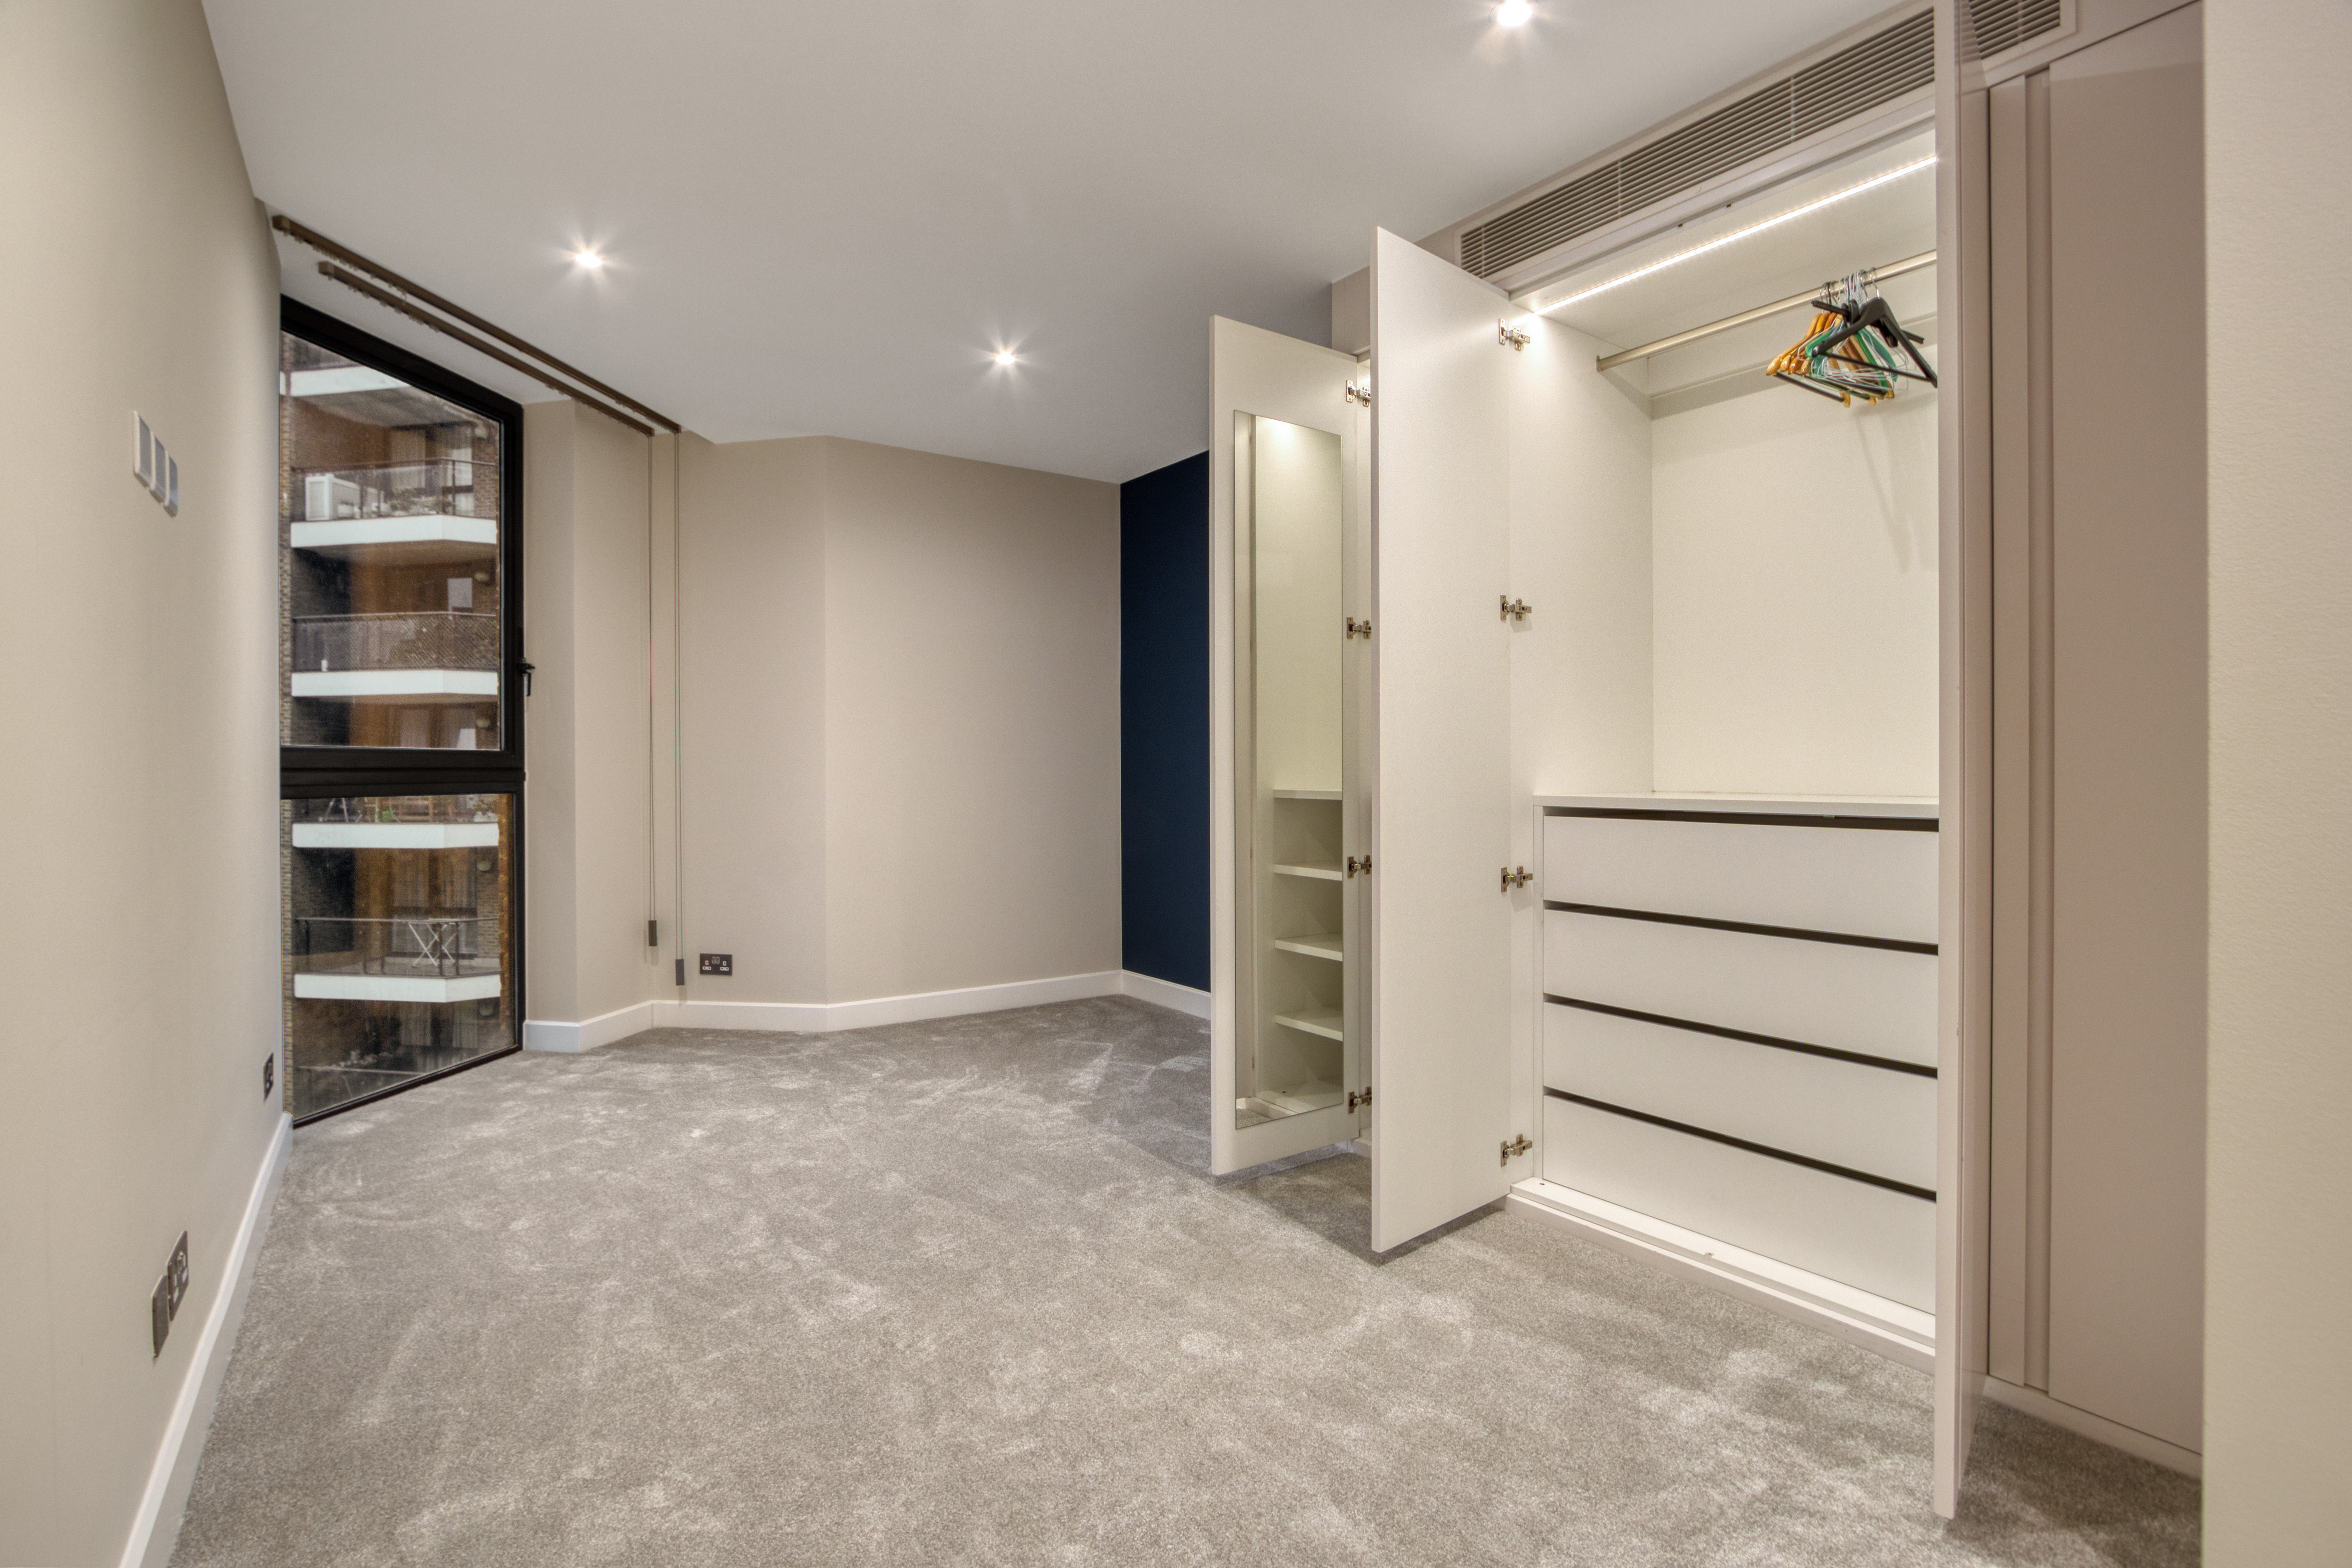
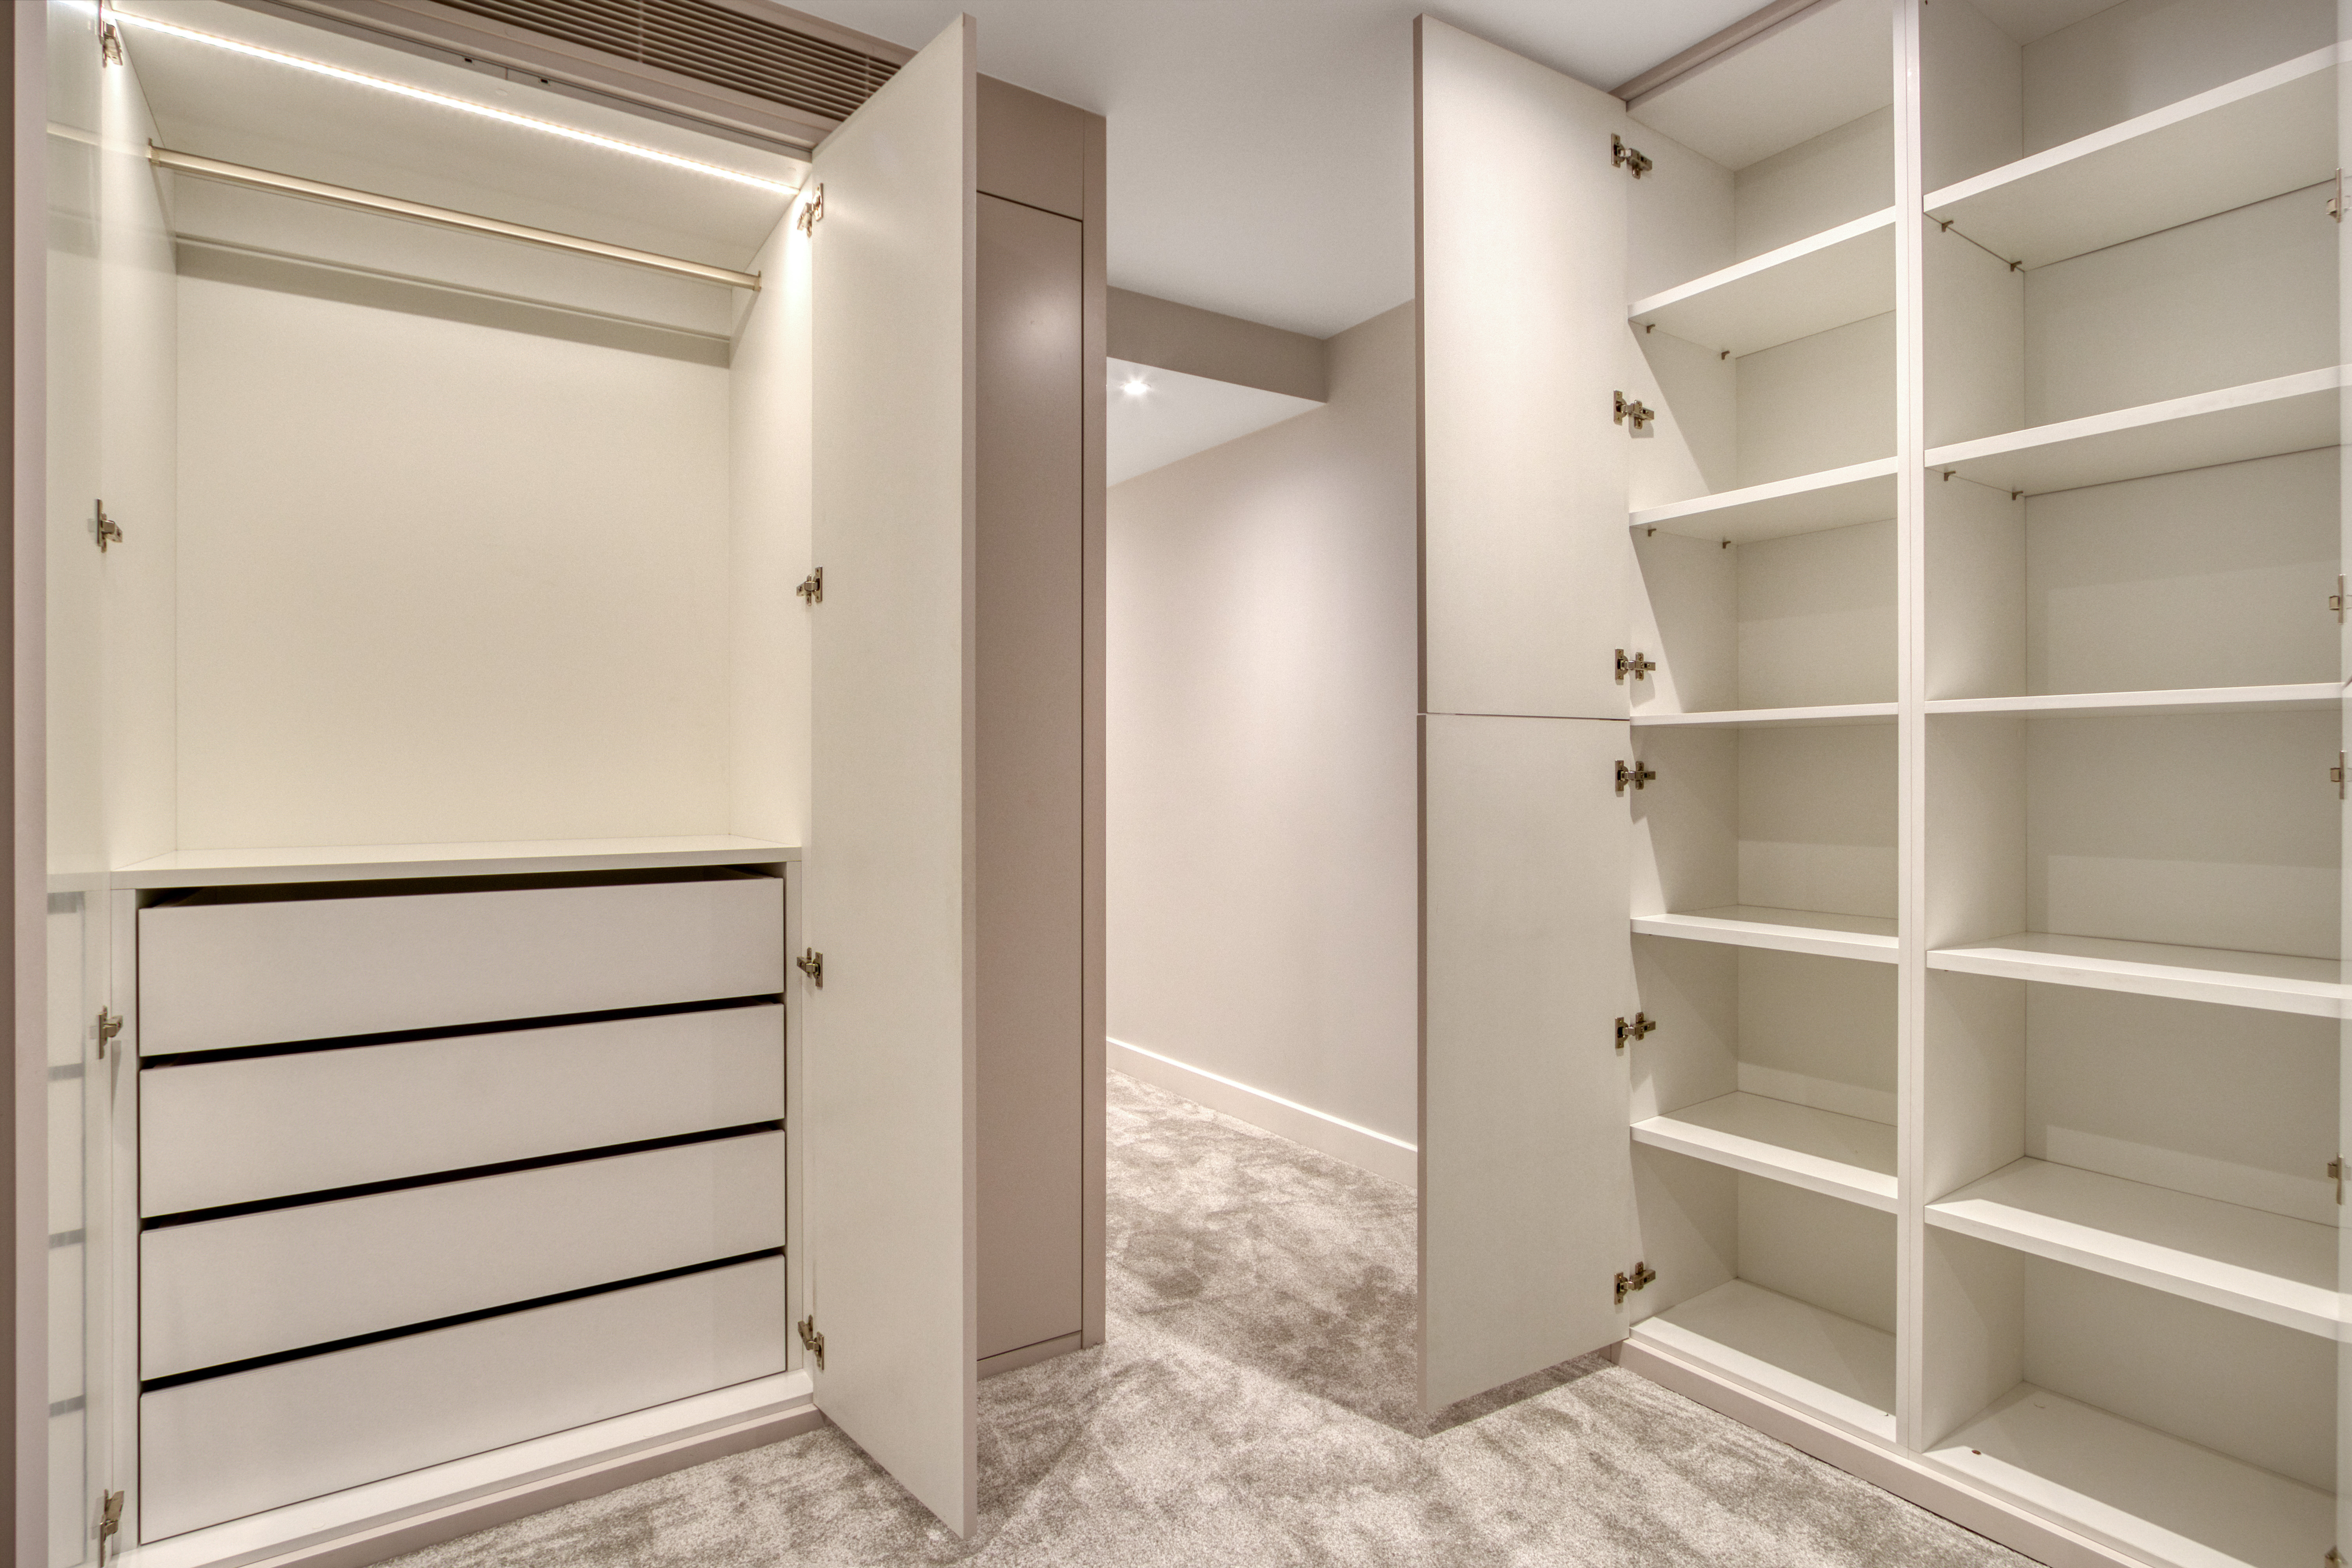
A newly refurbished bedroom with a built-in wardrobe featuring open doors, drawers, and hanging rail, and large windows offering a view of a balcony.

Factors to Consider Before Choosing a Design

Before exploring specific built wardrobe designs, it helps to work through a handful of practical considerations. Getting these right at the outset ensures your finished wardrobe is as functional as it is beautiful.

Available space and room layout. Start with the dimensions and proportions of your room. In small bedrooms or London flats, the priority is usually maximising vertical space and using shallower depths where necessary. You’ll also need to maintain adequate circulation space so doors and drawers open comfortably — this is especially crucial in walk-in setups. Pay close attention to architectural features such as windows, radiators, sloping ceilings, alcoves and chimney breasts, all of which influence where wardrobes can sit. Attic rooms, for instance, are ideal candidates for loft-fitted wardrobes that follow the roofline.

Storage needs and lifestyle. Take time to audit your clothing and belongings. Do you need long hanging for dresses and coats, or double hanging for shirts and jackets? How much shelving do you require for knitwear and folded items, and what about dedicated zones for shoes, bags and accessories? In the UK climate, concealed upper storage for seasonal items such as winter coats and holiday clothes is a particularly useful addition.

Budget. In the UK, built-in wardrobes generally range from around £1,000 to £5,000 or more, depending on size, materials, finishes and accessories. Standard finishes with simple interiors sit at the lower end of the market, while bespoke designs with premium materials, integrated lighting and specialist accessories command higher prices. The trade-off is a higher upfront investment in exchange for long-term value, better use of space and improved property appeal.

Personal style and home aesthetic. Built-in wardrobes can be tailored to suit any interior. Contemporary London flats often favour clean lines, handleless doors and neutral palettes, whereas period homes may suit Shaker or classic panelled doors with traditional hardware. Decide early whether you want your wardrobe to be subtle and blended — matching the wall colour — or a bold feature piece in a contrasting tone or texture. For broader inspiration on creating a cohesive look throughout your home, explore our guide to bespoke interior design in London.

Functionality versus aesthetics. Finally, let functionality drive the layout, then layer the aesthetics on top. Common pitfalls to avoid include overloading the space with storage so movement feels tight, relying on too much open shelving that demands constant tidiness, and poor lighting that casts shadows over your clothes.

Designer’s Insight

Always plan a little spare capacity into your design rather than filling every centimetre to match your current wardrobe. Lifestyles and clothing collections evolve, and a wardrobe with room to breathe will serve you far better over the years.

Innovative Built-In Wardrobe Design Ideas

This is the heart of the matter. Below we’ve gathered a broad selection of built in wardrobe design ideas, grouped by style, layout, space-saving solutions, materials, lighting and statement features. Mix and match to create a wardrobe that’s entirely your own.

Built-In Wardrobe Ideas
Minimalist & Modern
Classic & Luxury
Walk-In & Loft
Space-Saving
Materials & Finishes
Lighting
Statement Features

Style-Based Ideas

Minimalist built-in wardrobes rely on flat, handleless doors finished in soft whites, greys or beiges that blend gently with the walls. Pair this with a simple internal layout, hidden drawers and integrated lighting to keep visual clutter to a minimum. The result is a calm, hotel-like feel that works beautifully in compact London bedrooms.

Modern and contemporary schemes embrace matte finishes, push-to-open doors and slimline handles. Incorporating open display niches dressed with LED strip lighting adds a touch of personality, while combining wood-effect carcasses with plain doors creates a subtle, layered look.

Classic or Shaker style designs feature panelled doors painted in timeless colours such as white, off-white, deep blue or forest green, finished with traditional knobs or cup handles. Crown moulding and framed fronts echo the period detailing found in many Victorian and Edwardian London homes.

Luxury built-in wardrobes bring high-end materials into play — rich wood veneers, leather or velvet accents and marble-effect surfaces. Add integrated LED lighting, glass-fronted display cabinets and full-length mirrors, and in larger walk-in wardrobes, consider a small seating area for an exclusive dressing-room feel.

Layout and Configuration Ideas

Full-height, wall-to-wall wardrobes are ideal for maximising storage in standard rectangular rooms. Reserve the top sections for seasonal or rarely used items, accessed with steps or pull-down mechanisms.

Corner wardrobes use L-shaped configurations to transform otherwise wasted corners, with internal carousels or angled shelves preventing dead space. Walk-in wardrobes and dressing rooms suit larger properties or situations where a small room or alcove can be repurposed. Here the golden rules are to prioritise flow and circulation rather than crowding the space with joinery, to balance open hanging with drawers and concealed storage, and to use glazed partitions to draw light through while retaining a sense of privacy.

Loft and sloping-ceiling wardrobes are a major trend in London, making use of awkward eaves and attic rooms. Doors and carcasses are built to follow the slope, with lower sections housing drawers and shoes, and higher areas used for hanging where head height allows. If you’re considering making the most of your attic space more broadly, our guide to maximising space in your London home is well worth reading.

When it comes to doors, the choice between sliding and hinged is an important one. Sliding doors are best in narrow rooms or where the bed sits close to the wardrobe, and they pair wonderfully with mirrored panels to visually enlarge a space and bounce light around. Hinged doors, on the other hand, give full access to internal compartments at once and allow integrated hooks or mirrors on the reverse — perfect for larger rooms and walk-in wardrobes.

Space-Saving and Small-Room Solutions

For London flats and small bedrooms, clever space-saving is everything. Maximise vertical storage with double hanging rails, high shelves and full-height carcasses. Opt for pull-out drawers rather than deep shelves for easier access in tight spaces, and use slim hangers to increase hanging capacity without widening the unit. Built-in shoe racks and pull-out trays keep floors clear, while mirrored doors reflect light and make a small room feel noticeably more spacious. If a room is especially tight, shallow wardrobes with more hanging and less depth — fronted by sliding doors to save floor clearance — can be the perfect compromise.

Materials, Finishes and Colour Concepts

For interiors, melamine or laminate offer cost-effective, durable options, while veneered or painted MDF doors allow an enormous range of colours and textures. At the premium end, veneers, glass, metal trims and leather accents lend a genuine sense of luxury.

Finish choices set the tone. Matt finishes are perennially popular for a contemporary, understated look; high-gloss reflects light well in smaller rooms but shows fingerprints more readily; and textured finishes such as wood grain or linen-effect add depth and warmth. As for colour, matching the wardrobe to the wall creates a seamless, built-in effect, whereas a deliberate contrast — dark wardrobes in a light room, or vice versa — turns the run of joinery into a striking feature wall. Neutral tones like white, grey and taupe offer longevity, while bolder hues such as navy and forest green make a confident statement in period properties.

Lighting and Interior Organisation Ideas

Good lighting elevates any built wardrobe designs from functional to boutique. Integrated LED strip lights inside hanging sections and along shelves greatly improve visibility, while motion-sensor lights that switch on as doors open add a welcome touch of convenience. Accent lighting on open shelving creates that coveted boutique feel, particularly in walk-in wardrobes.

Inside, smart organisation makes all the difference. Drawer organisers keep ties, jewellery, watches and small accessories in order. Dedicated shoe storage — whether pull-out racks, angled shelves or cubbies — keeps footwear neat, and pull-out trouser, tie and belt racks make daily routines effortless. Hooks and rails for bags and scarves, along with concealed laundry bins built into lower cupboards, round out a thoroughly considered interior.

Statement and Feature-Focused Designs

For those wanting their wardrobe to make an impression, mirrored wardrobes are a timeless choice — full-height mirrored doors double as dressing mirrors and visually enlarge the room, making them especially effective in small bedrooms and apartments. Glass-fronted or glazed wardrobes display curated clothing and accessories behind clear or tinted glass; they shine in luxury walk-ins but demand good organisation to avoid visual clutter.

Textured and feature finishes — ribbed, fluted or slatted door fronts, or mixed-material designs combining wood with fabric or metal detailing — bring a modern, high-end edge. And integrated open display, where open shelves or niches are woven into the run of wardrobes and lit with LEDs, creates a natural focal point for decor, books or plants.

Design Element Best Suited To
Sliding mirrored doors Small bedrooms & narrow rooms
Loft-fitted wardrobes Attic & eaves conversions
Walk-in with glazed partitions Larger homes & master suites
Handleless minimalist fronts Contemporary city flats
Shaker panelled doors Victorian & Edwardian homes
Corner L-shaped units Awkward room layouts

Tailoring Designs to Different London Spaces

One of the great strengths of an inbuilt wardrobe design is its versatility. The same core principles can be adapted to suit very different rooms and home types found across London.

Master bedrooms benefit from balanced storage — his-and-hers hanging, generous drawers and long hanging for dresses and coats. Incorporate full-length mirrors, integrated lighting and quality finishes for a boutique atmosphere, and consider building a dressing table or vanity into the wardrobe run.

Small bedrooms and city apartments call for floor-to-ceiling built-in wardrobes that maximise vertical storage while keeping the floor area clear. Sliding or mirrored doors save space and enhance natural light, and light, neutral colours with minimalist fronts prevent the room from feeling cramped.

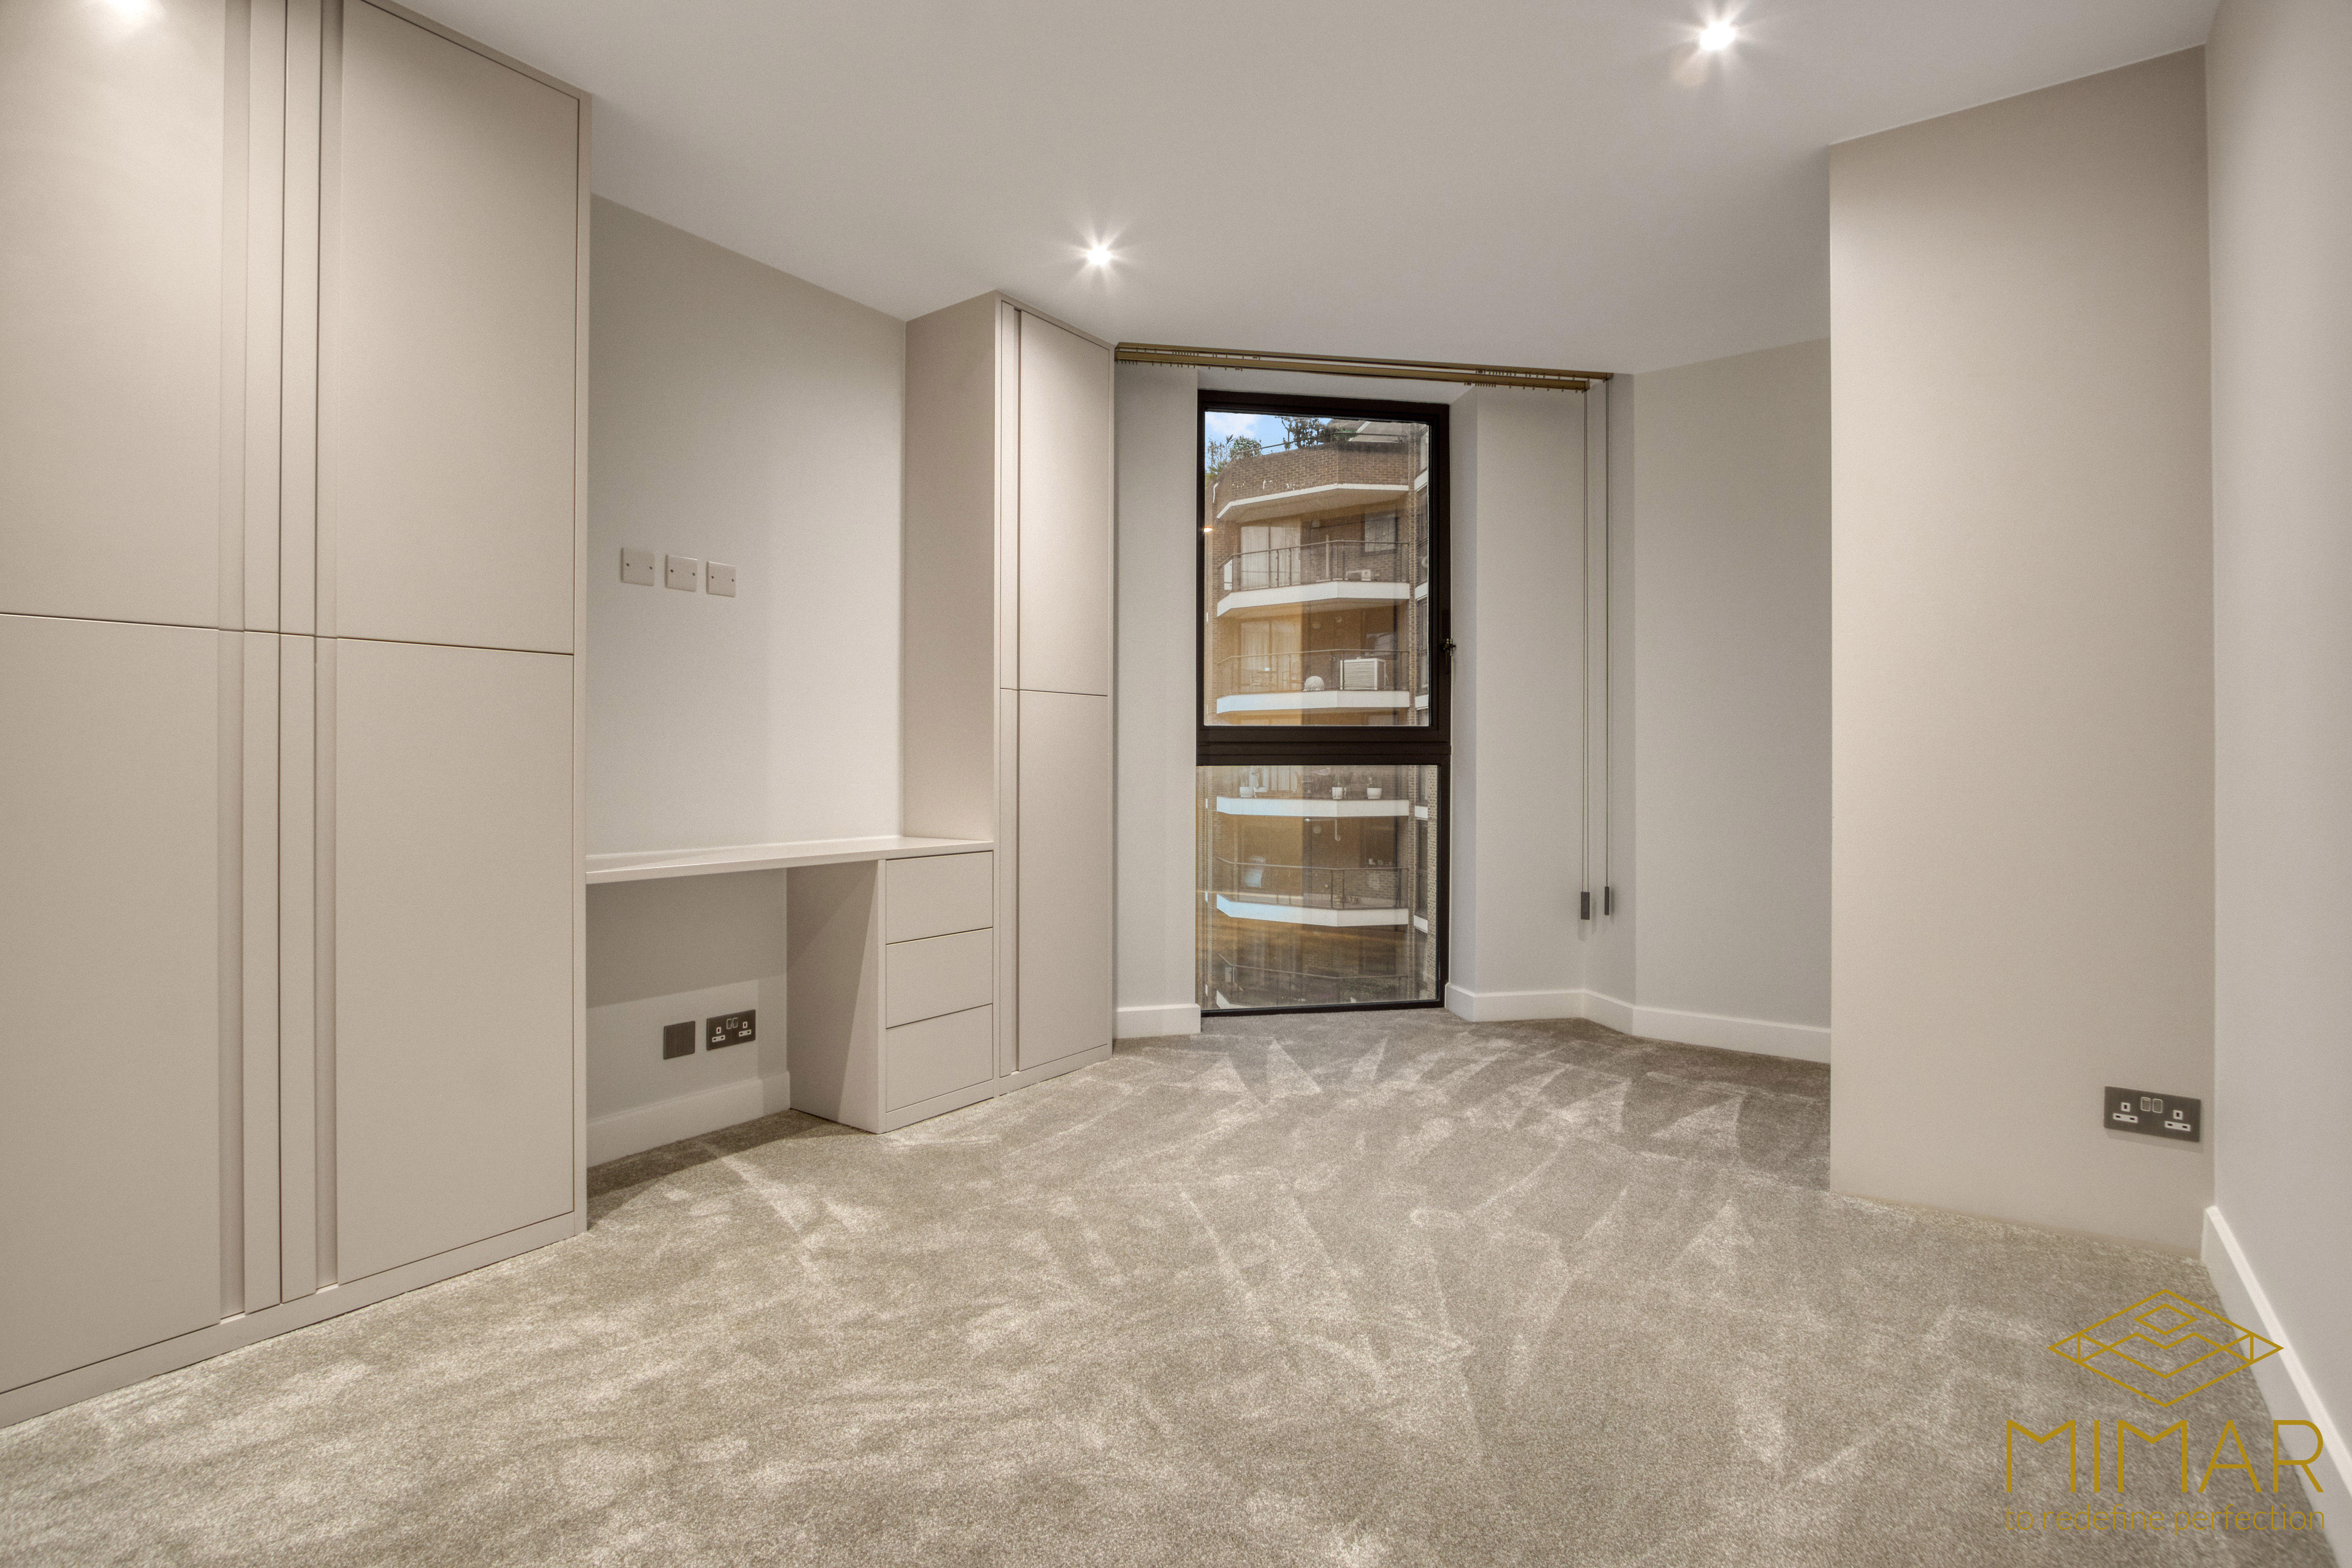
A modern bedroom interior showcasing custom built-in wardrobes and a small desk area with neutral coloring and a large window.

Kids’ rooms are best served by flexible interiors that adapt as children grow — adjustable shelves and rails, lower hanging within easy reach, and higher shelves for longer-term storage. Robust, easy-clean materials and soft-close mechanisms cope with heavy use, while playful coloured interiors or open cubbies for toys keep things fun without dating the exterior.

Guest and spare rooms can house multi-purpose storage: hanging and drawers for visitors, plus concealed sections for bedding and luggage. Slimline or corner wardrobes free up room for a desk or sofa bed.

Lofts and attic conversions are where loft-fitted wardrobes truly come into their own. Built to follow the pitch of the roof, they make the most of awkward spaces common to London houses, combining lower drawers and cabinets under the eaves with higher hanging sections where there’s more headroom. Walk-through spaces in larger prime London homes often sit between bedroom and en-suite — back-to-back runs of joinery, generous circulation width and good lighting turn these into elegant walk-through dressing zones.

Tips for Maximising Style and Functionality

To get the very best from your built in wardrobes design, keep these practical principles in mind.

Start with a storage audit. Identify exactly what you own and how you use it — formal versus casual, shoes, accessories — and design your internal layout around your real habits rather than guesswork. From there, plan the layout before the look: settle the hanging, shelving, drawers and shoe storage first, then choose door styles, colours and handles.

Use vertical space intelligently with double hanging rails, high shelves and pull-down hanging systems, reserving the highest sections for seasonal or rarely used items. Integrate smart accessories such as drawer organisers, pull-out shoe racks, tie and belt racks and jewellery trays to boost everyday usability.

Get the lighting right so it never casts shadows over your clothes, and consider motion sensors for convenience and accent lighting to highlight display areas. Choose durable, timeless finishes — hard-wearing materials in neutral base colours that withstand both daily wear and shifting trends — then add personality through handles, decor and accessories.

Future-proof the design with adjustable shelves and rails so it adapts to your changing lifestyle, and don’t overlook ventilation, which is especially important for wardrobes in basements or enclosed dressing rooms to prevent mustiness. Finally, coordinate with the wider room by aligning wardrobe heights, colours and trims with your skirting, doors and other joinery, so the design feels like a natural part of the architecture rather than an afterthought.

Worth Remembering

For complex spaces — loft conversions, walk-in dressing rooms or awkward period layouts — working with a professional designer or skilled joiner pays dividends. Their expertise ensures every centimetre is used wisely and the finished result is built to last.

Conclusion

Well-executed built in wardrobes design offers a genuinely powerful way to transform bedrooms and other spaces — especially where room is limited — by marrying customised storage with a seamless, integrated aesthetic. When planned carefully around space, lifestyle, budget and personal style, fitted wardrobes make the most of every centimetre, keep belongings beautifully organised and accessible, and enhance both the perceived quality and the value of your home.

Use the ideas in this guide to pinpoint your preferred style, layout and features, whether that’s a minimalist handleless run for a contemporary flat, a luxurious glazed walk-in for a master suite, or a clever loft-fitted design that tames an attic conversion. The goal is a wardrobe that not only looks impeccable on day one but remains functional, adaptable and aligned with your lifestyle for many years to come.

If you’d like expert guidance on creating a bespoke wardrobe tailored to your London home, contact Mimar Construction. Our team combines refined design with meticulous craftsmanship to deliver storage solutions that feel like a natural extension of your space.

Types and Benefits of Wall Insulators for Modern Homes

The image shows the refurbished exterior of a residential building with white and brick facades and multiple windows.
Estimated Reading Time: 10 minutes

Introduction: Why Wall Insulators Matter

As energy prices climb and environmental standards tighten, wall insulators have become a central concern for homeowners seeking warmer, more efficient and more valuable properties. Walls typically account for a significant share of heat loss in UK homes, particularly in older solid-walled or uninsulated cavity-walled houses, so addressing them delivers some of the biggest gains available to a property owner. Quality insulation on a house slows the flow of heat between the inside and outside, keeping winter warmth indoors and summer heat out.

The benefits are tangible: lower energy use and bills, more stable indoor temperatures, and reduced carbon emissions in line with the UK’s climate targets. In this guide, we’ll explore the main types of wall insulators used in modern UK homes, the key benefits they bring, the costs and return on investment to consider, and how to choose the right solution for your property and budget.

View from a balcony overlooking older residential brick buildings with chimneys and traditional windows.

What Are Wall Insulators?

Wall insulators are materials or systems installed in or on walls to reduce heat transfer. Their performance is usually specified by their thermal resistance, or R-value—the higher the R-value, the better the insulating effect. Common wall insulators found in homes include fibreglass and glasswool, cellulose, mineral wool, spray foam, rigid foam boards, EPS beads and insulation-backed plasterboard, as detailed in this overview of the best insulation for walls.

At their core, these materials work by trapping still air within fibres, foam cells or bead-filled cavities, reducing conduction through the wall and, when installed as a continuous layer with airtight detailing, blocking air leakage too.

How insulation on a house regulates temperature

Heat naturally flows from warm areas to cold ones. In winter, warm indoor air tries to escape through external walls; in summer, the process reverses and heat flows inwards. Insulation slows this exchange. Fibrous products such as glass and mineral wool or cellulose trap air in countless tiny pockets, while foam boards and spray foams use closed or open cells to resist heat flow and reduce air leakage. Cavity wall insulation fills the gap between a wall’s inner and outer leaves to stop convection and conduction across that void. The result is less heat loss, shorter boiler or heat pump run-times, and more even internal temperatures.

Why this matters for modern construction

UK building regulations have progressively tightened insulation requirements, pushing builders toward higher-performing wall assemblies—thicker insulation layers, rigid foam boards, structural insulated panels and well-detailed cavity systems. Modern buyers increasingly expect lower running costs, good EPC ratings and climate-resilient comfort. As the Federation of Master Builders notes, effective wall insulators remain one of the most cost-effective ways to meet these expectations while complying with energy standards. Homeowners planning broader eco-friendly refurbishments will find that wall insulation is a cornerstone of any sustainable living strategy in London.

Types of Wall Insulators for Modern London Homes

Wall insulators can be understood in two ways: by the material used and by where the insulation is placed. London’s housing stock is remarkably diverse—from Victorian solid-walled terraces to post-war cavity-walled semis and contemporary self-builds—so understanding both dimensions helps you match the right solution to the right home.

Common material-based wall insulators

Fibreglass and glasswool batts and rolls are among the most common insulation types in UK homes. Supplied as rolls or batts placed between studs or battens, they are relatively inexpensive, fire-resistant, widely available and straightforward for installers to handle. They do, however, require correct thickness and a careful fit to avoid gaps that undermine performance.

Cellulose insulation is a loose-fill or blown-in product typically made from recycled paper treated with fire retardants. It boasts strong environmental credentials and fits well around services, though it can settle over time and must be kept dry to avoid mould.

Mineral wool (rock or stone wool) is made from molten rock spun into fibres. Used in stud walls, cavity systems and as external wall slabs, it offers excellent fire resistance and acoustic performance with stable thermal behaviour—making it ideal where fire safety and sound control are priorities.

Spray foam is a liquid polyurethane foam sprayed or injected into cavities, where it expands to fill gaps. Open-cell foam is flexible and good for sound absorption, while closed-cell offers a higher R-value per inch and better moisture resistance. While excellent at air-sealing complex areas, it carries an important UK caveat: mortgage lenders are often wary of homes with spray foam due to inspection and damp concerns, sometimes refusing lending altogether. Homeowners considering expanding insulation foam for other areas of their home, such as garage doors, should also be aware of these material-specific considerations.

Rigid foam boards—including polyisocyanurate (PIR), expanded polystyrene (EPS) and extruded polystyrene (XPS)—offer very high thermal resistance per inch. They are common in external wall insulation, internal lining systems and structural insulated panels, helping homes meet tight U-value targets with slim build-ups.

Wood fibre and bio-based boards, finished with lime plaster, are breathable and particularly suited to heritage or solid-walled properties that need vapour-permeable solutions. The team at Wrapt Homes highlights how these materials manage moisture safely, though they tend to be thicker and more expensive than synthetic alternatives. Finally, reflective multi-foil membranes—multi-layer aluminium sheets with foam or wadding cores—are useful where space is tight on internal walls, working by reflecting radiant heat.

Placement-based distinctions

Cavity wall insulation suits homes built with a gap between two wall leaves. The cavity is filled with EPS beads, mineral wool or polyurethane foam. As LivGreen explains, it is a relatively quick retrofit completed from outside with minimal disruption—ideal for post-1920s homes with suitable cavities and no major damp issues.

Internal wall insulation (IWI) adds insulation to the inner face of solid walls or partitions. Approaches include insulation-backed plasterboard fixed with adhesive dabs, timber or metal battens filled with mineral wool and finished in plasterboard, or breathable wood fibre boards with lime plaster. IWI can be more cost-effective than external work and is well-suited where a building’s exterior appearance must be preserved—a frequent requirement in London’s many conservation areas. The trade-offs are reduced room size and the need for careful detailing at junctions to avoid cold bridging and condensation.

External wall insulation (EWI) involves fixing insulation boards—often EPS, mineral wool or PIR—to the outside of solid walls, then covering them with render or cladding. Typical systems use boards around 60–100 mm thick. EWI creates a continuous thermal layer that cuts cold bridges, protects the masonry, provides a fresh weather-resistant façade, improves soundproofing and helps manage damp. It is especially well-suited to solid-wall homes and deep retrofits where a façade refresh is also desired. For a detailed look at how external wall insulation can boost your home’s energy efficiency, comfort and value, it’s worth exploring the full range of options available to London homeowners.

Structural insulated panel homes

Structural insulated panels (SIPs) represent a thoroughly modern approach. These prefabricated panels feature a core of rigid foam insulation sandwiched between structural boards, typically OSB. Used for walls, roofs and floors in new builds and extensions, structural insulated panel homes offer very high insulation levels compared with traditional cavity walls, lightweight yet strong panels that speed up construction, and reduced thermal bridging thanks to their continuous insulation layer. In the UK, SIPs are popular for eco-friendly self-builds and extensions. While they can in principle be retrofitted, they are predominantly a new-build solution. Those interested in how sustainability features in new builds across London are evolving will find SIPs represent one of the most forward-thinking construction approaches available.

An in-progress construction site showing structural framing, insulating materials, and scaffolding for a house extension.

Wall Insulator Options
Cavity Fill
Internal (IWI)
External (EWI)
Rigid Foam Boards
Mineral Wool
SIPs

Matching Solution to Home

Cavity wall insulation suits mainstream 20th-century cavity homes; internal wall insulation works where the exterior is protected or budgets are tighter; external wall insulation excels on solid-walled or poorly-insulated homes needing both a fabric and aesthetic upgrade; and SIPs shine in new eco-builds targeting very low energy demand.

Benefits of Wall Insulators for London Homes

The advantages of investing in quality wall insulators extend well beyond a warmer living room. They touch on running costs, comfort, acoustics, building health, the environment and long-term property value.

Energy efficiency and lower bills

Insulating walls significantly cuts heat loss, reducing the energy needed to keep a home comfortable. For London households facing volatile energy tariffs, this translates into meaningful annual savings on heating. High-performance wall insulators such as rigid foam and SIPs also help homes meet—or exceed—Building Regulations U-value requirements, which in turn improves overall EPC ratings. It’s also worth considering how attic insulation works alongside wall insulation to maximise temperature control and energy savings throughout the whole home.

Improved comfort and temperature regulation

Better wall insulation reduces cold spots and draughty areas, keeping room temperatures more even throughout the day. Both internal and external systems raise the surface temperature of walls, cutting the risk of condensation on cold surfaces and making rooms feel less damp or chilly. The difference in everyday liveability is often what homeowners notice first.

Noise reduction

Acoustic performance is an underrated benefit, particularly in busy parts of London. Mineral wool, glasswool and dense wood fibre all offer good sound absorption, reducing noise transmission between rooms and from outside. Rigid foam boards and EWI systems add mass and decoupling to walls, which can further help dampen external traffic and street noise.

Moisture control and building protection

Correctly chosen and installed insulation keeps internal surfaces warmer, reducing surface condensation and the mould risk that comes with it. External systems also protect masonry from driving rain and freeze-thaw cycles. For heritage and solid-walled properties, breathable solutions such as wood fibre and lime are important, allowing moisture to migrate safely and protecting the building fabric. The opposite is also true: poorly chosen products, such as mis-applied closed-cell spray foam, can trap moisture—which is precisely why product selection and detailing are so critical.

Environmental advantages

Reduced energy use translates directly into lower carbon emissions, especially in gas-heated homes. Some insulators carry strong green credentials too—glasswool made from recycled glass bottles, or cellulose from recycled paper. External insulation that extends the life of an existing building also supports retrofit over rebuild, which is generally better from an embodied-carbon perspective.

Long-term value

Upgrading wall insulation can improve EPC banding—something buyers increasingly scrutinise—and reduce running costs, making a home more attractive to energy-conscious purchasers. When properly installed, EWI and IWI systems are considered long-life improvements that contribute to lasting asset value rather than short-term cosmetic appeal.

Cost Considerations for Wall Insulation in London

Pricing for wall insulation varies considerably, and understanding the drivers helps you budget realistically and compare quotes fairly.

Factors that influence pricing

Several variables shape the final figure. Wall type and construction matter—cavity versus solid wall, brick, block, timber frame or heritage masonry each behave differently. The chosen method (cavity fill, internal lining, external system or SIPs) and the material (mineral wool and EPS tend to be cheaper per square metre than PIR, wood fibre or closed-cell spray foam) both affect cost. Higher performance targets require more or higher-grade material, raising the price. Property size and complexity—larger external wall areas and intricate junctions around windows, eaves and rooflines—add labour and materials. Finally, access and condition play a role: scaffolding, repairs to existing render or brickwork, and any damp remediation can all increase a project’s total. Homeowners looking to reduce overall energy costs may also want to explore whether they qualify for free loft insulation schemes, which can complement wall insulation upgrades and further reduce energy bills.

External house insulation cost

External wall insulation usually sits at the higher end of retrofit spending. This reflects the scaffolding required, the extensive external detailing, and the new render or cladding finishes applied across all treated façades. Typical systems combine 60–100 mm insulation boards with mesh and decorative render. While the upfront external house insulation cost is greater than cavity fill or simple internal upgrades, EWI offers the greatest energy-saving potential on solid-walled homes. It also bundles insulation, façade renewal and weather protection into a single project—which can make strong economic sense when external works are due anyway.

Comparing costs across methods

Insulation Method Relative Cost Position
Cavity wall insulation (beads / blown mineral wool) Lowest per m²
Insulation-backed plasterboard (simple internal) Low
Battened internal systems with PIR / mineral wool Mid-range
External wall insulation (solid-wall homes) Higher
Structural insulated panels (new build) Part of build cost
Spray foam retrofit High & contentious

It’s worth noting that SIPs are generally considered part of the structural build cost for a new home rather than a standalone insulation upgrade, while spray foam can prove costly and contentious if later removal is needed or if it affects mortgageability.

The cost-benefit relationship

Cavity wall and loft insulation often deliver the shortest payback periods, but wall insulation in general cuts energy bills year after year, protects against future energy price rises and can lift both comfort and property value. With EWI and deeper retrofits, the return on investment should be viewed over a longer horizon and weighed alongside reduced maintenance from a new render finish, an improved appearance, and better moisture and structural performance. For an exact picture, market costs are best confirmed via a professional survey, as figures depend heavily on the individual property.

How to Choose the Right Wall Insulator

Selecting the right wall insulator is a balance of practical and financial factors unique to each home.

Key factors to weigh

Start with home type and wall construction. Cavity walls, solid walls and timber frame each call for different approaches. Heritage properties—common across London’s older boroughs—often need vapour-permeable systems such as wood fibre and lime, whereas later 20th-century homes frequently suit mineral wool or glasswool between battens with a plasterboard finish. Consider climate and exposure too: areas subject to high wind-driven rain require careful cavity assessment and robust external systems.

Budget and disruption tolerance are equally important. Internal systems can be cheaper but more disruptive for occupants, involving redecoration and some loss of room size. External systems cost more but cause less internal upheaval and improve the façade at the same time. Where thickness must be minimised, rigid boards and multi-foil membranes help. Any existing damp or structural issues must be addressed before insulating, and breathable solutions may be necessary on solid walls. Finally, be mindful of mortgage and resale implications—particularly with spray foam, where lenders may be reluctant to lend.

When structural insulated panel homes make sense

SIPs are most appropriate for new builds or major extensions aiming for very low energy use, quick construction and high airtightness with integrated insulation. Self-build and modern eco-home projects are the typical candidates. For a straightforward retrofit, however, cavity, internal or external wall insulation will usually be the more practical route, as SIPs are less suited to upgrading an existing structure.

Professional versus DIY

Professional installation is strongly recommended for cavity wall insulation, which needs a proper drilling pattern and density; for external wall insulation, with its critical detailing, structural fixings and weatherproofing; and for spray foam and SIP installations. Confident DIYers might tackle some internal upgrades, such as installing insulation-backed plasterboard or mineral wool between battens—but they must follow manufacturer and Building Regulations guidance on vapour control, fire safety and junction detailing. Using qualified installers helps ensure the correct product choice, reduces the risk of condensation, damp and thermal bridging, and protects both warranties and mortgageability.

Conclusion

Choosing the right wall insulators is one of the most effective ways to improve a modern home’s comfort, energy efficiency and long-term value. By understanding the different types of wall insulation—cavity, internal, external and SIP systems—the materials available, and the cost–benefit trade-offs, homeowners can select a solution tailored precisely to their property and budget. Quality insulation on a house pays back not only in lower bills but in everyday comfort, a healthier building fabric and a stronger position when it comes time to sell.

If you’re ready to take the next step, the most valuable move is to arrange a professional insulation survey, compare options for external or internal upgrades, or—if you’re planning a new build—explore structural insulated panel homes as a high-performance alternative. Contact Mimar Construction for expert guidance on specifying and installing the right wall insulators for your London home, combining design sensitivity with rigorous, regulation-compliant delivery.

What Does a Structural Engineer Do in Construction?

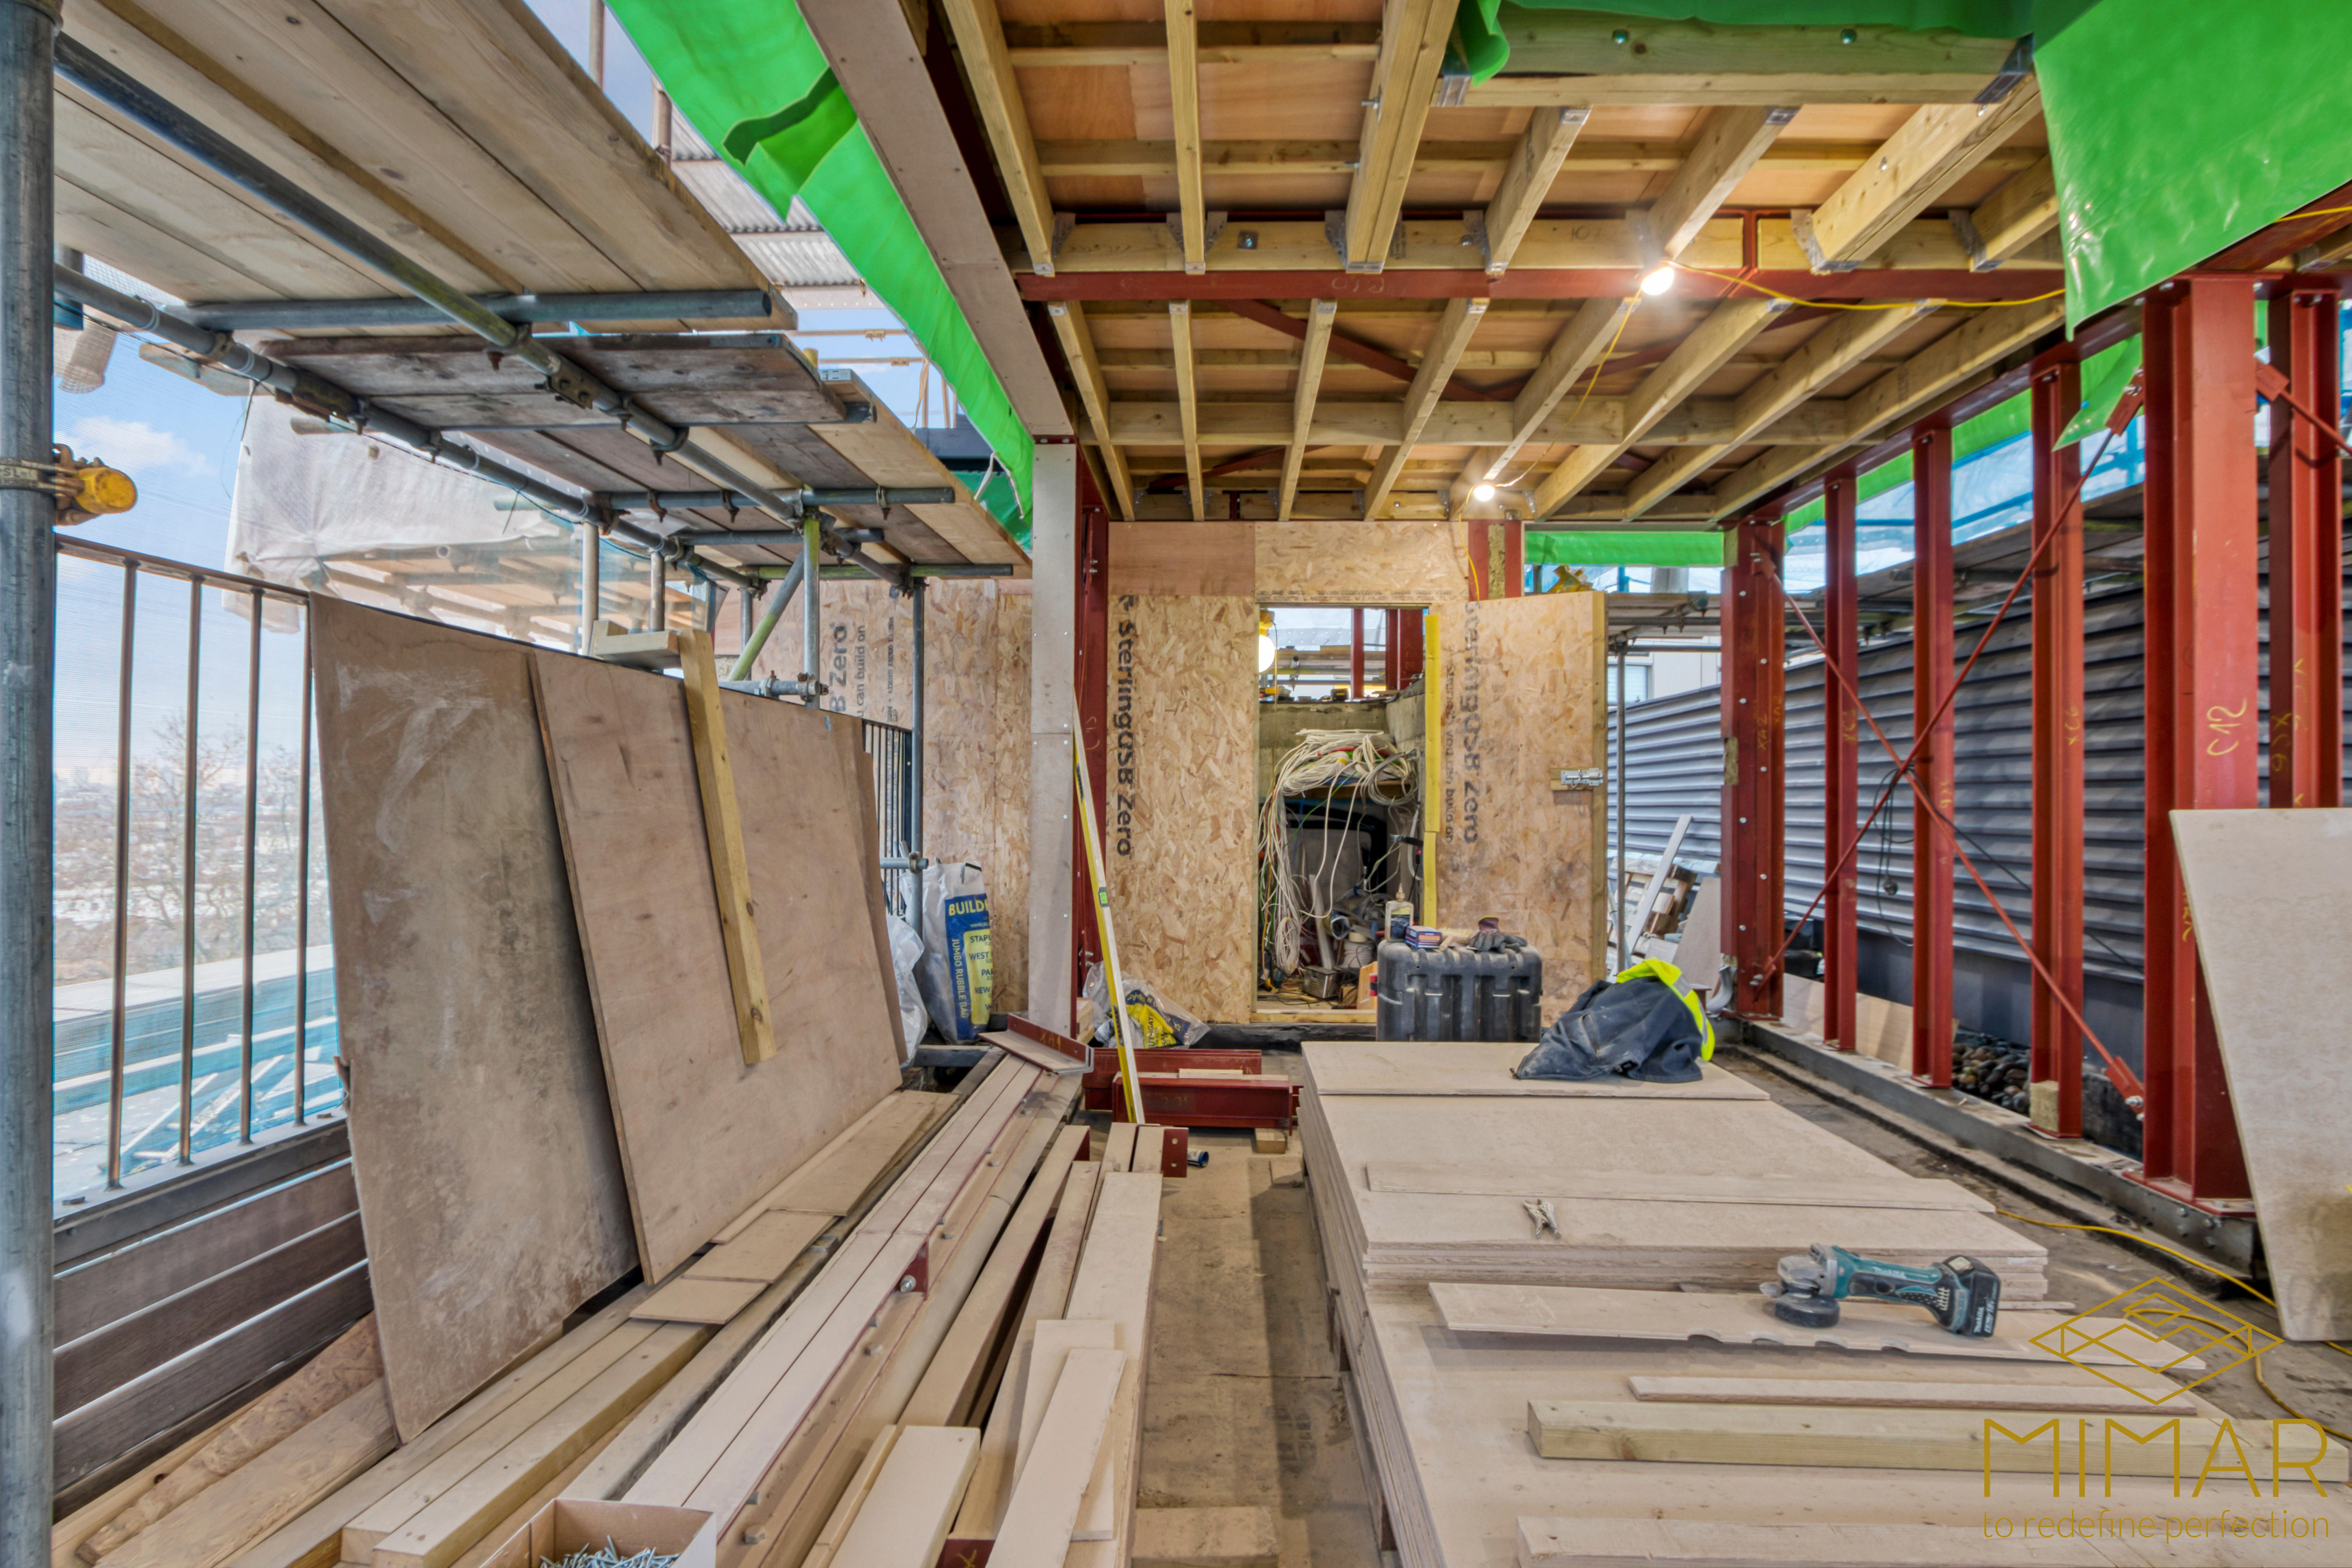
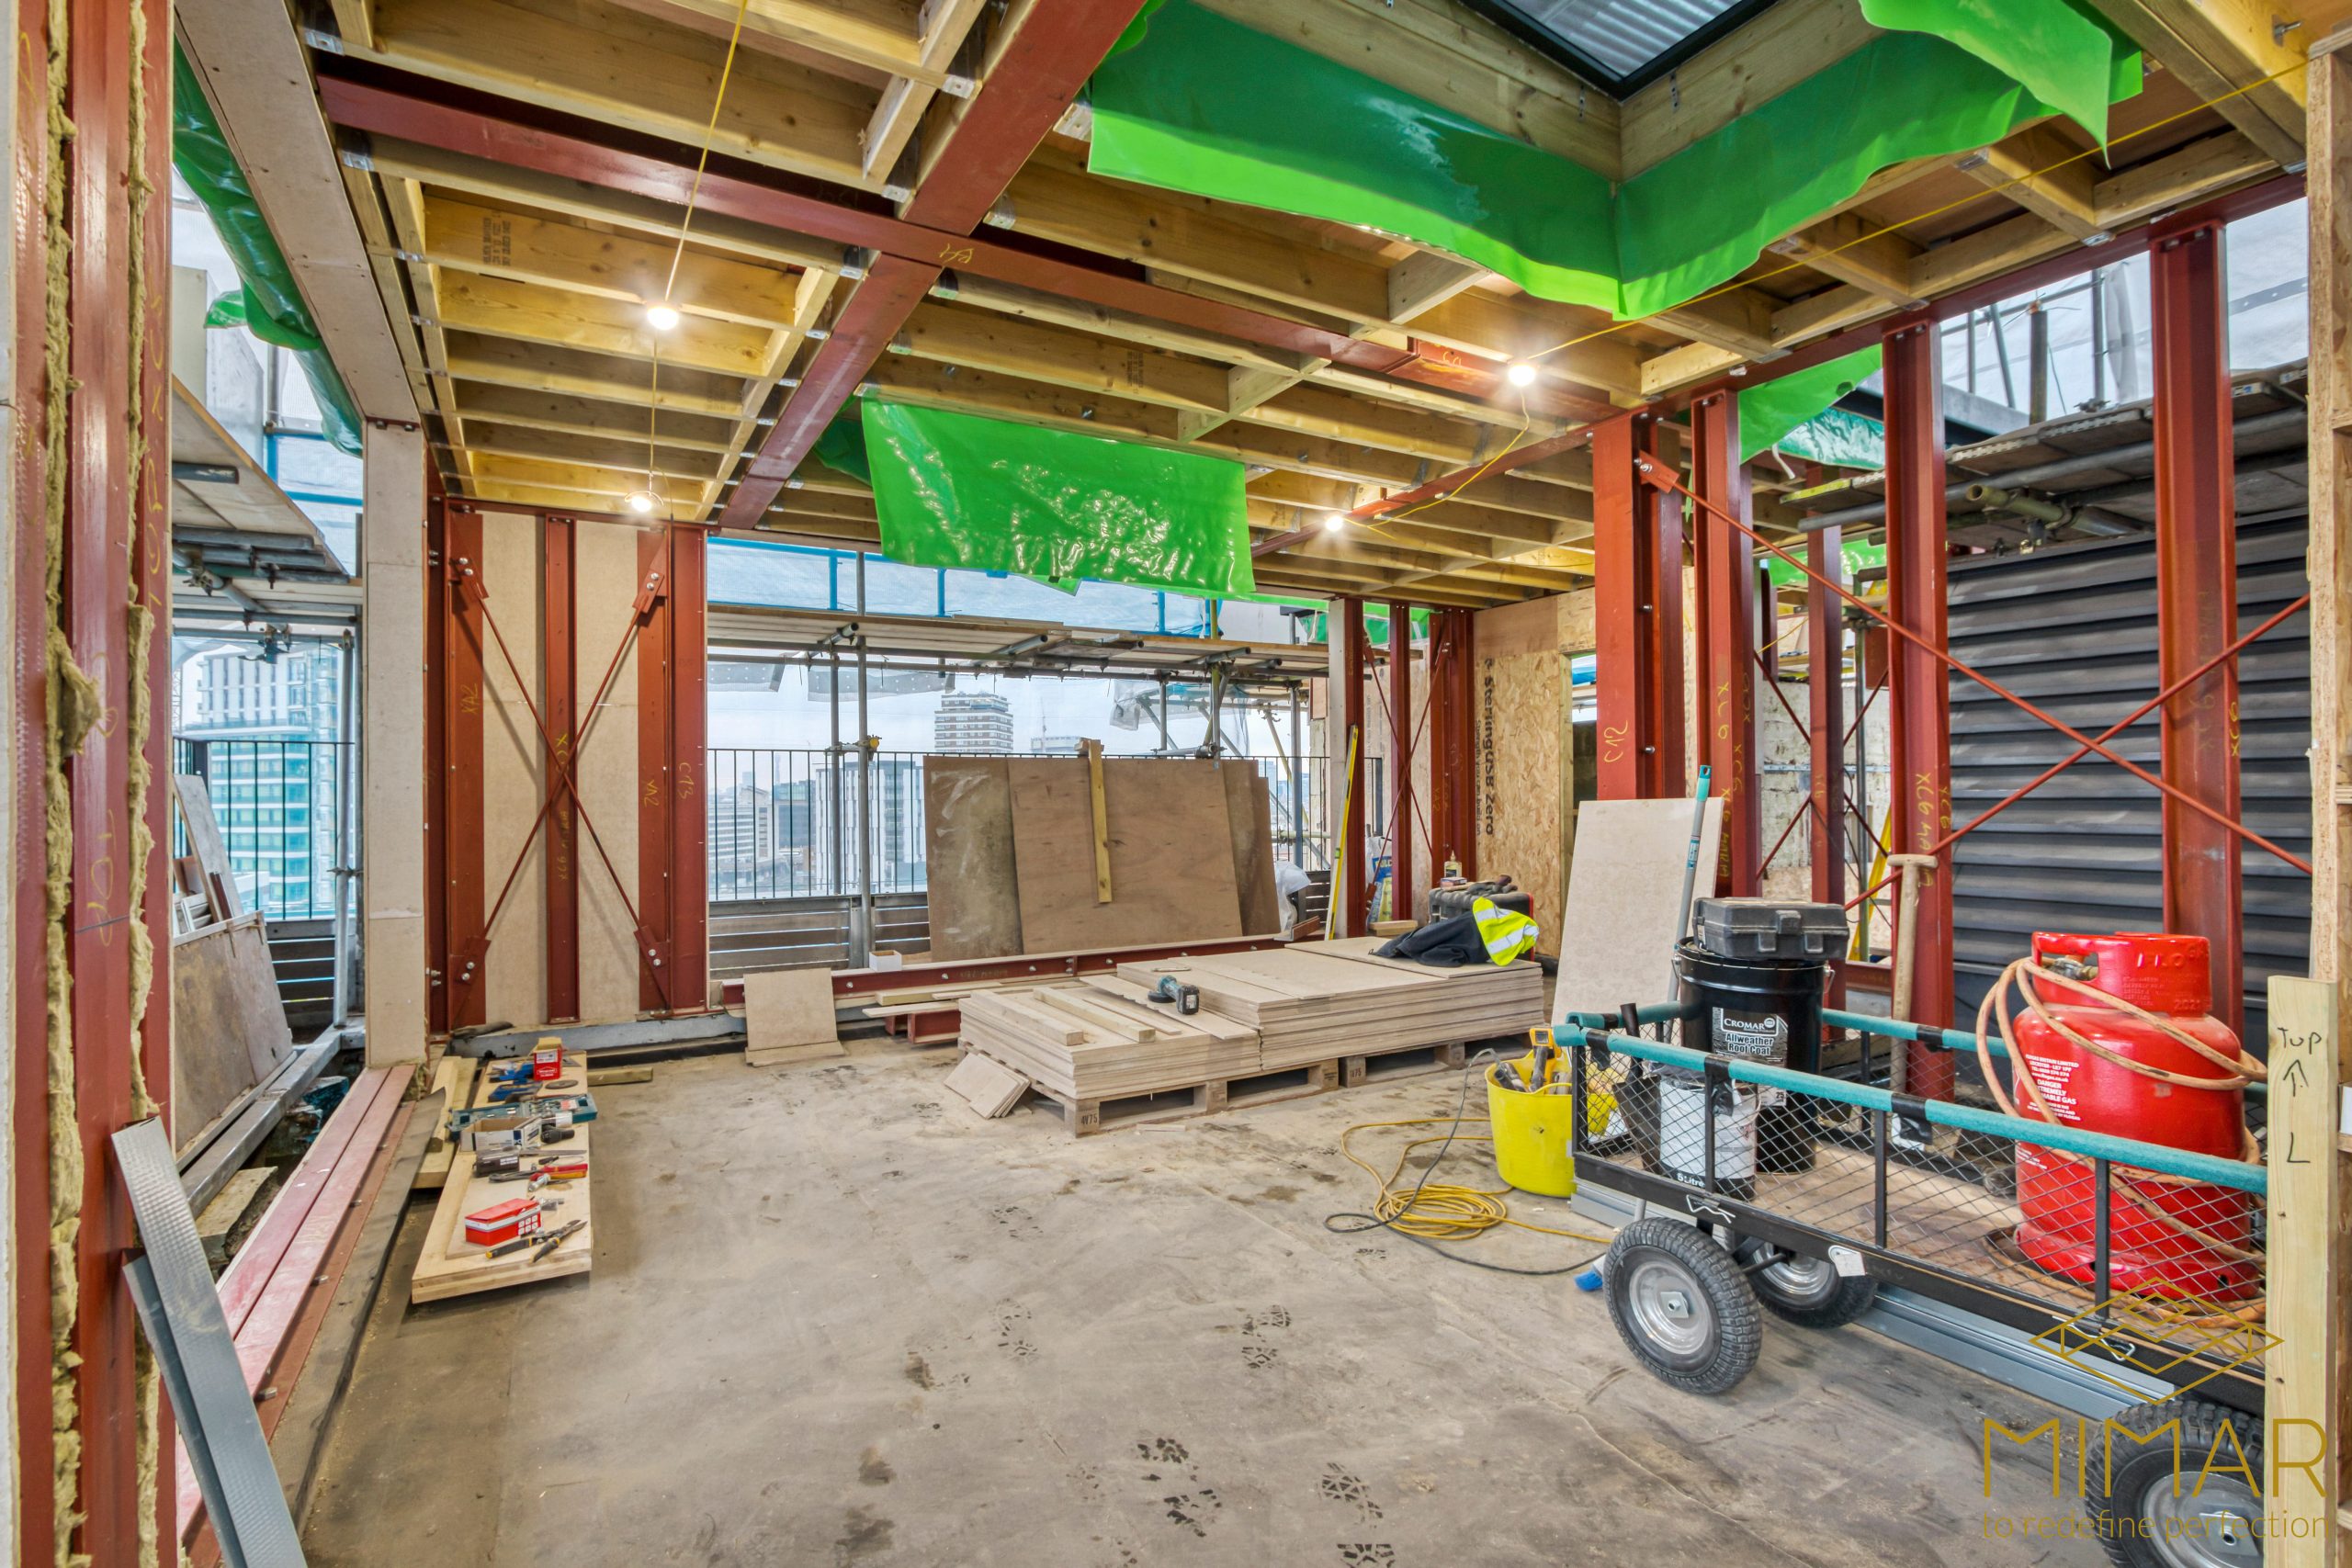
Interior construction site with exposed beams, metal structures, and construction materials inside a room with large windows.
Estimated Reading Time: 9 minutes

Introduction: The Engineer Behind Every Safe Building

Every building you walk into, every bridge you cross, every extension that transforms a family home — behind each of these stands the work of a structural engineer. While architects are often the visible face of a construction project, structural engineers are the technical backbone that makes ambitious designs a physical reality. Understanding what a structural engineer does in construction, and why their role is so critical, is essential knowledge for anyone planning a build, renovation or significant alteration.

At its core, a structural engineer specialises in the structure of buildings and other assets — ensuring they can safely carry loads from people, furniture and equipment, and resist forces such as wind, weather and ground movement. From the earliest feasibility stages of a project through to completion and long-term maintenance, their influence shapes everything from foundation depth to beam sizing, material selection to compliance sign-off. In short, no serious construction project should proceed without one.

What is a Structural Engineer?

A structural engineer is a professional who designs, analyses and checks structures to ensure they are strong, stable and fit for purpose throughout their intended lifespan. Their discipline sits within the broader field of civil and structural engineering, which encompasses transport infrastructure, water engineering, geotechnics and environmental engineering. Structural engineering is one of the most prominent specialisms within that wider field, focused specifically on the load-bearing framework of buildings, bridges and other structures.

It is worth distinguishing the structural engineer’s role from those of other construction professionals. Compared with architects, who lead on spatial design, aesthetics and user experience, structural engineers focus on whether and how an architectural concept can be safely realised — selecting structural systems, calculating member sizes and specifying connection details. Compared with general civil engineers, who might concentrate on highways, drainage or earthworks, structural engineers are primarily concerned with the load-bearing frame: beams, columns, slabs, walls and foundations. And compared with contractors, who execute the physical works on site, structural engineers operate in the realm of design, analysis, specification and technical oversight.

The structural engineer’s work overlaps meaningfully with geotechnical engineers on matters of foundations and ground-structure interaction, with building services engineers when coordinating how mechanical, electrical and plumbing systems penetrate or load the structure, and with architects throughout the design process to ensure that structural realities and architectural ambitions are genuinely reconciled.

What Does a Structural Engineer Actually Do?

The role of a structural engineer spans the entire lifecycle of a construction project, from the first sketch on a page to the final inspection on site. Understanding the breadth of their responsibilities gives a much clearer picture of why they are indispensable.

In the early stages of a project, structural engineers assess site conditions and feasibility, often reviewing ground investigation reports and evaluating existing structures where alterations or extensions are planned. They work closely with architects and clients to develop structural concepts that suit the intended use, the architectural layout and the available budget. Initial estimates of material quantities and structural costs are also produced at this stage to inform decision-making.

Once a concept is agreed, the engineer moves into detailed structural analysis and design. This involves calculating loads and stresses on every element of the structure — foundations, beams, columns, walls and slabs — accounting for self-weight, occupancy, wind, snow and in some cases seismic or other special loads. Computer modelling and simulation are used extensively to predict how a structure will behave under different conditions. From this analysis, the engineer selects appropriate materials — concrete, steel, timber, masonry or composites — based on strength, durability, cost, sustainability and practical buildability. Detailed drawings and specifications are then produced, setting out member sizes, reinforcement arrangements, connection details, foundation types and construction methods, all checked against relevant building codes and British Standards.

What a Structural Engineer Does
Feasibility & Site Assessment
Structural Analysis
Material Selection
Detailed Design & Drawings
Coordination with Design Team
Site Inspections
Compliance & Approvals
Long-term Performance Advice

Throughout the design process, coordination and communication are constant responsibilities. Structural engineers liaise with architects, surveyors, other engineers and project managers to integrate the structural design with all other disciplines. They review shop drawings and contractor proposals — for example, steelwork fabrication drawings or precast concrete layouts — to confirm they align with the design intent. They respond to Requests for Information from contractors, resolving clashes or discrepancies between drawings, and they prepare calculations and reports required for building control approvals, structural warranties and lender sign-off.

Interior view of a house extension under construction with exposed beams, steel supports, and building materials.

During the construction phase, structural engineers do not simply hand over drawings and disappear. They monitor progress, carry out site inspections and verify material quality through tests such as concrete cube testing and steelwork inspections. When unexpected issues arise — unusual ground conditions, discrepancies between survey information and reality, non-compliant workmanship — they redesign details or provide remedial solutions to ensure the finished structure still meets its safety and performance requirements.

Beyond new construction, structural engineers also inspect existing buildings to assess their integrity. This is particularly relevant for conversions, extensions and buildings affected by subsidence, fire, impact or deterioration. They advise on repairs, strengthening measures or, in severe cases, demolition. They may also investigate structural failures, determining the cause and mechanism of collapse to inform future design and safety practice. Looking further ahead, structural engineers contribute to long-term performance by designing to reduce deflection, cracking and settlement over time, by specifying low-carbon materials where possible, and by recommending maintenance and refurbishment strategies that extend the life of structures.

The Role of a Civil Structural Engineer in London Construction Projects

In the context of larger or more complex developments — particularly those common in London — the civil structural engineer plays an especially integrated role. On such projects, their responsibilities extend beyond the building frame itself to encompass the relationship between the structure and the wider site: earthworks and retaining walls, the interaction between substructure and superstructure, how the building interfaces with adjacent infrastructure such as access roads, utilities and drainage.

Civil and structural engineering expertise becomes particularly valuable in London’s dense urban environment, where construction sites are often constrained, ground conditions can be challenging, and proximity to existing buildings demands careful management of loads, vibration and temporary works. A civil structural engineer on a London project will typically lead on foundation selection, manage risks associated with complex load paths and construction sequencing, and provide the load information and structural constraints that shape architectural layouts, services routing and facade design.

The intersection with other construction professionals is continuous. The structural engineer works alongside the architect to ensure that the designed form can stand up safely and efficiently. They coordinate with contractors and subcontractors to confirm that construction methods are feasible and that temporary conditions — propping, shoring, excavation support — are properly accounted for. They collaborate with building control officers and warranty providers by supplying calculations that demonstrate compliance and structural adequacy. And they support project managers and quantity surveyors with the cost and programme implications of structural decisions, contributing to value engineering exercises where budget pressures require creative solutions.

Professional Tip

Engaging a structural engineer at the earliest possible stage of a project — even before planning is submitted — allows structural constraints and opportunities to inform the design from the outset, rather than creating costly redesign work further down the line.

Why Structural Engineers Are Important

The importance of structural engineering in construction is difficult to overstate. At the most fundamental level, structural engineers are responsible for ensuring that buildings and infrastructure are safe to use, even under extreme conditions. They design structures to resist everyday loading from occupants and contents, environmental forces such as wind and snow, temperature-induced movement, and in certain contexts, events such as earthquakes or flooding. Rigorous analysis and the application of carefully calibrated safety factors help prevent catastrophic failures and the human and financial consequences that follow.

Compliance is another area where structural engineers provide irreplaceable value. They ensure that construction projects meet UK Building Regulations and the relevant British Standards and Eurocodes, producing the calculations and drawings that building control bodies and structural warranty providers rely upon to issue approvals. Without this documentation, projects cannot legally proceed, and without the expertise behind it, there is no meaningful assurance that the building will perform as intended.

The economic case for good structural engineering is equally compelling. Thoughtful structural design can significantly improve cost-effectiveness — optimising spans, reducing unnecessary material usage and simplifying construction details. Structural engineers also design for durability, specifying materials and detailing methods that limit corrosion, cracking and water ingress, with buildings typically designed for lifespans of 50 years or more, and bridges often designed for 100 years or beyond. Over that lifespan, the quality of the structural design has a direct bearing on maintenance costs, resilience and long-term asset value.

Increasingly, structural engineers also contribute to sustainability objectives. National career guidance highlights the growing role of structural engineers in green building design, recommending low-carbon materials such as sustainably sourced timber and recycled steel, and designing more efficient structural systems that use less material while achieving longer lifespans. The Institution of Structural Engineers itself emphasises the profession’s responsibility in addressing embodied carbon and climate resilience in the built environment.

Professional Standards and the Institution of Structural Engineers

In the United Kingdom, structural engineering is governed by well-established professional bodies that set standards for education, training, ethics and ongoing competence. The most prominent of these, specifically within structural engineering, is the Institution of Structural Engineers (IStructE) — a leading international professional body headquartered in London. Chartered Membership of IStructE (designated MIStructE) and Fellowship (FIStructE) are widely recognised marks of professional competence and are achieved only after rigorous assessment of a candidate’s technical knowledge, design judgement and professional conduct.

Professional registration is also governed by the Engineering Council UK, which registers engineers at various levels — Engineering Technician (EngTech), Incorporated Engineer (IEng) and Chartered Engineer (CEng). Most practising structural engineers who have achieved chartered status hold CEng registration, typically via IStructE or the Institution of Civil Engineers (ICE), the latter being particularly relevant for engineers whose work spans broader civil infrastructure alongside structural projects.

The typical pathway into the profession in the UK begins with an accredited degree in civil or structural engineering, followed by a period of supervised professional experience in graduate engineer roles. Candidates then undertake the professional review process of their chosen institution — in the case of IStructE, a notably demanding Chartered Membership examination designed to test real-world design competence and engineering judgement. Chartered engineers are also expected to maintain their skills through Continuing Professional Development (CPD), keeping pace with evolving codes, new materials and emerging technologies.

For clients commissioning structural work in London, choosing an engineer who holds recognised professional accreditation matters. It provides assurance that the engineer’s competence has been independently assessed, that they adhere to a professional code of conduct, and that they can be held accountable by their institution if standards are not met. It is a meaningful trust signal in a sector where the consequences of poor engineering can be severe.

Professional Body Designation What It Signifies
Institution of Structural Engineers (IStructE) MIStructE / FIStructE Chartered competence in structural engineering design and practice
Engineering Council UK CEng / IEng / EngTech Registered professional engineering status
Institution of Civil Engineers (ICE) MICE / FICE Chartered civil engineering competence, including structural work

When Do You Need a Structural Engineer in London?

One of the most practical questions for homeowners and developers alike is knowing when to bring a structural engineer into a project. The answer, in most cases, is earlier than you might think — and certainly before any physical works begin on anything that affects the load-bearing elements of a building.

According to homeowner guidance from the HomeOwners Alliance, you will typically need a structural engineer when removing or altering load-bearing walls — for example, when creating open-plan living spaces or knocking through between rooms. Adding extensions, whether to the rear, side or roof of a property, almost always requires structural input, as does converting a loft or basement where new floors, beams or foundations are introduced. Changing a roof structure, removing a chimney breast, creating large new openings in external walls or installing significant glazing are all situations where structural calculations and drawings are required before a contractor can proceed safely.

Structural engineers are equally important when something has gone wrong. If a property shows signs of cracking, subsidence, sagging floors, leaning walls or damage from fire or impact, a structural inspection and report is an essential first step before any remedial work is planned. For older and heritage buildings — of which London has an exceptional stock — structural engineers can advise on sympathetic repairs and strengthening approaches that preserve architectural character while restoring structural integrity.

On commercial and industrial projects, the need for structural engineering input is even more consistent. New builds, significant fit-outs and refurbishments that alter the structural frame or change loading patterns all require a structural engineer’s involvement from the outset. They produce the structural calculations and drawings that architects and builders rely upon, prepare the documentation needed for Building Regulations approval, and advise on whether proposed works are feasible, safe and compliant — suggesting alternative solutions where they are not.

It is also worth noting that before purchasing a property with visible structural concerns or unusual alterations, commissioning a structural inspection can provide clarity on the risks involved and give a realistic picture of likely remedial costs — information that can prove invaluable during negotiations or in deciding whether to proceed at all. Projects involving basement construction in particular benefit enormously from early structural engineering involvement, given the complexities of excavation, waterproofing and foundation interaction.

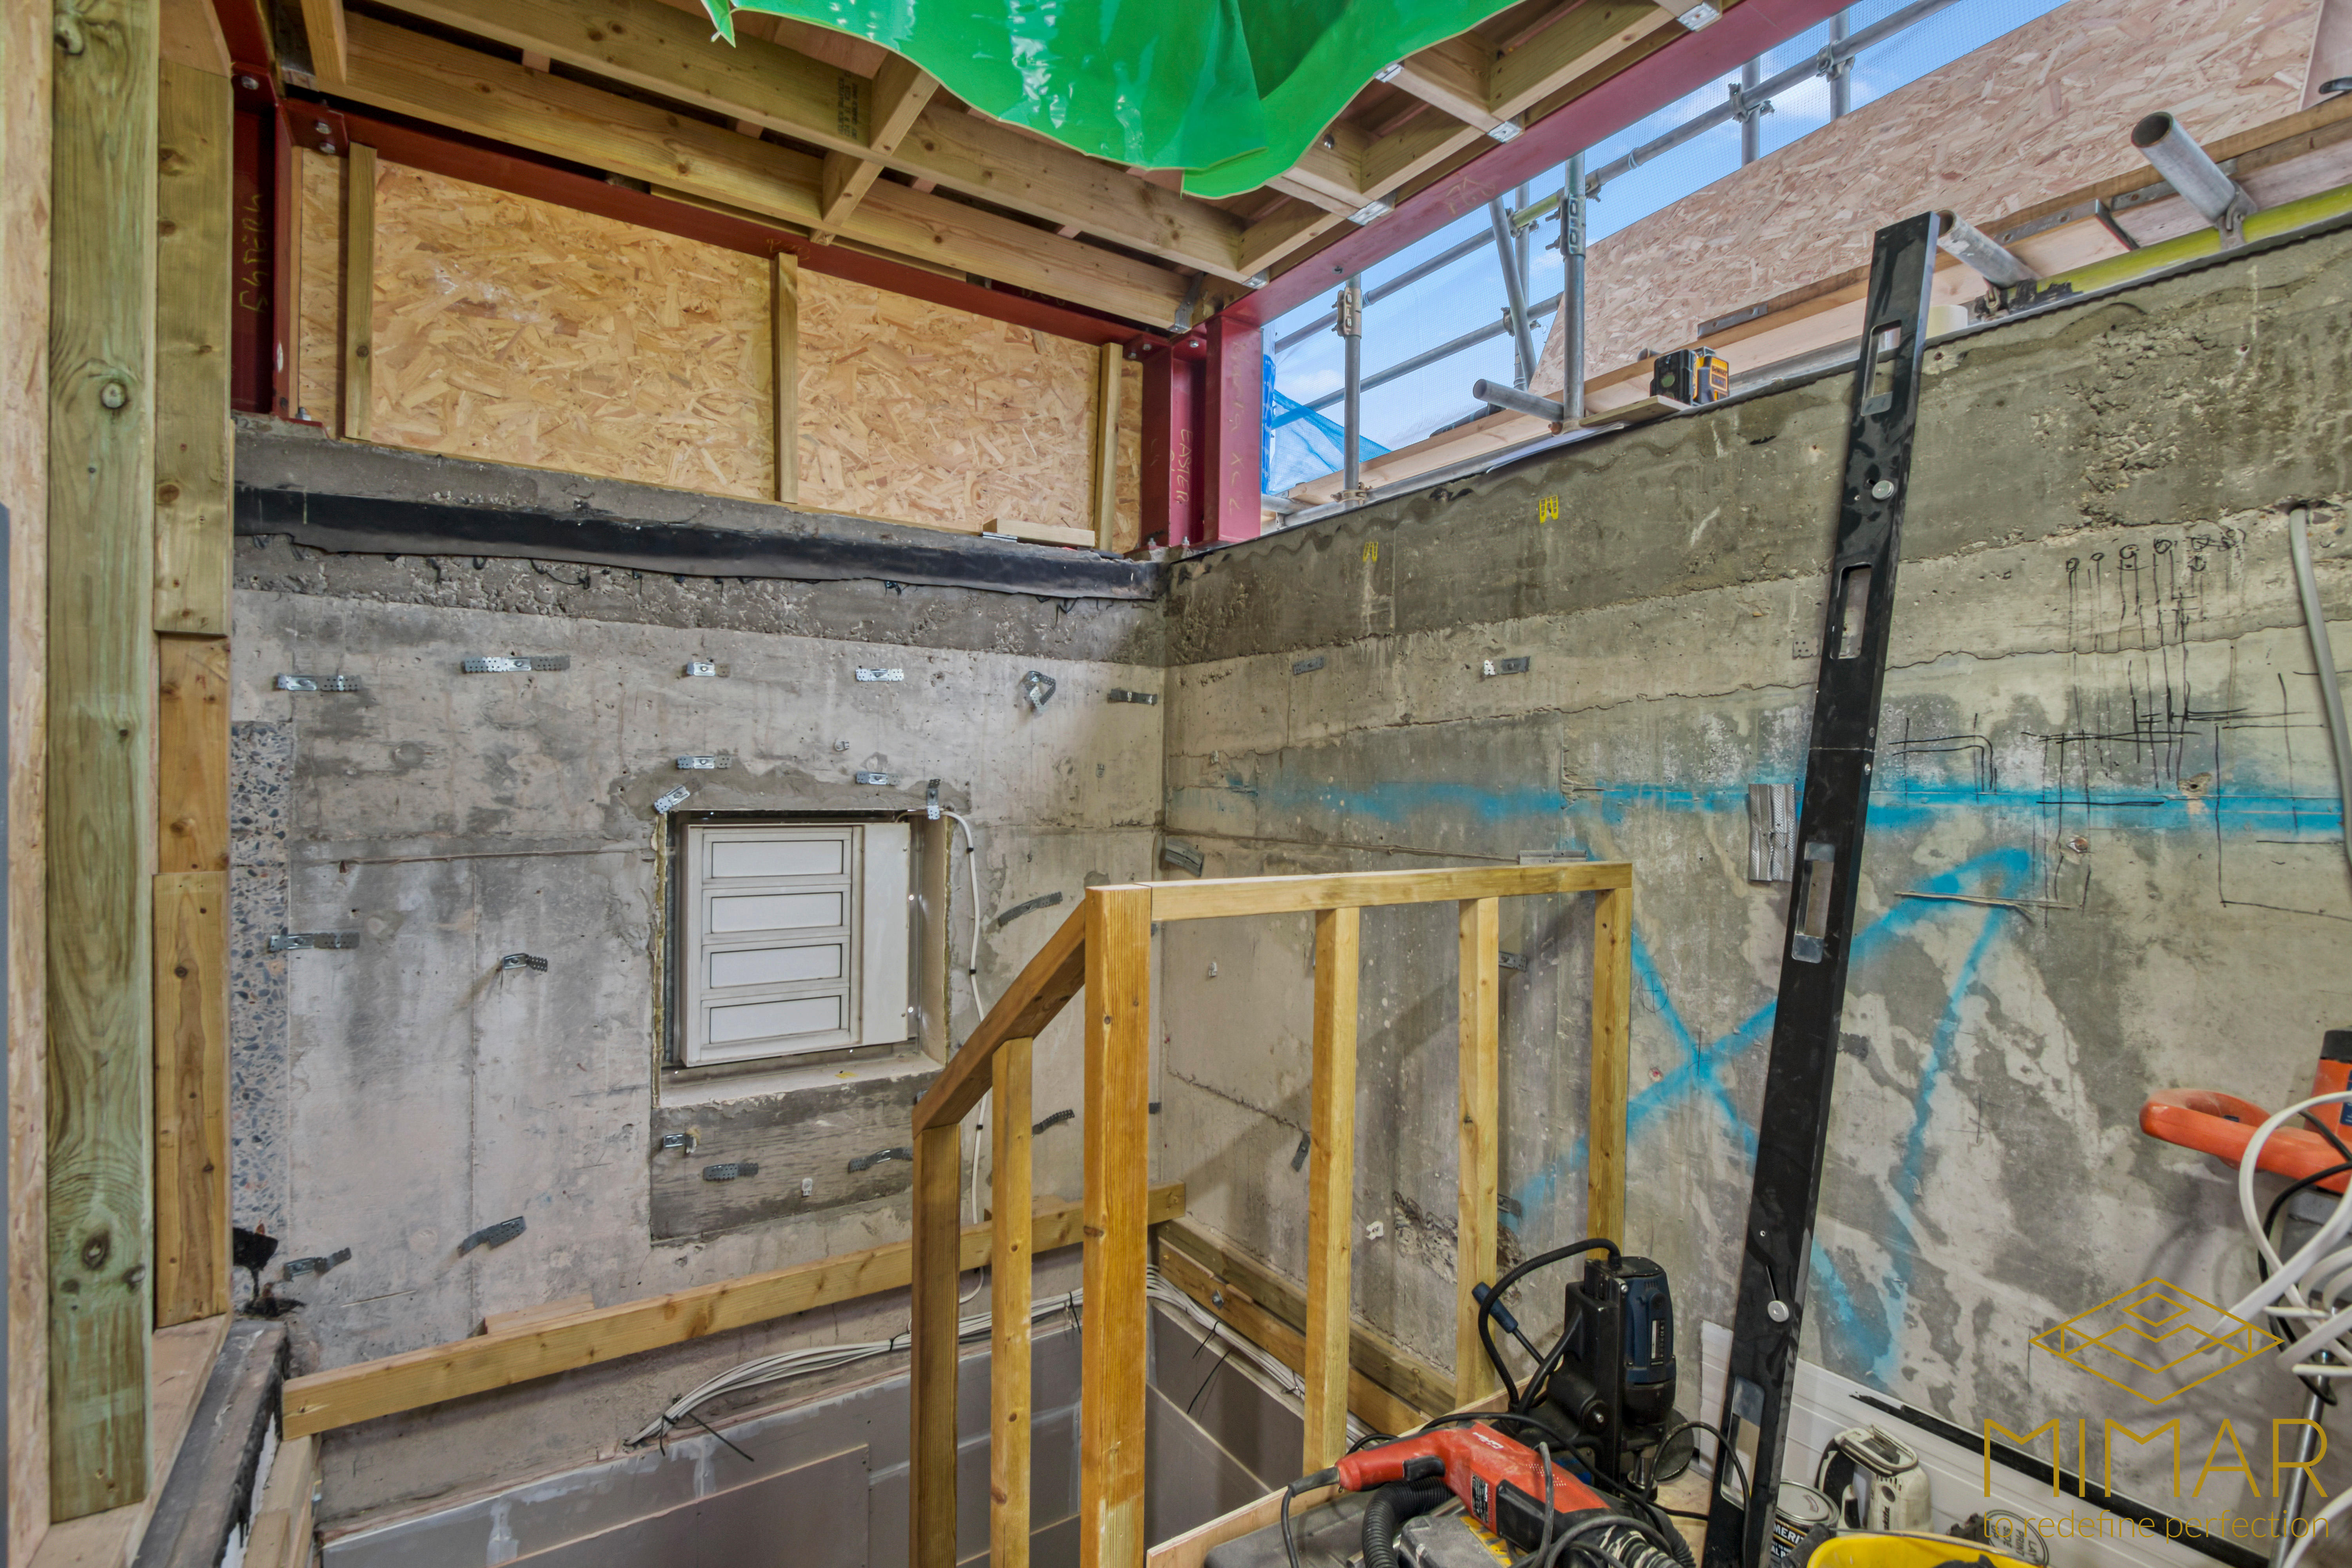
Interior view of a partially constructed basement with exposed concrete walls, wooden frameworks, and construction tools.

Conclusion

A structural engineer in construction is far more than a calculator of beams and columns. They are a critical professional whose influence runs from the earliest feasibility conversations through to the final structural sign-off, and whose expertise underpins the safety, stability, compliance and long-term value of every project they touch. From detailed structural analysis and material selection to site inspections, problem-solving and sustainability guidance, the scope of their work is both technically demanding and genuinely consequential.

The field of civil and structural engineering continues to evolve, with structural engineers taking on a growing role in low-carbon design, climate resilience and the retrofit of existing buildings. Professional accreditation through the Institution of Structural Engineers and recognition by the Engineering Council remain the clearest signals of competence and professional accountability in the sector.

For homeowners and developers in London, understanding what a structural engineer does — and engaging one at the right stage of your project — can mean the difference between a smooth, compliant build and a costly, time-consuming set of problems. Whether you are planning a loft conversion, a large rear extension, a basement excavation or a complex commercial refurbishment, structural engineering expertise is not an optional extra. It is the foundation on which everything else is built. To discuss how structural engineering can support your next London project, get in touch with the Mimar team today.

Step-by-Step Electric Underfloor Heating Installation Guide

Spacious refurbished living area with large floor-to-ceiling windows and herringbone wood flooring.

Estimated Reading Time: 9 minutes

Introduction: A Step-by-Step Guide to Electric Underfloor Heating Installation

Electric underfloor heating installation has become an increasingly popular upgrade for homeowners looking to improve comfort, eliminate bulky radiators, and bring modern efficiency to their homes. Whether you are renovating a bathroom, refreshing a kitchen, or upgrading a ground-floor room, understanding the full process from initial planning through to commissioning is essential before any work begins. This guide walks through each stage clearly and in sequence, so you know exactly what to expect and where professional support is needed along the way.

A modern living room with a large sofa, built-in shelving with a television, and a small dining table with chairs, featuring wooden flooring and a view out to a balcony.

What Is an Electric Heating Floor?

An electric heating floor consists of thin heating cables or pre-assembled mats embedded directly beneath the floor surface. Powered by electricity, the system radiates heat evenly upward from the floor plane, warming the room from the ground up rather than relying on wall-mounted radiators or forced air. According to Thermosphere, electric underfloor heating integrates seamlessly into modern homes as either a primary heat source or a supplementary comfort layer, working particularly well under tiles, laminate, or vinyl flooring where its low-profile installation adds minimal floor height. Because each room can be controlled independently via a thermostat, the system also supports a zoned approach to heating — only warming spaces when and where they are needed.

When Is an Electric Heating Floor System the Right Choice?

An electric heating floor system is best suited to smaller rooms such as bathrooms, en-suites, kitchens, and studies, where the installation footprint is manageable and the benefits of even heat distribution are most noticeable. As Tile Giant explains, it is an ideal solution for both new builds and retrofit renovations where a low installation height — typically under 10mm — is required to avoid significantly raising floor levels. Homeowners are often drawn to electric systems because they respond quickly, warming a room within hours of being switched on, and because they eliminate the need for radiators entirely in the treated zone. Projects that need to avoid the complexity of water-based plumbing, or where available ceiling height or structural constraints rule out thicker floor build-ups, are particularly strong candidates for this approach.

Electric Systems vs. Water-Based Underfloor Heating Pipes

It is worth clarifying the distinction between electric systems and water-based alternatives before going further, as the two are frequently confused. Water-based systems rely on a network of underfloor heating pipes set into screed, connected to a boiler, pump, and manifold. They are better suited to whole-house installations and, while cheaper to run over the long term in larger properties, they involve considerably more complex installation work, higher upfront costs, and longer commissioning times. Electric systems, by contrast, use cable mats rather than underfloor heating pipes, making them far quicker to install, more accessible for smaller areas, and generally more practical for retrofitting into existing homes without major structural disruption. Understanding this difference helps set realistic expectations for both the installation process and the ongoing running costs of each approach.

Electric Underfloor Heating Installation
Planning & Measurement
Subfloor Preparation
Insulation Boards
Mat Placement
Sensor & Thermostat
Resistance Testing
Floor Covering
Commissioning

Planning and Preparation in London Homes

Thorough planning before installation begins is one of the most important factors in a successful outcome. For London homes in particular, where floor heights are often tightly constrained in period properties and room layouts can be irregular, this stage deserves careful attention. The process starts with sketching an accurate room layout and identifying all fixed elements — toilets, vanity units, kitchen cabinets, built-in furniture — that will sit over the floor and cannot be heated beneath. As noted by PlumbNation, these unheated zones must be excluded from calculations, and a perimeter clearance of 40–50mm should be maintained around all walls and obstacles to prevent cable damage and overheating at the edges. The subfloor should also be assessed at this stage for levelness, dryness, and structural stability, and the proximity of the power source and availability of a dedicated electrical circuit should be confirmed before any materials are ordered.

Choosing the Right System Components

Selecting the right components for the project is just as important as the installation itself. The heating floor mat — a pre-spaced heating cable fixed to a mesh backing — is the most common format for regular-shaped rooms, as it can be rolled out quickly and offers consistent cable spacing. For irregular room shapes, loose cable systems offer greater flexibility since they can be routed around obstacles more freely. Alongside the mat or cable, the key components include a thermostat for user control, a floor sensor for monitoring surface temperature, insulation boards to sit beneath the heating layer, and the appropriate adhesives or levelling compounds for the floor type. Fastwarm highlights that insulation boards beneath the mat can improve system efficiency by up to 50% by preventing heat from being lost downward into the subfloor — making them a component that should not be omitted even when budgets are tight.

Component Tip

Always select a mat sized to match your heatable area rather than the total room footprint. Ordering based on the measured coverage zone — excluding all fixed furniture and fittings — prevents wasteful overlap and ensures the system operates safely and efficiently.

Preparing the Installation Area

Before laying any heating components, the subfloor must be properly prepared. This means thoroughly cleaning the surface to remove dust, debris, and any loose material, then checking for any unevenness, cracks, or protrusions. Any significant dips or bumps should be addressed with a levelling compound before the insulation layer goes down. Once the surface is level and clean, insulation boards can be laid in a staggered pattern — similar to brickwork — and secured with adhesive or screws, with all joints taped to create a continuous thermal barrier. Channels may also need to be cut into the insulation at this stage to accommodate the sensor conduit and cold tail cables, ensuring these elements can sit flush without creating raised areas beneath the finished floor. Smart Plumbing & Heating Bristol emphasises that an unprimed or uneven surface is one of the most common causes of poor adhesion and system failure further down the line, making this preparation stage foundational to the project’s success.

Planning the Placement of the Heating Floor Mat

With the subfloor prepared and insulation in place, the next step is to plan exactly how the heating floor mat will be positioned before it is permanently fixed. The mat should be dry-laid first — unrolled across the floor without adhesive — starting from near the thermostat or power point location and working outward across the heatable zone. When the mat reaches a wall or obstacle, only the mesh backing should be cut with scissors to allow the mat to change direction; the heating cables themselves must never be cut under any circumstances. The mat should be flipped and reversed to double back in the opposite direction, maintaining a consistent spacing between cable runs — typically a minimum of 60mm — and keeping the required perimeter gap from all walls and fixed elements. Topps Tiles recommends completing a resistance test at this dry-lay stage to confirm that the mat’s electrical values match the manufacturer’s specification before any adhesive is applied.

The Core Installation Flow

Once the dry-lay plan has been confirmed and tested, the physical installation can proceed in a logical sequence. The insulation layer should already be in place, with channels prepared for the cold tail cables and sensor conduit. The heating floor mat is then secured to the insulation surface using tape or a suitable adhesive, keeping it flat and free from any distortion or overlapping. The floor sensor is placed in its conduit between two cable runs — not directly under a cable — and the conduit is capped and taped securely in position. The cold tail cables, which are the non-heating leads that run from the mat to the thermostat position, are routed to the wall back box through the prepared channel without any jointing inside the wall cavity. The final electrical connections — connecting the live and neutral terminals to the thermostat and linking the system to the mains supply — must be carried out by a qualified electrician in line with UK Part P regulations. This step is not optional: without certified electrical work, the installation cannot be formally signed off and may not be covered by building insurance.

Controls and Monitoring

The thermostat and floor sensor are integral to the long-term performance of the system, not simply optional add-ons. The thermostat should be mounted on a shaded wall at approximately 1.5 metres above floor level to avoid false readings from direct sunlight or draughts. The floor sensor feeds real-time temperature data back to the thermostat, allowing the system to maintain a set floor surface temperature — typically with a maximum limit of around 27°C to protect certain floor coverings from heat damage. Modern thermostats often support app-based control and programmable schedules, enabling zonal management across different rooms. Fastwarm notes that the thermostat connections should be tested before the floor covering is applied, as accessing the cables beneath a finished floor is not a straightforward repair.

Testing and Checking Before Floor Covering

Before any floor finish is applied, a thorough testing phase is essential. A multimeter should be used to carry out resistance tests on the mat, cables, and floor sensor, with the readings checked against the manufacturer’s stated values to identify any damage that may have occurred during laying. A brief power-on test via the thermostat can also confirm that the system heats without any hotspots or irregularities. The electrician conducting the final wiring should also verify that all connections are secure and certify the installation as compliant. This testing stage is the last practical opportunity to identify and resolve any faults before they are permanently buried beneath the floor surface — making it a step that should never be rushed or skipped.

Installation Stage Key Action
Planning Sketch layout, measure heatable area, confirm power source
Subfloor Prep Clean, level, prime, and install insulation boards
Mat Placement Dry-lay, check spacing, perform resistance test
Core Installation Secure mat, route cold tails, install sensor conduit
Electrical Connection Qualified electrician connects thermostat and mains
Testing Resistance test, power-on check, electrician certification
Floor Covering Apply adhesive/compound, lay compatible floor finish
Commissioning Gradual temperature raise over first week of use


Installing the Final Floor Covering

With testing complete and the system certified, the floor covering can be applied. For tiled floors, a self-levelling compound or thinset tile adhesive is applied over the heating mat at a depth of around 1–5mm, encasing the cables without air pockets that could cause uneven heating or hotspots. Even trowelling technique is important here to ensure the mat is fully embedded before tiles are laid on top. For laminate or engineered wood floors, a floating installation method is generally used, as these products cannot be glued directly over the mat. Thick carpets should be avoided entirely, as they insulate against the rising heat and significantly reduce the system’s efficiency. Regardless of floor type, the adhesive or compound should be allowed to cure fully — typically 24–48 hours — before the floor is subjected to weight or grouting begins. This installation walkthrough provides a useful visual reference for the covering stage of the process.

Post-Installation: Setup and Initial Use in London Properties

Once the floor covering has been laid and fully cured, the system is ready to be commissioned. The thermostat should initially be set to floor-sensor mode with a surface temperature limit of 27°C, and the system should be left off for 24 hours after the adhesive has cured to allow any remaining moisture to continue dissipating. When the system is first switched on, the temperature should be raised gradually — by approximately 2°C per day — up to the desired operating level. This controlled approach prevents thermal shock to the floor covering, which could otherwise cause cracking or warping, particularly with stone tiles or wood-based products. Thermosphere recommends running the system on low settings for the first week to allow the entire floor assembly to acclimatise before normal scheduling begins. Certificates from the electrician should be retained alongside any manufacturer warranties for future reference.

Common Mistakes to Avoid

A number of installation errors appear consistently across electric underfloor heating projects, and most are entirely preventable with careful planning. The most serious is cutting the heating cables — only the mesh backing of a heating floor mat should ever be cut, and only with scissors rather than a knife. Positioning the mat beneath fixed fixtures such as toilets, bath panels, or kitchen base units creates trapped heat with no outlet, leading to hotspots and potential cable damage. Skipping the insulation layer beneath the mat is another frequent oversight that results in significant heat loss downward and noticeably higher running costs. Mats should never be overlapped, and the required 40–50mm perimeter gap from walls and obstacles must always be observed. Feeding cable joints or cold tail connections inside wall cavities without proper routing is a wiring fault that can cause overheating within the wall structure. Finally, neglecting to level or prime the subfloor before installation leads to poor adhesion and an uneven finished surface that is difficult to correct after the fact.

DIY or Professional Support?

Electric underfloor heating installation occupies an interesting middle ground when it comes to the DIY versus professional question. The physical preparation work — cleaning and levelling the subfloor, fitting insulation boards, laying and positioning the heating floor mat, and installing the sensor conduit — is accessible to a competent DIYer with basic tools including a multimeter, tape measure, and scissors. In a small bathroom or kitchen, the physical installation can often be completed in one to two days. However, the electrical connection of the system to the mains supply is a different matter entirely. Under UK Part P building regulations, this work must be carried out and certified by a qualified electrician. Attempting to connect the thermostat and mains wiring without the appropriate qualifications not only creates a safety risk but also invalidates the installation for insurance and resale purposes. For complex layouts, larger areas, or properties with limited electrical capacity, engaging a specialist from the outset is the more practical approach overall.

Conclusion: The Complete Electric Underfloor Heating Installation Journey

Electric underfloor heating installation is a well-structured process that, when followed correctly, delivers reliable and efficient warmth beneath almost any floor finish. The journey begins with accurate planning and layout assessment, moves through subfloor preparation and insulation, progresses to the careful positioning and securing of the heating floor mat, and then involves the certified electrical connection of controls and monitoring components. A thorough testing phase before the floor covering is applied protects the investment, and a gradual commissioning process ensures the finished heating floor system performs safely from day one. Avoiding the common mistakes covered in this guide — and knowing where professional input is required — makes the difference between a system that performs well for years and one that causes problems from the outset. If you are considering electric underfloor heating for a London property and would like expert guidance on the right approach for your project, contact the Mimar team to discuss your requirements.

Electric underfloor heating is especially popular in bathroom renovation London projects, where removing radiators can free up wall space and improve comfort.

It can also be a smart addition during a kitchen remodeling, particularly when upgrading flooring and improving day-to-day functionality.

In compact layouts, pairing this system with small bathroom remodeling ideas can help maximise both comfort and usable space.

Because insulation has such a direct impact on efficiency, homeowners may also benefit from exploring broader eco-friendly refurbishments that reduce overall energy consumption.

For properties with older external envelopes, external wall insulation can further improve heat retention and overall comfort.

And since certified electrical work is essential, it is worth understanding EICR certificate cost and importance when planning compliance and safety checks in London homes.

Create Your Dream Closet with Custom Made Wardrobes

A custom-built wardrobe with mirrored doors and wooden shelving in a modern interior.
Estimated Reading Time: 9 minutes

Introduction: Why Custom Made Wardrobes Are Worth It

There is a significant difference between a wardrobe that fits your room and one that truly works for your life. Custom made wardrobes are tailored storage solutions designed and built specifically around your space, your habits, and your aesthetic preferences. Unlike a flat-pack unit pulled from a shop floor, they can be engineered to include soft-close drawers, motion-activated lighting, dedicated shoe storage, and every other detail that makes getting dressed in the morning feel effortless rather than chaotic.

The appeal goes far beyond aesthetics. Many homeowners find themselves battling the same recurring storage problems — cluttered surfaces, clothes spilling out of overfull drawers, wasted space above freestanding units, or corners that simply cannot accommodate a standard rectangular wardrobe. Custom built wardrobes solve these problems at the source by making use of every available inch, including the awkward ones. By the end of this guide, you will have a clear picture of the layouts, features, finishes, and decisions involved in creating a wardrobe that genuinely transforms your space.

A spacious, custom-built wardrobe with open shelves and closed drawers, featuring interior lighting and a modern design.

Understanding the Key Terms

The terms used around bespoke storage can feel interchangeable, but they carry slightly different emphases. Custom made wardrobes refers to fully personalised units crafted to your exact specifications, with a strong focus on unique aesthetics, functionality, and fit. Custom built wardrobes tends to describe site-specific construction — often fitted floor-to-ceiling — with precision engineering at the heart of the design. A bespoke built in wardrobe, meanwhile, is typically handcrafted and integrated directly into the room’s architecture, using high-end materials to create a permanent, luxurious result that feels like it was always part of the building.

In practical terms, all three sit at the opposite end of the spectrum from freestanding or flat-pack options. Freestanding wardrobes leave gaps at the top and sides, collect dust in hard-to-reach areas, and are constrained by the standard dimensions in which they are manufactured. A bespoke fitted solution, by contrast, uses the full height of your ceiling, wraps around architectural quirks, and integrates with your room’s design rather than sitting awkwardly within it.

Aspect Custom / Bespoke Built-In Freestanding / Flat-Pack
Flexibility Unlimited; adapts to odd shapes and ceiling heights Limited sizes; gaps in awkward spaces
Fit Perfect, floor-to-ceiling utilisation Standard dimensions; wasted space above and sides
Aesthetics Seamless room integration, dust-free Can clash with décor, bulky, dust-prone
Longevity High-quality materials built to last Subject to wear; may need replacing sooner

Core Benefits of Custom Built Wardrobes in London

The most immediate benefit of custom built wardrobes is space maximisation. By building to the exact dimensions of your room — including height, width, and any irregular angles — every corner and niche becomes usable storage rather than dead space or a dust trap. In London homes especially, where square footage is at a premium, this distinction carries real weight.

Aesthetically, the result is a far more cohesive room. A well-designed bespoke built in wardrobe does not look like furniture that has been placed into a room — it looks like it belongs to the room. The choice of materials, finishes, and door styles can echo the rest of the interior, whether that means complementing original period features or reinforcing a clean, contemporary scheme. According to Fox Wardrobes, this seamless integration is one of the most consistently cited advantages among homeowners who make the switch from freestanding units.

There is also a compelling long-term value argument. High-quality fitted wardrobes, built with solid materials and soft-close mechanisms, are built to outlast cheaper alternatives by many years — and can add genuine premium appeal to a property when it comes to sale or rental.

London Property Tip

In a competitive London property market, a beautifully designed bespoke built in wardrobe can be a meaningful selling point, signalling quality craftsmanship and thoughtful design to prospective buyers.

Layout and Configuration Options

One of the most exciting aspects of commissioning custom made wardrobes is choosing a layout that genuinely suits your space and the way you live. The most common configurations each offer distinct advantages depending on room size and personal preference.

A single wall layout keeps everything linear and is well-suited to smaller bedrooms, providing generous storage without encroaching on floor space. An L-shaped configuration makes excellent use of corners and works particularly well for busy professionals who benefit from being able to see and access items quickly. A U-shaped wardrobe wraps around three walls, offering comprehensive organisation in medium to large rooms, while a walk-in closet takes the concept further by creating an entirely dedicated dressing area — one of the most sought-after features in premium London homes.

For smaller rooms, reach-in setups with clever pull-out elements can deliver a surprisingly large amount of storage within a compact footprint. Walk-in wardrobes, on the other hand, offer full immersion and are ideal for fashion enthusiasts or anyone who wants their wardrobe to function as a proper dressing room. The right choice will always come back to the proportions of your room and the demands of your daily routine.

Wardrobe Layouts
Single Wall
L-Shaped
U-Shaped
Walk-In Closet
Reach-In
Alcove Fitted

Internal Storage and Personalisation

The internal configuration of custom built wardrobes is where the real personalisation begins. Rather than working around a fixed interior, you design the inside to reflect exactly how you dress and organise your life. Hanging sections can be split between short hang (shirts, jackets, folded trousers) and long hang (dresses, coats, suits), with rails positioned at heights that suit you rather than a notional average. Shelving can be fixed or adjustable, allowing you to accommodate bulkier folded items or reconfigure the layout as your needs evolve over time.

Drawers with soft-close mechanisms are a popular inclusion for everything from everyday clothing to bed linen, while pull-out trays offer a practical solution for items that benefit from being laid flat. For those with larger accessory collections, the range of specialist inserts available is extensive — dedicated shoe racks, bag storage, jewellery trays, tie and belt racks, and pull-out valet rails can all be incorporated as standard elements rather than afterthoughts.

For couples sharing a wardrobe, divided sections with clearly defined hanging and drawer space on each side avoid the daily negotiation over storage. In children’s rooms, adjustable shelving that can be reconfigured as a child grows makes the investment genuinely future-proof. For those who prioritise workwear, extra long-hang sections, built-in tie racks, and dedicated suit storage make the morning routine considerably smoother.

Exterior Design Choices and Finishes

While the interior drives functionality, the exterior of a bespoke built in wardrobe defines how it looks and feels within your room. Door style is one of the most significant choices. Sliding doors are a practical option in rooms where floor space in front of the wardrobe is limited, while hinged doors offer a more traditional feel and full, unobstructed access to the interior. Mirrored fronts remain perennially popular — they reflect light, create a sense of additional space, and eliminate the need for a separate full-length mirror. Shaker-style doors suit period interiors particularly well, while handleless designs deliver the kind of clean, seamless finish that defines contemporary London interiors.

Material and finish choices are equally diverse. Wood veneers, painted finishes, laminates, and glass panels each bring a different texture and character, and can be matched or contrasted with existing furniture, flooring, and wall colours. Hardware — from discreet integrated recesses to statement bar handles — adds a final layer of detail that can either blend quietly into the design or serve as a deliberate focal point. The cumulative effect of these choices is a wardrobe that feels purpose-built for your home rather than sourced from a catalogue.

Space Optimisation and Problem-Solving in London Homes

London properties frequently present the kinds of spatial challenges that defeat off-the-shelf storage solutions. Sloped ceilings in loft conversions, chimney breast recesses, rooms with alcoves on either side of a fireplace, awkward corners created by irregular floor plans — these are not unusual features in the capital, but they are precisely the situations where custom made wardrobes come into their own.

A bespoke built in wardrobe can be designed with an angled top to follow a sloped roofline, fitted into an attic space at the exact height where the ceiling permits, or shaped to wrap around a window or door frame without leaving a gap. Alcoves and recesses that would otherwise serve no purpose can be transformed into fully fitted storage with doors that flush seamlessly with the surrounding wall. In smaller London bedrooms where every centimetre counts, the ability to build floor-to-ceiling and wall-to-wall — without losing space to standard unit dimensions — can make a meaningful difference to how the room feels and functions.

Built Wardrobe Ideas for Every Lifestyle

One of the most compelling aspects of the bespoke wardrobe market is how effectively different built wardrobe ideas can be tailored to different ways of living. For a fashion enthusiast with an extensive wardrobe of clothing and accessories, a U-shaped or walk-in layout with mirrored walls, dedicated shoe display shelving, jewellery pull-outs, and a central island with drawers creates an experience closer to a boutique dressing room than a bedroom storage unit. Pull-down hanging rails can bring items stored at height within easy reach, making the most of ceiling height without sacrificing accessibility.

For minimalists, the goal is often the opposite — a single-wall fitted design with handleless sliding doors, clean painted finishes, and a simplified internal layout that keeps surfaces clear and the overall aesthetic calm. The wardrobe almost disappears into the room, which is precisely the point.

Couples benefit enormously from clearly divided sections, ensuring that shared storage does not become contested storage. Children’s wardrobes, meanwhile, can be designed with adjustable shelving at a lower starting height, with rails and drawers repositioned as the child grows — meaning the wardrobe evolves alongside them rather than being outgrown prematurely.

A modern refurbished bedroom with a visible walk-in closet on the left, featuring a chandelier, large windows, and an adjacent mirrored closet area.

Functional Upgrades and Modern Features

Contemporary custom built wardrobes can incorporate a range of features that elevate everyday practicality well beyond what standard storage offers. Integrated LED lighting — whether as strips along hanging rails, shelf underlighting, or motion-sensor systems that activate when doors are opened — transforms a wardrobe from a functional box into a considered space. Soft-close doors and drawers reduce noise and wear, contributing to both the quality of day-to-day experience and the longevity of the unit itself.

Built-in mirrors, whether on door fronts or within the interior, are a practical luxury that removes the need for a separate dressing mirror. A pull-out dressing table integrated into the base of the wardrobe is a particularly intelligent solution for smaller rooms where a freestanding vanity would take up too much floor space. Valet rods — small pull-out bars for laying out the following day’s outfit — and integrated charging points for devices are among the more contemporary additions that reflect how wardrobes are increasingly being designed around modern routines rather than simply around clothing.

Planning and Decision-Making

Before approaching a designer or wardrobe company, it is worth investing some time in honest self-assessment. The most useful starting point is identifying where your current storage is genuinely failing — which surfaces are perpetually cluttered, which items are difficult to find or access, and which parts of your room feel inefficient. This gives any designer a clear brief to work from rather than a blank canvas.

Accurate measurements are equally important, including ceiling height, the position of any skirting boards, light switches, radiators, or power sockets that may affect the design, and any structural irregularities that need to be accommodated. From there, it is worth separating must-have features (a specific amount of long-hang space, for instance, or a particular number of drawers) from elements that would be desirable but are not essential.

When communicating with a designer, detailed sketches, lifestyle descriptions, and an in-person site visit all contribute to a more accurate and well-considered outcome. The more clearly you can articulate how you use your wardrobe day-to-day, the more effectively a specialist can translate that into a design that works for you.

Budget, Quality, and Value

The cost of custom made wardrobes varies considerably depending on a number of factors. Size is the most obvious — a full wall of fitted storage will naturally cost more than a single alcove unit. Material choice plays a significant role: solid wood and premium veneers sit at the higher end of the market, while laminates offer a more accessible price point without necessarily compromising on visual quality. The complexity of the design matters too — a straightforward reach-in wardrobe with standard internals costs less than a fully fitted walk-in closet with integrated lighting, bespoke joinery, and premium hardware throughout.

At the budget end of the spectrum, laminate finishes and simpler internal configurations can deliver a clean, functional result that is far superior to flat-pack alternatives. At the premium end, high-end bespoke built in wardrobe solutions using hand-finished veneers, solid drawer boxes, and quality ironmongery come with a higher initial investment but are built to last significantly longer and carry warranty coverage that reflects the quality of the craftsmanship. Evaluating quality through construction standards, material specification, and guarantees is the most reliable way to assess whether a quote represents genuine value rather than simply a low price.

Working With Professionals vs DIY Components

For straightforward spaces and tighter budgets, modular fitted wardrobe systems — available from a number of specialist retailers — can approximate the look of custom built wardrobes at a lower cost. These systems offer more flexibility than fully freestanding furniture and can be configured to suit a range of room sizes, though they are still constrained by standard module dimensions and will struggle to accommodate genuinely irregular spaces.

For complex rooms, high-end results, or truly bespoke outcomes, working with a professional designer and installer is almost always the better route. Specialists bring the expertise to handle intricate spatial challenges, produce a finish that modular systems cannot replicate, and take responsibility for the entire process from design through to installation. The investment is higher and the lead time longer, but the result is a wardrobe built precisely for your space and your life — not adapted from a standard format.

Approach Pros Cons
Specialist Professional Perfect fit, high-end results, complex spaces handled with expertise Higher cost, longer installation lead time
Modular / DIY Systems More budget-friendly, quicker to install Limited customisation, poor fit in irregular spaces

Maintenance and Longevity

One of the less-discussed advantages of a well-designed bespoke built in wardrobe is how much easier it is to keep clean and functional over time. Because fitted wardrobes leave no gaps above or behind them, dust and damp have far fewer opportunities to accumulate — a meaningful practical benefit in older London properties where air circulation can be limited. Soft-close hinges and drawer runners reduce the mechanical wear that comes from daily use, helping the unit retain its quality feel for longer.

In terms of ongoing care, the habits required are minimal. Wood veneers benefit from gentle wiping with a slightly damp cloth, while interior shelves and rails can be vacuumed or wiped down seasonally. Investing in quality ironmongery at the outset — drawer runners, hinges, and door mechanisms from reputable manufacturers — pays dividends over time, since these are the components that receive the most daily stress and are the most likely to show wear in cheaper products.

Conclusion

Custom made wardrobes represent one of the most genuinely transformative investments you can make in your home. They solve real, persistent storage problems, make the most of space that standard furniture simply cannot use, and deliver a finish that elevates the look and feel of an entire room. Whether you are drawn to the clean lines of a handleless modern design, the warmth of a classic shaker-style bespoke built in wardrobe, or the immersive luxury of a fully fitted walk-in closet, the breadth of built wardrobe ideas available means there is a solution to suit every lifestyle, every room size, and every budget.

The best starting point is always a clear understanding of what you need, an accurate picture of your space, and an honest conversation with someone who knows how to turn both into a wardrobe that works. If you are ready to explore what a bespoke fitted wardrobe could look like in your London home, get in touch with the team at Mimar to discuss your project.

A Comprehensive Guide to Home Renovations

Spacious, modern living room with wooden herringbone flooring and large glass doors leading to a balcony.
Estimated Reading Time: 15 minutes

Introduction: The Renovation Revolution

Across the UK, a “renovation nation” trend is transforming the housing landscape. More homeowners than ever are choosing to update and improve their existing properties rather than relocate. This shift reflects evolving priorities: the desire for personalized living spaces, increased property value, and sustainability considerations, all while navigating rising housing costs and limited new build options.

Whether you’re contemplating a simple home refurbishment or a comprehensive property renovation, this guide will walk you through the end-to-end process and key options available to transform your living space.

Before diving in, it’s worth briefly distinguishing between renovation and remodeling. While often used interchangeably, renovation typically involves refreshing or updating existing elements of your home, while remodeling refers to changing the structure or layout of your space. Understanding this distinction will help clarify the scope and scale of your project from the outset.

Modern kitchen with white cabinetry, marble countertops, and glass partition in a renovated home.

Clarifying Goals and Vision for Your Renovation in London

Every successful home renovation begins with a clear vision. Before picking up a paintbrush or calling a contractor, take time to define what you want to achieve. Are you looking to create more space? Improve your home’s layout? Boost its resale value? Or simply update its aesthetics?

The key to satisfaction with your renovation project lies in distinguishing between needs and wants. Needs are essentials that address functional problems in your home, while wants are desirable features that improve comfort or aesthetics. Using SMART goals (Specific, Measurable, Achievable, Relevant, Time-bound) can help prevent scope creep and keep your project focused.

Common Renovation Scenarios
Full Property Renovation
Cosmetic Refreshes
Layout Changes
Extension Projects

When establishing your renovation vision, consider your lifestyle needs (family size, work-from-home requirements), long-term plans (selling soon or staying put), and neighborhood norms (to ensure your improvements align with local property values). A comprehensive property renovation in London’s Kensington might focus on preserving period features while adding modern amenities, while a refurbishment in an up-and-coming area might prioritize contemporary styling to attract young buyers.

Renovation Tip

Create a vision board of inspiration images to help communicate your style preferences to designers and contractors. Digital platforms like Pinterest or Houzz can be invaluable for collecting and organizing ideas for your home renovations.

Assessing Your Current Property

Before plunging into a remodel or refurbishment, conducting a thorough assessment of your current property is crucial. This initial evaluation identifies potential issues early, preventing costly surprises mid-project and helping determine whether you’re looking at a light home refurbishment or a more extensive renovation.

A comprehensive property assessment typically reviews four key areas:

  • Structure: Foundations, load-bearing walls, roof condition
  • Layout: Traffic flow, space efficiency, natural light
  • Systems: Plumbing, electrical, heating/cooling
  • Finishes: Floors, walls, ceilings, fixtures

While homeowners can self-assess certain aspects using detailed checklists, professional inspections are recommended for critical elements like structural integrity, electrical systems, plumbing, or when purchasing an older property. Particular attention should be paid to damp issues, which are common in London’s older housing stock, and can significantly impact the scope and cost of your renovation.

The findings from your assessment will help determine whether your project falls into the category of light home refurbishment (primarily cosmetic updates) or a deeper property renovation or remodel (involving structural changes). This distinction is crucial for budgeting accurately and setting realistic expectations about timeframes and disruption.

Budgeting and Financial Planning for a Renovation

Realistic budgeting forms the cornerstone of any successful property renovation. Without careful financial planning, even the most inspired renovation concept can quickly become a stressful experience.

The first rule of renovation budgeting is to include a contingency fund—experts recommend setting aside 10-20% of your total budget to cover unexpected issues that may arise once work begins. This is particularly important when renovating older properties in London, where hidden problems behind walls or under floors are common.

For effective budget allocation, consider the following typical breakdown:

Budget Category Typical Allocation Notes
Labor 40-50% Higher in London due to skilled trade shortages
Materials 25-35% Quality varies significantly by price point
Permits & Fees 5% More for listed buildings or conservation areas
Contingency 10-20% Essential buffer for unexpected issues

Different types of home renovations come with varying cost implications. According to market data, kitchen renovations in London typically range from £10,000-£30,000 depending on the quality of fixtures and appliances, while bathroom overhauls cost between £5,000-£15,000. A comprehensive property renovation can start at £50,000 and easily reach six figures for larger homes.

When considering financing options, homeowners typically choose between savings, home equity loans, refinancing existing mortgages, or using 0% credit cards for smaller refurbishment projects. Each option has advantages and drawbacks, making it important to consult with a financial advisor before proceeding.

Finally, it’s crucial to balance renovation goals with potential return on investment. While kitchens and bathrooms typically yield a 50-70% return, more personal or niche renovations may not add equivalent value. The London property market has specific preferences, so understanding local buyer expectations can help prioritize renovation elements that maximize resale potential.

Planning, Design, and Scope Definition

Defining your project’s scope is essential for keeping your home renovations on track, both in terms of budget and timeline. Clear scope definition means identifying exactly which rooms will be involved, the level of finish you expect (from budget to luxury), and establishing a realistic timeline.

The design phase of your renovation involves making decisions about:

  • Layouts: How spaces will flow and function
  • Materials: Balancing durability, aesthetics, and cost
  • Styles: Creating a cohesive look that suits your taste

For simple refurbishment projects, many homeowners successfully use planning templates and basic software tools to organize their ideas. However, for more complex remodels involving structural changes, professional input becomes invaluable. Architects and interior designers bring not only creative vision but also technical knowledge of building regulations and structural possibilities.

Consider incorporating future flexibility into your designs, particularly if your needs may change in coming years. Modular solutions, multi-purpose rooms, or planning for potential extensions can extend the lifespan of your renovation investment. Similarly, taking a staged approach—renovating one room at a time—can make the process more manageable both financially and logistically.

Planning Tip

Create a detailed room-by-room inventory of all fixtures, materials, and finishes before starting your renovation. This document becomes invaluable when shopping for materials and communicating with contractors about your vision.

Renovation vs Remodel vs Refurbishment – Understanding Your Options in London

The terms renovation, remodel, and refurbishment are often used interchangeably, but understanding their distinctions helps clarify the scope, cost, and disruption level of your project.

Renovation typically involves updating existing elements of your home without major structural changes. This might include new paint, replacing fixtures, updating flooring, or modernizing outdated features. Renovations are ideal when the fundamental layout works but the space needs refreshing. In London, renovation projects often cost between £2,000-£20,000 and cause minimal disruption.

Remodel projects involve altering the structure or layout of your property. This might include removing walls to create open-plan spaces, adding extensions, or completely reconfiguring room layouts. Remodels transform how spaces function and generally cost upwards of £20,000, with significant disruption during construction. According to industry experts, remodeling projects typically take 2-3 times longer than renovations of similar-sized spaces.

Home refurbishment generally refers to cosmetic and surface-level improvements—essentially “refreshing” a space without major changes to functionality. This might include redecorating, new flooring, or updating fixtures. Refurbishments are the least invasive option, typically costing between £1,000-£10,000, and are particularly popular for rental properties or homes being prepared for sale.

Type Typical Work Cost Range (London) Timeframe
Renovation Updating existing elements, no major structural changes £2,000-£20,000 2-6 weeks
Remodel Structural changes, layout alterations, extensions £20,000+ 6 weeks-6 months
Refurbishment Cosmetic updates, decorative changes £1,000-£10,000 1-4 weeks

Many successful property projects combine elements of all three approaches for efficiency and impact. For example, you might remodel the kitchen layout while simply renovating bathrooms and refurbishing bedrooms with new paint and fixtures.

Navigating the legal and regulatory landscape is a crucial aspect of any property renovation in London. Before beginning work, it’s essential to check whether your project requires planning permission, building regulations approval, or other permits.

Planning permission is typically required for:

  • Extensions exceeding certain size limits (generally over 3-4 meters from the original building)
  • Major changes to external appearance
  • Changes to listed buildings
  • Alterations in conservation areas

Building regulations approval is needed for most structural work, regardless of whether planning permission is required. This ensures your renovations meet safety standards for structure, fire safety, ventilation, and energy efficiency. Failure to comply with building regulations can result in enforcement action, requiring you to rectify the work or even remove it entirely.

The scale of approvals needed generally correlates with the scope of your project. Cosmetic home renovations often require no formal approvals, while full remodels need comprehensive planning permission and building control oversight. London’s diverse mix of housing stock, from Victorian terraces to modern apartments, means regulations can vary significantly depending on your property type and location.

Safety considerations should be paramount throughout your renovation. Electrical work must comply with Part P of Building Regulations and should be completed by a certified electrician. Similarly, structural modifications should be approved by a structural engineer, and all gas work must be carried out by Gas Safe registered professionals.

If you live in a conservation area or a property with listed status, additional restrictions may apply to what changes you can make, particularly to exteriors. Similarly, if you live in a leasehold property, you’ll likely need permission from the freeholder before undertaking significant renovations.

Choosing the Right Professionals for Your London Property Renovation

Selecting the right team can make the difference between a smooth renovation and a stressful one. For significant home renovations, you may need several types of professionals:

  • General Contractors: Oversee the entire project and coordinate subcontractors
  • Architects/Designers: Create plans and ensure aesthetic cohesion
  • Specialists: Including plumbers, electricians, carpenters, and plasterers
  • Structural Engineers: Essential for projects involving load-bearing modifications

When evaluating professionals for your property renovation, look for credentials such as membership in professional bodies (like Checkatrade or the Federation of Master Builders), comprehensive insurance coverage, and a portfolio of similar projects. For London-specific expertise, professionals familiar with the unique challenges of the capital’s housing stock—from period features to party wall agreements—will be invaluable.

Always request at least three detailed quotes for comparison. Focus not just on the total cost but on the breakdown of labor, materials, and time estimates. The cheapest quote isn’t necessarily the best value if it excludes important elements or uses inferior materials.

Once you’ve selected your team, clear contracts are essential. These should specify scope, timeline, payment schedule, and how variations to the original plan will be handled. Regular communication is crucial throughout the project—many successful renovations use dedicated project management apps to keep everyone informed and document decisions.

Hiring Tip

Ask potential contractors for references from clients whose projects were completed at least a year ago. This gives insight into not just the quality of the initial work but how well it has stood the test of time.

DIY vs Professional Work in Home Renovations

The decision between DIY and professional work depends on your skills, available time, and the nature of the renovation tasks. While taking on certain aspects yourself can save money, it’s important to recognize which elements of home renovations are suitable for DIY and which demand professional expertise.

Tasks generally considered DIY-friendly include:

  • Painting and decorating
  • Minor tiling projects
  • Simple flooring installation (laminate, vinyl)
  • Cabinet hardware replacement
  • Basic landscaping

Tasks that typically require professional skills include:

  • Electrical work (legally mandated in many cases)
  • Plumbing beyond simple fixture replacement
  • Structural modifications
  • Gas installations or modifications
  • Complex tiling or flooring

The trade-offs between DIY and professional work extend beyond cost savings. DIY projects often take significantly longer and may not achieve the same quality as professional work. While you might save 20-30% on labor costs, this needs to be weighed against time investment, tool purchases, and potential for costly mistakes.

A balanced approach that many homeowners find effective is to hire professionals for specialized, critical, or structural work, then take on finishing touches like painting or decorating themselves. This partial DIY approach can be particularly effective in larger property renovations, allowing you to control costs while ensuring quality where it matters most.

Remember that DIY work still needs to comply with relevant building regulations, particularly for structural, electrical, or plumbing modifications. Improper work can void insurance policies and cause complications when selling your property.

The Step-by-Step Renovation Process in London

Understanding the typical sequence of a renovation project helps set realistic expectations about timelines and disruption. While every property renovation is unique, most follow a similar pattern:

  1. Pre-construction (2-4 weeks): Finalizing designs, obtaining permits, selecting materials, and securing contractors. This phase involves planning and paperwork rather than physical changes.
  2. Demolition (1-2 weeks): Removing unwanted elements such as old fixtures, flooring, or wall coverings. This is typically dusty and noisy, making it one of the most disruptive phases.
  3. Rough work (2-6 weeks): Installing or modifying structural elements, plumbing, electrical systems, and HVAC. This is when the “bones” of your renovation take shape behind the scenes.
  4. Finishes (2-4 weeks): Adding drywall, plastering, painting, installing fixtures, cabinetry, flooring, and other visible elements. This is when your space begins to look like the finished product.
  5. Cleanup and inspection (1 week): Final touches, thorough cleaning, and official inspections. This phase transitions the space from a construction site to a livable home.

The timeline and disruption level vary significantly based on project scope. Small home refurbishments might take just 1-4 weeks with minimal impact on daily life, while full property renovations can extend to 3-12 months with major disruptions to normal routines.

London renovations often face unique challenges that can affect timelines, including parking restrictions for deliveries, limited working hours in residential areas, and the complexities of working in older buildings with non-standard dimensions and hidden surprises. Planning for these contingencies in advance helps keep projects moving smoothly.

Renovation Timeline
Pre-construction: 2-4 weeks
Demolition: 1-2 weeks
Rough work: 2-6 weeks
Finishes: 2-4 weeks
Cleanup: 1 week

Design Themes, Materials, and Functionality

Creating a cohesive design across your home renovations enhances both aesthetic appeal and property value. Whether you’re undertaking a full property renovation or a focused remodel, consistency in color schemes, materials, and styling creates a polished, professional result.

When selecting materials and finishes, consider the balance between:

  • Durability: How well materials will withstand daily use and time
  • Maintenance requirements: The ongoing care needed to keep elements looking their best
  • Energy efficiency: How choices impact heating, cooling, and lighting costs
  • Sustainability: Environmental impact of materials and production methods

In London’s property market, certain design choices consistently add value. Neutral color palettes with strategic accents appeal to the broadest range of potential buyers. Smart home technology—from heating controls to security systems—increasingly features on buyers’ wish lists. Quality fixtures in kitchens and bathrooms typically yield the strongest return on investment, with potential property value increases of 5-10% for well-executed renovations.

Consider how your design choices will age over time. Trend-driven design elements may feel dated quickly, while classic approaches tend to maintain appeal longer. This is particularly relevant in London’s period properties, where blending contemporary functionality with heritage character often creates the most desirable results.

Design Tip

If budget constraints mean prioritizing certain areas, focus on spaces where quality is most noticeable—typically kitchens, bathrooms, and main living areas. Secondary spaces can use more cost-effective solutions without significantly impacting overall impression.

Common Challenges and How to Overcome Them

Even the most meticulously planned home renovations encounter challenges. Being aware of common pitfalls can help you navigate them effectively when they arise.

Scope creep—the gradual expansion of project goals beyond the original plan—is perhaps the most prevalent issue in property renovation. This often happens incrementally (“while we’re at it, let’s also…”) but can increase costs by 20-50% and extend timelines significantly. Combat this by documenting your original scope clearly and evaluating any proposed changes against your budget and timeline before approving them.

Under-budgeting is another frequent challenge, particularly when contingency funds are inadequate or omitted entirely. Industry experts recommend maintaining a contingency of at least 15% for renovations and 20% for remodels involving structural work or older properties.

Poor planning—including unrealistic timeframes or scheduling dependencies—can cascade into delays across an entire project. Mitigate this risk by using detailed project templates, building buffer time into your schedule, and ensuring materials are ordered well in advance of when they’re needed.

When unexpected issues are discovered during a renovation (such as rot, outdated wiring, or asbestos), the best approach is to pause, consult relevant professionals, and reassess your plan. While this may feel like a setback, addressing these issues properly is invariably less expensive than dealing with their consequences later.

Communication breakdowns between homeowners, contractors, and subcontractors frequently lead to misunderstandings and mistakes. Establish clear communication channels from the outset, document all decisions in writing, and schedule regular progress meetings to keep everyone aligned.

Living Through a Renovation in London

The practical realities of daily life during a renovation require careful consideration. The impact varies widely depending on project scope—a full house remodel creates substantially more disruption than a focused home refurbishment.

Typical disruptions include:

  • Noise and dust throughout the property
  • Limited or no access to certain rooms
  • Temporary loss of utilities (water, electricity, heating)
  • Reduced privacy with contractors present
  • Limited cooking facilities during kitchen renovations

Homeowners typically have two options: stay in the property during works or relocate temporarily. Staying in place is more economical but requires flexibility and tolerance for disruption. For major renovations in London, temporary accommodation costs (hotels, Airbnb, or short-term rentals) should be factored into your budget if you choose to relocate.

If staying during the renovation, consider these strategies to minimize disruption:

  • Sequence work strategically (leaving kitchen functional until last possible moment)
  • Create sealed work zones using plastic sheeting and tape
  • Establish a dust management protocol with contractors
  • Set up temporary kitchen facilities in another room
  • Schedule noisy work during times when you’re typically out

London’s compact living spaces can make living through renovations particularly challenging. Many London homeowners find creative solutions like working from cafés during the day, using neighbors’ facilities temporarily, or even scheduling renovation work during planned holidays.

After the Renovation

The final phase of any property renovation is ensuring everything is completed to standard and properly documented. Before making final payments, conduct a thorough inspection and create a “snag list” of items needing attention. Common snags include uneven paint, imperfect tiling, non-functioning fixtures, or incomplete cleanup.

Once these items are addressed, collect and organize all relevant documentation:

  • Building control certificates and approvals
  • Electrical and gas safety certificates
  • Warranties for new appliances, materials, and workmanship
  • Before and after photographs (valuable for insurance and potential future sale)
  • Final receipts and proof of payment

Establishing a maintenance plan helps protect your investment in home renovations. This might include scheduling routine checks of new systems, understanding care requirements for specialty materials, and budgeting for ongoing maintenance costs.

Consider updating your home insurance after significant renovations to ensure your coverage reflects the improved value of your property. Similarly, if you’ve increased your home’s square footage or made substantial improvements, you may need to notify your local council for council tax purposes.

After-Renovation Tip

Create a digital “home manual” with all warranties, maintenance schedules, paint colors, and contractor contacts. This becomes invaluable for future maintenance or if you eventually sell the property.

Room under renovation with drywall, light fixtures, and a covered HVAC unit, indicating ongoing refurbishment work.

Individual home renovations connect to wider trends reshaping London’s housing landscape. The “renovation nation” phenomenon reflects shifting priorities toward improving existing properties rather than building new ones, driven by sustainability concerns, limited developable land, and the unique character of London’s historic housing stock.

Property renovation and home refurbishment projects increasingly emphasize energy efficiency, with improvements like enhanced insulation, smart heating systems, and high-performance windows. These updates not only reduce environmental impact but also deliver tangible financial benefits—studies indicate that proper insulation alone can cut energy bills by around 20%.

As remote and flexible working becomes more established, renovations increasingly focus on creating functional home offices, multi-purpose spaces, and better indoor-outdoor connections. London’s premium on space makes clever remodeling that maximizes functionality particularly valuable.

The preservation and thoughtful modernization of period properties—from Victorian terraces to converted warehouses—continues to be a hallmark of London’s renovation landscape. Projects that successfully blend heritage character with contemporary convenience command premium prices in the capital’s competitive property market.

Conclusion

Embarking on a property renovation journey requires careful planning, realistic budgeting, and informed decision-making. Whether you’re considering a light home refurbishment, a targeted remodel, or a comprehensive renovation, the principles outlined in this guide provide a roadmap for success.

Remember that the most successful home renovations balance three key elements: clear goals that reflect your lifestyle needs, realistic budgets that include contingency planning, and quality professional support where needed. By approaching your project systematically—assessing your property thoroughly, defining your scope clearly, and selecting the right team—you can transform your living space while managing costs and minimizing stress.

As part of the UK’s “renovation nation” trend, your property investment contributes to the sustainable use of existing housing stock while creating a home that better meets your needs. Whether you’re updating a London terrace, renovating a suburban semi, or refurbishing an urban apartment, the satisfaction of seeing your vision realized makes the renovation process ultimately rewarding.

With this comprehensive guide as your foundation, you’re well-equipped to navigate the complexities of home renovations and enjoy the benefits of your transformed living space for years to come.

Exploring the Benefits of a Hip to Gable Loft Conversion

Luxuriously refurbished bedroom with elegant decor, featuring a large bed, modern chandelier, and open French doors leading to a balcony.
Estimated Reading Time: 10 minutes

Introduction to Hip to Gable Loft Conversions

A hip to gable loft conversion represents one of the most transformative home improvement projects available to London homeowners. This specialized conversion takes an underutilized attic space beneath a sloped hip roof and dramatically expands it by replacing one or more sloping sides with a vertical wall—called a gable end. The result is a spacious, practical living area where previously there was just cramped storage space.

For properties with hipped roofs—a common feature in London’s semi-detached houses and bungalows built between the 1930s and 1950s—this conversion unlocks tremendous potential that other loft conversion types simply cannot match. Where the sloping sides of a traditional hipped roof severely limit headroom and usable floor space, a hip to gable conversion creates vertical walls and a higher ceiling, transforming awkward attic space into valuable living area.

This comprehensive guide will explore exactly what a hip to gable loft conversion entails, the variations available, key benefits, planning considerations specific to London properties, costs, and practical advice to help you determine if this conversion type is right for your home. Whether you’re looking to create additional bedrooms, a luxurious master suite, a home office, or simply increase your property’s value, a hip and gable loft conversion offers compelling advantages worth considering.

A modern bedroom with a large bed, decorative padded wall panels, stylish chandelier, and side tables, showcasing a contemporary refurbishment.

What Is a Hip to Gable Loft Conversion?

To understand the hip to gable loft conversion process, we first need to clarify the structural elements involved. A traditional hipped roof slopes downward on all sides of the property, creating a pyramid-like shape with the ridge at the top. While architecturally pleasing, this design inherently limits usable attic space because the sloping sides reduce headroom significantly as you move away from the central ridge.

In contrast, a gable end is a vertical triangular wall that extends from the eaves to the ridge of the roof. Properties with gable ends typically have much more usable loft space because the vertical walls provide full headroom right to the edges of the building.

A hip to gable loft conversion (also called a hip to gable end loft conversion) transforms a hipped roof by extending the ridge line and replacing one of the sloping sides with a vertical gable wall. This structural modification dramatically increases both the headroom and floor area within the loft space, making it suitable for conversion into proper living accommodation.

Hip to Gable Conversion Basics
Extends ridge line
Creates vertical wall
Increases headroom
Expands floor space
Transforms roof profile
Utilizes existing structure

The terminology around these conversions can sometimes be confusing. You may hear variations like “hip to gable attic conversion” or “hip and gable loft conversion”—these all refer to essentially the same structural transformation. The term “hip and gable” specifically indicates that the finished roof will contain both hip elements (on the remaining sides) and the new gable end.

This conversion type is particularly well-suited to specific property types in London. Semi-detached houses, end-of-terrace properties, and detached homes with hipped roofs are ideal candidates. The conversion works by extending the existing ridge line to create a new triangular gable end wall where previously there was a sloping hip. Specialist loft conversion companies accomplish this by building up the bottom of the side slope, maintaining structural integrity while creating significantly more internal space.

It’s worth noting that mid-terraced houses are typically not suitable for hip to gable conversions as they lack the necessary hip end roof structure. However, most other property types with hipped roofs can benefit tremendously from this conversion style.

Types of Hip to Gable Loft Conversions in London

The hip to gable conversion concept can be implemented in several configurations depending on your property’s structure and your space requirements. Understanding the variations available will help you determine which approach best suits your London home.

Standard Hip to Gable Conversion

The most straightforward approach is a single-sided hip to gable conversion. This involves replacing just one sloping hip (typically at the side of the property) with a vertical gable wall. This configuration works well for semi-detached and end-of-terrace properties in London, where one side of the roof adjoins a neighboring property while the other is exposed. The conversion extends the ridge line and creates a vertical end wall, substantially increasing the usable floor area.

Double Hip to Gable Conversion

For detached properties in London with hipped roofs on both ends, a double hip to gable conversion replaces both sloping hips with vertical gable walls. This maximizes the potential space gain and creates a more symmetrical external appearance. This approach is particularly effective for bungalows or detached houses where the goal is to create multiple rooms or a very spacious single area.

Hip to Gable with Rear Dormer

Many London homeowners combine a hip to gable conversion with a rear dormer extension to maximize both headroom and floor space. This combination creates a vast, box-shaped room that’s ideal for luxurious master suites or multiple bedrooms with an en-suite bathroom. The hip to gable element transforms the side profile while the rear dormer extends the back, resulting in a comprehensive loft transformation that maximizes the potential living space.

This combined approach is particularly popular in London where property prices make maximizing every square meter essential. The resulting space often features excellent natural light from both gable-end windows and dormer windows or French doors.

Hip to Gable Attic Conversion for Bungalows

Bungalows with hipped roofs present an exceptional opportunity for hip to gable attic conversions. By converting a single-story bungalow’s roof space, homeowners can effectively double their living space without extending the property’s footprint. In London’s crowded neighborhoods where garden space is precious, this upward expansion offers substantial benefits compared to ground-floor extensions.

The hip to gable end loft conversion is particularly transformative for bungalows, often creating enough space for multiple bedrooms and bathrooms on a new floor level. Given the relatively low starting point of bungalow roofs, these conversions frequently incorporate dormer windows to maximize headroom.

Property Suitability Tip

Before committing to a hip to gable loft conversion, have a specialist assess your property’s specific roof structure. Some London properties built in conservation areas or with unusual roof configurations may require modified approaches or additional planning considerations.

Key Benefits of Hip to Gable Conversions

A hip to gable loft conversion delivers multiple compelling advantages that make it one of the most popular home improvement projects for suitable London properties. Understanding these benefits will help you evaluate whether this conversion type aligns with your goals.

Dramatic Space Increase

The primary benefit is the substantial gain in usable living space. A hip to gable conversion can add an extra 2 meters of head space and typically increases living area by at least 20m². This transformation turns restrictive attics into large, practical living areas with straight walls and good headroom throughout most of the space.

Regular-Shaped, Functional Rooms

Unlike simpler loft conversions that work within the existing roof profile, a hip and gable loft conversion creates box-shaped rooms with vertical walls. This makes the space significantly more functional for furniture placement and interior design. The straight walls and increased headroom enable creative layouts not possible with sloped ceilings, allowing for standard furniture and fixtures without customization.

Versatile Use Options

The additional space created by a hip to gable attic conversion offers remarkable versatility. Depending on your needs, the new space can accommodate:

  • Additional bedrooms (typically 1-2 extra bedrooms)
  • A master suite with walk-in wardrobe and en-suite bathroom
  • A spacious home office or studio
  • A children’s playroom
  • A teenage retreat or guest accommodation
  • A home gym or yoga studio

Significant Property Value Enhancement

In London’s competitive property market, a well-executed hip to gable conversion can add 10-20% to your property’s value. This makes it one of the highest-return home improvements available, often paying for itself when the property is eventually sold. The added square footage and improved functionality make properties significantly more attractive to potential buyers, particularly in markets with high housing demand.

Enhanced Exterior Aesthetics

Beyond the interior benefits, a hip to gable conversion often improves the property’s external appearance by creating a more substantial and balanced roofline. The transformation creates a more imposing visual profile and can improve aesthetic uniformity within neighborhoods, particularly benefiting semi-detached properties where neighboring homes may already have similar conversions.

Improved Natural Light

The new vertical gable end can accommodate standard windows, adding extra light sources and pleasant views. Combined with rear dormer windows or skylights, this dramatically increases natural light in the space, creating bright, welcoming rooms that feel spacious and airy.

Energy Efficiency Gains

Modern hip to gable conversions incorporate high-performance insulation, energy-efficient windows, and contemporary building techniques that can improve your home’s overall thermal efficiency. These improvements often reduce energy consumption and lower heating bills while creating a more comfortable living environment year-round.

Garden Space Preservation

Unlike ground-floor extensions that consume precious garden space, hip to gable loft conversions expand your living area without reducing outdoor space—a significant advantage in London where garden space is highly valued. This makes the conversion an eco-friendlier choice that maintains your property’s external footprint while maximizing internal space.

Comparing with Other Loft Conversion Types

Understanding how hip to gable conversions compare to other loft conversion styles will help you determine which option best suits your London property and specific requirements.

Conversion Type Best For Space Gained Relative Cost
Hip to Gable Semi-detached, end-of-terrace, detached with hipped roof Substantial (adds floor space and headroom) Medium-high
Dormer Only Properties with adequate existing headroom Moderate (adds headroom but not floor area) Medium
Mansard Conservation areas, terraced houses Maximum possible Highest
Rooflight/Velux Properties with adequate existing space Minimal (no structural changes) Lowest

Hip to Gable vs. Dormer Conversions

While dormer conversions add headroom by extending vertically from a sloped roof, they don’t fundamentally alter the roof structure. In contrast, hip to gable end loft conversions transform the entire roof profile to create more usable floor area and headroom. For properties with hipped roofs, a dormer alone often doesn’t create sufficient space, making hip to gable (or a combination of both) a more effective solution.

Hip to Gable vs. Mansard Conversions

Mansard conversions replace the entire roof structure with a nearly vertical wall and a flattened top, maximizing internal space. While mansards create slightly more space than hip to gable conversions, they involve more extensive structural changes, typically cost significantly more, and often require planning permission. Hip to gable conversions generally offer a better balance of space gained versus cost and complexity for suitable properties.

Hip to Gable vs. Rooflight Conversions

Rooflight (Velux) conversions simply add windows to the existing roof without changing its structure. While this is the most affordable option, it creates no additional headroom or floor space. Hip to gable conversions are substantially more expensive but deliver dramatically more usable space, making them a better long-term investment for properties with hipped roofs.

Combination Approaches

Many London homeowners opt for a combination of hip to gable with rear dormers to maximize space gain. This approach transforms the side profile with the hip to gable conversion while extending the rear with a dormer, creating a comprehensive solution that maximizes potential living space from the existing roof structure.

Planning Permission and Building Regulations in London

Navigating the planning landscape is a crucial aspect of any hip to gable loft conversion project in London, where regulations can vary by borough and property location.

Permitted Development Rights

In many cases, hip to gable loft conversions in London fall under permitted development rights, meaning they don’t require full planning permission. However, this depends on several factors:

  • Your property type and location
  • Whether your home is in a conservation area
  • If your property is listed
  • Whether you’ve already used up your permitted development allowance with previous extensions

Even when permitted development rights apply, you’ll need to adhere to specific criteria regarding height, materials, and window placements. Professional guidance is essential as the rules can be complex and vary by London borough.

Building Regulations Compliance

All hip to gable conversions must comply with building regulations regardless of planning permission requirements. These regulations cover critical aspects including:

  • Structural stability
  • Fire safety (including escape routes)
  • Staircase specifications
  • Energy efficiency and insulation standards
  • Sound insulation
  • Electrical safety

For London properties, building regulations compliance is particularly stringent, and you’ll need professional architectural plans and building control approval before and during the construction process.

Party Wall Agreements

For semi-detached or terraced properties in London, hip to gable loft conversions typically require party wall agreements with adjoining neighbors. These legal documents protect both parties during construction work that affects shared walls or boundaries. The process involves:

  • Serving formal notice to neighbors
  • Obtaining consent or appointing party wall surveyors
  • Creating a legally binding agreement
  • Documenting the condition of neighboring properties before work begins

Structural Considerations

Hip to gable conversions involve significant structural changes that require professional assessment. Key structural considerations include:

  • Existing roof structure evaluation
  • Load-bearing capabilities of supporting walls
  • Foundation assessment
  • New structural beam calculations

Given London’s varied housing stock, from Victorian terraces to 1930s semi-detached homes, professional structural engineering input is essential to ensure the conversion is safe and compliant with all regulations.

The Hip to Gable Conversion Process

Understanding the typical process and timeline for a hip to gable loft conversion will help you plan effectively and know what to expect during your project.

Initial Assessment and Design (2-4 weeks)

The process begins with a professional survey of your property to assess feasibility and identify any structural challenges. This is followed by architectural design work that considers both the structural requirements and your vision for the space. During this phase, you’ll work with architects or designers to:

  • Develop floor plans and elevations
  • Consider window placements and natural light
  • Plan the staircase location and design
  • Decide on room layouts and uses
  • Specify materials and finishes

Planning and Approvals (4-8 weeks)

With designs finalized, the next stage involves securing necessary permissions and approvals:

  • Submitting for planning permission (if required) or obtaining a certificate of lawful development
  • Applying for building regulations approval
  • Arranging party wall agreements with neighbors
  • Securing any other required permissions specific to your London location

The timeline for this phase varies depending on your local borough’s processing times and whether any revisions or additional information are required.

Contractor Selection and Preparation (2-4 weeks)

With approvals in place, you’ll select a suitable contractor through a tendering process and prepare for construction:

  • Obtaining detailed quotes from multiple contractors
  • Checking references and previous hip to gable projects
  • Finalizing the construction schedule and payment schedule
  • Arranging for temporary accommodations if necessary
  • Preparing the property (clearing the loft space, protecting furnishings)

Construction Phase (8-12 weeks)

The construction of a hip to gable loft conversion typically follows these stages:

  1. Scaffolding and roof protection – Ensuring the property remains weatherproof during construction
  2. Structural modifications – Removing the hip section and constructing the new gable end
  3. Roof alterations – Extending the ridge line and installing new rafters
  4. Floor reinforcement – Strengthening the existing ceiling joists to serve as floor joists
  5. First-fix services – Installing electrical wiring, plumbing, and heating systems
  6. Insulation and boarding – Applying high-performance insulation and plasterboard
  7. Staircase installation – Constructing the new access staircase
  8. Second-fix services – Installing sockets, switches, radiators, and bathroom fixtures
  9. Plastering and decoration – Finishing walls and ceilings
  10. Final finishing – Flooring, painting, and final touches

Inspection and Completion (1-2 weeks)

The final phase involves inspection by building control, addressing any minor issues (snagging), and obtaining completion certificates. Once these are in place, your new hip to gable loft conversion is ready to use.

A modern residential staircase with wooden handrails and carpeted steps in a newly refurbished hallway.

Project Management Tip

Weekly progress meetings with your contractor are essential for maintaining momentum and addressing any issues promptly. This is particularly important in London where logistical challenges like restricted access or parking limitations can affect timelines.

Costs and Financial Considerations

Understanding the financial aspects of a hip to gable loft conversion will help you budget effectively and assess the return on investment.

Typical Cost Ranges in London

Hip to gable loft conversions in London generally range from £35,000 to £60,000, depending on several factors:

  • Property size – Larger properties require more materials and labor
  • Complexity – Unusual roof structures or difficult access increase costs
  • Specification level – Premium fixtures, fittings, and finishes add to the budget
  • Additional features – En-suite bathrooms, custom built-in furniture, or specialized lighting
  • Location within London – Central London projects typically cost 10-15% more than outer boroughs

Cost Breakdown

To help you understand where your budget will be allocated, here’s a typical cost breakdown:

Element Percentage of Total Cost
Structural work and roofing 30-35%
Windows and dormers (if included) 10-15%
Staircase installation 5-10%
Insulation and plastering 10-15%
Electrics and plumbing 10-15%
Bathroom installation (if included) 10-15%
Finishing (painting, flooring, etc.) 10-15%
Professional fees and planning 5-10%

Additional Costs to Consider

Beyond the core conversion costs, budget for:

  • Architectural fees – £1,500-£3,000 for designs and plans
  • Structural engineer fees – £800-£1,500 for calculations and specifications
  • Building regulations fees – £500-£1,000 for inspections and certificates
  • Party wall agreements – £700-£1,000 per affected neighbor
  • Planning permission – £206 (if required)
  • Contingency budget – 10-15% of the total project cost for unexpected issues

Return on Investment

In London’s property market, a well-executed hip to gable loft conversion typically adds 10-20% to your property’s value. This significant increase often means the project pays for itself when the property is eventually sold. The return is typically higher in areas with premium property values and where space is at a premium.

Financing Options

Most London homeowners fund hip to gable conversions through:

  • Mortgage refinancing – Releasing equity from your property
  • Home improvement loans – Specific financing for renovation projects
  • Savings – Personal funds allocated for home improvements
  • Staged payment plans – Arrangements with contractors for phased payments

Value Maximization Tip

To maximize return on investment, focus on creating versatile spaces that appeal to a wide range of potential future buyers. A well-designed bathroom and quality finishes typically deliver the best returns.

Common Questions About Hip to Gable Conversions

Addressing frequent homeowner concerns will help you approach your project with confidence and realistic expectations.

How disruptive is the construction process?

A hip to gable loft conversion is less disruptive than many other major renovations because most of the work is conducted from scaffolding outside the property or within the loft space itself. Most homeowners continue living in their property throughout the project. The most disruptive phases are:

  • The initial structural work (1-2 weeks) when the roof is partially open
  • Staircase installation (2-3 days) which connects to existing living areas
  • First-fix electrical work which may require power shutdowns

A good contractor will minimize disruption by carefully scheduling work and maintaining clean, safe working practices.

Will I need to move out during the conversion?

Most London homeowners remain in their properties during hip to gable conversions. However, if you have young children, work from home, or are particularly sensitive to noise and disruption, you might consider alternative arrangements during the most intensive 2-3 week period of structural work.

How will the conversion affect my neighbors?

Impact on neighbors is a significant consideration, particularly in London’s closely spaced housing. Key neighbor considerations include:

  • Noise disruption during working hours (typically 8am-5pm weekdays)
  • Scaffolding that may partially extend over or near their property
  • Shared party wall considerations for semi-detached or terraced homes
  • Potential privacy impacts from new windows

Clear communication with neighbors before and during the project is essential for maintaining good relationships. Formal party wall agreements protect both parties’ interests when structural work affects shared walls.

How do I choose a reliable contractor?

For London hip to gable loft conversions, look for contractors who:

  • Specialize in loft conversions rather than general builders
  • Have specific experience with hip to gable attic conversions
  • Provide references and examples of similar completed projects in your area
  • Hold appropriate insurance and guarantees
  • Are members of relevant trade associations
  • Have good reviews and ratings online
  • Provide detailed, transparent quotes

Always meet contractors in person, visit previous projects if possible, and never pay the full amount upfront. A staged payment schedule tied to completion milestones offers protection for both parties.

What are the potential drawbacks or limitations?

While hip to gable conversions offer numerous benefits, they do have some limitations:

  • Not suitable for all properties – Mid-terraced houses typically cannot have this conversion type
  • Exterior appearance change – The property’s profile will be permanently altered
  • Significant investment – Higher upfront cost than simpler conversion types
  • Construction complexity – More involved structural work than dormer-only conversions
  • Potential planning hurdles – Some London boroughs or conservation areas have specific restrictions

Discuss these considerations with your architect or conversion specialist to determine if the benefits outweigh any potential drawbacks for your specific property and circumstances.

Real-World Examples and Applications

Examining real-world applications of hip to gable loft conversions helps illustrate their potential and versatility in London homes.

Case Study 1: 1930s Semi-Detached Home in North London

A family in Finchley transformed their three-bedroom 1930s semi-detached house by adding a hip to gable loft conversion with a rear dormer. The project converted an unusable attic space into a spacious master bedroom with en-suite bathroom and built-in wardrobes, adding approximately 26m² of living space. The conversion included a new staircase rising from the first-floor landing and two large skylights in addition to the gable-end window.

This transformation allowed the growing family to remain in their beloved neighborhood rather than relocating to a larger property. The conversion cost approximately £45,000 but increased the property’s value by an estimated £90,000-£100,000, representing an excellent return on investment while providing the additional space the family needed.

Case Study 2: Bungalow Hip to Gable Attic Conversion in East London

A retired couple in Wanstead converted their single-story bungalow using a hip to gable attic conversion combined with dormers. This transformation created an entire new floor comprising two bedrooms and a shower room. The previously unused roof space was transformed into approximately 35m² of living area, effectively doubling the property’s usable space.

The project enabled the owners to accommodate visiting family and create a home office without sacrificing their garden with a ground-floor extension. The construction cost approximately £50,000 but added an estimated £120,000 to the property’s value in this desirable East London location, while also future-proofing the home for the owners’ changing needs.

Case Study 3: End-of-Terrace Hip to Gable End Loft Conversion in South London

A professional couple in Clapham converted the loft of their Victorian end-of-terrace property with a hip to gable end loft conversion. The project transformed the cramped attic into a luxurious home office and occasional guest bedroom with an adjoining shower room. The new space featured a large gable-end window offering views across London and creating a light-filled workspace.

This conversion allowed both homeowners to work remotely several days per week, eliminating long commutes and improving their work-life balance. The project cost approximately £40,000 but significantly enhanced both the property’s livability and its market appeal in an area where dedicated home office space commands a premium.

These case studies demonstrate how hip and gable loft conversions can address various needs and property types across London, from family homes requiring additional bedrooms to properties being adapted for home working or multigenerational living.

Conclusion: Is a Hip to Gable Conversion Right for You?

A hip to gable loft conversion represents one of the most transformative home improvements available to London homeowners with suitable properties. By replacing sloping hip roof sections with vertical gable walls, this specialized conversion dramatically increases usable space, creating regular-shaped rooms with good headroom throughout.

The hip to gable attic conversion is particularly valuable in London’s competitive property market, where space comes at a premium and moving costs are substantial. With the potential to add 10-20% to your property’s value, these conversions often represent an excellent return on investment while delivering immediate lifestyle benefits.

The hip and gable loft conversion offers remarkable versatility, creating space for additional bedrooms, luxurious master suites, home offices, or multi-purpose living areas. Combined with modern insulation and energy-efficient features, these conversions not only expand your home but can also improve its overall performance and comfort.

While the process involves significant structural work and investment, most hip to gable end loft conversions can be completed within 10-14 weeks with relatively manageable disruption. For semi-detached, end-of-terrace, and detached properties with hipped roofs, this conversion style typically offers the optimal balance of space gained versus cost and complexity.

If you’re considering a hip to gable conversion for your London property, the next steps should include:

  1. A professional assessment of your property’s structural suitability
  2. Initial architectural concepts to visualize the potential space
  3. Checking planning requirements specific to your London borough
  4. Obtaining detailed quotes from specialist loft conversion companies

With careful planning and professional execution, a hip to gable loft conversion can transform your London home, creating valuable additional living space that enhances both your lifestyle and your property’s market position for years to come.

Essential Guide to Home Refurbishment in London

Modern living room with large glass sliding doors and hardwood flooring in a refurbished residential space.
Estimated Reading Time: 12 minutes

Introduction: The Essential Guide to House Refurbishment in London

Home refurbishment in London represents a significant investment in both time and money, yet it’s an increasingly popular choice for property owners looking to transform their living spaces without relocating. Whether you’re considering updating a flat in a post-war block, breathing new life into a Victorian terraced house, or undertaking a full London house refurbishment to modernize your family home, this comprehensive guide will walk you through every crucial step of the process.

House refurbishment in London comes with its own unique set of challenges and opportunities. From navigating the capital’s complex planning regulations to managing higher costs and finding specialists familiar with London’s diverse housing stock, the journey requires careful planning and informed decision-making. This guide aims to equip you with the knowledge needed to approach your refurbishment project with confidence, whether you’re refreshing a single room or completely transforming your London property.

Open-plan kitchen and living area with herringbone wooden flooring, a modern kitchen island, fireplace, built-in shelves, and staircase.

What Does Home Refurbishment in London Actually Mean?

When discussing house refurbishment in London, it’s important to understand exactly what this term encompasses, as it’s often confused with renovation, restoration, or simple redecoration. While there’s some overlap between these terms, they represent different approaches to improving a property.

London house refurbishment typically falls into three main categories:

  • Light cosmetic updates: This includes painting, new flooring, updating fixtures and fittings, and minor repairs. These projects generally don’t require planning permission and can be completed relatively quickly.
  • Partial refurbishments: These focus on specific areas like kitchen or bathroom overhauls, which might involve some structural changes but are limited in scope to particular rooms or functions.
  • Full structural refurbishments: Comprehensive projects involving significant layout changes, complete rewiring, plumbing upgrades, and substantial modernization throughout the property.

Unlike simple redecoration, refurbishing house projects in London generally imply comprehensive updates aimed at improving functionality, comfort, energy efficiency, and ultimately, property value. It differs from renovation, which may add entirely new space (like extensions), and restoration, which focuses on preserving or reinstating historical features in older or listed buildings.

Key Distinction

A full London house refurbishment typically works within the existing envelope of the building to modernize and optimize the space, while renovation often involves adding new structural elements or additional space.

Why London House Refurbishment Is Unique

House refurbishment in London presents unique challenges and considerations that set it apart from similar projects elsewhere in the UK. The capital’s distinctive property landscape significantly influences the scope, cost, and approach to refurbishment projects.

London’s diverse housing stock includes:

  • Victorian and Edwardian terraces (particularly prevalent in zones 2-4)
  • Post-war blocks of flats (common in many boroughs)
  • Georgian townhouses (in historic central areas)
  • Listed buildings (with strict conservation requirements)
  • Ex-council blocks (often with specific structural considerations)
  • New builds (which may have different refurbishment needs)

Each property type brings its own set of considerations. For example, refurbishing house projects in Victorian terraces typically require party wall agreements with neighbors, while flats often face leasehold restrictions that limit structural changes.

London-specific constraints that impact refurbishment include:

  • Space limitations: London’s premium on space means clever design solutions are essential.
  • Shared walls and buildings: Many properties share structural elements with neighbors.
  • Leasehold vs freehold: Leasehold properties often require permission for substantial works.
  • Conservation areas: Many London neighborhoods have strict rules about external changes.
  • Borough-specific planning rules: Requirements vary significantly between London’s 32 boroughs.
  • Access challenges: Limited parking, narrow streets, and restricted working hours can complicate logistics.

These factors collectively increase project complexity, extend timelines (with permission processes adding months), and drive up costs, which can be 15-20% higher in central and north London compared to outer boroughs or national averages for similar work.

Clarifying Your Goals and Scope

Before embarking on any house refurbishment in London, it’s crucial to clearly define what you hope to achieve. This early clarity will guide every subsequent decision, from budgeting to hiring professionals and establishing timelines.

Start by considering your primary motivations:

  • Creating more usable space within existing boundaries
  • Improving layout and flow between rooms
  • Enhancing energy efficiency and reducing bills
  • Modernizing outdated features and systems
  • Increasing property value for future sale or rental
  • Adapting the home for changing family needs

Once you’ve identified your priorities, you can better decide whether your project requires a light refresh or a full London house refurbishment. A helpful approach is to create a room-by-room assessment, listing elements that need addressing in each space.

Refurbishment Goals
Functional Improvement
Aesthetic Update
Space Optimization
Energy Efficiency
Value Enhancement
Lifestyle Adaptation

Within your assessment, categorize items as:

  • Must-haves: Essential elements that address primary concerns (e.g., fixing structural issues, updating dangerous wiring, solving damp problems)
  • Nice-to-haves: Desirable improvements that enhance quality of life but could be postponed if budget constraints arise (e.g., luxury finishes, smart home technology)

This categorization helps maintain focus on priorities when inevitable decisions about scope and budget arise during your refurbishment journey. It also provides a framework for phasing work if you decide to spread your home refurbishment in London across multiple stages.

Budgeting for Home Refurbishment in London

Accurate budgeting is crucial for any successful house refurbishment in London, where costs typically exceed national averages due to higher labor rates, material costs, and logistical challenges. Understanding the financial landscape helps set realistic expectations and avoid mid-project surprises.

Project Type Typical London Cost Range (2025)
Full House (3-bed) £56,586–£93,868+
Kitchen Refurbishment £15,000–£30,000
Bathroom Refurbishment £6,000–£12,000
Complete Electrical Rewire £5,000–£10,000
Structural Alterations £2,000–£10,000+

Several London-specific factors drive these higher costs:

  • Premium labor rates for skilled tradespeople in the capital
  • Higher material costs and delivery charges
  • Expenses for scaffolding and access solutions in densely built areas
  • Parking permits and restrictions affecting deliveries and waste removal
  • Limited working hours due to noise restrictions in residential areas
  • Building type premiums (period properties typically cost more to refurbish)

When planning your London house refurbishment budget, follow this allocation framework:

  • 50-60% for construction works and materials
  • 10-15% for contingency (essential in older London properties)
  • 10% for professional fees and permissions
  • Remaining funds for finishes, fixtures, and furnishings

To ensure you’re getting fair value, obtain at least three detailed quotes for your house refurbishment London project. Look for itemized breakdowns rather than single-figure estimates, and be wary of quotes significantly below the average—these often lead to quality compromises or later “variations” that inflate the final bill.

For detailed insights into London refurbishment costs, it’s worth consulting specialist resources that provide borough-specific pricing guidance, as costs can vary by 10-15% between different parts of the capital.

Permissions, Regulations and Legal Considerations in London

Navigating the regulatory landscape is one of the most challenging aspects of home refurbishment in London. The capital’s complex planning framework, conservation priorities, and building regulations require careful attention to avoid costly delays and potential enforcement action.

Key permissions to consider include:

  • Planning Permission: Required for structural changes, extensions, or alterations that materially affect the building’s appearance. In conservation areas or for listed buildings, even minor external changes may require consent.
  • Permitted Development Rights: Allow certain works without formal planning permission, though these rights are often restricted in London, particularly in conservation areas and for flats.
  • Building Regulations Approval: Mandatory for most structural, electrical, and plumbing works to ensure safety and compliance with energy efficiency standards.
  • Listed Building Consent: Essential for any works to listed properties, with strict requirements for materials and methods.
  • Party Wall Agreements: Legally required when work affects shared walls, boundaries, or foundations—particularly relevant in London’s terraced housing.
  • Freeholder Consent: Leaseholders typically need permission from freeholders or management companies for significant internal alterations.

London’s boroughs vary significantly in their interpretation and enforcement of planning rules. For example, Kensington and Chelsea, Westminster, and Camden tend to have more stringent requirements than outer boroughs, particularly regarding conservation and design. Always check your specific borough’s local plan before planning your house refurbishment in London.

Professional Tip

Many London refurbishment projects benefit from a pre-application consultation with the local planning department. Though there’s usually a fee, this investment can save thousands by identifying potential issues before formal applications.

The London Borough of Hammersmith and Fulham provides a comprehensive guide that outlines key considerations for renovating and extending homes in London, with principles applicable across many boroughs.

Choosing the Right Professionals and Contractors

The success of your London house refurbishment largely depends on assembling the right team of professionals. London’s property market has created a sophisticated ecosystem of specialists familiar with the capital’s unique challenges.

Key professionals to consider include:

  • Architects: Essential for complex refurbishments, they provide design expertise, planning application support, and can oversee project delivery. Look for RIBA-registered architects with portfolios featuring London properties similar to yours.
  • Structural Engineers: Crucial when removing walls, altering layouts, or addressing structural issues. Seek chartered engineers with experience in London’s diverse building types.
  • Interior Designers: Help maximize space and functionality—particularly valuable in London’s smaller properties where every square foot counts.
  • Project Managers: Coordinate multiple contractors, manage timelines, and control budgets. In complex London refurbishments, their fee (typically 10-15% of project cost) often pays for itself through efficiencies.
  • Specialist Contractors: For house refurbishment London projects, experienced main contractors can manage the entire process, though you may need specialists for particular elements (e.g., period restoration).

When evaluating refurbishment contractors for your London project, look for:

  • Specific experience with your property type (Victorian, Edwardian, post-war, etc.)
  • References from similar projects in your borough
  • Appropriate insurance (including public liability and professional indemnity)
  • Relevant accreditations (e.g., Gas Safe, NICEIC for electrics, FMB membership)
  • Detailed contracts specifying scope, timelines, payment schedules, and warranties
  • Clear communication about how they’ll manage site constraints typical in London

Industry experts recommend obtaining at least three comparable quotes and setting up staged payments tied to completion milestones rather than calendar dates. This protects you from paying for incomplete work while giving contractors appropriate cash flow.

The Step-by-Step Process of London House Refurbishment

Understanding the sequential nature of house refurbishment in London helps manage expectations and plan logistics, particularly important in the capital where delays can cascade through a project.

  1. Initial assessment and design concepts: Evaluate the property’s condition, identify structural issues, and develop preliminary designs aligned with your goals.
  2. Surveys and investigations: Commission specialized surveys (structural, damp, electrical, asbestos) to uncover hidden issues common in London’s aging housing stock.
  3. Planning and permissions: Submit applications for planning permission, building regulations approval, party wall agreements, and other consents—allowing 8-12 weeks for this process in London.
  4. Detailed design and specification: Develop comprehensive plans, including material specifications, finishes, and technical details to ensure accurate quotes.
  5. Contractor selection: Obtain multiple quotes, check references, and select professionals with relevant London experience.
  6. Scheduling and site setup: Establish timelines, arrange logistics (including parking suspensions and neighbor notifications), and prepare the site with appropriate protection.
  7. Strip-out and structural work: Remove existing elements and complete major structural alterations, often the most disruptive phase.
  8. First fix: Install hidden elements including electrical wiring, plumbing pipework, heating systems, and ventilation ducts.
  9. Second fix: Fit visible elements including kitchens, bathrooms, doors, sockets, switches, and decorative features.
  10. Finishes and snagging: Complete decorative works and address any defects or incomplete items before final sign-off.

London-specific challenges that affect this process include:

  • Restricted working hours (typically 8am-6pm weekdays, 8am-1pm Saturdays in most boroughs)
  • Limited parking and access for deliveries and waste removal
  • Coordination with neighbors for shared access or party wall matters
  • Extended timelines for planning decisions in conservation areas

Experienced London contractors recommend building these constraints into project timelines from the outset, with realistic buffers for the inevitable delays that occur in complex London house refurbishment projects.

Common Refurbishment Projects in London Homes

While every house refurbishment in London is unique, certain projects are particularly common in the capital’s housing stock, each with specific considerations worth understanding.

Kitchen Refurbishments

Kitchen refurbishments represent the most popular home improvement in London, with costs typically ranging from £15,000 to £30,000 depending on size and specification. London-specific considerations include:

  • Space optimization in typically smaller London kitchens
  • Ventilation solutions in period properties and flats
  • Plumbing challenges in older buildings with outdated systems
  • Potential for creating open-plan kitchen-diners in terraced houses

For maximum value, focus on quality appliances, durable surfaces, and smart storage solutions that make the most of limited space.

Bathroom Refurbishments

London bathroom refurbishments typically cost £6,000-£12,000 and present unique challenges:

  • Working within compact spaces common in London properties
  • Navigating plumbing constraints in older buildings
  • Creating en-suites from existing bedrooms where space permits
  • Incorporating efficient ventilation in properties where external walls are limited

Wetrooms and space-efficient fixtures are particularly popular in London homes where maximizing floor area is crucial.

Modern bathroom with glass-enclosed shower, marble tiles, and wooden vanity.

Living Area Refurbishments

Many London house refurbishment projects focus on reconfiguring living spaces to improve flow and functionality:

  • Creating open-plan arrangements in terraced houses by removing internal walls
  • Improving natural light in properties with narrow floor plans
  • Installing efficient heating systems in period properties with poor thermal performance
  • Adding bespoke storage to maximize usable space

Whole-Property Refurbishments

Comprehensive London house refurbishment projects combine multiple elements to transform entire properties. These projects typically:

  • Balance restoration of period features with modern convenience
  • Address all major systems (electrical, plumbing, heating)
  • Improve energy performance while respecting architectural character
  • Reconfigure layouts to suit contemporary living patterns

Case studies show that thoughtful whole-house refurbishments can add significant value—a recent Islington terrace refurbishment project added approximately £120,000 to the property’s value against an investment of £70,000.

Space-Saving Tip

In London’s compact homes, bespoke joinery that combines multiple functions (e.g., storage stairs, media walls with integrated storage, window seats with drawers) offers exceptional return on investment by maximizing usable space.

Structural Changes and Layout Reconfiguration

Structural alterations often form the heart of substantial house refurbishment in London, creating the open, flowing spaces that modern living demands while working within the constraints of period properties.

Common structural changes in London refurbishments include:

  • Removing internal walls to create open-plan kitchen-dining-living spaces, particularly popular in Victorian and Edwardian terraces
  • Reconfiguring room layouts to add additional bathrooms or create master suites
  • Adding or relocating staircases to improve circulation or access loft conversions
  • Installing larger openings or glazed doors to connect internal spaces with gardens or terraces
  • Creating new openings in load-bearing walls to improve flow between rooms

Structural interventions in London homes require particular care due to:

  • The complex load paths in older buildings, which may have been modified over decades
  • Party wall considerations when altering elements shared with neighboring properties
  • The presence of non-standard construction methods in different eras of London housing
  • Limited access for installing new structural elements in dense urban settings

For most structural changes, you’ll need:

  • A structural engineer to design appropriate supporting elements
  • Building regulations approval for the structural work
  • Party wall agreements if the work affects shared walls or foundations
  • Contractors experienced in structural work in London’s historic buildings

Party wall matters are particularly significant when refurbishing house projects in London’s terraced and semi-detached properties. The Party Wall Act requires formal notices to neighbors and potentially the appointment of surveyors to protect all parties’ interests.

Energy Efficiency and Modernisation in London Refurbishments

Energy efficiency improvements have become a cornerstone of London house refurbishment projects, driven by rising energy costs, environmental awareness, and increasingly stringent building regulations. For London’s predominantly older housing stock, this presents both challenges and opportunities.

Key energy efficiency measures in London refurbishments include:

  • Insulation upgrades: Adding insulation to solid walls (typically via internal or external systems), lofts, floors, and roofs
  • Window enhancements: Installing double or triple glazing sympathetic to period properties, or upgrading existing windows with draught-proofing
  • Heating system modernization: Replacing inefficient boilers with condensing models or heat pumps, installing smart controls, and upgrading radiators
  • Ventilation improvements: Adding mechanical ventilation with heat recovery to improve air quality while maintaining thermal efficiency
  • Renewable technologies: Incorporating solar panels, air source heat pumps, or battery storage where appropriate

The distinct challenges of London properties include:

  • Conservation restrictions limiting external changes in many areas
  • Solid wall construction that requires specialized insulation approaches
  • Limited space for new technologies like heat pumps
  • The need to balance thermal performance with moisture management in historic buildings

Home refurbishment in London increasingly incorporates smart home technology, including:

  • Integrated lighting, heating, and security systems
  • Remote monitoring and control via smartphones
  • Energy management systems that optimize consumption
  • Electric vehicle charging points, now increasingly requested in refurbishment briefs

These improvements not only reduce running costs but also future-proof properties against tightening energy performance regulations. For London homeowners, this is increasingly important as the capital moves toward zero-carbon targets that may impact property values and saleability.

Practical Tips on Planning, Timelines and Living Arrangements

Realistic planning is essential for navigating the complexities of house refurbishment in London, particularly regarding timelines, logistics, and living arrangements during works.

Typical Timeframes

London refurbishment projects generally take longer than similar projects elsewhere due to logistical challenges, permissions processes, and the complexity of working with older buildings:

  • Kitchen or bathroom refurbishments: 2-6 weeks
  • Partial house refurbishments: 6-12 weeks
  • Full London house refurbishment: 3-12 months (with period properties and structural work at the longer end)
  • Add 2-3 months for planning and permission processes before construction begins

Living Arrangements

Deciding whether to remain in the property during refurbishment depends on several factors:

  • Project scope: Minor works might allow continued occupation of parts of the property, while full refurbishments typically require moving out
  • Property size: In London’s typically smaller homes, living alongside works is particularly challenging
  • Family situation: Households with young children, elderly members, or those working from home may find it impractical to remain during works
  • Budget implications: Temporary accommodation adds significant cost in London, where short-term rentals command premium rates

If you decide to move out, budget for 3-6 weeks longer than the projected timeline to account for delays.

Practical Logistics

London refurbishment projects require careful management of:

  • Noise restrictions: Most London boroughs limit construction noise to 8am-6pm weekdays and 8am-1pm Saturdays
  • Neighbor relations: Proactive communication with neighbors about timelines, potential disruption, and site contact details is particularly important in London’s dense housing
  • Trade access: Arrange parking suspensions (requiring 7-10 days’ notice to the council) for deliveries and skips
  • Waste removal: Regular waste clearance is essential in London’s limited-space sites
  • Parking permits: Tradespeople may need temporary parking arrangements in controlled zones

Construction management experts recommend appointing a single point of contact (either yourself or a project manager) to coordinate with neighbors, council officials, and other stakeholders throughout the project.

Common Mistakes to Avoid When Refurbishing a House in London

London house refurbishment projects come with pitfalls that can derail budgets, timelines, and ultimately, satisfaction with the finished result. Being aware of these common mistakes can help you navigate your project more successfully.

Underestimating Costs

London’s premium pricing for materials and labor frequently catches homeowners by surprise. This is compounded by the tendency of refurbishment projects to uncover hidden issues in older properties.

Prevention strategy: Add a minimum 10-15% contingency to your budget, with 20% advisable for period properties. Obtain detailed quotes rather than estimates, and ensure your contract includes clear processes for approving variations.

Neglecting Permissions and Regulations

Proceeding without proper planning permission, building regulations approval, or party wall agreements is a common mistake that can result in enforcement action, costly retrospective applications, or disputes with neighbors.

Prevention strategy: Research requirements early, consult professionals about your specific property and borough, and factor permission timelines into your project schedule. The cost of planning consultants often pays for itself by preventing costly mistakes.

Insufficient Contingency for Discoveries

London’s old buildings frequently conceal issues like rot, damp, outdated wiring, asbestos, or inadequate foundations that only become apparent once work begins.

Prevention strategy: Commission thorough surveys before finalizing budgets, and maintain a flexible approach to timelines. Experienced contractors recommend allowing extra time and budget specifically for addressing unforeseen conditions in properties over 50 years old.

Choosing Contractors Based Solely on Price

The lowest quote for refurbishing house projects often results in cut corners, quality compromises, or a stream of expensive “extras” that eventually exceed higher initial quotes.

Prevention strategy: Prioritize contractors with verifiable experience in similar London properties, check multiple references, and ensure quotes are truly comparable in terms of specifications, materials, and inclusions.

Poor Project Sequencing

Tackling works in the wrong order is a common error, such as decorating before resolving damp issues or installing kitchens before dusty structural work is complete.

Prevention strategy: Develop a detailed project program with your contractor, highlighting dependencies between different trades and elements. In particular, ensure “first fix” elements like wiring and plumbing are complete and tested before proceeding to decorative finishes.

Maximising Value and Return on Investment

Strategic approach to home refurbishment in London can significantly enhance property value beyond the cost of works. Understanding which improvements deliver the best returns helps prioritize investments, especially important in London’s varied property market.

Highest value-adding refurbishments in London typically include:

  • Kitchen modernizations: Contemporary, well-designed kitchens consistently return 5-10% above costs in most London postcodes
  • Additional bathrooms: En-suites and second bathrooms add significant value, particularly in family homes
  • Layout improvements: Creating open-plan living spaces or better flow between rooms adds perceived value beyond the construction cost
  • Energy efficiency upgrades: Increasingly valued by buyers concerned about running costs and environmental impact
  • Creating multi-functional spaces: Home offices, utility rooms, and flexible living areas have gained significant premium since the pandemic

The value-enhancement calculation differs for different property owners:

  • Owner-occupiers should balance personal enjoyment with potential resale value, prioritizing improvements that enhance daily living
  • Landlords should focus on durability, low maintenance, and features that maximize rental appeal and income
  • Investors need to analyze local ceiling values to avoid over-specification that won’t be reflected in sales prices

London house refurbishment projects should align with local market expectations. For example:

  • In prime central London, high-specification fixtures, home automation, and luxury finishes typically return their investment
  • In family-focused outer boroughs, practical improvements like additional bedrooms, improved gardens, and off-street parking often add more value
  • In up-and-coming areas, being an early adopter of quality improvements can capture neighborhood value growth

Property experts note that comprehensive refurbishments typically add more value than the sum of individual improvements—a recent case study showed a £70,000 whole-house refurbishment in Islington added approximately £120,000 to the property’s value by creating a coherent, modern home while preserving period character.

Conclusion and Next Steps

Successful house refurbishment in London demands thorough planning, realistic budgeting, regulatory compliance, and skilled professional support. This guide has walked through the essential considerations for transforming your London property, from initial concept to finished project.

Key takeaways include:

  • Understanding the unique challenges of London properties and planning accordingly
  • Setting clear goals and priorities before commencing work
  • Budgeting realistically for London’s premium costs (£56,000+ for a full house refurbishment)
  • Navigating the permissions landscape specific to your borough and property type
  • Choosing professionals with relevant London experience
  • Planning for appropriate timescales (3-12 months for comprehensive projects)
  • Avoiding common pitfalls through proper preparation and contingency planning
  • Focusing investments on improvements that add both livability and value

As you contemplate your home refurbishment in London, consider starting with these practical next steps:

  1. Conduct a thorough property assessment to identify issues and opportunities
  2. Create a detailed wish list, separating essential needs from desirable extras
  3. Research planning and building regulation requirements specific to your property
  4. Obtain initial professional advice to develop realistic budgets and timescales
  5. Collect references and examples of similar successful London house refurbishment projects

Whether you’re planning a focused update to a specific area or embarking on a comprehensive London house refurbishment, the key to success lies in thorough preparation, realistic expectations, and assembling the right team. With proper planning and professional support, your refurbishing house project can transform your London property into a home that combines the character of the capital’s rich architectural heritage with the comfort, efficiency, and style that modern living demands.

The Benefits of Adding a Basement Apartment to Your Home

A partially constructed basement stairway with visible wiring and unfinished walls.
Estimated Reading Time: 12 minutes

Introduction: The Value of Basement Apartments in London

In London’s competitive property market, homeowners are constantly seeking ways to maximize space and value. A basement apartment London solution represents one of the most effective approaches to achieve both. But what exactly constitutes a basement apartment in the London context?

A London basement flat is a self-contained, fully habitable dwelling created at or below ground-floor level, usually within the existing footprint of a house. These spaces typically include their own kitchen, bathroom, sleeping and living areas, and often feature a separate entrance, allowing them to function as independent units rather than just extra storage or casual living space.

A newly renovated basement area featuring a wooden staircase leading upwards, with white painted brick walls and storage shelves to the side.

The appeal is clear: a well-executed basement conversion London project can dramatically increase your property’s market value, offer flexible living arrangements for family members or guests, and potentially generate significant rental income. In a city where space comes at an absolute premium, the ability to transform underutilized below-ground areas into valuable living space represents a compelling opportunity.

Whether you’re considering creating a basement rental London property for income purposes, seeking additional family living space, or looking to boost your home’s overall value, this guide will walk you through the key benefits, practical considerations, design possibilities, and regulatory requirements to help you make informed decisions about your basement project.

Why Basement Apartments Are Especially Valuable in London

London’s property market dynamics create unique conditions that make basement apartments particularly valuable compared to other cities. Understanding these factors helps explain why a basement conversion London project can be such an attractive investment. For a broader context on how basements sit alongside other types of extensions, see our guide on maximising space with London home extensions.

Premium Property Values and Space Constraints

London has some of the highest residential property values in the UK, with prime areas like Kensington & Chelsea, Camden and Westminster commanding up to £15,000 per square meter for quality living space. Even in more typical London neighborhoods, additional habitable space can be worth between £7,500–£10,000 per square meter. This means that converting an underused basement into a functional apartment can potentially add hundreds of thousands of pounds to your property’s value.

The city’s housing stock—predominantly period properties with limited footprints—presents natural challenges for expansion. Many London homes are narrow terraced houses on small plots, particularly in inner boroughs. While extending upwards (loft conversions) or outwards (rear/side extensions) are popular options, they often face significant constraints:

  • Limited garden depth for rear extensions
  • Overlooking and privacy concerns with neighbors
  • Daylight and overshadowing restrictions
  • Conservation area and character preservation policies

A basement apartment London development works with these constraints by utilizing the property’s existing footprint and sometimes part of the garden below ground. This approach is often more acceptable in planning terms than large visible extensions, especially in densely packed terraced streets and conservation areas.

Strong Rental Demand and Income Potential

The London rental market remains consistently strong, with particularly high demand for self-contained units in well-connected areas. A quality basement rental London property can achieve impressive yields, especially when thoughtfully designed to maximize natural light and provide separate access.

Data from London letting agents shows that well-designed, well-lit basement flats in central locations can command rental values approaching those of equivalent above-ground units. In prime areas like Islington, Hackney, and Camden, basement apartments with their own entrance and outdoor space (even small lightwells or patios) are highly sought after by young professionals and couples willing to compromise on natural light in exchange for location, privacy, and often lower rental costs compared to higher floors.

Planning Context Making Basements Practical

While many London boroughs have tightened basement development policies in recent years, they generally still support single-story basements under the existing house plus up to 50% of the garden area. This means that basement development remains a viable option for adding substantial living space.

Although multi-story “mega-basements” are increasingly restricted, single-level basement conversions for creating additional dwelling space are usually acceptable, subject to design quality, impact assessment, and structural evidence. For homeowners in conservation areas where above-ground massing is heavily controlled, basement design can be the only realistic way to add substantial area without harming the street character or historic fabric.

Basement Apartment Value Drivers in London
High Property Values (£7,500-£15,000/m²)
Limited Extension Options Above Ground
Strong Rental Demand
Planning Policies Supporting Single Basements
Efficient Use of Limited Urban Space
Preservation of Historic Streetscapes

Financial Benefits of Adding a Basement Apartment

Creating a basement apartment in your London home represents a significant financial opportunity through both immediate capital appreciation and ongoing rental potential. For a high-level overview of these advantages, you can also explore our article on the benefits of adding a basement apartment to your home.

Capital Value Enhancement

Specialist London architects and property valuers confirm that properly executed basement apartments can add between £7,500 and £10,000 per square meter in extra value across most London boroughs, rising to £15,000 per square meter in prime central locations. This substantial uplift reflects the transformation of what might currently be unusable or low-value storage space into fully habitable accommodation.

While an unconverted cellar may contribute little to a property’s valuation, a compliant, well-designed basement apartment London development is typically valued as full habitable space. This means a 50-square-meter basement conversion could potentially add £375,000-£500,000 to a property’s market value in many London areas.

Estate agents particularly note that a self-contained London basement flat is often treated as a separate, income-generating asset during valuation, making it especially attractive to buyers seeking investment properties or homes with rental potential. Properties offering flexible accommodation options—where spaces can serve multiple functions or accommodate different household arrangements—typically achieve faster sales and stronger pricing.

Rental Income Potential

A basement rental London property can generate significant ongoing income through various letting arrangements:

  • Long-term Assured Shorthold Tenancies (ASTs) – Providing steady monthly income with minimal management overhead
  • Medium-term lets – Serving professionals on assignments or individuals between permanent homes
  • Short-term holiday lets – Where permissible under local planning policies and lease terms

This rental income can help offset mortgage payments, fund other home improvements, or provide additional household income. In prime London locations, a high-quality one-bedroom basement apartment with good natural light, private access, and outdoor space can achieve gross rental yields of 3-6%, depending on the area and quality of finish.

Importantly, while basement apartments historically sometimes commanded lower rents than equivalent above-ground units, this gap has narrowed considerably as design quality has improved. Well-executed modern basement conversions with effective light wells, proper ventilation, and quality finishes can achieve rental values approaching or matching those of similar ground-floor apartments.

Investment Insight

Lenders increasingly view properly converted basement apartments favorably when calculating a property’s value for mortgage purposes. A compliant basement conversion with proper Building Regulations sign-off and insurance can significantly enhance borrowing capacity and investment returns.

Lifestyle and Flexibility Benefits

Beyond the financial advantages, a basement apartment London development offers remarkable flexibility to adapt to changing family circumstances and lifestyle needs over time.

Multigenerational Living Solutions

Modern family structures increasingly benefit from flexible living arrangements that balance togetherness with independence. A basement apartment creates a separate yet connected living space ideal for:

  • Aging parents – Providing proximity and care while maintaining privacy and dignity
  • Adult children – Offering semi-independent living during university years or while saving for their own property
  • Live-in caregivers or household staff – Enabling professional support with appropriate accommodation

The physical separation provided by a self-contained basement flat—with its own entrance, facilities and living space—supports healthy boundaries while maintaining family connections. This arrangement has become particularly valued following recent global events that highlighted the importance of flexible home environments.

Adaptable Spaces for Changing Needs

One of the most compelling aspects of a basement conversion London project is the ability to adapt the space as your needs evolve. Many homeowners initially create a basement that serves multiple functions:

  • A guest suite for occasional visitors combined with a home office
  • A teenager’s retreat that can later become rental accommodation
  • A work-from-home professional space with client access separate from family areas

Because a properly executed basement conversion will already comply with Building Regulations for habitable space, transitioning between family use and rental accommodation becomes largely a matter of fit-out and marketing rather than major structural work. This future-proofs your investment and allows the space to grow with your changing circumstances.

Enhanced Day-to-Day Living

Even without renting the space, basement apartments offer numerous lifestyle enhancements that improve everyday living:

  • Home cinema or entertainment zones – The natural acoustic isolation of basement spaces makes them ideal for media rooms
  • Creative studios – Artists and musicians benefit from spaces with controlled lighting and sound insulation
  • Wellness areas – Home gyms, yoga spaces or treatment rooms work well in basement settings
  • Home offices with client access – Professional spaces separated from family life

These basement apartment ideas allow homeowners to maximize their property’s potential without necessarily committing to rental arrangements, while retaining the option to convert to income-generating space in the future.

Design Possibilities and Basement Apartment Ideas

Transforming a basement into a high-quality living space requires thoughtful design to overcome the inherent challenges of below-ground environments. Successful basement design focuses on creating spaces that feel bright, airy and connected to the outdoors, rather than subterranean. For a deeper dive into the technical build-up of these spaces—from surveys and foundations through waterproofing, insulation, and services—see our guide to the essential elements of basement construction.

Smart Layout Strategies for London Homes

In typical London terraced houses, basements generally extend beneath the full house footprint and sometimes into part of the garden. This presents both challenges and opportunities for creating functional, comfortable living spaces.

Effective layout strategies include:

  • Strategic room placement – Positioning bedrooms and living spaces toward lightwells or courtyards where natural light is maximized, while locating bathrooms and storage in deeper, darker areas
  • Open-plan arrangements – Using open layouts for kitchen/living areas to allow borrowed light to penetrate throughout the space
  • Efficient circulation – Minimizing corridors and using straight or dog-leg staircases to maximize usable floor area
  • Zoning techniques – Using furniture, level changes or partial walls to define spaces without blocking light

These approaches help create a London basement flat that feels spacious and well-proportioned despite potentially lower ceiling heights and limited natural light compared to above-ground spaces.

Maximizing Light, Ventilation, and Height

The quality of a basement apartment is largely determined by how effectively it addresses three key elements: natural light, fresh air, and ceiling height. London planning departments specifically scrutinize these factors when assessing basement conversions for habitable use.

Light-enhancing strategies include:

  • Rear and side lightwells – Creating external courtyards that bring light deep into the plan (front lightwells are possible but more heavily controlled in most London boroughs)
  • Full-height glazing – Maximizing glass area where external walls are exposed to lightwells
  • Walk-on rooflights – Installing flush glazing in gardens or terraces to bring light from above
  • Light reflective finishes – Using materials and colors that amplify available natural light
  • Carefully designed artificial lighting – Creating layered lighting schemes that mimic natural light patterns

Ventilation solutions typically combine:

  • Natural ventilation – Through openable windows in lightwells where possible
  • Mechanical ventilation with heat recovery (MVHR) – Providing continuous fresh air exchange while maintaining energy efficiency
  • Dehumidification systems – Controlling moisture levels for comfort and building protection

Adequate ceiling height—ideally at least 2.3-2.4 meters—is essential for creating a sense of spaciousness. This often requires excavation to lower the floor level, particularly in older London properties with shallow existing cellars. While this adds cost, the investment is justified by the significantly enhanced quality and value of the resulting space.

Creative Basement Apartment Ideas

Beyond basic layout and technical solutions, thoughtful design details can dramatically enhance the quality and appeal of a London basement flat:

  • Independent access – Creating a separate entrance from the street or side passage, with secure, well-lit access stairs
  • Outdoor connections – Designing lightwells as usable outdoor spaces with seating, planting, and visual interest
  • Innovative storage – Incorporating under-stair storage, built-in wardrobes, and recessed shelving to maximize functional space
  • Premium finishes – Using high-quality materials, textures, and lighting to create a sense of luxury that compensates for below-ground location
  • Sound insulation – Installing effective acoustic separation from the main house to ensure privacy

These basement apartment ideas help create spaces that feel like desirable, self-contained homes rather than compromised conversions, enhancing both livability and rental or resale potential.

Design Element Impact on Basement Quality
Lightwells/Courtyards Essential for natural light and ventilation; can double as outdoor space
Ceiling Height Critical for spaciousness; minimum 2.3m recommended for comfort
Separate Entrance Provides independence and increases rental value; enhances privacy
Open-Plan Layout Allows light penetration and creates sense of space; popular with renters
High-Quality Finishes Compensates for below-ground location; justifies premium rental rates

Creating a compliant basement apartment in London involves navigating several regulatory frameworks. Understanding these requirements early is crucial for developing a feasible basement design and preventing costly alterations or enforcement action later.

Planning Permission in London Boroughs

Planning requirements for basement development vary across London boroughs, but several common principles apply:

When planning permission is typically required:

  • Creating a new basement where none currently exists
  • Significantly enlarging an existing basement (especially extending under gardens)
  • Adding lightwells or other features that change the external appearance
  • Lowering floor levels substantially to increase ceiling height
  • Working on or within listed buildings
  • Creating a separate dwelling unit (change of use)

For simple conversions of existing cellar spaces without structural alterations or external changes, planning permission may not be required. However, it’s always advisable to confirm with your local planning authority before proceeding.

Many London boroughs have introduced Supplementary Planning Documents (SPDs) specifically addressing basement development. These typically:

  • Limit basement depth to a single story in most cases
  • Restrict the extent to no more than the house footprint plus 50% of the garden
  • Require Basement Impact Assessments for larger schemes
  • Mandate Construction Traffic Management Plans to address neighborhood disruption
  • Require detailed structural reports and hydrological assessments

In conservation areas, which cover significant portions of inner London, additional restrictions often apply to visible elements like lightwells and entrance arrangements. Early consultation with planning officers is strongly recommended for properties in these sensitive locations.

Building Regulations Compliance

All basement conversions creating habitable space must comply with UK Building Regulations, regardless of whether planning permission is required. Key areas of compliance include:

  • Structure (Part A) – Ensuring stability, proper underpinning, and adequate retaining walls
  • Fire safety and escape (Part B) – Providing safe escape routes, appropriate doors, and alarm systems; bedrooms often require direct escape routes or alternative fire strategy solutions
  • Damp proofing and waterproofing (Part C) – Implementing robust systems to prevent moisture ingress
  • Ventilation (Part F) – Ensuring adequate fresh air and extract systems
  • Thermal insulation (Part L) – Meeting energy efficiency standards
  • Drainage and waste (Part H) – Properly managing sewage and wastewater
  • Electrical safety and lighting – Providing safe, compliant installations

For basement bedrooms, the requirements around fire escape and ventilation are particularly stringent. Bedrooms either need direct escape routes via lightwells or windows, or alternative measures such as enhanced fire detection, sprinkler systems, or protected escape corridors.

Requirements for Basement Rental London Properties

If you plan to let your basement apartment as a rental property, additional requirements apply:

  • Landlord safety obligations – Including gas safety certificates, electrical safety reports (EICR), smoke and carbon monoxide alarms, and fire risk assessments
  • Licensing – Many London boroughs operate selective or additional licensing schemes for rental properties; your basement flat may also form part of a House in Multiple Occupation (HMO) if the main house contains other tenants
  • Minimum space standards – London Plan and local policies often reference nationally described space standards for habitable rooms
  • Energy performance – Rental properties must meet minimum Energy Performance Certificate (EPC) ratings

You’ll also need to determine whether your property has proper planning permission for use as a separate dwelling unit. Some basement conversions may have Building Regulations approval as habitable space but might not have planning permission for use as an independent flat for rental purposes.

Planning Insight

When submitting planning applications for basement developments in London, a growing number of boroughs give favorable consideration to schemes that incorporate sustainable features such as green roofs over extensions, sustainable drainage solutions (SuDS), and high energy-efficiency standards. Including these elements can improve approval chances in challenging planning contexts.

The Role of a Specialist Basement Construction Company

Basement conversions are technically demanding projects that involve structural engineering, waterproofing, and compliance with complex regulations. In London’s challenging urban environment—characterized by tight sites, close neighbors, party walls, high groundwater, clay soils, and often historic housing stock—the expertise of a specialist basement construction company becomes invaluable.

Specialized Knowledge and Skills

A qualified basement construction company brings critical expertise to your project in several key areas:

  • Structural integrity – Professional assessment of load-bearing walls, proper underpinning methodologies, temporary works design, and load transfer calculations
  • Waterproofing design and installation – Implementation of robust systems meeting British Standard 8102 for underground structures, often using combined approaches (tanking plus cavity drainage) to provide belt-and-braces protection
  • Party Wall compliance – Navigation of the Party Wall etc. Act 1996 requirements when work affects shared walls with neighbors
  • Health and safety – Management of excavation risks, confined space working, and other construction hazards
  • Construction logistics – Coordination of materials delivery, spoil removal, and site operations in constrained urban settings
  • Environmental control – Minimization of noise, dust, and disruption to neighbors

These specialized skills go beyond what general builders typically offer and are essential for creating safe, compliant, and durable basement spaces.

Services Provided by Basement Specialists

Comprehensive basement construction companies typically offer a range of services spanning the entire project lifecycle:

  • Initial feasibility study – Assessment of whether your property is suitable for basement development, considering ground conditions, water table, access constraints, and planning context
  • Survey coordination – Management of topographical, structural, drainage, and soil investigations to inform design decisions
  • Planning support – Assistance with planning applications, Basement Impact Assessments, structural calculations, and Construction Traffic Management Plans
  • Design development – Creation of detailed technical drawings and specifications for waterproofing, structure, and services
  • Construction delivery – Implementation of the structural shell, waterproofing systems, and often interior fit-out
  • Building Control liaison – Management of inspections and certification to ensure regulatory compliance
  • Warranty provision – Supply of appropriate guarantees, particularly for waterproofing systems

Many companies offer either design-and-build services or work collaboratively with your appointed architect and engineers to deliver a coordinated solution.

Selecting the Right Basement Construction Company

When evaluating potential contractors for your basement conversion London project, consider these important criteria:

  • Specific basement experience – Look for companies with documented London basement projects similar to yours, particularly in your borough where local conditions and planning approaches may be specific
  • Professional affiliations – Membership in organizations like the Basement Waterproofing Association, Property Care Association, or Royal Institution of Chartered Surveyors
  • Qualified personnel – Access to chartered structural engineers and certified waterproofing designers
  • Waterproofing guarantees – Provision of long-term, insurance-backed warranties for waterproofing systems
  • Planning knowledge – Familiarity with local basement policies and Building Regulations requirements
  • Transparent processes – Clear documentation of pricing, program, and risk management approaches
  • Positive client references – Testimonials and case studies from previous basement projects

Taking time to select the right specialist contractor will significantly reduce risks and increase the likelihood of a successful basement apartment project.

Cost Factors and Return on Investment

Understanding the financial parameters of a basement conversion London project is essential for making informed decisions and planning effectively. While costs vary significantly based on specific circumstances, certain key factors consistently influence the overall investment required.

Major Cost Drivers

The primary elements that determine basement conversion costs include:

  • Excavation and spoil removal – Digging out new or deeper basement spaces and disposing of material, complicated by access constraints in London’s tight streets
  • Structural work – Underpinning existing foundations, creating retaining walls, and supporting the structure above
  • Waterproofing – Implementing comprehensive tanking, cavity drainage systems, and often sump pumps with backup power
  • Separate access creation – Building external staircases, lightwells, and entrance arrangements
  • Services installation – Providing new electrical, plumbing, heating, and ventilation systems
  • Interior fit-out – Installing walls, floors, bathrooms, kitchens, and decorative finishes
  • Professional fees – Paying for architectural design, engineering, planning consultants, party wall surveyors, and Building Control submissions

For projects in London, current cost ranges (as of 2023) typically fall between:

  • £3,000-£4,500 per square meter for basic structural conversion of existing cellars with modest excavation
  • £4,500-£7,000+ per square meter for new basement excavation with high-quality fit-out and separate access

These figures can increase further in prime central London locations where access is particularly challenging or where specialized engineering solutions are required due to site constraints.

Return on Investment Considerations

When assessing the financial viability of a basement apartment London development, consider both capital appreciation and potential rental returns:

  • Capital value uplift – In many London areas, a well-executed basement can add £7,500-£10,000+ per square meter in value, meaning that despite high construction costs, the net gain can be substantial
  • Rental income – A one-bedroom basement apartment in central London zones might achieve £1,500-£2,500+ monthly rental, generating annual income of £18,000-£30,000
  • Payback periods – Depending on location and quality, rental income might provide a 3-6% gross yield on the overall investment, suggesting payback periods of 15-25 years from rental alone, but significantly faster when combined with capital appreciation

The financial equation is most favorable in high-value areas where both the capital appreciation and rental potential are strongest. In prime central London, the combination of value uplift and rental potential often makes basement apartments among the most financially attractive home improvement investments available.

Maximizing Value for Money

To optimize the return on your basement conversion investment:

  • Focus on creating a fully self-contained unit with separate access, which commands higher rental values and offers greater flexibility
  • Ensure generous natural light through well-designed lightwells and glazing, which significantly impacts both rental and resale values
  • Allocate budget to high-quality waterproofing and ventilation, as these fundamental elements protect your investment long-term
  • Consider the target market for potential rental (young professionals, couples, visiting academics) and tailor the design accordingly
  • Balance construction costs against quality, recognizing that premium finishes can justify higher rental rates in competitive markets

Remember that while a basement conversion represents a significant upfront investment, it delivers both immediate lifestyle benefits and long-term financial returns through increased property value and potential rental income.

Practical Planning Tips for Homeowners

Embarking on a basement conversion London project requires careful planning and systematic approach. This step-by-step overview will help you navigate the process from initial concept through to completion and potential rental. For additional guidance on permissions, builder checks, and setting up your project for success, see our article on putting the practical pieces of a project together.

Step-by-Step Process Overview

  1. Initial assessment and feasibility
    • Clarify your objectives (rental income, family space, or value enhancement)
    • Assess your property’s basement potential (existing space or new excavation)
    • Check local planning policies regarding basement development
    • Consider budgetary parameters and financing options
  2. Professional consultation
    • Engage an architect or basement specialist for preliminary assessment
    • Commission initial surveys (structural condition, soil, drainage)
    • Discuss concept layouts and design possibilities
    • Obtain preliminary cost estimates
  3. Design development
    • Create detailed architectural plans and basement design
    • Develop structural engineering solutions
    • Specify waterproofing strategy and services
    • Refine cost projections and program
  4. Planning and consents
    • Submit planning application if required
    • Prepare specialized supporting documents (Basement Impact Assessment, Construction Management Plan)
    • Apply for Building Regulations approval
    • Issue Party Wall notices to affected neighbors
  5. Contractor selection
    • Identify suitable basement construction companies
    • Request detailed quotes based on finalized designs
    • Check references, insurance, and warranties
    • Appoint preferred contractor and finalize contract terms
  6. Construction phase
    • Site setup and protection measures
    • Structural works and waterproofing
    • Services installation and finishes
    • Building Control inspections throughout
  7. Completion and certification
    • Final Building Control inspection and certificate
    • Collection of guarantees and warranties
    • Defect resolution and final accounts
    • Update home insurance to reflect new basement
  8. Marketing as rental (if applicable)
    • Obtain necessary licenses for letting
    • Complete safety certificates (gas, electric, EPC)
    • Furnish and photograph the space
    • List with letting agents or on platforms like Airbnb (where permitted)

Property Suitability Assessment

Before proceeding with detailed plans, evaluate whether your property is suitable for a basement conversion using this checklist:

  • Planning context – Is your property in a borough generally supportive of basement development? Are there specific restrictions due to conservation area status or local policies?
  • Existing space – Is there an existing cellar or would this be a new excavation? What is the current headroom?
  • Ground conditions – Are there known issues with high water table, flooding risk, or unstable soil in your area?
  • Neighboring properties – Do you share party walls that will be affected? How close are adjacent buildings?
  • Access constraints – Is there adequate access for construction equipment and material removal?
  • Services – Will you need to relocate main drains, gas pipes, or other utilities?
  • Budget viability – Does the potential value uplift justify the likely construction costs in your location?

Questions to Ask Professionals

When consulting architects, engineers, or basement construction companies, ask these key questions:

  • “How will you ensure compliance with Building Regulations, particularly regarding fire escape routes and waterproofing?”
  • “What is your track record with similar basement projects in this London borough?”
  • “What waterproofing system do you recommend, and what guarantees will it carry?”
  • “How will you manage party wall matters and neighbor relations during construction?”
  • “What timeline do you anticipate from design through to completion?”
  • “How will you minimize disruption and manage construction logistics in this location?”
  • “What contingency should I budget for unexpected issues?”
  • “Will the finished space meet requirements for residential letting if I choose to rent it out?”

Common Pitfalls and How to Avoid Them

Be aware of these frequent challenges in basement apartment London projects:

  • Underestimating planning complexity – Allow sufficient time for planning processes and neighbor consultations
  • Inadequate waterproofing – Never economize on waterproofing; specify comprehensive systems with long-term guarantees
  • Insufficient ceiling height – Ensure designs provide adequate headroom (minimum 2.3m) even after finishes are applied
  • Poor natural light – Maximize opportunities for daylight through generous lightwells and glazing
  • Ventilation issues – Incorporate both natural ventilation where possible and effective mechanical systems
  • Neglecting acoustic separation – Install proper sound insulation between the basement and upper floors
  • Ignoring rental regulations – Research licensing requirements early if letting is planned
  • Contractor selection based solely on price – Prioritize experience and quality over the lowest quote

The image shows a construction site with exposed wooden beams, steel supports, and construction materials, indicating an ongoing basement construction project.

By anticipating these challenges and planning accordingly, you can significantly smooth the path to a successful basement apartment project.

Conclusion: Unlocking the Potential of Your London Property

Converting an unused or underutilized basement into a high-quality apartment represents one of the most effective ways to maximize your London property’s potential. As we’ve explored throughout this guide, a well-executed basement conversion London project delivers multiple benefits that can transform both your lifestyle and your property’s value.

Creating a basement apartment London development can significantly increase your property’s market value, with quality conversions adding £7,500-£10,000+ per square meter in many areas. This substantial uplift often exceeds construction costs, making it a sound financial investment, particularly in London’s premium property market where space comes at an extraordinary premium.

Beyond capital appreciation, a basement rental London property creates opportunities for ongoing income generation. Whether through long-term tenancies or, where permitted, flexible letting arrangements, this income stream can offset mortgage payments, fund other improvements, or provide additional household revenue for years to come.

The lifestyle benefits are equally compelling. A basement apartment creates flexible space that can adapt to changing family circumstances—from accommodating adult children or aging parents to providing dedicated work-from-home environments or guest accommodation. This adaptability future-proofs your home against evolving needs and enhances day-to-day living.

While basement conversions involve navigating complex planning, building regulations, and technical challenges, partnering with experienced professionals makes the process manageable and rewarding. A specialist basement construction company brings the expertise needed to create safe, compliant, and beautiful living spaces below ground.

As London continues to face housing pressures and space constraints, innovative basement design will remain a vital strategy for homeowners looking to maximize property potential. By creating additional habitable space that doesn’t compromise the character of period properties or neighborhood streetscapes, basement apartments offer a win-win solution that balances preservation with practical living needs.

Whether you’re motivated by financial returns, additional family space, or enhanced property marketability, a thoughtfully designed and professionally executed basement apartment represents one of the smartest investments you can make in your London home.

Ready to explore the possibilities for your property? The first step is a professional assessment to determine feasibility and potential. With the right team, your underutilized basement could become one of your home’s most valuable and versatile assets.