Introduction: Why Under Sink Plumbing Deserves Your Attention
Efficient under sink plumbing is essential for a functional, leak-free kitchen or bathroom, yet it is one of the least considered parts of the home until something goes wrong. Hidden behind a cupboard door and usually obscured by cleaning products, spare carrier bags and half-used bottles of bleach, this small cluster of valves, hoses and waste pipes quietly carries clean water in and dirty water out every single day. It is also one of the most common locations for domestic leaks and blockages, and problems frequently go unnoticed until the cabinet base swells or a musty smell gives the game away.
This guide walks you through the fundamentals: what under sink plumbing actually is, the components you will find beneath a typical UK sink, practical tips for keeping the space organised and efficient, the most common faults and how to spot them early, and what changes when you introduce a modern fixture such as a boiling water tap. We also look at how this small area connects to the wider water and heating network in your property, including underfloor heating pipes, and finish with a straightforward maintenance routine.
You do not need to be a qualified plumber to benefit from this knowledge. Understanding what sits beneath your sink helps you spot issues early, limit water damage, and — crucially — know when a job is safely within your reach and when it is time to call in a professional.
Understanding the Basics of Under Sink Plumbing in London Homes
Under sink plumbing refers to the set of water supply and waste components positioned directly beneath a kitchen or bathroom sink. It divides neatly into two halves that behave very differently.
The first is the pressurised supply side: the cold and hot pipes feeding the tap, usually small-bore copper or plastic pipework fitted with isolation valves and flexible tap tails, as explained in this overview of kitchen plumbing components. Because this side is always under pressure, any failure here will leak continuously, whether or not the tap is in use.
The second is the waste side: the plughole and waste fitting, the trap (commonly a P-trap or U-bend), and the horizontal waste pipes carrying greywater away to the main soil stack. This side only carries water when the sink is being used or drained, which is why waste leaks often appear intermittently and can be surprisingly hard to trace.
Under sink plumbing sits at the junction of several larger systems. It receives mains cold water, typically via the internal stop tap, takes hot water from the boiler or hot water cylinder, and returns wastewater to the building’s drainage and vent system. In most UK properties, the internal stopcock is located under the kitchen sink or close to where the mains enters the property, which makes this cupboard the single most important place in the house during a water emergency.
That is precisely why a well-organised setup matters. A tidy cupboard allows you to see which fitting wets first when you are hunting a slow leak. It reduces the risk of knocking a trap out of alignment or cross-threading a joint with heavy stored items. And it makes future upgrades — a dishwasher, a water filter, a boiling water tap — far simpler, because the valves and pipework remain genuinely accessible rather than buried behind clutter. If you are planning a kitchen remodeling project, thinking through the under-sink layout from the outset can save considerable time and expense later.
Under Sink Plumbing
Stopcock
Isolation Valves
Flexible Tap Tails
Trap / U-Bend
Waste Pipes
Appliance Connections
Key Components of an Under Sink Plumbing System
Once you know what you are looking at, the space beneath your sink becomes far less intimidating. Here is what you will typically find and why each part matters.
The stop tap or stopcock
The internal stop tap shuts off all mains water to the property. Its function is purely protective: when a pipe fails or a fitting bursts, this is the valve that stops the flood. Knowing exactly where it is — and confirming that it still turns freely — is one of the highest-value five-minute checks any homeowner can perform. A seized stopcock discovered mid-emergency turns a manageable leak into a costly insurance claim.
Isolation (service) valves
These small valves sit on individual hot and cold supply pipes and often on appliance feeds too. A quarter turn of the slot, so it sits across the pipe, shuts off water to that single tap or appliance without disrupting the rest of the house. As guidance on repairing a sink makes clear, isolation valves are the first thing a plumber reaches for when replacing a tap or fixing a drip. Operate them occasionally so they do not seize in place.
Flexible hoses and tap tails
Braided flexible hoses connect the supply pipework to the tap tails, providing a secure but manoeuvrable link that simplifies installation in cramped cabinets. Their weak points are the threaded connections at either end, where a loose nut or a perished seal produces a slow, continuous drip on the pressurised side. Quality hoses, correctly tightened, dramatically reduce long-term failure risk; budget hoses are a false economy given what a sustained leak can do to a kitchen floor.
The trap (P-trap or U-bend)
Directly below the plughole sits the curved trap. It retains a small volume of standing water that forms a seal against sewer odours entering the room, and it incidentally catches debris on its way down. That dual role makes it the most common blockage point in the system. Modern plastic traps are designed to be unscrewed by hand, so cleaning one out with a bucket underneath is well within the scope of a confident homeowner.
Waste pipes and compression fittings
From the trap, plastic or metal waste pipes carry greywater to the main drainage, joined with compression or push-fit connections. Leaks here occur almost exclusively at the joints, where washers dry out or slip nuts work loose over time. Pipe joint leaks are consistently among the most common plumbing problems reported in London homes. Correctly sized, undamaged washers are essential — and it is worth remembering that overtightening a plastic nut can crack it, creating the very leak you were trying to prevent.
Appliance connections
In most kitchens, the dishwasher and sometimes the washing machine draw their supply from beneath the sink, usually via a 15mm cold feed with its own stop valve, while their waste hoses connect into the sink’s waste run through a spigot or Y-connector. Properly installed valves and anti-kink hoses prevent backflow, reduce leak risk, and make servicing straightforward.
Component
Primary Function
Common Failure Point
Stopcock
Shuts off all mains water
Seizing through lack of use
Isolation valves
Isolates a single tap or appliance
Corrosion, stiff operation
Flexible tap tails
Connects supply to tap
Perished seals, loose nuts
Trap / U-bend
Blocks odours, catches debris
Blockage, cracked plastic nuts
Waste pipe joints
Carries greywater away
Dried washers, loose slip nuts
Appliance feeds
Supplies and drains appliances
Kinked hoses, poor connections
The consistent theme is that quality fittings, sound sealing and correct torque on compression joints determine how long the system performs without intervention. Temporary remedies such as tape wrapped around a weeping joint or jointing compound smeared over a crack are always inferior to replacing the faulty component properly.
Tips for Efficient and Organised Under Sink Plumbing
Efficiency under a sink is largely about access and restraint. The more you can see and reach, the earlier you catch problems and the cheaper they are to resolve.
Start by decluttering. Storing heavy items directly against pipework is a genuine cause of leaks: a bulk pack of detergent leaning on a trap over months can nudge a compression joint out of alignment or cross-thread a nut. Shallow baskets, a door-mounted organiser or a simple tray on the cabinet floor keep contents away from the pipes while remaining practical. A tray has the additional benefit of revealing water that would otherwise soak straight into the chipboard base.
Next, protect your sight lines. You should be able to see and physically reach the trap and waste connections, the isolation valves and stopcock, and both flexible tap tails without dismantling anything. If any of those are hidden behind stored items or a bulky appliance hose, rearrange until they are not.
Layout discipline pays dividends too. When adding appliances, use proper tees and manifolds rather than makeshift joints, so the pipework follows a logical, traceable path. Avoid tight bends and excessive slack in flexible hoses — both stress the end fittings and increase leak risk over time. If a filter housing, water softener or boiling water tank is going in, position it so that it does not block the trap, stopcock or service valves. This kind of detailed planning is one reason why bespoke handmade kitchens can be designed with properly integrated plumbing provision from the outset, rather than retrofitted around existing cabinetry.
The Fifteen-Second Leak Check
Run the cold tap for fifteen seconds, then the hot for fifteen seconds, and feel around the trap, waste connections and isolation valves for dampness. This simple weekly routine catches the vast majority of slow leaks long before they damage cabinetry or flooring.
Finally, resist the urge to overtighten. Plastic nuts on traps and compression fittings need to be firm, not forced — hand-tight plus a small nudge is usually correct. Where a washer or seal has hardened, replace it with an identical type rather than compensating with brute force.
Common Under Sink Plumbing Issues in London Properties
The faults that plumbers see repeatedly are remarkably consistent, which is good news: it means most are predictable and preventable.
Leaks from waste pipe connections and traps top the list. Because the waste side only carries water in use, these leaks tend to appear only when the sink is running or when a full bowl is drained, which is why they can persist unnoticed for weeks.
Continuous leaks from supply connections or flexible tap tails are the more urgent category. Anything on the pressurised side leaks whenever the system is live, and even a slow drip can deliver a substantial volume of water into a cabinet base over a few days.
Slow or clogged drains arise from the gradual accumulation of grease, food waste and debris in the trap and waste run. Fat poured down a kitchen sink cools, solidifies and narrows the pipe bore, and this is among the most frequent plumbing issues in UK homes.
Corroded or seized valves are the silent risk. An isolation valve or stopcock that will not turn is only discovered when you desperately need it to, and by then the damage is already accumulating.
Early warning signs worth knowing
Damp patches or swollen chipboard at the base of the cabinet are the classic first indicator, usually appearing before any visible dripping. A musty smell or visible mould around the trap and rear panel suggests moisture has been present for some time. On copper pipework, look for greenish staining, and on joints look for white crusty deposits — both signal slow seepage that has been evaporating rather than pooling. And of course, water gathering after you run the taps or empty a full sink points squarely at the waste side.
When to tackle it yourself and when to call a professional
Several jobs are genuinely DIY-appropriate. Clearing a minor clog by removing visible debris, flushing with hot — not boiling — water and using a plunger is straightforward. If the drain is still sluggish, placing a bucket beneath the trap, unscrewing it by hand, cleaning it out and refitting it is a manageable task on modern plastic fittings. Gently tightening a loose compression nut on a plastic trap or replacing a simple waste washer also sits comfortably within homeowner territory.
Bring in a professional when the leak is on the pressurised supply side and does not stop with modest tightening; when an isolation valve or the stopcock is corroded, seized or non-functional; when pipework or a trap is cracked and needs replacement rather than adjustment; or when repeated attempts at a fix keep failing, which usually means the underlying fitting is beyond saving. One further signal deserves particular attention: if more than one drain in the property is backing up, or water is rising in an outside drain, the problem lies in the main drainage system rather than under your sink, and that requires proper diagnosis. Whether it is a kitchen or bathroom renovation in London, getting the plumbing right from the start avoids these costly discoveries further down the line.
Considerations for Modern Installations
Contemporary kitchens ask far more of the space beneath the sink than they did a generation ago. Water softeners, under-sink filtration, waste disposal units and boiling water taps all compete for the same modest cupboard, and each brings additional connections with it. If you are budgeting for such upgrades, it is worth reading a detailed kitchen remodel cost guide to understand how plumbing work factors into the overall investment.
A quooker tap installation is the clearest illustration of this. A boiling water tap of this type requires a tank unit installed under or near the sink, and the manufacturer’s own installation guidance confirms that where there is insufficient space directly beneath the sink, an extension hose allows the tank to sit up to around two metres away. That flexibility is welcome in compact London kitchens, but it does not remove the need for careful planning — hoses still have to be routed sensibly, and access to valves and the trap must be preserved.
Three considerations matter most when planning a quooker tap installation. The first is space: the tank, and any chilled or sparkling water unit accompanying it, must fit without obstructing the trap, the stopcock or other service valves, and manufacturer clearances between mounting brackets and the cabinet base must be respected. The second is connections: the system requires teed connections into the cold supply, sometimes the hot as well, plus dedicated isolation valves so the unit can be serviced safely without shutting down the whole kitchen. The third is serviceability: a tank crammed into a corner may technically fit, but if a filter cannot be changed or a valve cannot be reached, the installation will cause friction for years.
In practice, this is why professional installation and a considered under-sink layout are so valuable. It is entirely possible to fit a boiling water tap, a dishwasher feed and a waste disposal into one cupboard — but only if the arrangement is planned as a whole rather than assembled piecemeal.
How Under Sink Plumbing Connects to Wider Home Systems
It helps to think of the area under your sink as a node on a much larger network rather than a self-contained assembly. Cold water arrives there from the mains through the internal stop tap. Hot water arrives from the boiler or cylinder through the distribution pipework. Greywater departs through the trap and waste pipes into the building’s soil stack. Three major systems converge in a space the size of a suitcase.
That convergence is exactly why the under-sink cupboard becomes the natural access point for so many upgrades. Appliance feeds with their own stop valves, filtration systems and boiling water taps can all be introduced here without re-routing the property’s main pipework, which keeps disruption and cost down.
The same principles of good practice extend across the rest of the network, including the heating side. Underfloor heating pipes are a useful comparison, because they represent the opposite extreme in terms of accessibility: once a screed is poured and a floor finish laid, the pipework is effectively unreachable. For this reason, underfloor heating installation guidance specifies that pipework should be laid as a single continuous run with no inaccessible joints beneath the insulation, precisely to minimise leak risk and avoid a scenario where a failure means lifting a floor. If you are considering adding underfloor heating to your home, our step-by-step electric underfloor heating installation guide covers the planning and layout decisions in detail.
Under sink plumbing and underfloor heating pipes are not directly connected, but they share the same supply infrastructure and the same underlying logic: eliminate unnecessary joints, use quality fittings, and preserve access wherever access is possible. When a property is designed and maintained around those principles, the whole water and heating network performs more reliably. Conversely, a house with a chaotic under-sink cupboard and improvised appliance connections often reveals similar compromises elsewhere. Understanding how these systems interact helps homeowners appreciate that a decision as small as which isolation valve to fit contributes to the overall efficiency of the property.
Maintenance Best Practices for London Homeowners
None of this requires specialist tools or significant time. A consistent, lightweight routine delivers most of the benefit.
Adopt a monthly under-sink check. Clear the front of the cupboard, run the cold tap for fifteen seconds and the hot for fifteen seconds, then run a hand around the trap, the waste connections and the isolation valves feeling for moisture. Inspect the cabinet base for damp, swelling or staining, and look over the flexible hoses and tap tails for corrosion, bulging or wet spots. Confirm the stop tap still turns freely and that the isolation valves operate — a valve exercised occasionally is a valve that works when you need it.
Periodically, go slightly further. Clean the trap and any strainers before blockages establish themselves: remove visible debris, flush with hot water, use a plunger if drainage is sluggish, and take the trap apart if it still runs slowly. Where a washer or seal is clearly worn, replace it promptly rather than repeatedly nipping up the joint, which only masks the deterioration. Ahead of winter is a sensible point to address any minor weeps, since the whole system works harder in cold weather and small faults have a habit of becoming larger ones.
Never Pour It Down the Sink
Cooking fats, oils, paint, coffee grounds and plaster-laden water are the leading causes of avoidable kitchen blockages. Fats solidify as they cool, progressively narrowing the waste pipe until a full blockage forms — often at the trap or the first bend beyond it. Collecting fat in a container and disposing of it with household waste is the single easiest habit for protecting a kitchen drain.
The long-term case for proactive care is straightforward. Regular inspection prevents hidden leaks from destroying cabinetry and flooring, extends the working life of fittings and valves, and reduces the likelihood of an emergency call-out at short notice. It also keeps connected fixtures performing as intended — a boiling water tap or dishwasher relies on clean, correctly pressurised supply and a free-draining waste run. The same principle applies in bathrooms: good maintenance underpins any bathroom refurbishment, and a well-maintained plumbing system makes it far easier to achieve the high-quality finish you are aiming for. For London homeowners in particular, where older housing stock and high property values raise the stakes considerably, a few minutes of monthly attention protects both the fabric of the building and its value.
Conclusion
Efficient under sink plumbing comes down to three things: components that are correctly installed and genuinely accessible, cupboard space that is organised well enough to allow inspection and future upgrades, and a maintenance habit that catches leaks while they are still trivial. None of that demands technical expertise — it demands familiarity. Knowing where your stopcock is, which valve isolates which tap, and what a healthy trap looks like puts you well ahead of most homeowners.
Apply the simple checks outlined here, keep the space beneath your sink clear and observable, and act on early warning signs rather than waiting for water to appear on the floor. Where the work moves beyond straightforward maintenance — a persistent leak on the pressurised supply side, a seized stopcock, a cracked waste run, or a more involved project such as a quooker tap installation or a heating upgrade involving underfloor heating pipes — bring in a qualified professional. For bathroom projects specifically, our guide to small bathroom remodeling offers practical ideas for making the most of limited space while ensuring plumbing is properly integrated. By understanding your under sink plumbing and maintaining it proactively, you keep your kitchen running smoothly and avoid the disruption and expense of repairs that could have been prevented.
If you are planning a kitchen or bathroom project in the capital and want the plumbing designed properly from the outset rather than improvised on site, contact Mimar Construction. Our team combines careful technical planning with precise delivery, ensuring the systems you cannot see are as well considered as the finishes you can.
Introduction: A Step-by-Step Guide to Electric Underfloor Heating Installation
Electric underfloor heating installation has become an increasingly popular upgrade for homeowners looking to improve comfort, eliminate bulky radiators, and bring modern efficiency to their homes. Whether you are renovating a bathroom, refreshing a kitchen, or upgrading a ground-floor room, understanding the full process from initial planning through to commissioning is essential before any work begins. This guide walks through each stage clearly and in sequence, so you know exactly what to expect and where professional support is needed along the way.
What Is an Electric Heating Floor?
An electric heating floor consists of thin heating cables or pre-assembled mats embedded directly beneath the floor surface. Powered by electricity, the system radiates heat evenly upward from the floor plane, warming the room from the ground up rather than relying on wall-mounted radiators or forced air. According to Thermosphere, electric underfloor heating integrates seamlessly into modern homes as either a primary heat source or a supplementary comfort layer, working particularly well under tiles, laminate, or vinyl flooring where its low-profile installation adds minimal floor height. Because each room can be controlled independently via a thermostat, the system also supports a zoned approach to heating — only warming spaces when and where they are needed.
When Is an Electric Heating Floor System the Right Choice?
An electric heating floor system is best suited to smaller rooms such as bathrooms, en-suites, kitchens, and studies, where the installation footprint is manageable and the benefits of even heat distribution are most noticeable. As Tile Giant explains, it is an ideal solution for both new builds and retrofit renovations where a low installation height — typically under 10mm — is required to avoid significantly raising floor levels. Homeowners are often drawn to electric systems because they respond quickly, warming a room within hours of being switched on, and because they eliminate the need for radiators entirely in the treated zone. Projects that need to avoid the complexity of water-based plumbing, or where available ceiling height or structural constraints rule out thicker floor build-ups, are particularly strong candidates for this approach.
Electric Systems vs. Water-Based Underfloor Heating Pipes
It is worth clarifying the distinction between electric systems and water-based alternatives before going further, as the two are frequently confused. Water-based systems rely on a network of underfloor heating pipes set into screed, connected to a boiler, pump, and manifold. They are better suited to whole-house installations and, while cheaper to run over the long term in larger properties, they involve considerably more complex installation work, higher upfront costs, and longer commissioning times. Electric systems, by contrast, use cable mats rather than underfloor heating pipes, making them far quicker to install, more accessible for smaller areas, and generally more practical for retrofitting into existing homes without major structural disruption. Understanding this difference helps set realistic expectations for both the installation process and the ongoing running costs of each approach.
Electric Underfloor Heating Installation
Planning & Measurement
Subfloor Preparation
Insulation Boards
Mat Placement
Sensor & Thermostat
Resistance Testing
Floor Covering
Commissioning
Planning and Preparation in London Homes
Thorough planning before installation begins is one of the most important factors in a successful outcome. For London homes in particular, where floor heights are often tightly constrained in period properties and room layouts can be irregular, this stage deserves careful attention. The process starts with sketching an accurate room layout and identifying all fixed elements — toilets, vanity units, kitchen cabinets, built-in furniture — that will sit over the floor and cannot be heated beneath. As noted by PlumbNation, these unheated zones must be excluded from calculations, and a perimeter clearance of 40–50mm should be maintained around all walls and obstacles to prevent cable damage and overheating at the edges. The subfloor should also be assessed at this stage for levelness, dryness, and structural stability, and the proximity of the power source and availability of a dedicated electrical circuit should be confirmed before any materials are ordered.
Choosing the Right System Components
Selecting the right components for the project is just as important as the installation itself. The heating floor mat — a pre-spaced heating cable fixed to a mesh backing — is the most common format for regular-shaped rooms, as it can be rolled out quickly and offers consistent cable spacing. For irregular room shapes, loose cable systems offer greater flexibility since they can be routed around obstacles more freely. Alongside the mat or cable, the key components include a thermostat for user control, a floor sensor for monitoring surface temperature, insulation boards to sit beneath the heating layer, and the appropriate adhesives or levelling compounds for the floor type. Fastwarm highlights that insulation boards beneath the mat can improve system efficiency by up to 50% by preventing heat from being lost downward into the subfloor — making them a component that should not be omitted even when budgets are tight.
Component Tip
Always select a mat sized to match your heatable area rather than the total room footprint. Ordering based on the measured coverage zone — excluding all fixed furniture and fittings — prevents wasteful overlap and ensures the system operates safely and efficiently.
Preparing the Installation Area
Before laying any heating components, the subfloor must be properly prepared. This means thoroughly cleaning the surface to remove dust, debris, and any loose material, then checking for any unevenness, cracks, or protrusions. Any significant dips or bumps should be addressed with a levelling compound before the insulation layer goes down. Once the surface is level and clean, insulation boards can be laid in a staggered pattern — similar to brickwork — and secured with adhesive or screws, with all joints taped to create a continuous thermal barrier. Channels may also need to be cut into the insulation at this stage to accommodate the sensor conduit and cold tail cables, ensuring these elements can sit flush without creating raised areas beneath the finished floor. Smart Plumbing & Heating Bristol emphasises that an unprimed or uneven surface is one of the most common causes of poor adhesion and system failure further down the line, making this preparation stage foundational to the project’s success.
Planning the Placement of the Heating Floor Mat
With the subfloor prepared and insulation in place, the next step is to plan exactly how the heating floor mat will be positioned before it is permanently fixed. The mat should be dry-laid first — unrolled across the floor without adhesive — starting from near the thermostat or power point location and working outward across the heatable zone. When the mat reaches a wall or obstacle, only the mesh backing should be cut with scissors to allow the mat to change direction; the heating cables themselves must never be cut under any circumstances. The mat should be flipped and reversed to double back in the opposite direction, maintaining a consistent spacing between cable runs — typically a minimum of 60mm — and keeping the required perimeter gap from all walls and fixed elements. Topps Tiles recommends completing a resistance test at this dry-lay stage to confirm that the mat’s electrical values match the manufacturer’s specification before any adhesive is applied.
The Core Installation Flow
Once the dry-lay plan has been confirmed and tested, the physical installation can proceed in a logical sequence. The insulation layer should already be in place, with channels prepared for the cold tail cables and sensor conduit. The heating floor mat is then secured to the insulation surface using tape or a suitable adhesive, keeping it flat and free from any distortion or overlapping. The floor sensor is placed in its conduit between two cable runs — not directly under a cable — and the conduit is capped and taped securely in position. The cold tail cables, which are the non-heating leads that run from the mat to the thermostat position, are routed to the wall back box through the prepared channel without any jointing inside the wall cavity. The final electrical connections — connecting the live and neutral terminals to the thermostat and linking the system to the mains supply — must be carried out by a qualified electrician in line with UK Part P regulations. This step is not optional: without certified electrical work, the installation cannot be formally signed off and may not be covered by building insurance.
Controls and Monitoring
The thermostat and floor sensor are integral to the long-term performance of the system, not simply optional add-ons. The thermostat should be mounted on a shaded wall at approximately 1.5 metres above floor level to avoid false readings from direct sunlight or draughts. The floor sensor feeds real-time temperature data back to the thermostat, allowing the system to maintain a set floor surface temperature — typically with a maximum limit of around 27°C to protect certain floor coverings from heat damage. Modern thermostats often support app-based control and programmable schedules, enabling zonal management across different rooms. Fastwarm notes that the thermostat connections should be tested before the floor covering is applied, as accessing the cables beneath a finished floor is not a straightforward repair.
Testing and Checking Before Floor Covering
Before any floor finish is applied, a thorough testing phase is essential. A multimeter should be used to carry out resistance tests on the mat, cables, and floor sensor, with the readings checked against the manufacturer’s stated values to identify any damage that may have occurred during laying. A brief power-on test via the thermostat can also confirm that the system heats without any hotspots or irregularities. The electrician conducting the final wiring should also verify that all connections are secure and certify the installation as compliant. This testing stage is the last practical opportunity to identify and resolve any faults before they are permanently buried beneath the floor surface — making it a step that should never be rushed or skipped.
Installation Stage
Key Action
Planning
Sketch layout, measure heatable area, confirm power source
Subfloor Prep
Clean, level, prime, and install insulation boards
With testing complete and the system certified, the floor covering can be applied. For tiled floors, a self-levelling compound or thinset tile adhesive is applied over the heating mat at a depth of around 1–5mm, encasing the cables without air pockets that could cause uneven heating or hotspots. Even trowelling technique is important here to ensure the mat is fully embedded before tiles are laid on top. For laminate or engineered wood floors, a floating installation method is generally used, as these products cannot be glued directly over the mat. Thick carpets should be avoided entirely, as they insulate against the rising heat and significantly reduce the system’s efficiency. Regardless of floor type, the adhesive or compound should be allowed to cure fully — typically 24–48 hours — before the floor is subjected to weight or grouting begins. This installation walkthrough provides a useful visual reference for the covering stage of the process.
Post-Installation: Setup and Initial Use in London Properties
Once the floor covering has been laid and fully cured, the system is ready to be commissioned. The thermostat should initially be set to floor-sensor mode with a surface temperature limit of 27°C, and the system should be left off for 24 hours after the adhesive has cured to allow any remaining moisture to continue dissipating. When the system is first switched on, the temperature should be raised gradually — by approximately 2°C per day — up to the desired operating level. This controlled approach prevents thermal shock to the floor covering, which could otherwise cause cracking or warping, particularly with stone tiles or wood-based products. Thermosphere recommends running the system on low settings for the first week to allow the entire floor assembly to acclimatise before normal scheduling begins. Certificates from the electrician should be retained alongside any manufacturer warranties for future reference.
Common Mistakes to Avoid
A number of installation errors appear consistently across electric underfloor heating projects, and most are entirely preventable with careful planning. The most serious is cutting the heating cables — only the mesh backing of a heating floor mat should ever be cut, and only with scissors rather than a knife. Positioning the mat beneath fixed fixtures such as toilets, bath panels, or kitchen base units creates trapped heat with no outlet, leading to hotspots and potential cable damage. Skipping the insulation layer beneath the mat is another frequent oversight that results in significant heat loss downward and noticeably higher running costs. Mats should never be overlapped, and the required 40–50mm perimeter gap from walls and obstacles must always be observed. Feeding cable joints or cold tail connections inside wall cavities without proper routing is a wiring fault that can cause overheating within the wall structure. Finally, neglecting to level or prime the subfloor before installation leads to poor adhesion and an uneven finished surface that is difficult to correct after the fact.
DIY or Professional Support?
Electric underfloor heating installation occupies an interesting middle ground when it comes to the DIY versus professional question. The physical preparation work — cleaning and levelling the subfloor, fitting insulation boards, laying and positioning the heating floor mat, and installing the sensor conduit — is accessible to a competent DIYer with basic tools including a multimeter, tape measure, and scissors. In a small bathroom or kitchen, the physical installation can often be completed in one to two days. However, the electrical connection of the system to the mains supply is a different matter entirely. Under UK Part P building regulations, this work must be carried out and certified by a qualified electrician. Attempting to connect the thermostat and mains wiring without the appropriate qualifications not only creates a safety risk but also invalidates the installation for insurance and resale purposes. For complex layouts, larger areas, or properties with limited electrical capacity, engaging a specialist from the outset is the more practical approach overall.
Conclusion: The Complete Electric Underfloor Heating Installation Journey
Electric underfloor heating installation is a well-structured process that, when followed correctly, delivers reliable and efficient warmth beneath almost any floor finish. The journey begins with accurate planning and layout assessment, moves through subfloor preparation and insulation, progresses to the careful positioning and securing of the heating floor mat, and then involves the certified electrical connection of controls and monitoring components. A thorough testing phase before the floor covering is applied protects the investment, and a gradual commissioning process ensures the finished heating floor system performs safely from day one. Avoiding the common mistakes covered in this guide — and knowing where professional input is required — makes the difference between a system that performs well for years and one that causes problems from the outset. If you are considering electric underfloor heating for a London property and would like expert guidance on the right approach for your project, contact the Mimar team to discuss your requirements.
Electric underfloor heating is especially popular in bathroom renovation London projects, where removing radiators can free up wall space and improve comfort.
It can also be a smart addition during a kitchen remodeling, particularly when upgrading flooring and improving day-to-day functionality.
In compact layouts, pairing this system with small bathroom remodeling ideas can help maximise both comfort and usable space.
Because insulation has such a direct impact on efficiency, homeowners may also benefit from exploring broader eco-friendly refurbishments that reduce overall energy consumption.
For properties with older external envelopes, external wall insulation can further improve heat retention and overall comfort.
And since certified electrical work is essential, it is worth understanding EICR certificate cost and importance when planning compliance and safety checks in London homes.
Introduction: The Modern Heating Solution for New Builds
Air source heat pumps represent the future of home heating and cooling, especially for new build properties in London and across the UK. These innovative systems extract heat from the outside air—even in cold weather—and efficiently transfer it into your home. As the UK moves toward more sustainable building practices, air to air heat pump installation has become increasingly common in new construction projects, offering an environmentally friendly alternative to traditional gas boilers.
This comprehensive guide walks you through the entire process of fitting air source heat pump systems in new builds. Whether you’re a self-builder creating your dream home, a developer working on multiple properties, or a homeowner planning a new construction, you’ll find practical, step-by-step advice on everything from initial planning to final commissioning and beyond.
With the Future Homes Standard on the horizon and increasing focus on low-carbon technologies, understanding how a heatpump installed in your new property can enhance comfort, reduce carbon emissions, and potentially lower running costs is more valuable than ever. Let’s explore how to integrate these efficient heating systems into your new build project successfully.
Understanding Air Source Heat Pumps in New Homes
Air source heat pumps (ASHPs) operate on a surprisingly simple principle: they extract heat from the outside air and upgrade it through a refrigerant cycle to provide warmth for your home. Unlike traditional heating systems that burn fuel to generate heat, ASHPs move existing heat from one place to another—making them incredibly efficient. In well-designed systems, they can deliver 2.5-4+ units of heat for every unit of electricity consumed, depending on conditions and system design.
When considering air to air heat pump installation for a new build, it’s important to understand the two main system types:
Air-to-Water Heat Pumps
Air-to-water systems transfer the captured heat to water, which is then circulated through your home. These systems:
Heat water for underfloor heating, radiators, and domestic hot water via a cylinder
Function as a direct replacement for a traditional boiler in a wet central heating system
Represent the most common choice for UK new builds as they align well with Building Regulations and low-carbon targets
Air-to-Air Heat Pumps
Air-to-air systems work more like efficient reverse-cycle air conditioning units:
They use an outdoor unit connected to indoor fan-coil units that deliver warm (or cool) air directly into rooms
They don’t provide hot water—a separate solution is required
They’re particularly attractive for heating and cooling in open-plan or well-zoned homes
New build homes offer the perfect environment for heat pump technology. According to the Self Build Portal, modern construction standards create highly insulated, airtight buildings that allow heat pumps to operate at their most efficient—using lower flow temperatures while maintaining comfortable indoor conditions.
Why New Builds Are Ideal for Heat Pumps
There are several reasons why having a heatpump installed during construction makes perfect sense:
High fabric efficiency – New builds can be designed with excellent insulation and airtightness, allowing heat pumps to run steadily at lower temperatures, maximizing efficiency and minimizing running costs.
Freedom to design optimal systems – Starting from scratch means you can incorporate low-temperature emitters like underfloor heating from the beginning, rather than retrofitting them later.
Design flexibility – New construction allows you to position outdoor units optimally, plan efficient pipe runs, and allocate space for all components without compromises.
Regulatory compliance – Heat pumps help new homes meet increasingly stringent energy and carbon standards, making them attractive for achieving required SAP/EPC ratings.
The Grant UK Heat Pump Guide highlights that new builds with heat pumps often achieve better efficiency than retrofitted systems because the entire heating system can be designed specifically for low-temperature operation from day one.
Did You Know?
The Future Homes Standard, due to be implemented in the mid-2020s, aims for 75-80% lower carbon emissions compared to 2013 standards. Industry experts anticipate that heat pumps will effectively replace fossil fuel boilers in most new homes as a result of these changes.
Planning Stage: Preparing for Installation in London
Successful air source heat pump installation begins long before the first component is fitted. In London’s competitive property market, where space comes at a premium and building regulations can be stringent, early planning is absolutely essential.
The Importance of Early Planning in London Projects
Heat pump performance depends heavily on whole-house design considerations, including fabric efficiency, emitter selection, plant space allocation, and electrical infrastructure. For London properties, where space optimization is crucial, decisions about system type, plant room location, outdoor unit positioning, and heat distribution methods should be made at the concept or planning stage—not left until first fix.
Integrating these decisions early in your London project ensures that your architect can incorporate necessary spaces and access points into the design, potentially saving costly revisions later.
Assessing Heating and Cooling Needs
Before choosing specific equipment, you’ll need to consider several factors about your new London home:
Size, orientation, and overall design of the property
Insulation strategy and glazing performance
Whether cooling will be required (particularly relevant in London’s urban heat island)
Hot water requirements based on occupancy
While detailed heat-loss calculations will be performed later by your installer, having a conceptual understanding of these factors helps guide early decisions. According to the Royal Institution of Chartered Surveyors, properly sizing a heat pump is critical to its performance—undersized units struggle to heat the property, while oversized ones may cycle inefficiently and cost more than necessary.
Choosing Between Air-to-Air and Air-to-Water Systems for London Properties
For London new builds, your choice between system types should consider:
Choose air-to-water if:
You want hot water and space heating from a single system
You’re already planning underfloor heating or radiators
Meeting SAP calculations and Building Regulations is a priority
You prefer a more traditional heating approach with modern efficiency
Choose air-to-air if:
You want integrated cooling capability (valuable in London summers)
You’re comfortable having a separate hot water solution
Your London property has an open-plan layout well-suited to fan-coil placement
You want rapid response times for heating and cooling
Positioning Indoor and Outdoor Units in London Properties
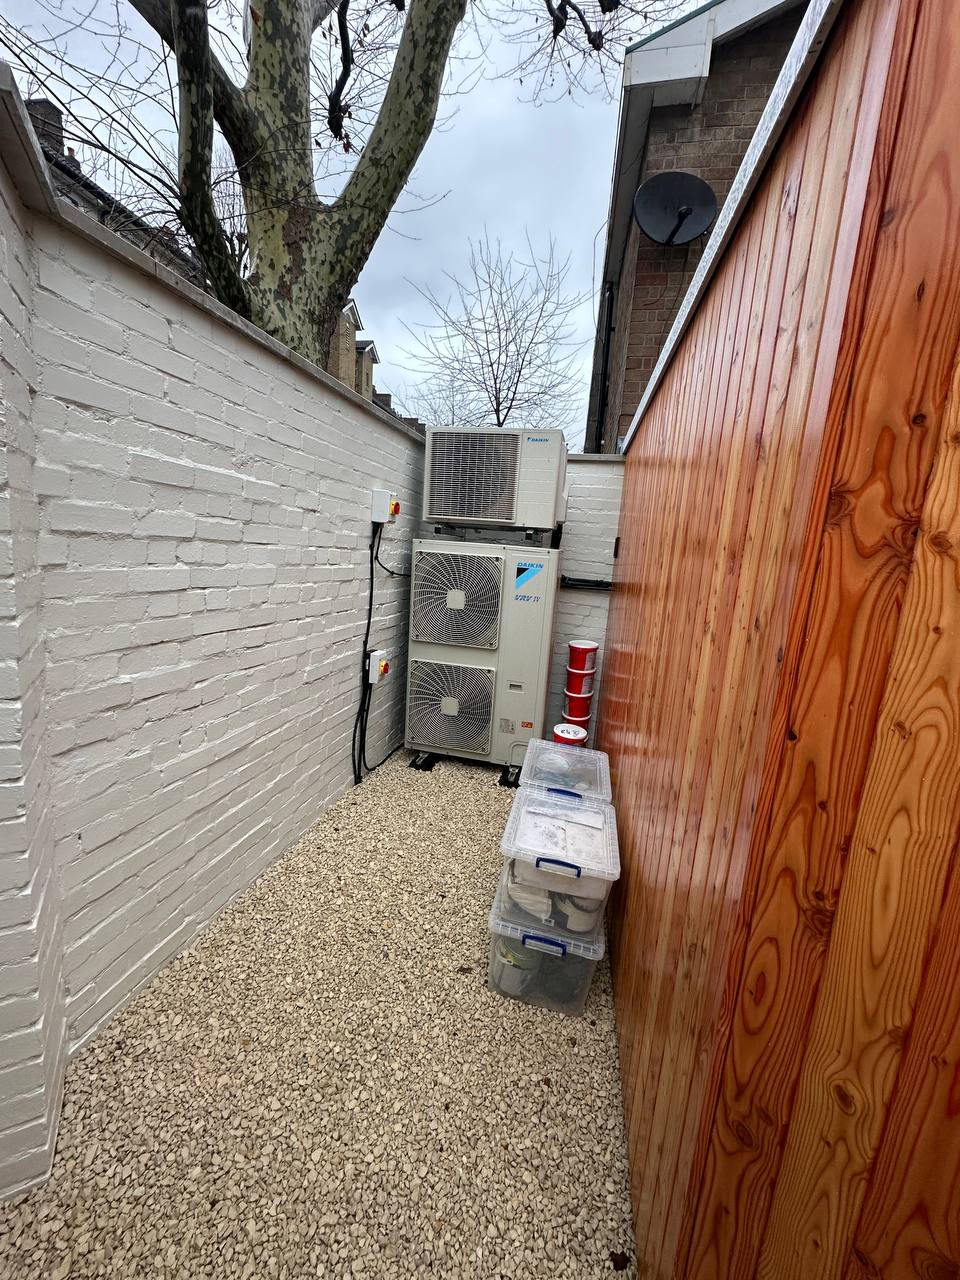
Location planning is particularly critical in London, where outdoor space may be limited and neighbor considerations important:
Outdoor unit placement should consider:
Clear airflow access and adequate clearances for performance and maintenance
Proximity to the plant room to minimize pipe runs and heat losses
Noise implications for neighboring properties (especially important in London’s dense urban environment)
Visual impact on the property’s appearance and any planning sensitivities
Security and protection from debris or damage in urban settings
Indoor component location planning should include:
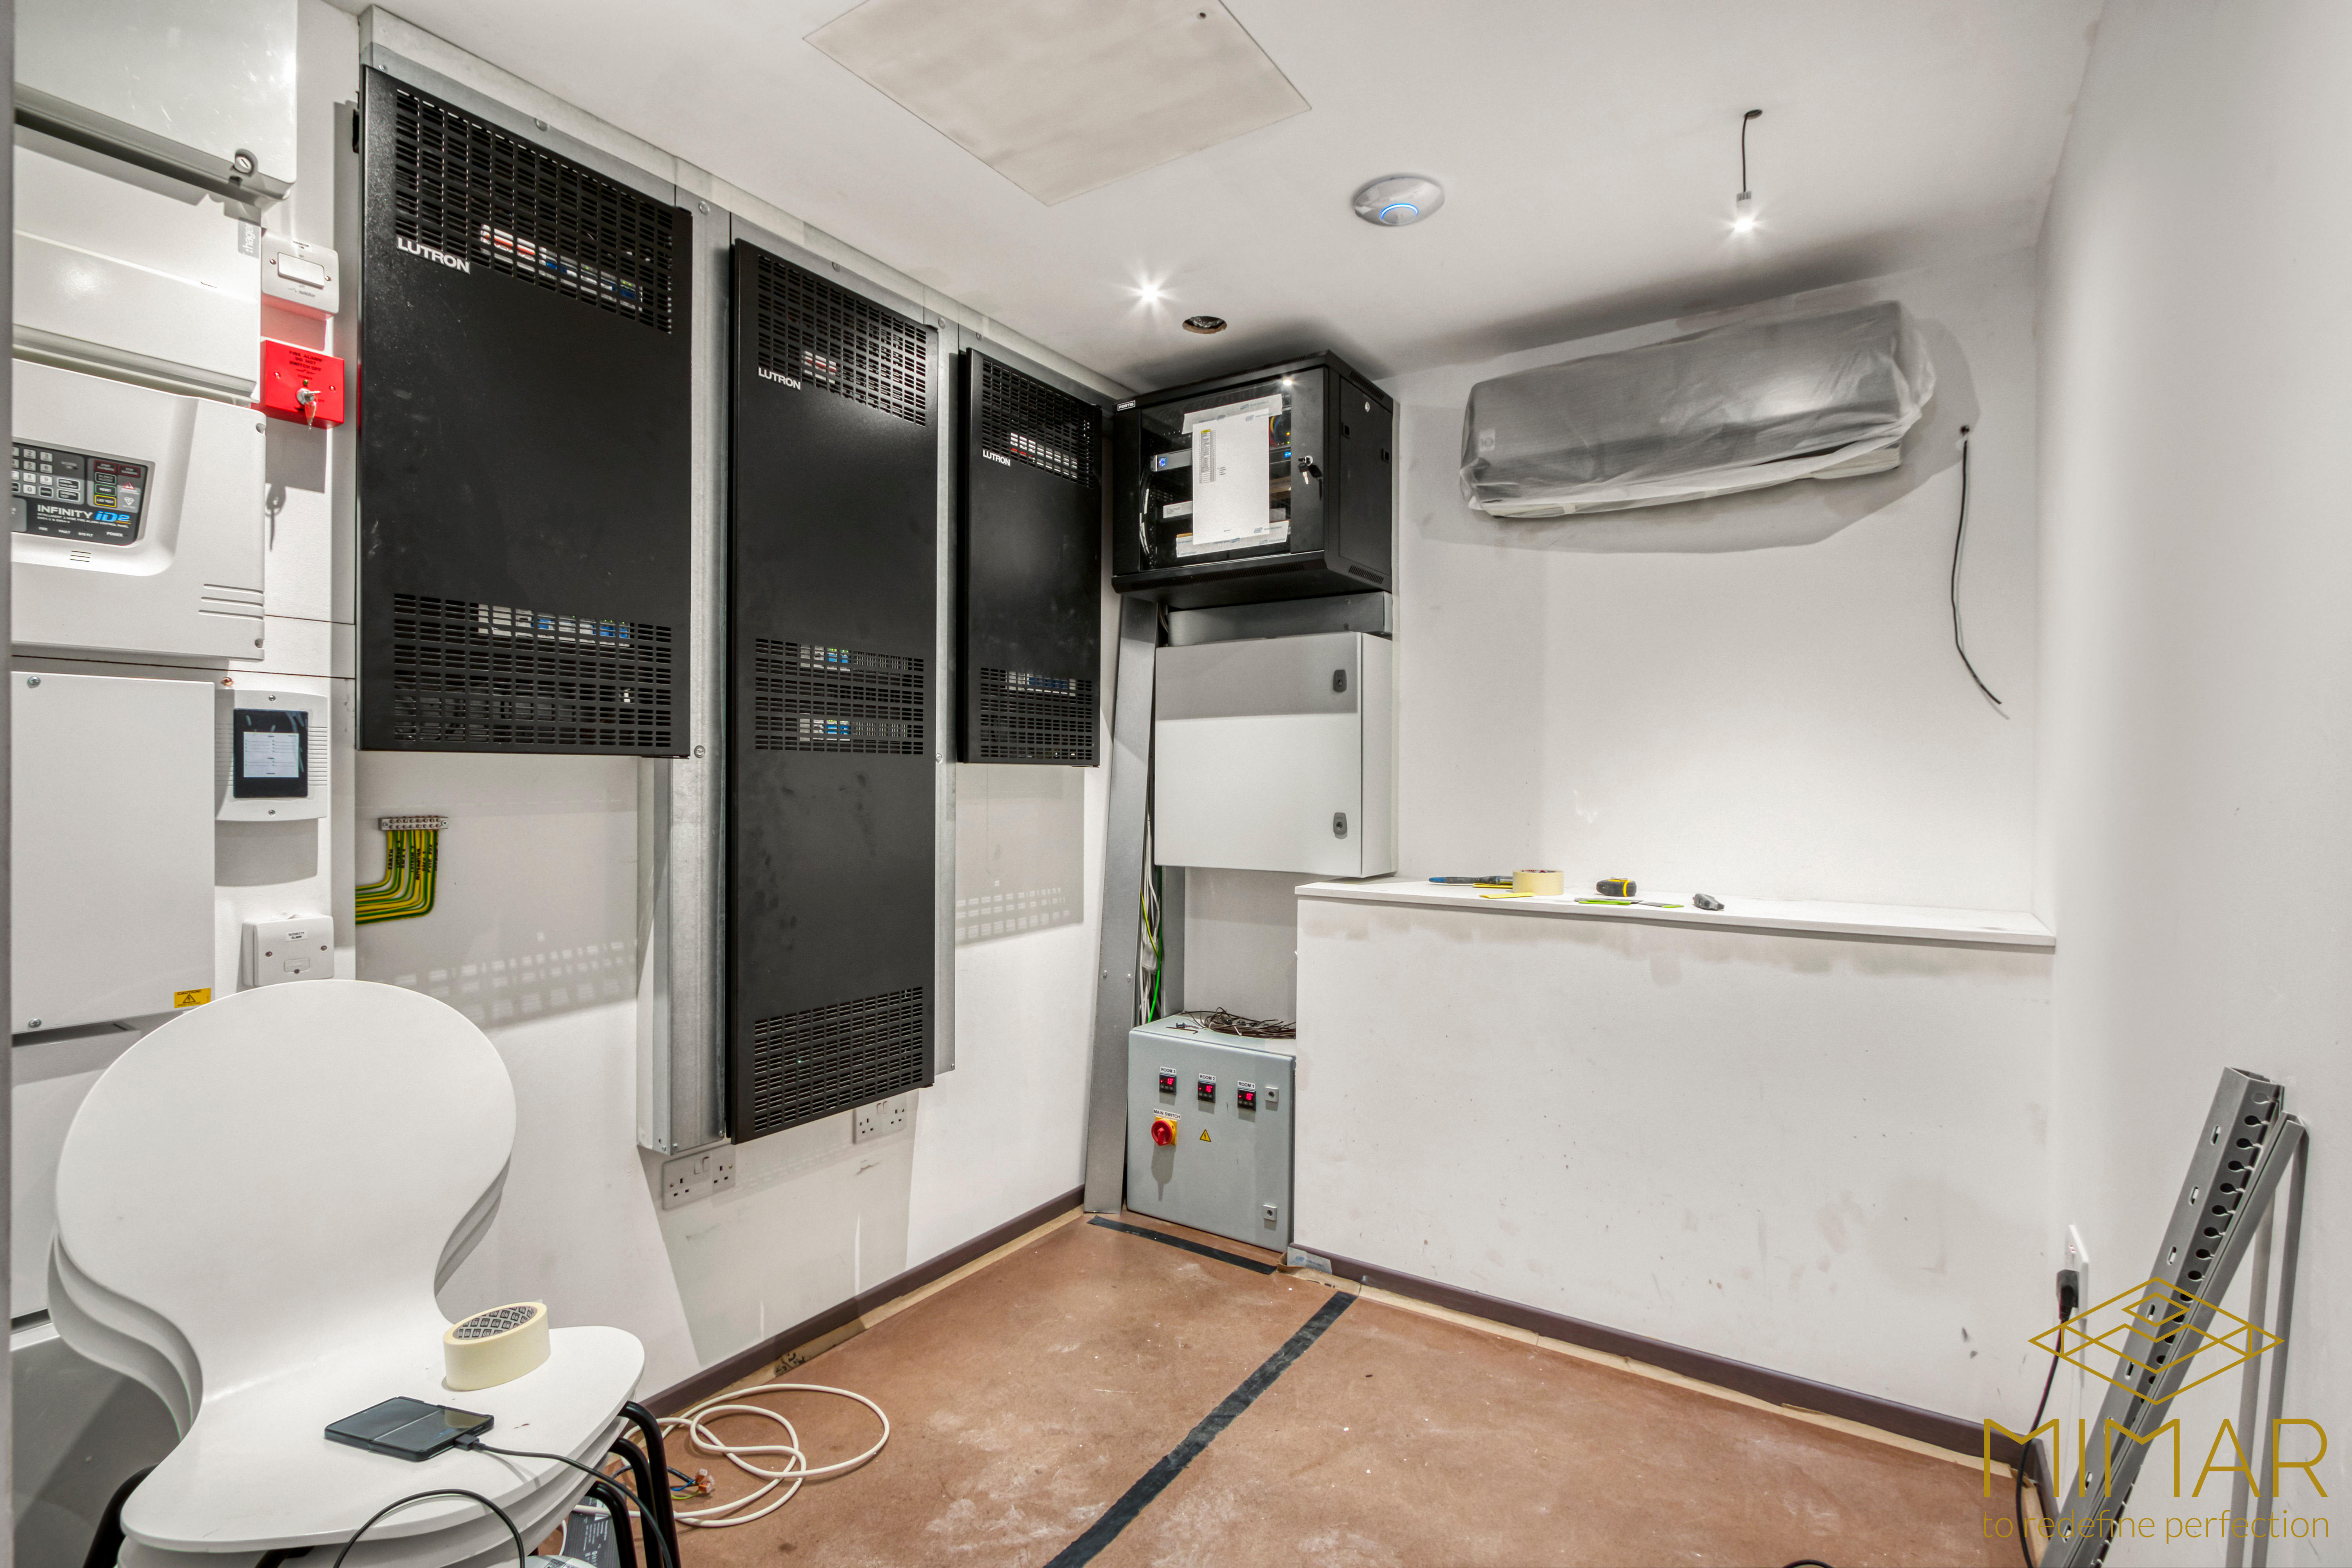
Space allocation for hot water cylinders, buffer tanks, and manifolds (for air-to-water)
Optimal positioning of fan-coil units for effective air distribution (for air-to-air)
Access for maintenance and future component replacement
London ASHP Planning
Space Constraints
Noise Considerations
System Integration
Planning Requirements
Efficiency Optimization
Aesthetic Impact
Coordination between your architect, builder, and mechanical/electrical designers is essential. Your ASHP specialist should be involved early to ensure that your London property’s plans incorporate:
ASHP plant space requirements in floor plans
Outdoor unit position on elevations and site plan
Routing for pipework, cable runs, and condensate drainage before structural and services drawings are finalized
This collaborative approach ensures that your fitting air source heat pump project is seamlessly integrated into the overall building design, reducing the risk of complications during construction.
Compliance, Permissions and Standards in London
Navigating London’s regulatory landscape for air source heat pump installation requires careful attention to both national regulations and local planning considerations. Understanding what permissions you need—and when you don’t—can save valuable time in your project timeline.
Planning Permission vs. Permitted Development in London
In most cases across England, including London, domestic air source heat pumps are classified as “permitted development,” meaning specific planning permission is often not required if the installation meets certain criteria. According to Rise Retrofit, these criteria typically include:
The unit is at least one meter from the property boundary
The installation complies with MCS Planning Standards or equivalent
The external unit volume is less than 0.6 cubic meters
The unit is not installed on a pitched roof or within 1 meter of a flat roof edge
The unit meets noise requirements (typically 42 decibels at neighboring property boundaries)
However, in London’s complex urban environment, you may still need planning permission if:
Your property is in a Conservation Area or Area of Outstanding Natural Beauty
You’re working with a listed building
The property is a flat rather than a house
Your installation doesn’t meet all permitted development criteria
As of May 2025, new regulations have simplified and expanded permitted development rights for heat pumps, making installations “simpler and more flexible” according to Navien UK. This is particularly beneficial for London homeowners looking to adopt this technology.
Building Regulations and Energy Standards for London New Builds
All new London homes must comply with current Building Regulations, with several sections particularly relevant to heat pump installations:
Part L (Conservation of fuel and power) – Sets standards for energy efficiency and carbon performance; heat pumps help meet low CO₂ targets and primary energy limits
Part F (Ventilation) – Important when designing airtight homes with MVHR systems alongside heat pumps
Part P (Electrical safety) – Covers electrical work associated with heat pump installation
Additionally, the London Plan includes policies that encourage sustainable design and construction, often making heat pumps an attractive option for meeting local planning requirements alongside national Building Regulations.
Certification and Competence Requirements
When selecting an installer for your London project, look for these important credentials:
MCS (Microgeneration Certification Scheme) – This UK certification covers both products and installers, and is typically required for accessing incentives like the Boiler Upgrade Scheme. It also provides quality assurance that’s particularly valuable in London’s high-end property market.
Professional body memberships – Affiliations with organizations like NICEIC (for electrical work) or relevant heating and ventilation associations indicate competence and adherence to industry standards.
Essential Documentation for London Heat Pump Projects
As a London property owner or developer, you should expect to receive a comprehensive documentation package including:
System design specifications and heat-loss calculation summary
MCS certificate (if applicable) and installer credentials
Manufacturer documentation including user and installation manuals
Commissioning sheets showing key settings, test results, and sign-off
Warranty and guarantee details
Maintenance schedule and service contact information
This documentation isn’t just for compliance—it’s valuable for future property sales and helps ensure your system operates efficiently for years to come.
Selecting the Right System and Installer
Choosing the appropriate heat pump system and a qualified installer is crucial for ensuring your London new build benefits from efficient, reliable heating and cooling. This section guides you through the evaluation process.
Evaluating Heat Pump Systems for London New Builds
When assessing heat pump options for your project, consider these key factors:
Capacity Range
Correct sizing is critical for system performance. Installers should calculate the required output based on the specific heat loss characteristics of your new build—not on general rules of thumb. According to the Greenmatch installation guide, an accurately sized system will provide optimal comfort while maintaining efficiency.
Efficiency Ratings
Look for high seasonal efficiency (SCOP) values and good energy-label ratings specifically for low-temperature operation, which is typical in well-insulated new homes. Higher efficiency ratings translate directly to lower running costs—particularly important in London where energy costs can be significant.
Brand Reliability
Prioritize established manufacturers with strong UK support networks, long-term parts availability, and proven track records. This is especially important in London’s premium property market, where system reliability directly impacts property value.
System Compatibility
Ensure the system can integrate effectively with other planned features of your home, such as:
Underfloor heating systems
Smart home controls
Solar PV or other renewable technologies
Cooling capabilities (if required)
Choosing a Professional Installer in London
London’s competitive construction market offers many installation companies, but quality varies significantly. Look for these qualifications when selecting your installer:
Relevant certification – MCS accreditation and proof of training on your chosen system brand
New build experience – Specific experience with heat pump installation in new construction rather than just retrofits
Local knowledge – Familiarity with London’s unique building stock and regulatory requirements
Comprehensive design approach – Willingness to provide detailed heat-loss calculations and system design documentation
Clear quotation process – Transparent pricing with scope, exclusions, and assumptions clearly stated
Verifiable references – Case studies or references from similar London projects
Essential Questions for Your Installer
Before committing to an installer for your air to air heat pump installation or air-to-water system, ask these important questions:
“How have you sized the system for my specific new build design?”
“What flow temperatures are you designing to, and how does that affect my choice of underfloor heating or radiators?”
“How will the hot water system be configured, and what are the expected reheat times?”
“What’s included in your commissioning and handover process?”
“What warranties apply to both equipment and workmanship, and what servicing is required to maintain them?”
“How will you integrate the heat pump with other systems like PV, MVHR, or smart controls?”
“What experience do you have with similar London properties?”
Understanding Heat Pump Installation Quotations
A professional quotation for your London heat pump installation should include:
Component
What to Expect
System Description
Clear details of system type, model, capacity, and main components
Installation Scope
Overview of pipework, electrical works, and any builder’s work required
Programme
Timeline showing first-fix, second-fix, and commissioning dates aligned with build stages
Cost Breakdown
Itemized equipment, labor, and ancillary costs including VAT
Terms
Warranty information, service agreements, and payment schedule
Be wary of quotations that lack detail or seem unusually low—quality heat pump installation requires proper design and premium components to deliver long-term performance.
Site Preparation for New Builds
Proper site preparation is fundamental to successful heat pump integration in your London new build. This phase ensures that all the necessary groundwork is in place before equipment installation begins.
Integrating Heat Pump Installation into Your London Build Schedule
Heat pump installation isn’t a single event but a process that spans several stages of construction. For efficient project management, your London build schedule should accommodate:
Early shell stages: Installation of concrete pad/bracket and creation of external wall penetrations
First fix: Installation of pipework and cable routes before walls and floors are closed
Second fix: Mounting of equipment, final connections, and system filling
Commissioning: Final setup and testing near completion once power and water are available
This phased approach aligns with typical London construction sequencing and ensures that heat pump installation doesn’t create delays or require disruptive remedial work.
Preparing Foundations for the Outdoor Unit
The outdoor unit of your heat pump requires proper structural support. In London properties where space is often at a premium, careful preparation of this area is essential:
Concrete pad or slabs:
Must provide a stable, level base
Should be slightly raised to prevent issues with standing water or snow
Typically needs to be at least 100mm thick for domestic units
Wall brackets (common in London where ground space is limited):
Must be rated for the weight of your specific unit
Should include vibration isolation to prevent noise transmission through the building structure
Require adequate clearance for service access
Your installer should provide specific requirements for your chosen system, but discussing these needs with your builder early prevents misunderstandings or delays.
Planning Service Routes in London New Builds
Early planning of service routes is particularly important in London’s often complex building designs:
Refrigerant or flow/return pipe routes between outdoor unit and indoor components should be planned before insulation, plasterboarding, and floor screeds are completed
Electrical supply cables and control wiring paths need to be incorporated into first-fix electrical works
Condensate drainage routes must be established with adequate fall and frost protection
The Samphire Homes ASHP guide emphasizes that minimizing pipe and cable runs not only reduces heat loss and installation costs but also improves system efficiency—particularly valuable in premium London developments where energy performance is a selling point.
Ensuring Proper Ventilation and Drainage
For optimal performance of your outdoor unit in London’s variable climate:
Maintain clear space around the unit according to manufacturer specifications (typically 300-500mm at sides and 1000mm at front)
Ensure good air circulation to prevent the unit from recycling its own cold exhaust air
Provide proper drainage for condensate and defrost water to prevent ice formation on paths and patios during winter
Consider London’s microclimate—units in sheltered urban locations may perform differently than those in exposed areas
Coordinating Between Trades in London Projects
Effective coordination between different trades is crucial for smooth heat pump installation, especially in London’s fast-paced construction environment:
Builder: Responsible for pad/bracket installation, wall penetrations, structural openings, and making good
Plumber/ASHP installer: Handles primary pipework, cylinder installation, manifold fitting, and system flushing
Electrician: Provides electrical supplies, isolators, consumer unit modifications, and control system wiring
Regular coordination meetings should align heat pump installation tasks with other building services to avoid clashes and ensure efficient workflow—particularly important in London’s typically tight construction timelines.
Outdoor Unit Installation: Step-by-Step
The outdoor unit is the heart of your air source heat pump system. Its proper installation is crucial for system efficiency, longevity, and compliance with London’s noise regulations and aesthetic considerations.
Finalizing the Outdoor Unit Position
Before installation begins, confirm the final position based on:
Required clearances for airflow and maintenance access (typically 300-500mm at sides, 1000mm at front)
Noise implications for neighboring properties—particularly important in London’s dense urban environment
Aesthetic impact on the property’s appearance
Optimal pipe run distance to indoor components
Protection from falling debris, especially in London’s tree-lined streets
According to Navien UK’s installation guide, positioning the outdoor unit correctly not only ensures optimal performance but also helps comply with the noise limits required under permitted development rules—crucial for avoiding planning issues in London.
Installation Sequence for Outdoor Units
The typical installation process follows these steps:
Install base or brackets: Secure the concrete pad or wall-mounting brackets, ensuring they’re level and stable. For wall mounts, verify the wall construction can support the unit’s weight.
Position anti-vibration mounts: These reduce noise transmission and are particularly important in London’s terraced or semi-detached properties where noise could affect neighbors.
Lift and secure the outdoor unit: Carefully position the unit on its mounting system, ensuring it’s level and firmly fixed. This often requires at least two people due to the unit’s weight.
Connect service routes: Attach pipework (refrigerant lines for air-to-air systems or flow/return water pipes for air-to-water systems) and electrical connections according to the manufacturer’s specifications.
Install condensate drainage: Connect and test the condensate drain to ensure proper water discharge away from the building’s foundations.
Verify clearances: Confirm that the installed unit maintains all required clearances for airflow and future maintenance access.
Weather and Debris Protection in London Conditions
London’s urban environment presents specific challenges for outdoor heat pump units:
Position the unit to avoid overhead gutters or roof edges that could drip directly onto it
Consider simple guards or covers to protect from falling leaves in London’s leafy neighborhoods
Ensure the unit is elevated enough to prevent issues during heavy rain or potential flooding
In areas with high pollution or dust levels (common in central London), allow for more frequent coil cleaning
These precautions help maintain system efficiency and extend equipment life despite London’s variable weather conditions and urban environment.
Professional Tip
In London’s premium property market, consider acoustic enclosures or decorative screens that reduce noise while enhancing aesthetics. These must be carefully designed to maintain proper airflow while addressing both visual impact and sound concerns—particularly valuable in high-end developments where external appearance affects property value.
Differences Between Air-to-Air and Air-to-Water Outdoor Installations
While the outdoor units for both system types look similar, there are important differences in their connections:
Air-to-water systems: Connect to water flow and return pipes, typically with insulation to prevent heat loss and often located close to the internal plant room housing the hot water cylinder
Air-to-air systems: Connect to refrigerant lines that branch to multiple indoor fan-coil units throughout the property, requiring careful planning of refrigerant pipe routes
Your installation team should be experienced with your specific system type to ensure proper setup and compliance with refrigerant handling regulations where applicable.
Indoor Components and Distribution Systems
The indoor elements of your heat pump system are crucial for effectively distributing warmth (and potentially cooling) throughout your London property. This section explains the installation considerations for these components.
Installing Indoor Units for Air-to-Air Systems in London Homes
Air-to-air heat pump systems use indoor fan units to distribute conditioned air directly into your living spaces:
Positioning considerations:
High-wall units are typically installed 2.1-2.4m above floor level for optimal air distribution
Ceiling cassettes provide discreet installation in rooms with suspended ceilings
Floor-standing units may be preferred in rooms with limited wall space
All units should be positioned to avoid direct airflow onto seating areas or beds
Zoning strategy for London properties:
Separate indoor units allow independent temperature control in different zones
Common configurations include separate units for living areas and bedroom zones
For London’s open-plan apartments, strategic unit placement ensures even coverage
Condensate management:
Each indoor unit requires condensate drainage (especially important when using cooling mode)
Drain lines must have sufficient fall (minimum 1:50) to prevent water pooling
Condensate pumps may be required where gravity drainage isn’t possible
Air-to-Water Indoor Components for London New Builds
Air-to-water systems require several indoor components to distribute heat via water:
Hot water cylinder installation:
Typically located in a dedicated plant room, utility room, or purpose-built cupboard
Must be properly sized based on household hot water demand
Requires sufficient access space for maintenance and potential future replacement
Space heating distribution options:
Underfloor heating: Ideal for heat pumps due to its large surface area that works efficiently with lower flow temperatures. According to Nu-Heat Northeast, underfloor heating paired with heat pumps can deliver superior comfort while maintaining high efficiency.
Low-temperature radiators: Larger than conventional radiators to work effectively with the lower flow temperatures typical of heat pump systems
Controls integration:
Central control panel for the heat pump system
Room thermostats and zone controllers for temperature management throughout the property
Weather compensation controls that adjust system operation based on outdoor temperature
Pipework and Cabling Installation
Proper installation of distribution networks is critical for system efficiency:
All pipework and cable routes should be planned and installed before walls and floors are closed to avoid surface-mounting later
Pipework must be properly insulated to minimize heat loss during distribution
Refrigerant pipes for air-to-air systems require careful installation with proper bending techniques and joint sealing
For air-to-water systems, heating circuits should be pressure-tested before final connections
Integration with Other Building Systems
Modern London properties often incorporate multiple systems that should work harmoniously with your heat pump:
MVHR (Mechanical Ventilation with Heat Recovery): Supply and extract locations should be coordinated with your heating distribution to avoid cold spots or interfering with airflow patterns
Solar PV: Controls can be configured to optimize heat pump operation during periods of solar generation, maximizing self-consumption of generated electricity
Smart home systems: Integration with property-wide automation can enhance comfort while optimizing energy use
In London’s premium property market, seamless integration of these systems can significantly enhance both comfort and property value.
Electrical and Control System Integration
The electrical infrastructure and control systems are critical components of your heat pump installation. In London’s high-value property market, sophisticated control systems are increasingly expected as standard in new builds.
The Electrician’s Role in London Heat Pump Installations
A qualified electrician is essential to your installation team and will be responsible for:
Providing a properly sized dedicated circuit for the heat pump with appropriate protection devices
Installing isolators for safe maintenance access
Running power supplies to both outdoor and indoor units
Installing control wiring between system components
Testing all electrical connections for safety and compliance with regulations
In London’s complex regulatory environment, using NICEIC-registered electricians helps ensure compliance with both Building Regulations and specific local requirements.
Connecting to Your Home’s Electrical System
Heat pumps require proper integration with your property’s electrical infrastructure:
The system connects to the consumer unit via a dedicated circuit breaker (typically 20-40 amps depending on system size)
Protection devices including RCDs/RCBOs must be installed according to current regulations
An external weatherproof isolator is installed near the outdoor unit for maintenance safety
For larger systems, your electrician may need to verify that your property’s incoming supply capacity is sufficient
The Greenmatch installation guide notes that electrical work for heat pump installation should always be performed by qualified electricians who understand the specific requirements of these systems.
Control Systems for London Heat Pumps
Modern heat pump installations in London typically include sophisticated control systems:
Basic control components:
Heat pump controller managing overall operation
Room thermostats for temperature monitoring and adjustment
Zone controllers for managing different areas independently
Hot water temperature and timing controls
Advanced control options:
Weather compensation systems that adjust operation based on outdoor temperature
Smart controls allowing remote operation via smartphone apps
Integration with home automation systems
Energy monitoring to track system performance
For London properties, where owners often expect cutting-edge technology, these advanced control options can be a significant selling point.
Setting Up User-Friendly Controls
During commissioning, your installer should:
Configure basic schedules and temperature set-points based on your lifestyle and preferences
Program appropriate set-back temperatures for periods when spaces are unoccupied
Ensure all controls are intuitively labeled and easy to understand
Set up any smartphone apps or remote access systems
This setup process is crucial for ensuring that your system operates efficiently from day one. According to the Samphire Homes ASHP guide, proper control setup can significantly impact both comfort levels and running costs.
London Energy Savings Tip
If your London property has solar PV installed or you’re on a time-of-use electricity tariff, ask your installer about configuring your heat pump controls to prioritize operation during low-cost periods or when solar generation is at its peak. This can substantially reduce running costs in London’s expensive energy market.
Commissioning and Testing Your Heat Pump
Commissioning is the critical final stage that transforms your installed components into a functioning, efficient heating system. This process ensures your London property’s heat pump will deliver optimal performance from day one.
What Commissioning Involves
In simple terms, commissioning includes:
System checks: Verifying that all components are installed correctly and operating as intended
Performance testing: Confirming the system can effectively heat your space and provide hot water as designed
Safety verification: Testing all safety devices and protective functions
Commissioning should always be performed by qualified technicians who understand both the technical requirements of the system and the specific needs of your London property.
The Installer’s Commissioning Process
After the physical installation is complete, your installer will follow a structured commissioning sequence:
System preparation: Filling and flushing the heating system to remove air and debris
Initial power-up: Carefully activating the system and performing initial checks
Configuration: Programming the heat pump controller with appropriate settings
Test cycles: Running the system through heating, cooling (if applicable), and hot water cycles
Performance verification: Measuring key parameters like flow temperatures, return temperatures, and pressure
Control testing: Ensuring all thermostats, zones, and schedules function correctly
Documentation: Recording all commissioning data on a formal commissioning sheet
This process typically takes several hours to complete properly and should not be rushed. According to the Greenmatch installation guide, thorough commissioning is essential for ensuring both efficiency and reliability.
Documentation and Demonstration for London Homeowners
At the end of commissioning, your installer should provide:
Comprehensive user guides and equipment manuals
A summary of key system settings and their purpose
A detailed maintenance schedule outlining required service intervals
Warranty documentation for all major components
Contact information for ongoing support and service
Additionally, they should conduct a thorough demonstration showing you:
How to adjust room temperatures and hot water settings
How to switch between operating modes
How to set schedules and timers
What to do if you notice any warning indicators
This handover process is particularly important in London’s premium property market, where clients expect comprehensive support and clear documentation.
Performance and Efficiency Verification
Before signing off on the installation, your commissioning engineer should verify:
That all rooms can reach and maintain their set-point temperatures
That hot water is delivered at the correct temperature and with appropriate recovery times
That the system is operating within the efficiency parameters promised during design
Some installers may also set up ongoing monitoring to track system performance over time, allowing for future optimization based on actual usage patterns.
Handover: Living With Your New Heat Pump
The handover marks the transition from installation to everyday use of your heat pump system. Understanding how to operate and interact with your new heating system is essential for maximizing comfort and efficiency in your London home.
Essential Knowledge for New Heat Pump Owners
On handover day, ensure you understand:
The basics of turning your system on and off safely
How to select between heating, hot water, and cooling modes (if applicable)
Methods for adjusting room temperatures and hot water settings
Programming schedules for different times of day or days of the week
Special functions like “holiday mode” for periods of absence
How to identify and respond to any warning indicators
Take notes during the demonstration and don’t hesitate to ask questions—this is your opportunity to gain confidence with the system.
The Settling-In Period for London Heat Pump Systems
New heat pump systems typically require an adjustment period:
During the first few weeks, you may need minor adjustments to schedules and set-points as you learn how the system behaves in your specific property
The installer might need to fine-tune weather compensation settings if some rooms are slightly over or under-heated
In new builds, there’s often a “drying out” period where the building fabric releases moisture, which can affect heating behavior
Your usage patterns may evolve as you become familiar with the system, leading to further optimization opportunities
This settling-in phase is normal and doesn’t indicate any problem with the installation—it’s simply part of adapting the system to your specific needs and property characteristics.
Seasonal Operation in London’s Climate
Understanding how your system operates throughout London’s seasonal changes helps maximize comfort and efficiency:
Air-to-air systems:
Switching between heating and cooling modes requires a simple controller adjustment
Set appropriate temperatures—avoid excessively low cooling settings in summer (around 23-24°C is typically comfortable while remaining efficient)
Be aware that performance can vary with outdoor temperature, particularly in London’s occasional temperature extremes
Air-to-water systems:
Space heating typically runs more in winter months while hot water production continues year-round
Some systems have different settings for the heating season versus summer mode
Weather compensation automatically adjusts operation based on outdoor conditions, optimizing efficiency
Adapting to Heat Pump Living
Heat pumps operate differently from traditional heating systems, and adapting your habits can enhance comfort and efficiency:
Heat pumps typically work best when maintaining steady temperatures rather than with large setbacks and recovery periods
In well-insulated London new builds, minor temperature setbacks (1-2°C) overnight or during absences are more efficient than turning the system off completely
Be patient with temperature changes—heat pumps often heat rooms more gradually than gas boilers but maintain more consistent comfort
Take advantage of zoning capabilities to heat only the areas you’re using, particularly valuable in larger London properties
With proper understanding and small adjustments to your heating habits, your heat pump will deliver exceptional comfort while maintaining energy efficiency.
Maintenance, Servicing and Long-Term Care
Proper maintenance ensures your London heat pump installation continues to operate efficiently throughout its expected 15-20 year lifespan. This section outlines essential care practices for heat pump owners.
Routine Homeowner Maintenance
As a heat pump owner, several simple maintenance tasks will help maintain peak performance:
Regularly check that the outdoor unit remains clear of leaves, debris, and snow—particularly important in London’s leafy suburbs and during autumn
Ensure vegetation around the outdoor unit is trimmed back to maintain proper airflow (typically at least 300-500mm clearance)
Periodically check indoor components for any signs of water leakage or unusual operation
If you have an air-to-air system, clean or replace indoor unit filters according to manufacturer recommendations (typically every 1-3 months)
According to the Rise Retrofit quick guide, keeping the outdoor unit clean and unobstructed is one of the most important maintenance tasks and can significantly impact system efficiency.
Professional Servicing Requirements
To maintain warranty coverage and ensure optimal performance, professional servicing is essential:
Most manufacturers recommend annual servicing by a qualified technician
Professional service typically includes:
Visual inspection of outdoor and indoor units
Checking refrigerant levels and pressures
Examination of electrical connections and components
Cleaning of heat exchangers and filters
Verification of control system operation
Testing of safety devices
For London properties, consider setting up a service agreement with your installer or a reputable local maintenance company
Regular professional servicing not only maintains efficiency but can identify potential issues before they develop into costly problems.
The Impact of Good Maintenance on Performance
Investing in proper maintenance delivers significant benefits:
Sustained efficiency: Well-maintained systems maintain their efficiency ratings, keeping running costs low—particularly important with London’s high energy prices
Enhanced reliability: Regular checks reduce the risk of unexpected breakdowns and extend system lifespan
Warranty protection: Most manufacturers require documented annual servicing to maintain warranty coverage
Optimal comfort: Properly maintained systems deliver more consistent heating and cooling performance
The Royal Institution of Chartered Surveyors notes that well-maintained heat pumps can maintain their efficiency levels throughout their operational life, making maintenance a worthwhile investment.
Recognizing Warning Signs
Being alert to potential issues allows for early intervention. Contact your service provider if you notice:
A noticeable drop in heating performance or hot water temperature
Unusual noises from either outdoor or indoor units
Error codes or warning lights on your controller display
Significant ice buildup on the outdoor unit outside of normal defrost cycles
Unexpected increases in electricity consumption
Prompt attention to these warning signs can prevent minor issues from developing into major problems requiring costly repairs.
London Property Management Tip
For London investment properties or high-end homes, consider remote monitoring systems that alert both you and your maintenance provider to performance issues in real-time. These systems can be particularly valuable for properties that aren’t continuously occupied, providing peace of mind and protecting your investment.
Costs, Timelines and Avoiding Common Pitfalls
Understanding the financial and scheduling aspects of heat pump installation helps ensure your London project proceeds smoothly and delivers value for money.
Heat Pump Installation Timeline in London New Builds
Heat pump installation integrates with your construction schedule at several key points:
Design stage (pre-construction): System selection, layout planning, and plant space allocation
Shell and first fix: Installation of outdoor unit base, wall penetrations, and preliminary pipe/cable runs
Second fix: Equipment mounting, final connections, and system filling
Pre-completion: Commissioning, testing, and handover
For most London residential properties, the actual on-site installation work typically spans 2-5 days, depending on system complexity and property size. However, these days are spread across the construction timeline rather than occurring consecutively.
According to Nu-Heat Northeast, coordinating heat pump installation with other construction activities is essential for efficiency and cost control, particularly in London’s fast-paced building environment.
Cost Components for London Heat Pump Projects
While specific prices vary based on property size, system type, and London location, understanding the main cost categories helps with budgeting:
Equipment costs:
Outdoor unit(s)
Indoor components (cylinder, manifolds, fan coils)
Control systems
Distribution system (underfloor heating, radiators, or fan coils)
Installation labor:
ASHP specialist/heating engineer
Electrician
Commissioning engineer
Additional works:
Groundworks for outdoor unit base
Electrical supply upgrades if required
Any decorative screening or acoustic treatment
In London’s premium construction market, high-quality heat pump installations typically represent a significant but worthwhile investment in long-term comfort and energy efficiency.
Common Installation Mistakes and How to Avoid Them
Being aware of typical pitfalls helps ensure your project runs smoothly:
Late decision-making: Selecting a heat pump after the design is finalized often leads to compromised locations and inefficient layouts. Solution: Integrate heat pump planning from the earliest design stages.
Poor outdoor unit positioning: Inadequate attention to noise, airflow, or access can cause neighbor complaints and performance issues. Solution: Carefully consider all aspects of outdoor unit location, particularly in London’s dense urban environment.
Undersized distribution systems: Conventional radiators or underfloor heating not designed for heat pump operation can lead to poor comfort and efficiency. Solution: Ensure all emitters are specifically designed for low-temperature operation.
Weak coordination between trades: Miscommunication often results in missing or misrouted services. Solution: Establish clear drawings, specifications, and regular site coordination meetings.
Insufficient user training: Inadequate handover can lead to inefficient operation. Solution: Ensure comprehensive demonstration and documentation are provided.
The Navien UK installation guide emphasizes that proper planning and communication between all parties involved is the key to avoiding these common issues.
Maximizing Value from Your London Heat Pump Investment
To ensure the best return on your investment:
Select a system with high seasonal efficiency ratings (SCOP)
Prioritize quality installation over lowest upfront cost
Consider the total cost of ownership (initial investment plus running costs) rather than just purchase price
Ensure your system is properly sized—neither oversized nor undersized
Choose a reliable manufacturer with good warranty coverage and UK support
In London’s property market, a well-designed and properly installed heat pump system can add significant value to your property while delivering long-term operating cost benefits.
Integration with Your Home’s Energy Strategy
Heat pumps work most effectively as part of a comprehensive energy strategy. For London new builds, integrating your heat pump with other systems and approaches maximizes both comfort and efficiency.
Heat Pumps in Low-Carbon London Homes
Your air source heat pump forms a central component in a low-carbon home strategy:
It provides efficient electric heating, aligning with the UK’s increasingly renewable electricity grid
It supports London’s sustainability goals and helps meet building regulations
When paired with other technologies, it creates a comprehensive approach to reducing carbon emissions and energy costs
The Grant UK guide to heat pumps in new builds notes that heat pumps are increasingly becoming the standard heating solution for new properties as the UK moves toward its net-zero carbon goals.
Complementary Building Approaches
Several design and construction approaches work synergistically with heat pumps:
Insulation and airtightness:
High-performance insulation reduces heat loss, allowing smaller heat pump systems
Together, these “fabric first” measures can reduce heating demand by 50-80% compared to older construction methods
According to Self Build Portal, better fabric efficiency translates directly into smaller, more affordable heat pump systems and significantly lower running costs—particularly valuable in London where both construction and energy costs are high.
Low-temperature emitters:
Underfloor heating provides large surface areas ideal for the lower flow temperatures of heat pumps
Oversized or low-temperature radiators deliver effective warmth without requiring high water temperatures
These emitters enable heat pumps to operate at their most efficient flow temperatures (typically 35-45°C)
Technology Integration for London Smart Homes
Modern London properties often incorporate multiple technologies that can work together with heat pumps:
Solar PV integration:
Heat pumps can be programmed to prioritize operation during periods of solar generation
This “self-consumption” approach maximizes the value of your solar electricity
Some systems can automatically heat water when excess solar power is available
Smart tariffs and controls:
Time-of-use electricity tariffs allow heat pumps to operate when electricity is cheapest
Smart controls can optimize operation based on electricity prices, weather forecasts, and occupancy patterns
These approaches can significantly reduce running costs in London’s expensive energy market
Home battery systems:
Battery storage can further enhance self-consumption of solar energy
Some advanced systems can store cheap off-peak electricity specifically for heat pump use
This approach is particularly valuable for maximizing energy independence
Future-Proofing Your London Property
Installing a heat pump in your new London property offers significant future benefits:
Regulatory readiness: Your property will already meet increasingly stringent energy regulations
Energy price protection: As electricity continues to decarbonize while gas prices potentially rise, heat pumps offer long-term cost stability
Upgrade pathways: A well-designed system can accommodate future technological improvements in controls and integration
By viewing your heat pump as part of an integrated energy strategy rather than just a heating appliance, you maximize both its immediate benefits and its long-term value to your London property.
Conclusion: Your Path to Efficient Heating
Installing an air source heat pump in your London new build represents a forward-thinking approach to home heating and cooling. From initial planning through design, installation, commissioning, and ongoing operation, the journey requires careful consideration and expert implementation—but the rewards are substantial.
A properly designed and installed heat pump system delivers multiple benefits for London properties:
Efficient, low-carbon heating that aligns with both national and London-specific environmental goals
Potential for cooling capability—increasingly valuable in London’s warming climate
Integration with smart home technologies and renewable energy sources
Long-term energy cost stability in an uncertain market
Enhanced property value in London’s premium real estate market
The key to success lies in approaching air to air heat pump installation as an integral part of your overall building design rather than an afterthought. By planning early, selecting qualified professionals, and ensuring proper integration with your building’s fabric and other systems, you’ll create a home that delivers exceptional comfort while minimizing environmental impact.
For the best results with fitting air source heat pump systems in your London new build, remember these essential principles:
Engage with heat pump specialists during the earliest design phases
Prioritize building fabric efficiency alongside your heating system design
Select appropriately sized systems and components designed specifically for heat pump operation
Choose qualified, experienced installers with relevant certification
Ensure comprehensive commissioning and handover
Maintain your system regularly to preserve efficiency and reliability
With these considerations in mind, your heatpump installed in your new London property will provide years of efficient, comfortable, and sustainable heating—representing a wise investment in both your home’s immediate livability and its long-term value.
Ready to explore how an air source heat pump could enhance your London new build project? Contact our team of specialists for a consultation tailored to your specific requirements and property design.
An Electrical Installation Condition Report (EICR) is a comprehensive assessment document that evaluates the safety and condition of the electrical systems within a property. This detailed inspection examines all fixed wiring, distribution boards, socket outlets, and other electrical installations to ensure they meet current safety standards. The EICR certificate cost represents the investment property owners make to confirm their electrical systems are safe for continued use and compliant with regulations.
For property owners in London and across the UK, understanding EICR cost factors has become increasingly important as electrical safety regulations have tightened. An EICR isn’t just a document—it’s a crucial safety measure that identifies potential hazards before they become dangerous, protecting both property and lives. The certificate provides documented evidence that electrical systems have been professionally assessed and either approved as safe or identified as requiring remedial work.
EICR Certificate
Safety Assessment
Legal Compliance
Defect Identification
Recommendations
Risk Mitigation
Professional Verification
The Legal and Practical Importance of an EICR
The legal landscape around electrical safety has evolved significantly in recent years, particularly for rental properties. EICR certificates are no longer optional for many property owners—they’re mandatory. For landlords in England, the Electrical Safety Standards in the Private Rented Sector Regulations 2020 require an EICR before any new tenancy begins and at least every five years thereafter. Failure to comply can result in fines of up to £30,000, making the EICR certificate cost a necessary expense rather than an optional outlay.
Beyond legal compliance, EICRs serve several practical purposes:
They identify potential fire risks from faulty wiring or overloaded circuits
They prevent electric shock hazards by ensuring proper earthing and bonding
They document the condition of electrical installations for property transactions
They provide peace of mind that a property’s electrical systems are safe
For homeowners or those considering improvements such as adding a basement apartment, while not legally mandated, an EICR is recommended every 10 years or when buying or selling a property. The Electrical Safety First organization advises that regular electrical inspections are a prudent safety measure for all properties, regardless of legal requirements.
Legal Requirement Note
Landlords must provide a copy of the EICR to existing tenants within 28 days of inspection, to new tenants before they move in, and to local authorities within 7 days if requested. This documentation requirement makes the EICR cost an essential part of a landlord’s compliance budget.
Who Needs an EICR and When?
Different property owners and managers have varying obligations regarding electrical safety reports. Understanding when an EICR is required helps to plan for the associated costs effectively. For extensive property refurbishments in London or when selecting the right construction and refurbishment partner, it is critical to schedule EICRs at the appropriate project phases.
Obtain a valid EICR before the start of new tenancies
Ensure existing tenancies have a valid EICR (this requirement came into force in April 2021)
Renew the EICR at least every five years, or more frequently if the previous report recommends it
Arrange for a new EICR following significant electrical modifications
Homeowners
While not legally required, homeowners are advised to arrange an EICR:
Every 10 years for owner-occupied properties
When purchasing a property (to verify the condition of electrical installations)
Before selling a property (to reassure potential buyers)
After major renovations or electrical work
Commercial Property Owners
Business premises have their own requirements under the Electricity at Work Regulations 1989:
Regular EICRs are essential to meet health and safety obligations
The frequency depends on the type of business and risk assessment
High-risk environments may require annual inspections
Insurance policies often require up-to-date electrical safety documentation
Factors Influencing EICR Cost in London
The cost of an EICR certificate varies considerably based on several key factors. In London’s diverse property market, these variables can significantly impact the final price you’ll pay.
Property Size and Complexity
Larger properties naturally require more time to inspect thoroughly, directly affecting the EICR cost. A studio flat might take 2-3 hours to inspect, while a 5-bedroom house could require a full day. Each additional circuit, distribution board, and electrical fixture adds to the inspection time and, consequently, the cost.
Property Type
Different property types present varying levels of complexity:
Residential flats typically have the lowest EICR costs
Houses with more extensive wiring systems cost more to inspect
Houses in Multiple Occupation (HMOs) require particularly thorough inspections due to their higher risk profile and regulatory requirements
Commercial properties often have complex electrical systems that command premium inspection rates
London Location Premium
London’s geographical factor significantly impacts EICR certificate costs. Central London postcodes typically command a 15-25% premium over outer boroughs due to higher overhead costs for electrical contractors, parking challenges, and congestion charge considerations. This “London premium” is a consistent factor across all property services.
Age and Condition of Electrical Installations
Older properties or those with outdated electrical installations require more extensive testing and often take longer to inspect thoroughly:
Properties with older wiring systems (pre-1980s) typically incur higher inspection costs
Installations with obvious signs of wear or previous DIY modifications need more careful examination
Newer properties with modern consumer units and wiring generally require less intensive inspection
According to professional electricians, these factors combine to create a wide range of potential costs, making it essential to get a property-specific quote rather than relying on general pricing guidelines. If you’re planning a construction or refurbishment project, ensure that building and planning permissions, insurance, and key certifications are in place, as these can affect both compliance and cost.
What’s Included in Your EICR Cost?
Understanding what services are covered in the EICR certificate cost helps property owners evaluate quotes and ensure they’re receiving a thorough inspection. A comprehensive EICR typically includes:
Visual Inspection
The electrician will visually examine all accessible electrical installations, including:
Consumer units/fuse boards
Wiring systems and their enclosures
Socket outlets and switches
Light fittings
Fixed appliances and their connections
Technical Testing
Beyond visual inspection, the EICR involves a series of technical tests:
Continuity testing of protective conductors
Insulation resistance measurements
Earth fault loop impedance testing
RCD operation verification
Polarity checks
Comprehensive Reporting
The final component of the EICR cost covers the creation of a detailed report that includes:
Details of the property and inspection
Description of the electrical installation
Any limitations of the inspection
Observations and recommendations coded by severity
Overall assessment of the installation’s condition
The reporting system uses standardized codes to classify findings:
C3: Improvement recommended (not dangerous but advisable)
FI: Further investigation required
A “satisfactory” EICR certificate indicates no C1, C2, or FI observations were found. If any of these codes appear, remedial work will be necessary before a satisfactory certificate can be issued.
EICR Cost Comparison: Residential vs. Commercial
The cost of obtaining an EICR certificate varies significantly depending on property type, with distinct price brackets for residential and commercial properties in London.
Property Type
Typical EICR Cost Range (London, 2024)
Studio/1-bedroom Flat
£120–£180
2-3 Bedroom House
£180–£280
4-5 Bedroom House
£250–£350
HMO (up to 5 bedrooms)
£280–£400
Small Commercial Unit
£250–£400
Medium Commercial Premises
£350–£600
Large Commercial Building
£500–£1,500+
These price ranges reflect the London market specifically, where costs tend to be 15-25% higher than the national average. Several factors explain the cost differential between residential and commercial EICRs:
Why Commercial EICRs Cost More
Complexity: Commercial installations often feature 3-phase power supplies, advanced distribution systems, and specialized equipment
Size: Commercial premises typically have more extensive electrical systems with multiple distribution boards
Accessibility: Testing may need to be scheduled outside business hours, incurring premium rates
Documentation: Commercial reports often require more detailed documentation for insurance and regulatory compliance
It’s worth noting that these costs represent the inspection and certificate only—they do not include remedial work that might be required if safety issues are identified. To make your project more sustainable or energy efficient, learn more about eco-friendly refurbishments and energy-saving installations.
Cost-Saving Tip
Some London electricians offer discounted rates for multiple properties or combined services. Landlords with several rental units can often negotiate better rates by arranging inspections for multiple properties simultaneously.
Understanding Ongoing EICR Costs
When budgeting for electrical safety compliance, property owners should consider that the initial EICR certificate cost may be just the beginning of their financial commitment. Several factors can lead to additional expenses:
Re-inspection Costs After Failed EICRs
If an EICR results in an “unsatisfactory” verdict due to C1, C2, or FI codes, remedial work must be completed before a satisfactory certificate can be issued. After the necessary repairs, a re-inspection is required, which typically costs between £80-£150 in London. Some electricians offer reduced re-inspection rates if they performed the original EICR and subsequent remedial work.
Remedial Work Expenses
The cost of addressing issues identified in an EICR can vary dramatically:
Minor issues like replacing a socket or switch: £60-£120
Upgrading a consumer unit: £350-£600
Rewiring a room: £600-£1,000
Full property rewire: £3,000-£10,000+ depending on property size
Given these potential costs, many property owners in London are opting for bundled services where the same contractor performs the EICR and any necessary remedial work, often at a package rate.
Regular Renewal Requirements
Remember that EICRs have fixed validity periods:
Rental properties: Every 5 years (minimum)
Homeowner properties: Every 10 years (recommended)
Commercial properties: Varies by risk assessment, typically 1-5 years
This means the EICR cost becomes a recurring expense that should be factored into long-term property maintenance budgets.
Emergency Inspection Scenarios
Certain situations may necessitate an unscheduled EICR outside the regular renewal cycle:
After flood or fire damage
Following major renovation work
When purchasing a property with unknown electrical history
If tenants report electrical issues or concerns
Emergency or rush EICRs in London often command a premium of 25-50% above standard rates, particularly if weekend or evening appointments are required. During time-sensitive construction or refurbishment projects, maintaining effective communication between all parties ensures that compliance milestones—like timely EICRs—are met reliably.
Why the EICR Certificate Cost is a Worthwhile Investment
While the EICR cost may initially seem like just another property expense, it represents a valuable investment for several compelling reasons:
Legal Protection and Compliance
For landlords, the cost of an EICR certificate is minimal compared to the potential penalties for non-compliance. With fines of up to £30,000 possible under current regulations, the investment in proper electrical certification is clearly justified. Additionally, insurance policies may be invalidated if required electrical safety checks aren’t maintained, potentially leading to significant financial exposure in the event of an electrical fire or accident.
Enhanced Safety for Occupants
Electrical faults are a leading cause of domestic fires in the UK. The National Residential Landlords Association highlights that regular electrical inspections help identify potential hazards before they cause harm. The EICR cost essentially purchases peace of mind that a property’s electrical systems don’t pose a risk to its occupants or to value-adding home improvements such as basement apartments.
Property Value Protection
A current, satisfactory EICR certificate demonstrates responsible ownership and maintenance, which can positively influence property valuation. For sellers, having an up-to-date EICR available during viewings signals transparency and attention to safety details—qualities that increasingly matter to today’s buyers, particularly in London’s competitive property market. If you are building your dream home in London, factoring in electrical compliance from the planning stage is crucial for long-term value and saleability.
Preventative Economics
Regular electrical inspections often identify minor issues before they develop into major problems. The EICR cost can be viewed as preventative maintenance that helps avoid more expensive emergency repairs. Early detection of issues like overloaded circuits or deteriorating insulation prevents more costly damage and system failures.
Tips for Getting Value When Arranging Your EICR
To ensure you receive quality service at a fair price when arranging an EICR in London, consider these practical recommendations:
Selecting a Qualified Provider
The quality and validity of your EICR depend entirely on the competence of the electrician performing it. To ensure value for money:
Verify that the electrician is registered with a recognized competent person scheme such as NICEIC, NAPIT, or ELECSA
Request proof of qualifications and specific experience with EICRs
Check online reviews and ask for references from previous clients
Confirm they carry professional indemnity insurance
When requesting quotes for EICR certificate costs:
Obtain at least three detailed quotes specifying exactly what’s included
Ask whether re-inspection after remedial work will incur additional costs
Clarify if the quote includes provision of digital and physical certificates
Inquire about any supplementary services included (e.g., minor repairs during inspection)
For larger or more complex projects, a comprehensive site survey and thorough builder vetting process will help ensure quality and compliance across all trades—not just electrical.
Timing Your EICR Strategically
In London’s seasonal electrical services market:
Spring and autumn typically offer better availability and sometimes lower rates
Avoid the end-of-month rush when landlords are preparing properties for new tenancies
Book well in advance of certificate expiry to avoid emergency rates
Maintain a dedicated file (physical or digital) for all electrical documentation including previous EICRs, remedial work invoices, and warranty information. This organized approach simplifies future inspections and can reduce their duration and cost.
Conclusion: Balancing EICR Cost with Safety and Compliance
The EICR certificate cost represents an essential investment in property safety and regulatory compliance, particularly in London’s dynamic real estate environment. While prices vary based on property characteristics and location, the typical range of £120-£350 for residential properties and £250-£1,500+ for commercial premises reflects the thoroughness of the inspection and the expertise required.
Property owners should view the EICR cost not as a burdensome expense but as a valuable safeguard that protects occupants, preserves property value, and ensures legal compliance. The potential consequences of neglecting electrical safety—from regulatory penalties to insurance invalidation and, most critically, the risk of electrical fires or accidents—far outweigh the investment in regular inspections.
When arranging an EICR, prioritize quality and compliance over finding the absolute lowest price. Working with qualified, accredited professionals ensures your certificate will be valid and the inspection thorough enough to identify genuine safety concerns. For best results, choose a builder or contractor with a proven reputation for compliance and transparency.
For landlords, homeowners, and commercial property managers across London, understanding the factors that influence EICR certificate cost helps in budgeting appropriately and recognizing the value received for this important safety measure. Remember that electrical safety is an ongoing commitment—schedule your next inspection well before your current certificate expires to maintain continuous compliance and protection. If you want your project to be sustainable, consult guides to eco-friendly refurbishments and energy efficiency early in your planning process.
If your property is due for an electrical inspection or you’re unsure about your current compliance status, consider consulting with a qualified electrical contractor who specializes in EICRs. Their expertise will help ensure your property remains safe, legally compliant, and protected against electrical hazards for years to come. And remember, strong communication between all parties—from architect to builder to client is key to a smooth and compliant project journey in London.
This website uses cookies
We use cookies to anonymously analyse traffic on our website and to ensure its proper functioning. You consent to our Cookies Policy and Terms of Use if you continue to use Mimar.co.uk website. It’s finePlease stop
Privacy & Cookies
Privacy Overview
This website uses cookies to improve your experience while you navigate through the website. Out of these, the cookies that are categorized as necessary are stored on your browser as they are essential for the working of basic functionalities of the website. We also use third-party cookies that help us analyze and understand how you use this website. These cookies will be stored in your browser only with your consent. You also have the option to opt-out of these cookies. But opting out of some of these cookies may affect your browsing experience.
Necessary cookies are absolutely essential for the website to function properly. This category only includes cookies that ensures basic functionalities and security features of the website. These cookies do not store any personal information.
Any cookies that may not be particularly necessary for the website to function and is used specifically to collect user personal data via analytics, ads, other embedded contents are termed as non-necessary cookies. It is mandatory to procure user consent prior to running these cookies on your website.