Table of Contents
- Introduction
- Understanding House Extensions
- Types of House Extensions in London
- Planning Your House Extension
- Design Considerations
- Regulations, Permits, and Structural Requirements
- Choosing the Right Building Contractor in London
- The House Extension Process – From Concept to Completion
- Integrating Extensions with Home Remodeling
- Costs, Budgeting, and Value
- Managing Disruption and Living Through Construction
- Common Mistakes to Avoid
- Real-World Extension Scenarios
- Conclusion
Introduction: Expanding Your London Home Without Moving
For many London homeowners, the dilemma of needing more space without wanting to relocate has a compelling solution: the house extension. As property prices continue to climb across the capital, extending your existing home offers a pragmatic alternative to the substantial costs and stress associated with moving – including stamp duty, legal fees, and the emotional toll of leaving an established community.
Unlike basic home remodeling that simply reconfigures existing spaces, a house extension physically increases your property’s square footage, often boosting its market value by 10-20% while creating custom-designed spaces that meet your specific needs. Whether accommodating a growing family, creating a dedicated home office, or designing the kitchen of your dreams, extensions represent a significant but rewarding investment in your property’s future.
The success of any extension project largely depends on partnering with professional building contractors who bring specialized expertise to every stage of the process. From initial design concepts to structural assessments and project management, quality building services ensure your vision transforms into a seamless addition to your home.
In this comprehensive guide, we’ll explore everything you need to know about house extensions in London – from the various types available and planning considerations to costs, regulatory requirements, and the importance of working with experienced professionals. Whether you’re just beginning to consider expanding your home or already have plans in motion, this resource will help you navigate the complexities of house construction and home remodeling to create additional living space that enhances both your lifestyle and property value.
Understanding House Extensions
A house extension is a purposeful addition to your existing property that creates entirely new rooms or enlarges current spaces through construction. Unlike interior renovations that work within your home’s existing footprint, extensions expand the physical boundaries of your property, becoming an integral part of your house construction and broader home remodeling strategy.
London homeowners typically consider extensions for several compelling reasons:
- Growing families – Creating additional bedrooms, bathrooms, or play areas for children
- Remote working – Establishing dedicated home office spaces separated from living areas
- Lifestyle enhancements – Adding entertainment rooms, hobby spaces, or accommodations for elderly relatives
- Property value – Increasing square footage and modernizing layouts to boost market appeal
- Avoiding relocation – Maintaining community ties and avoiding the substantial costs of moving
Extensions represent a significant segment of the building services industry in London, offering homeowners a cost-effective alternative to purchasing larger properties. Beyond simply adding space, well-designed extensions can dramatically improve energy efficiency, maximize natural light, and enhance overall well-being by creating purpose-built environments tailored to your specific needs.
When considering how an extension fits within your broader home improvement plans, it’s helpful to view it as both a structural enhancement and an opportunity to reimagine how you use your entire property. Many homeowners find that the process of extending catalyzes a comprehensive rethinking of their living arrangements, creating opportunities for improved flow, functionality, and aesthetic cohesion throughout the home.
Property Value Insight
A thoughtfully designed house extension typically adds more value to your property than it costs to build, with studies showing that extensions can increase home values by 10-20%, depending on location, quality of finish, and how well the new space integrates with the existing structure.
Types of House Extensions in London
London’s diverse housing stock – from Victorian terraces to post-war semis and modern townhouses – offers various extension possibilities. Each type has distinct advantages and suits different property layouts. Building contractors often specialize in particular extension styles based on local architectural patterns and planning considerations.
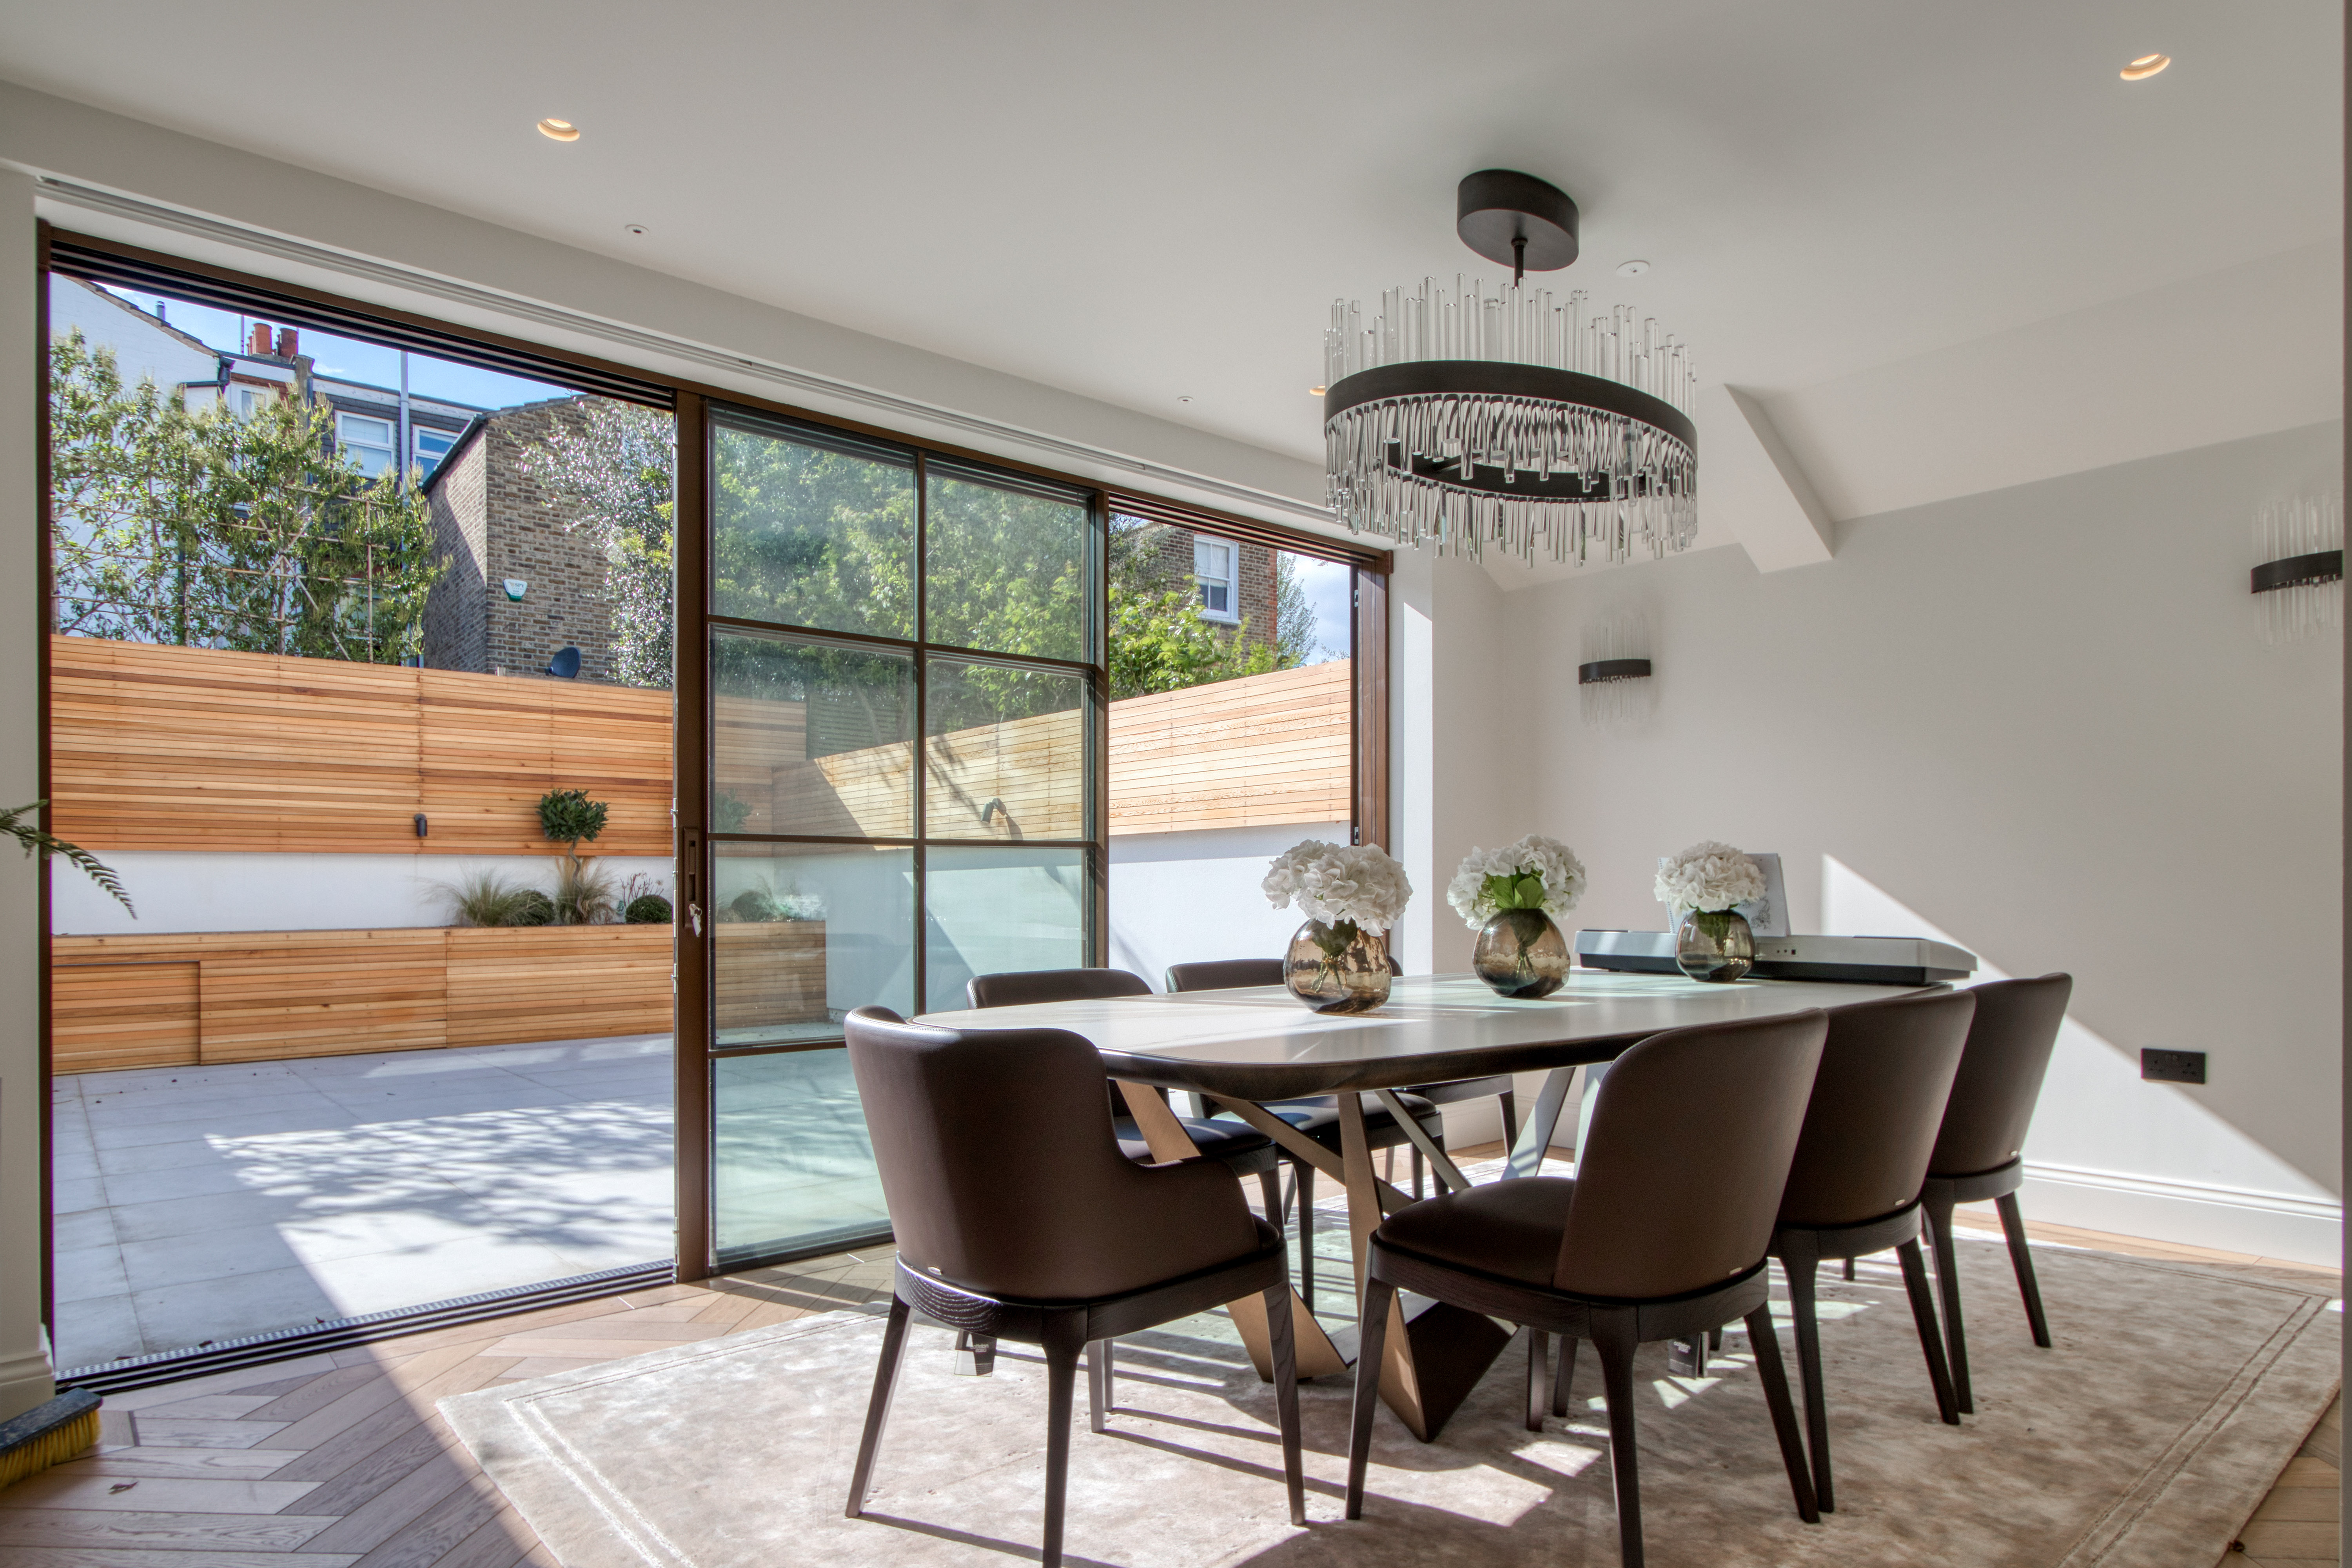
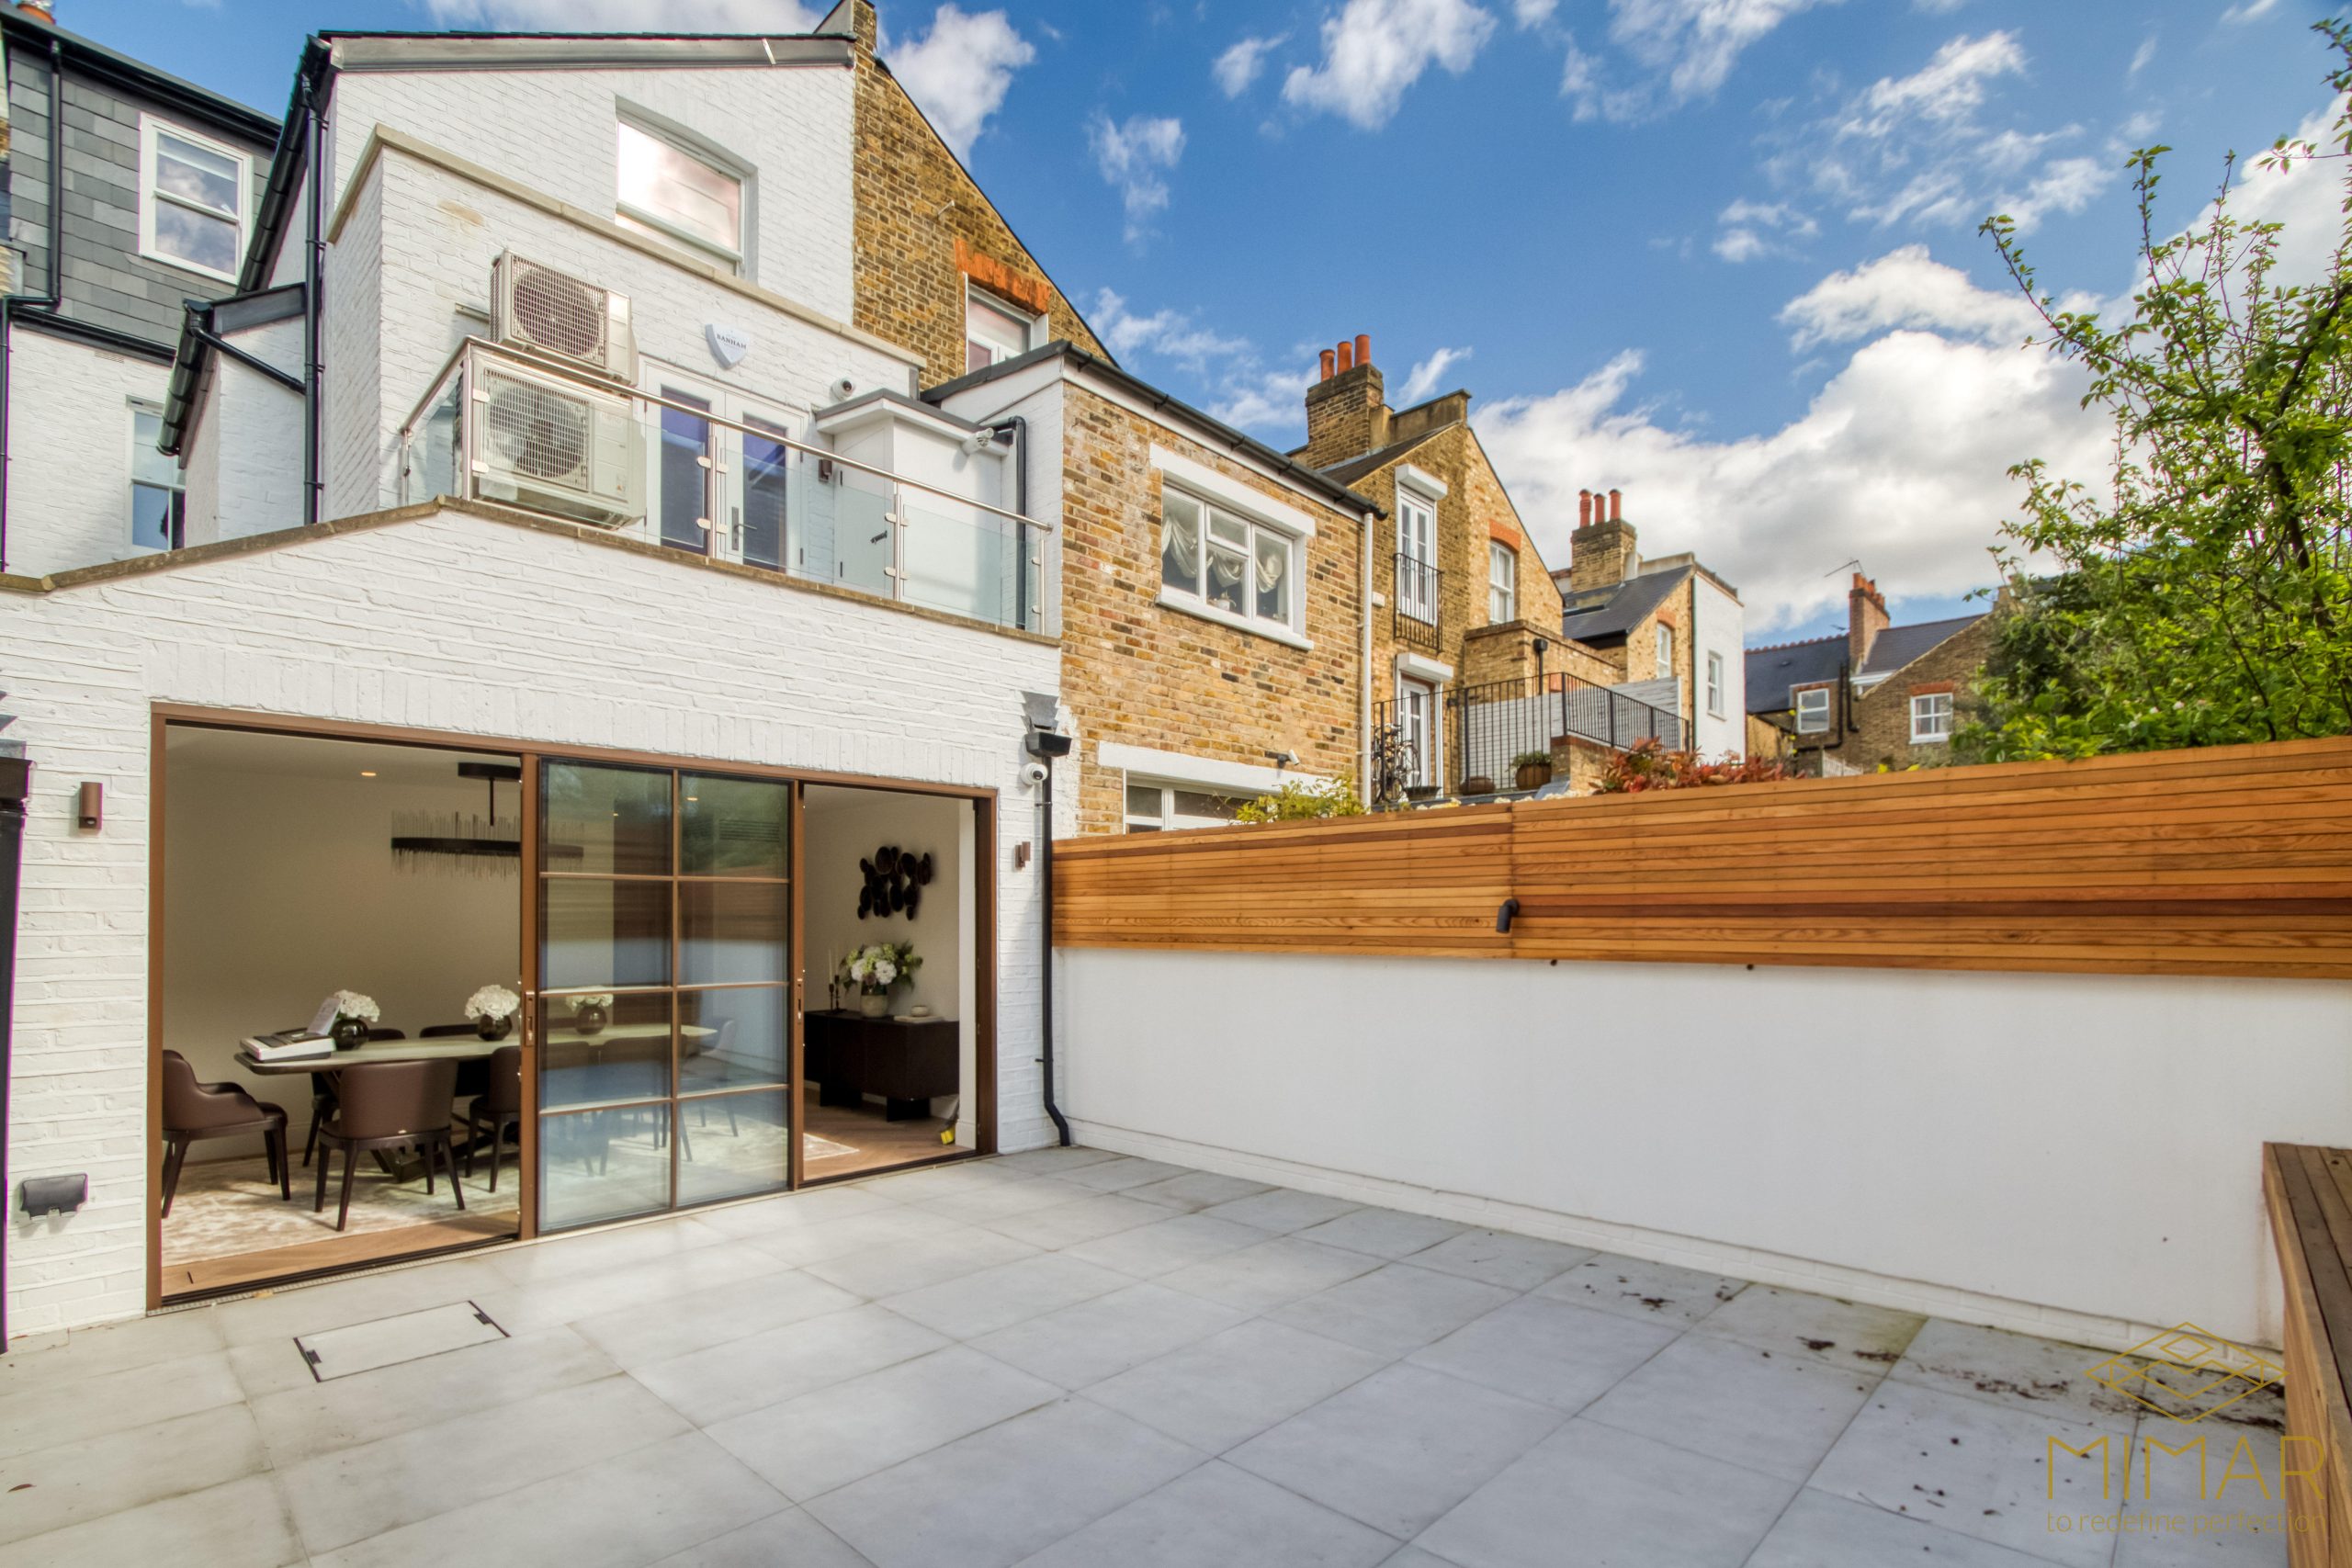
Single-Storey Rear Extension
Perhaps the most common extension type in London, rear extensions expand your home into the garden, typically creating enlarged kitchen and dining spaces. These extensions are particularly popular for period properties where front alterations would face conservation restrictions.
Ideal for: Open-plan kitchen-diners, living areas with improved garden access
Benefits: Enhanced natural light (especially with roof lights or bi-fold doors), improved indoor-outdoor connection, relatively straightforward planning process
Considerations: Reduction of garden space, potential impact on natural light to existing rooms
Side Return Extension
This clever solution utilizes the narrow alleyway often found alongside London’s terraced and semi-detached houses. Building contractors frequently recommend side returns for properties where maximizing ground floor space without sacrificing the garden is a priority.
Ideal for: Widening kitchens, creating utility rooms, home offices or playrooms
Benefits: Preserves rear garden, creates wider, more practical rooms, often falls within permitted development
Considerations: Limited additional space compared to other options, potential party wall agreements
Wrap-Around Extension
Combining both rear and side return extensions, wrap-arounds create L-shaped additions that maximize ground floor space. These comprehensive extensions are popular with London homeowners undertaking significant home remodeling projects.
Ideal for: Creating substantial open-plan living spaces, dramatic kitchen transformations
Benefits: Maximizes available space, excellent opportunity for architectural statements, significant lifestyle enhancement
Considerations: Greater garden impact, typically requires planning permission, higher cost than single-direction extensions
Double-Storey Extension
Adding space on both ground and first floors, double-storey extensions represent significant house construction projects that can transform family homes. London building services often recommend this approach for growing families needing both living space and bedrooms.
Ideal for: Adding bedrooms/bathrooms alongside ground floor living space
Benefits: Maximizes value-to-cost ratio, creates substantial additional space, minimizes proportional foundation costs
Considerations: Almost always requires planning permission, more complex structural requirements, greater neighborhood impact
Over-Structure/Over-Garage Extension
Particularly valuable in space-constrained London neighborhoods, these extensions build above existing single-storey elements of your home, commonly garages or previous ground-floor extensions.
Ideal for: Adding bedrooms or home offices without reducing garden space
Benefits: No garden impact, efficient use of property footprint, often simpler planning process
Considerations: Structural assessment of existing building essential, may require strengthening of existing structures
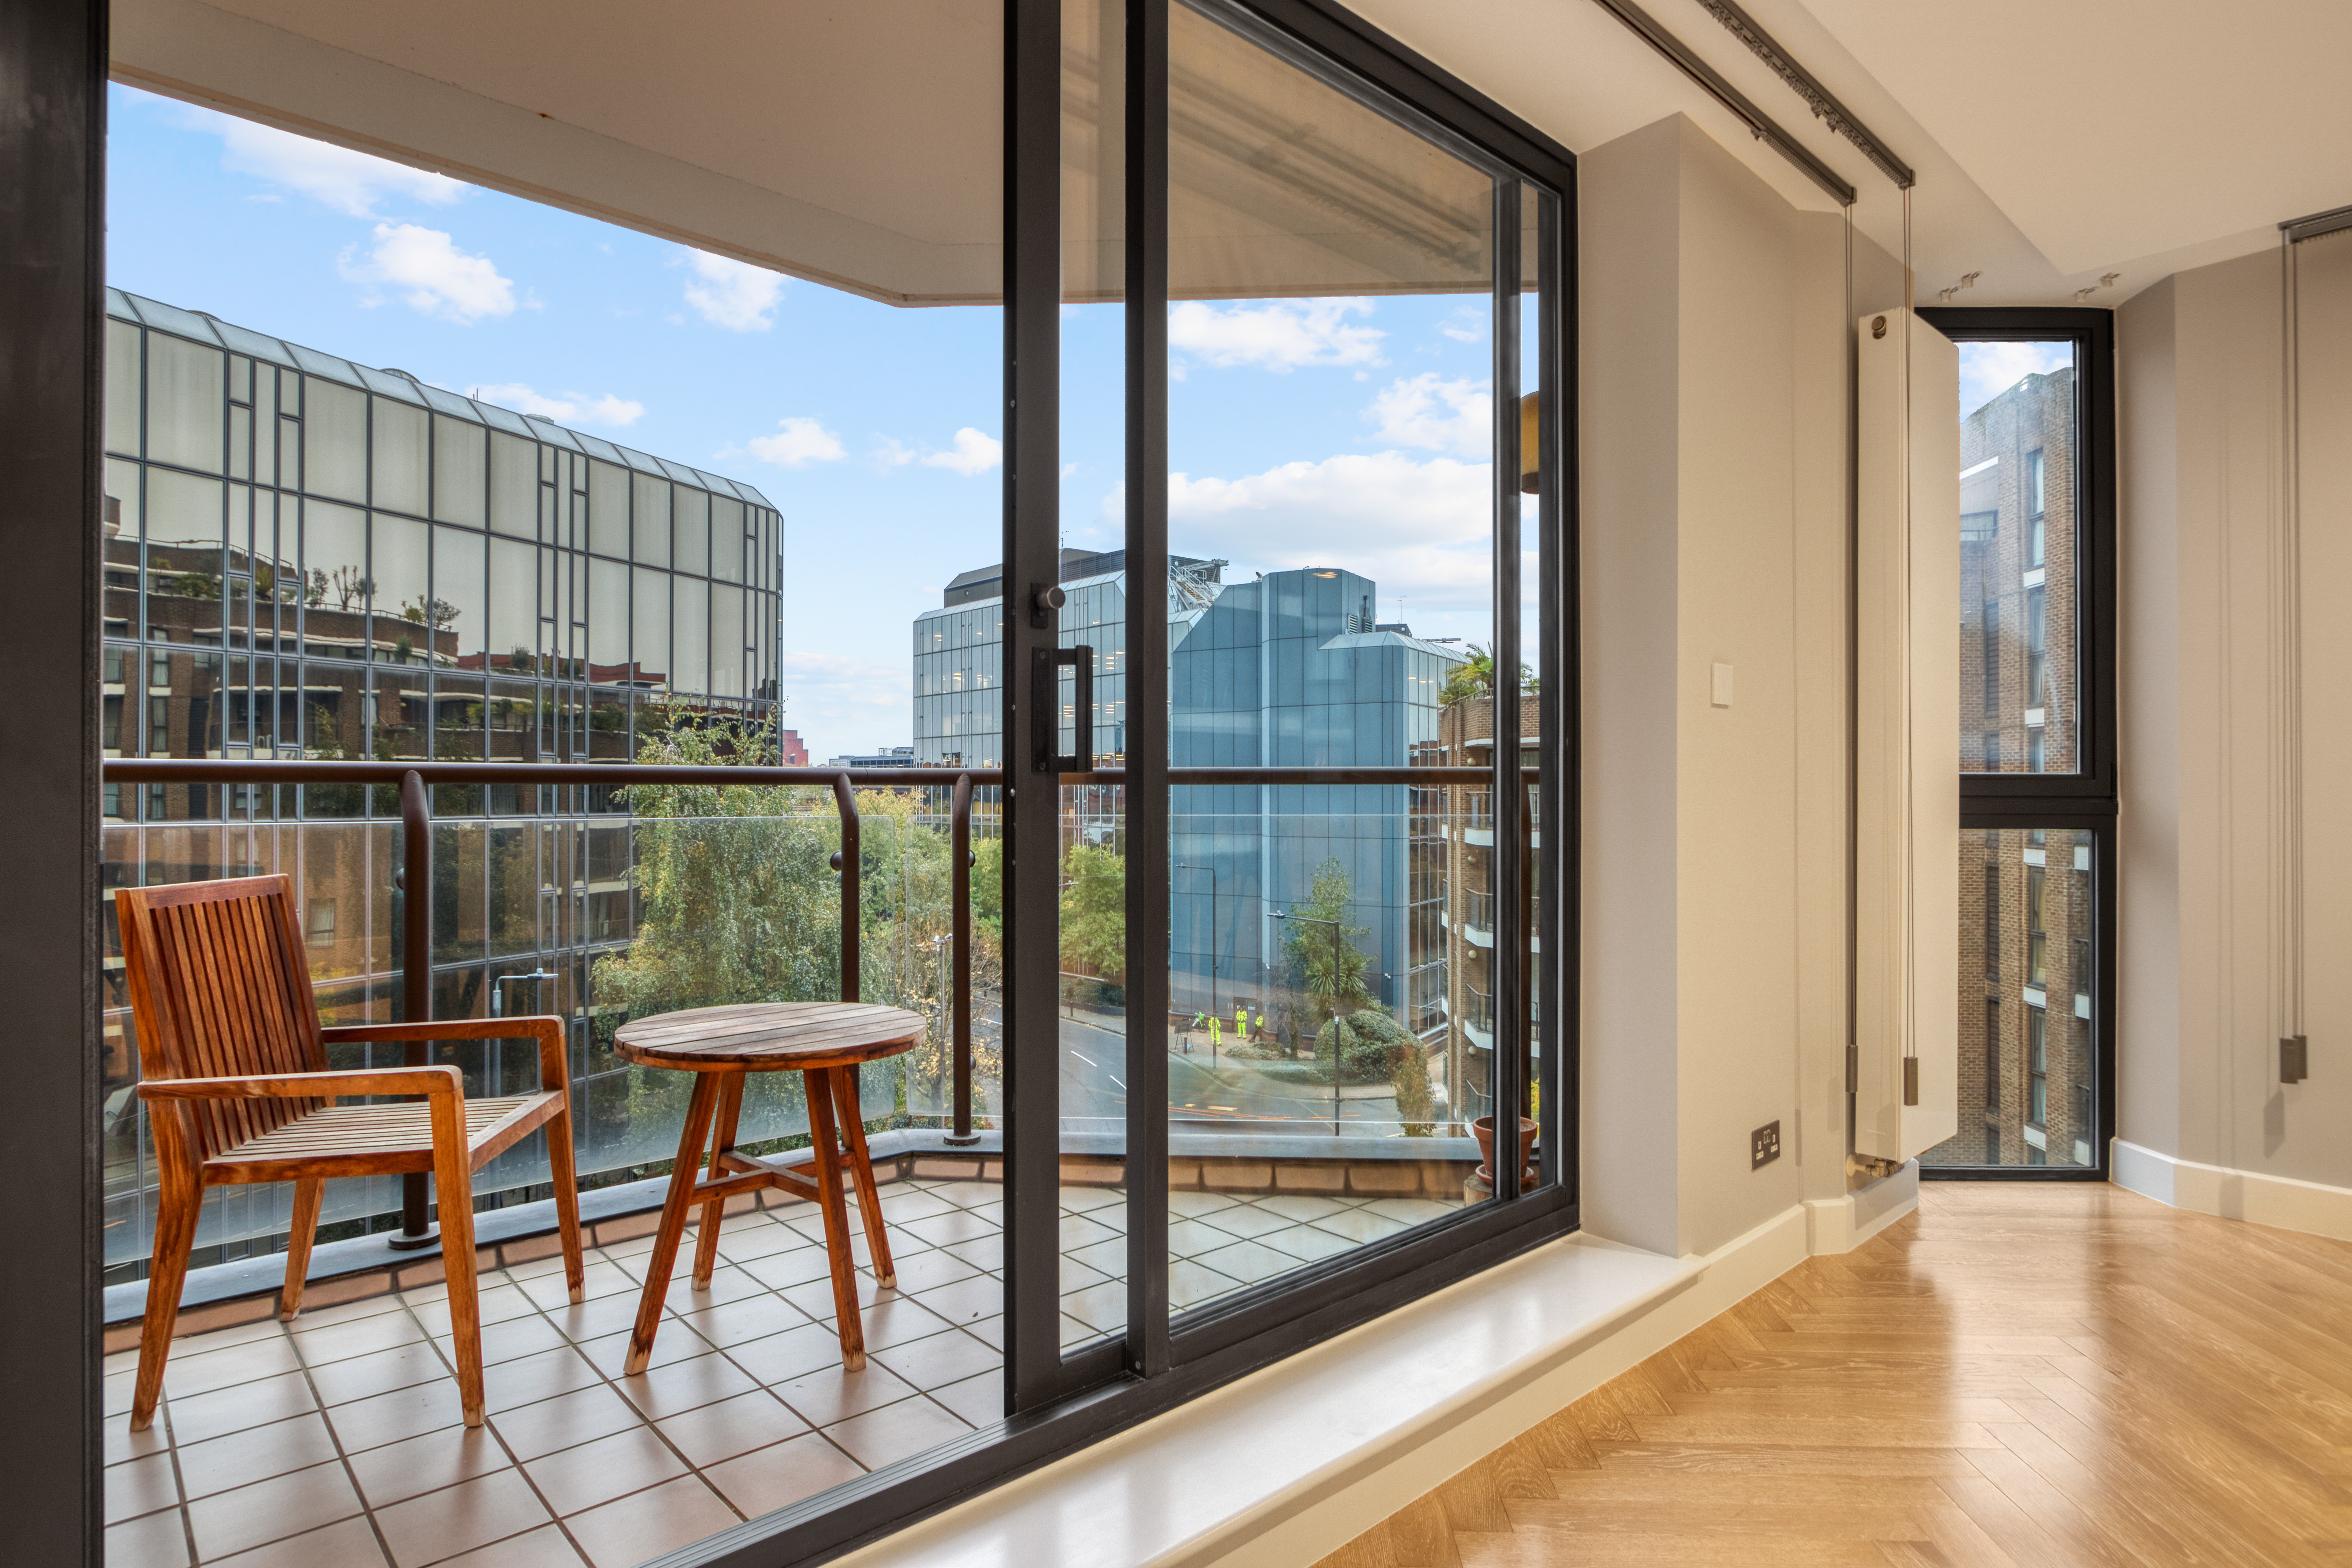
Conservatory/Orangery/Glass Extensions
These light-filled spaces blend the boundary between home and garden, with varying ratios of glazing to solid construction. Modern versions feature high-performance glass and sophisticated climate control for year-round use.
Ideal for: Garden rooms, dining areas, relaxation spaces with connection to nature
Benefits: Abundant natural light, relatively quick installation, potential permitted development status
Considerations: Temperature regulation, potential for excessive solar gain, maintenance of glass elements
Loft Conversion
While technically different from ground-level extensions, loft conversions represent a crucial vertical expansion option for London homes, particularly where garden space is limited or precious.
Ideal for: Additional bedrooms, home offices, studios or bathrooms
Benefits: No garden impact, often falls within permitted development, cost-effective per square meter
Considerations: Ceiling height requirements, staircase positioning, structural reinforcement
When evaluating these options, consider how each extension type might affect natural light, garden access, and internal flow throughout your home. Professional building contractors can provide property-specific guidance on which extension types would best suit your London home’s architecture and your lifestyle needs.
Planning Your House Extension
Thoughtful planning forms the foundation of successful house extensions in London. Before engaging architects or building contractors, take time to thoroughly assess your current and future space requirements.
Assessing Your Space Needs
Begin by identifying specific issues with your current layout that an extension would solve. Are you lacking dedicated workspace for remote work? Is your kitchen too cramped for family meals? Do you need additional bedrooms for children or guests? Creating a prioritized list of spatial requirements helps establish clear objectives for your project.
Think beyond immediate needs to consider how your requirements might evolve over the next 5-10 years. Will children leave home? Are elderly parents likely to move in? Might you need adaptable space for changing work patterns? This future-focused approach ensures your investment delivers long-term value.
Key Planning Factors
Budget: Be realistic about available funds, remembering that London building costs typically exceed national averages. Establish both your ideal budget and maximum spending limit, including a 10-20% contingency for unexpected issues.
Timescale: Most London house extensions take 3-6 months from breaking ground to completion, with planning and design adding several months beforehand. Consider how this timeline aligns with important family events or professional commitments.
Disruption tolerance: Extensions create noise, dust, and temporary loss of facilities. Assess your family’s ability to withstand these disruptions, especially if working from home or have young children.
Long-term objectives: Clarify whether your priority is creating an ideal living environment for the foreseeable future or maximizing property value for eventual sale. While these goals often align, they can sometimes suggest different design approaches.
Early Professional Consultation
Consulting with building contractors early in the planning process helps transform abstract ideas into realistic proposals. Experienced London building services providers can:
- Identify potential structural or planning constraints specific to your property
- Suggest extension types that maximize value while minimizing complications
- Provide ballpark cost estimates for different approaches
- Explain how various building services will be integrated (plumbing, electrical, heating)
- Outline the likely timeline from planning to completion
This preliminary guidance helps refine your vision before investing in detailed architectural plans or planning applications, potentially saving significant time and money by focusing on feasible options from the outset.
Planning Tip
Create a detailed scrapbook or digital collection of extension designs that appeal to you, noting specific elements like roof styles, window configurations, or interior layouts. This visual reference helps communicate your aesthetic preferences to designers and building contractors, ensuring your extension reflects your personal style.
Design Considerations
Thoughtful design transforms a basic house extension from a mere addition of square footage into a transformative enhancement of your London home. The most successful extensions balance aesthetic cohesion with practical functionality while maximizing light and space.
Harmonizing with Existing Architecture
Your extension should complement your home’s architectural character, either through sympathetic matching or deliberate contrast. In London’s conservation areas, planning authorities often favor extensions that maintain period features and materials. Even when pursuing contemporary design, consider how the extension’s proportions, roofline, and fenestration will integrate with the existing structure.
Building contractors experienced in London house construction can advise on locally appropriate materials and techniques that satisfy both aesthetic and regulatory requirements. For period properties, this might include matching brickwork, replicating cornicing details, or sourcing compatible roof tiles.
Interior Layout Planning
Effective extension design considers the entire home, not just the new space. Pay particular attention to:
- Flow and circulation – How people will move between old and new spaces
- Access points – Ensuring convenient connections to gardens, utilities, or storage
- Proportions – Creating rooms with balanced dimensions and ceiling heights
- Natural light – Preserving light to existing rooms while maximizing it in new spaces
- Sight lines – Creating visual connections between spaces and to outdoor areas
Consider whether open-plan arrangements suit your lifestyle or if more defined spaces would better serve your needs. For many London homes, the ideal solution combines open areas for socializing with quieter, separate zones for work or relaxation.
Technical Performance
Modern house extensions offer an opportunity to significantly improve your home’s technical performance. Prioritize:
Energy efficiency – Exceed current building regulations with high-performance insulation, energy-efficient glazing, and airtight construction. This not only reduces running costs but future-proofs against tightening energy standards.
Ventilation – Incorporate passive ventilation strategies alongside mechanical systems to ensure healthy indoor air quality without excessive heat loss. This is particularly important for London properties where ambient air quality may be poor.
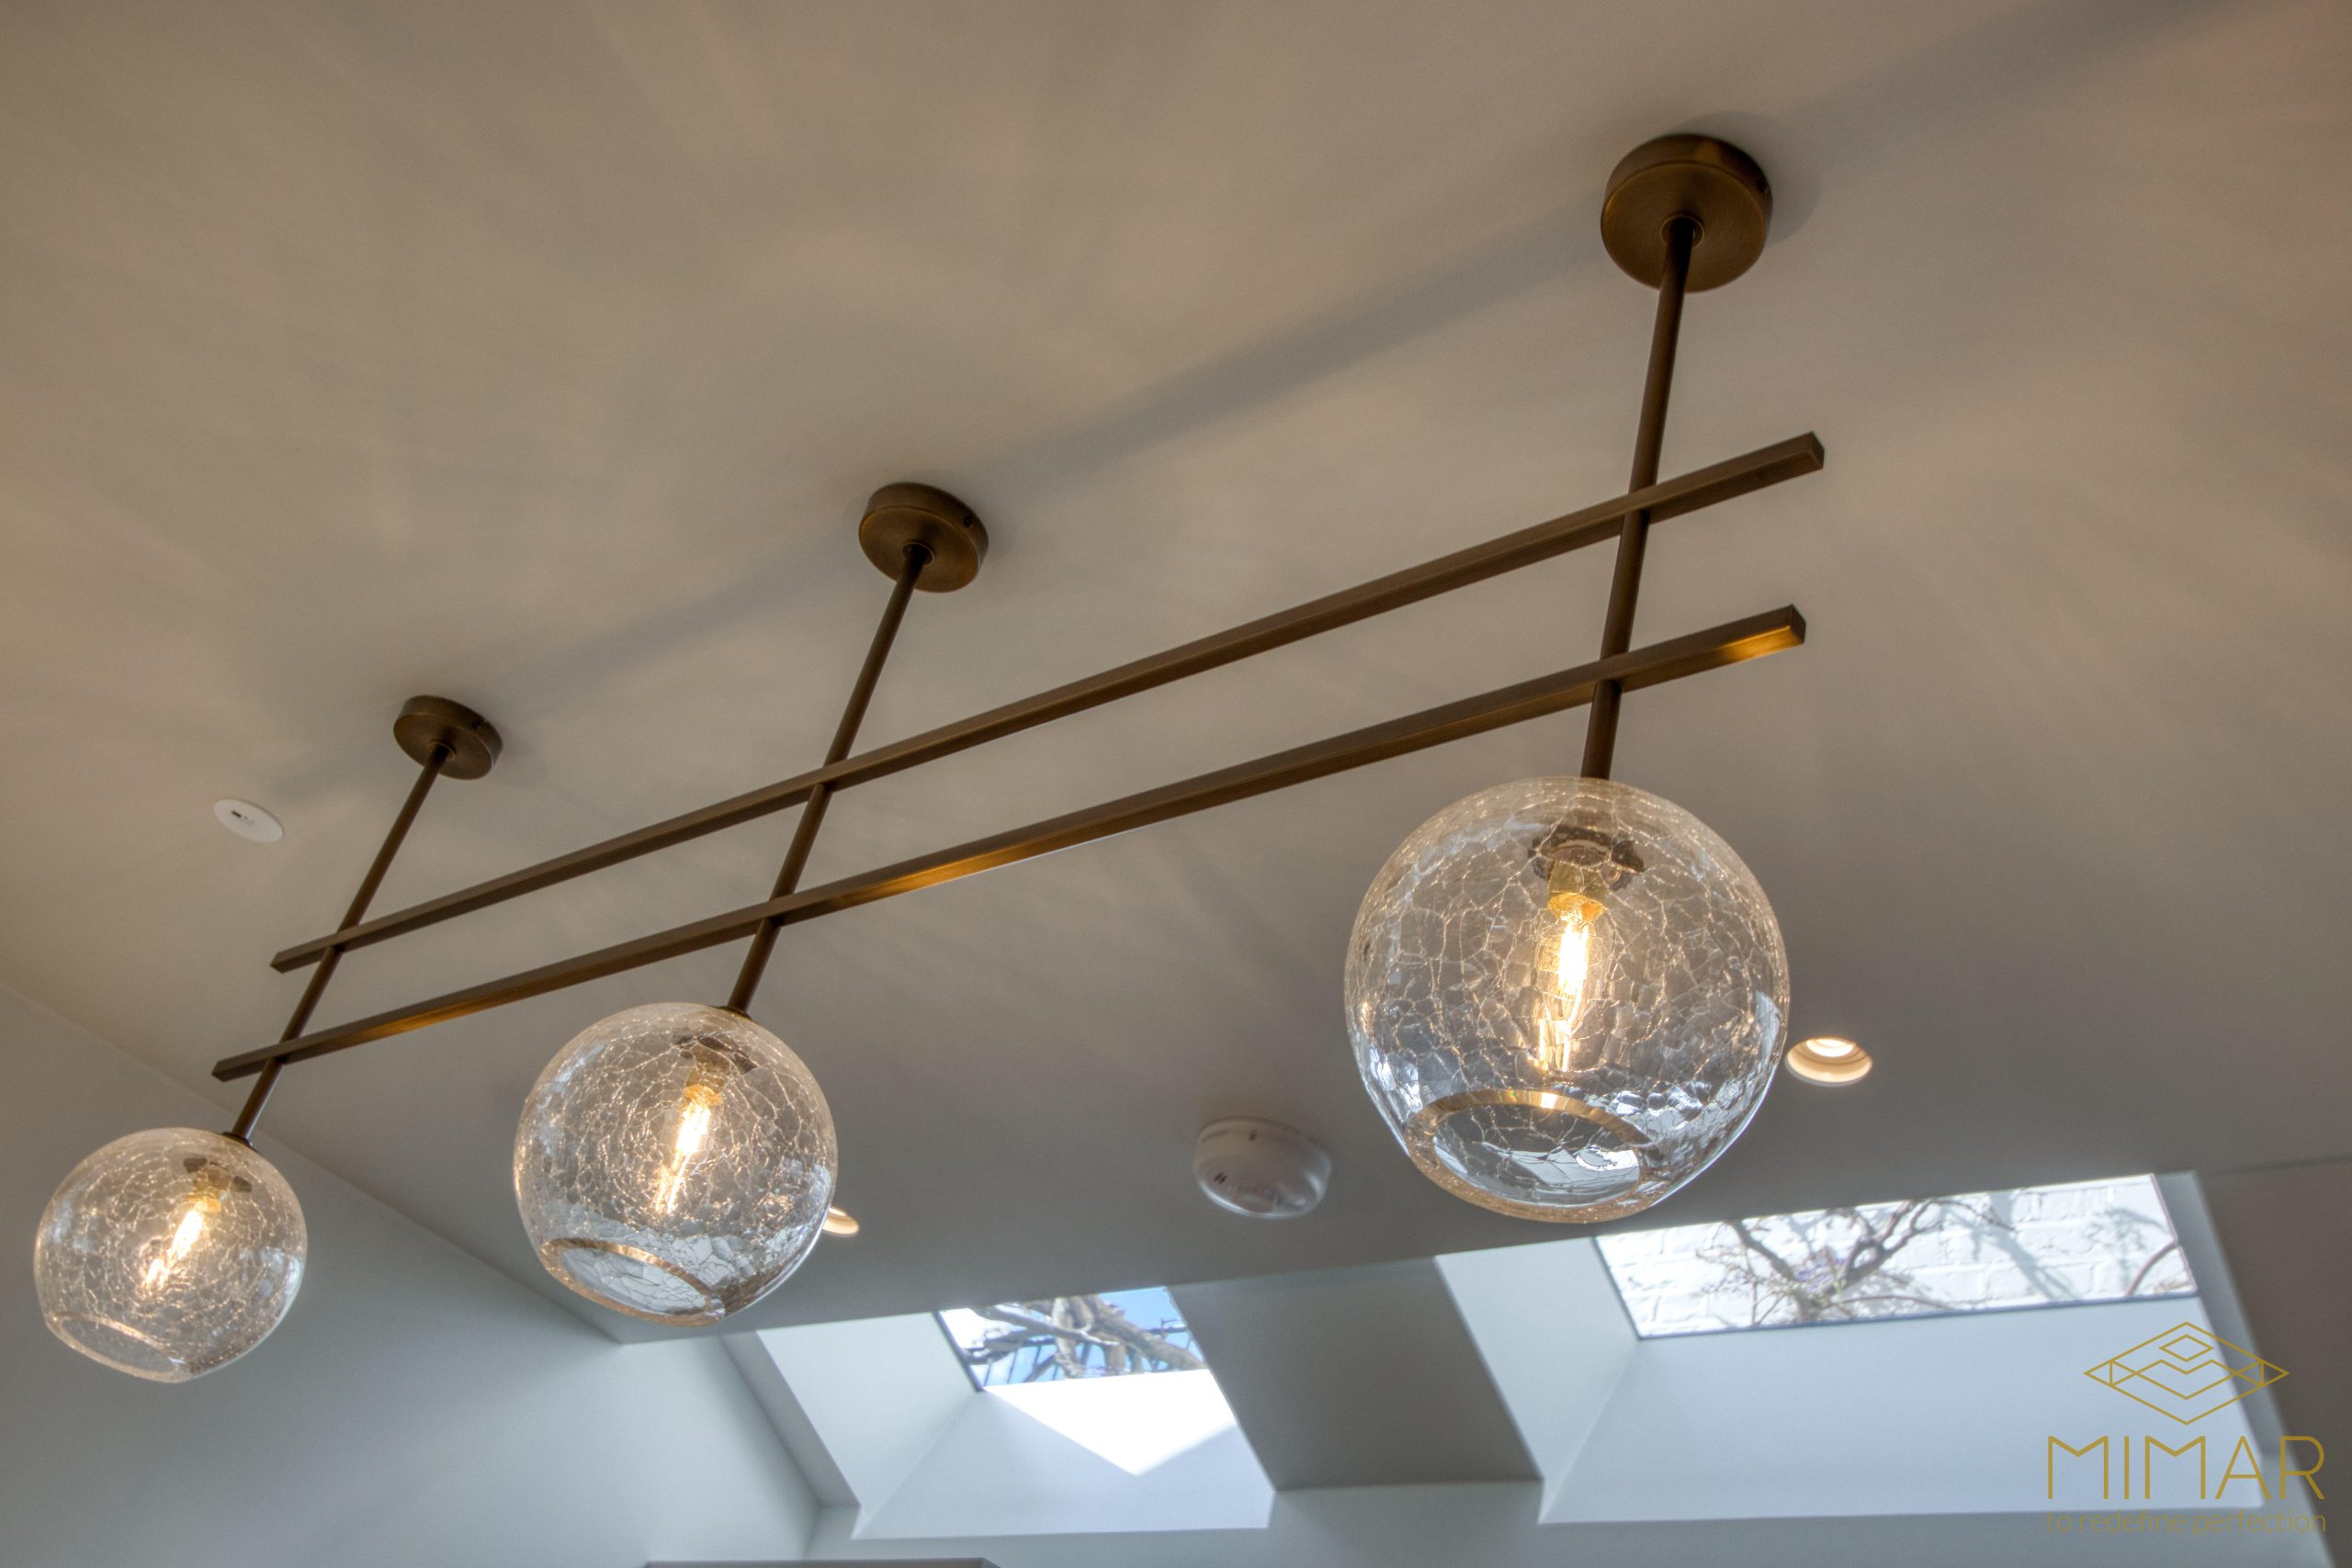
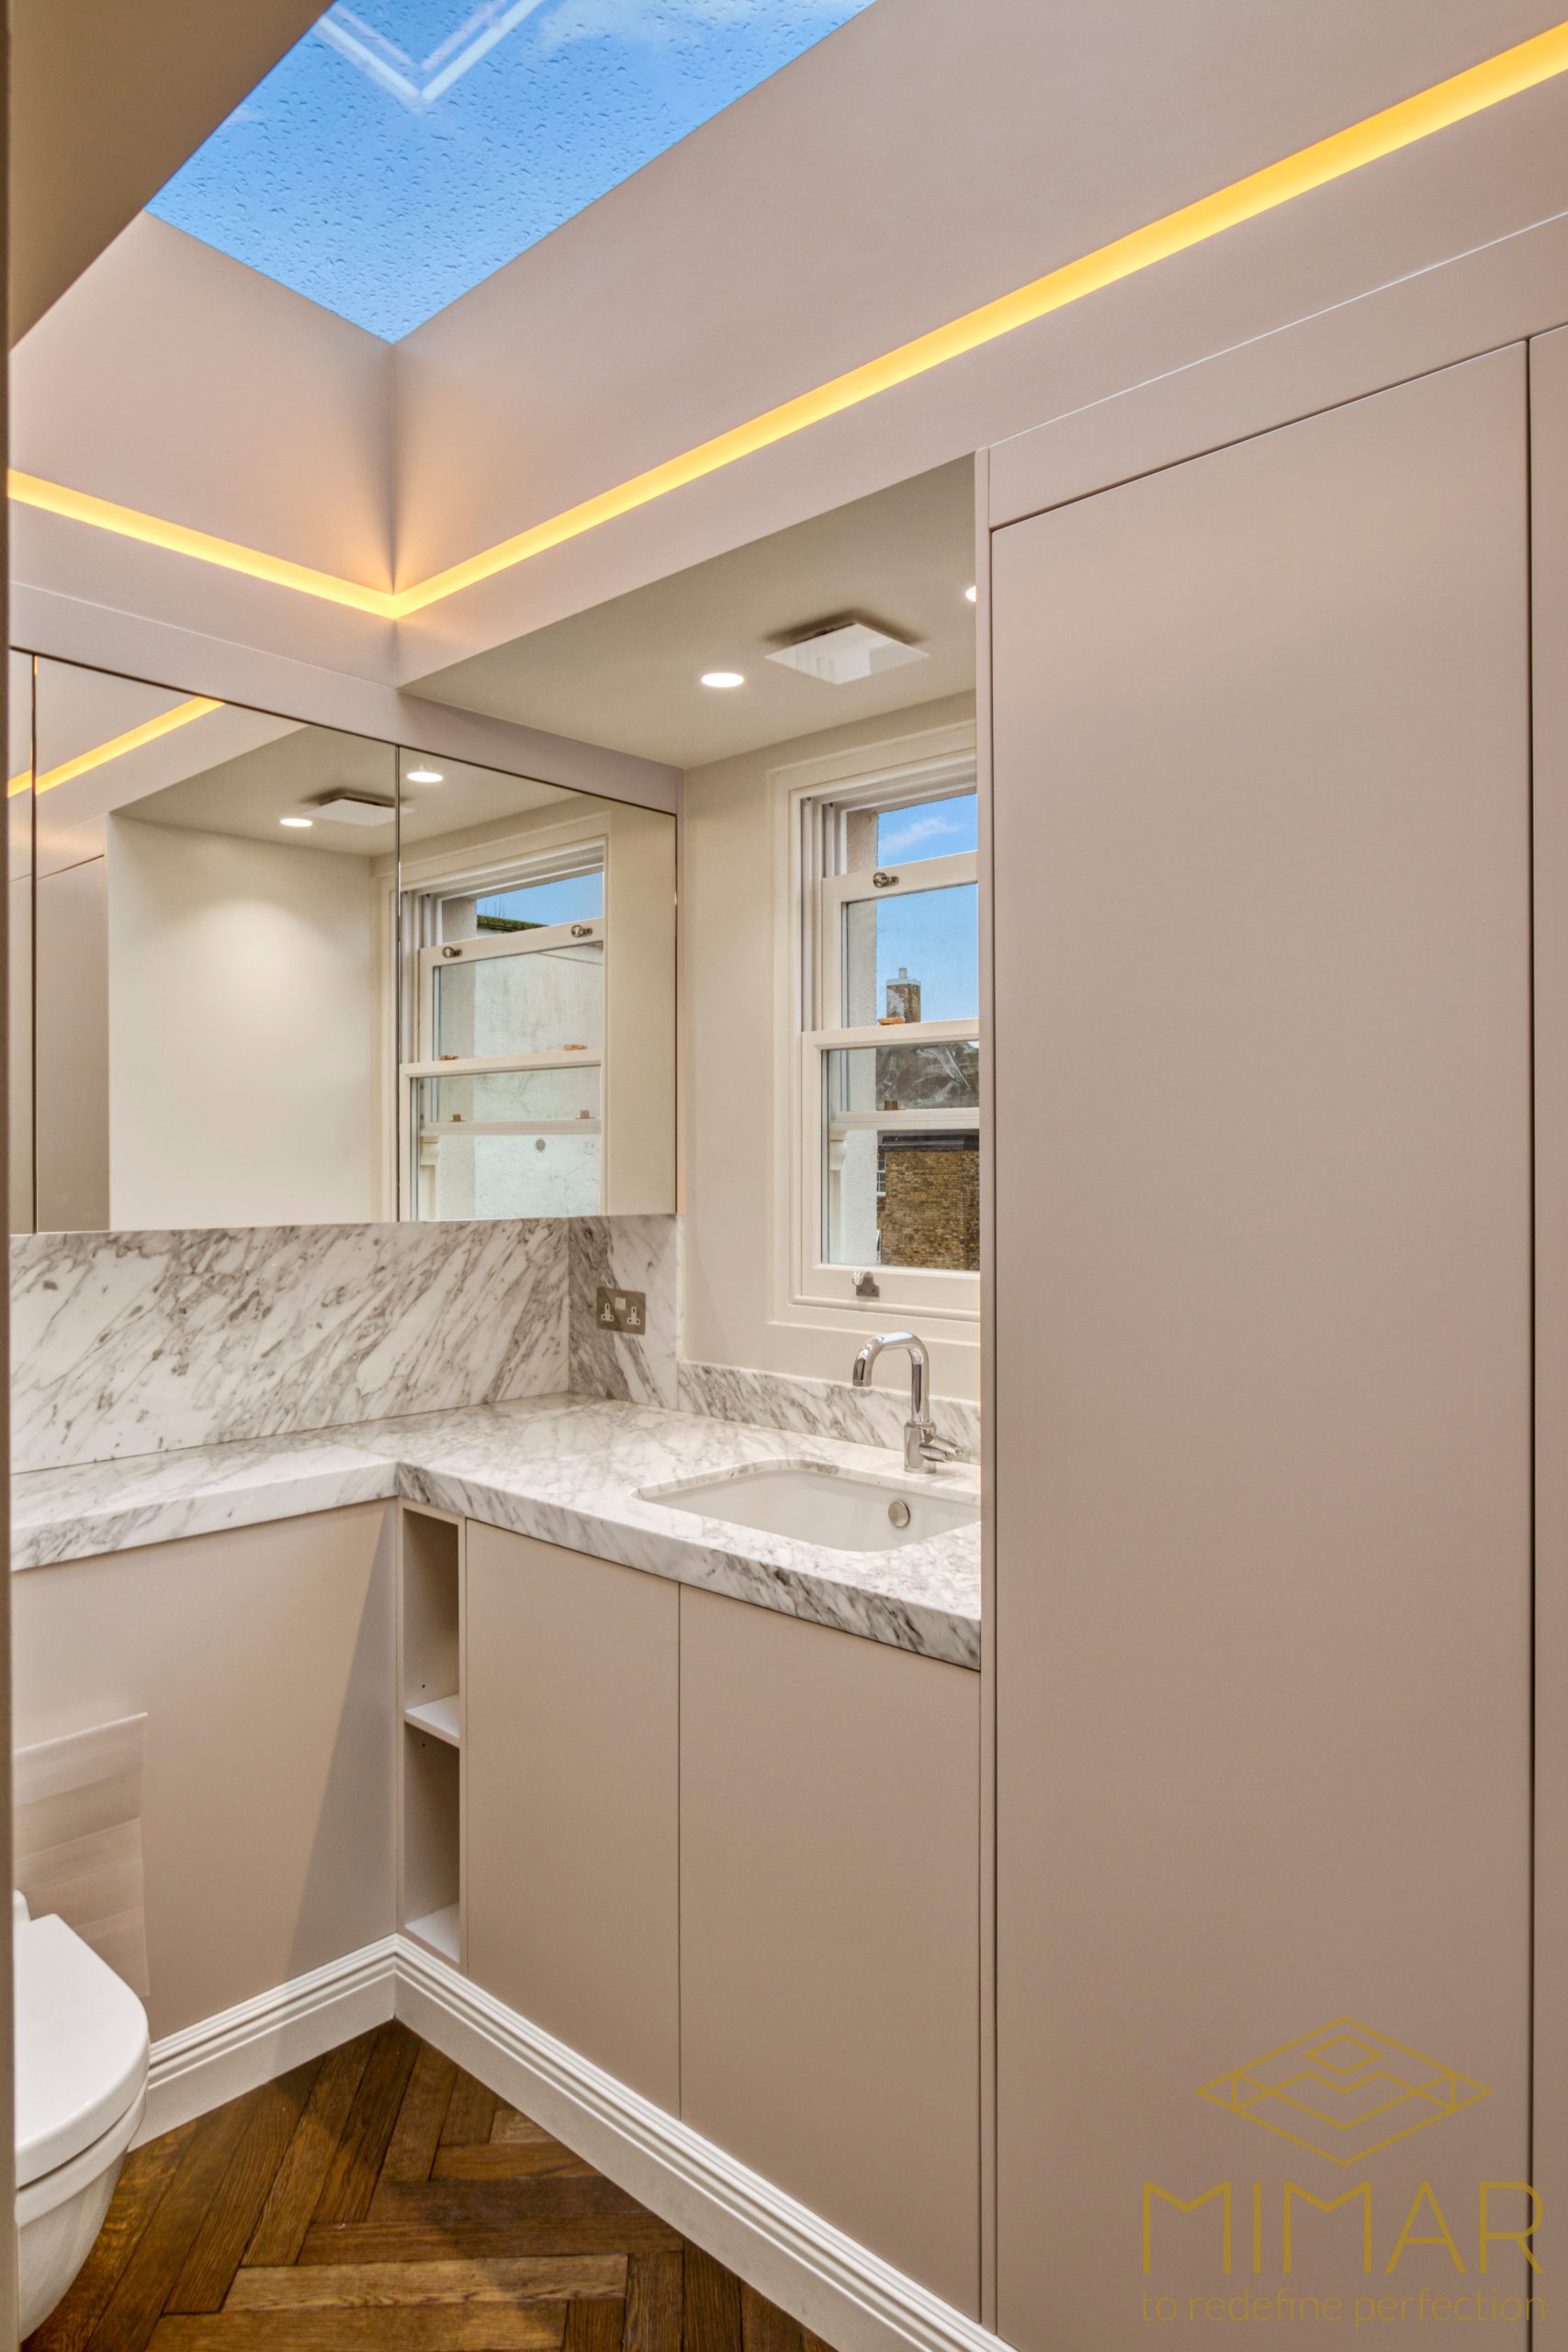
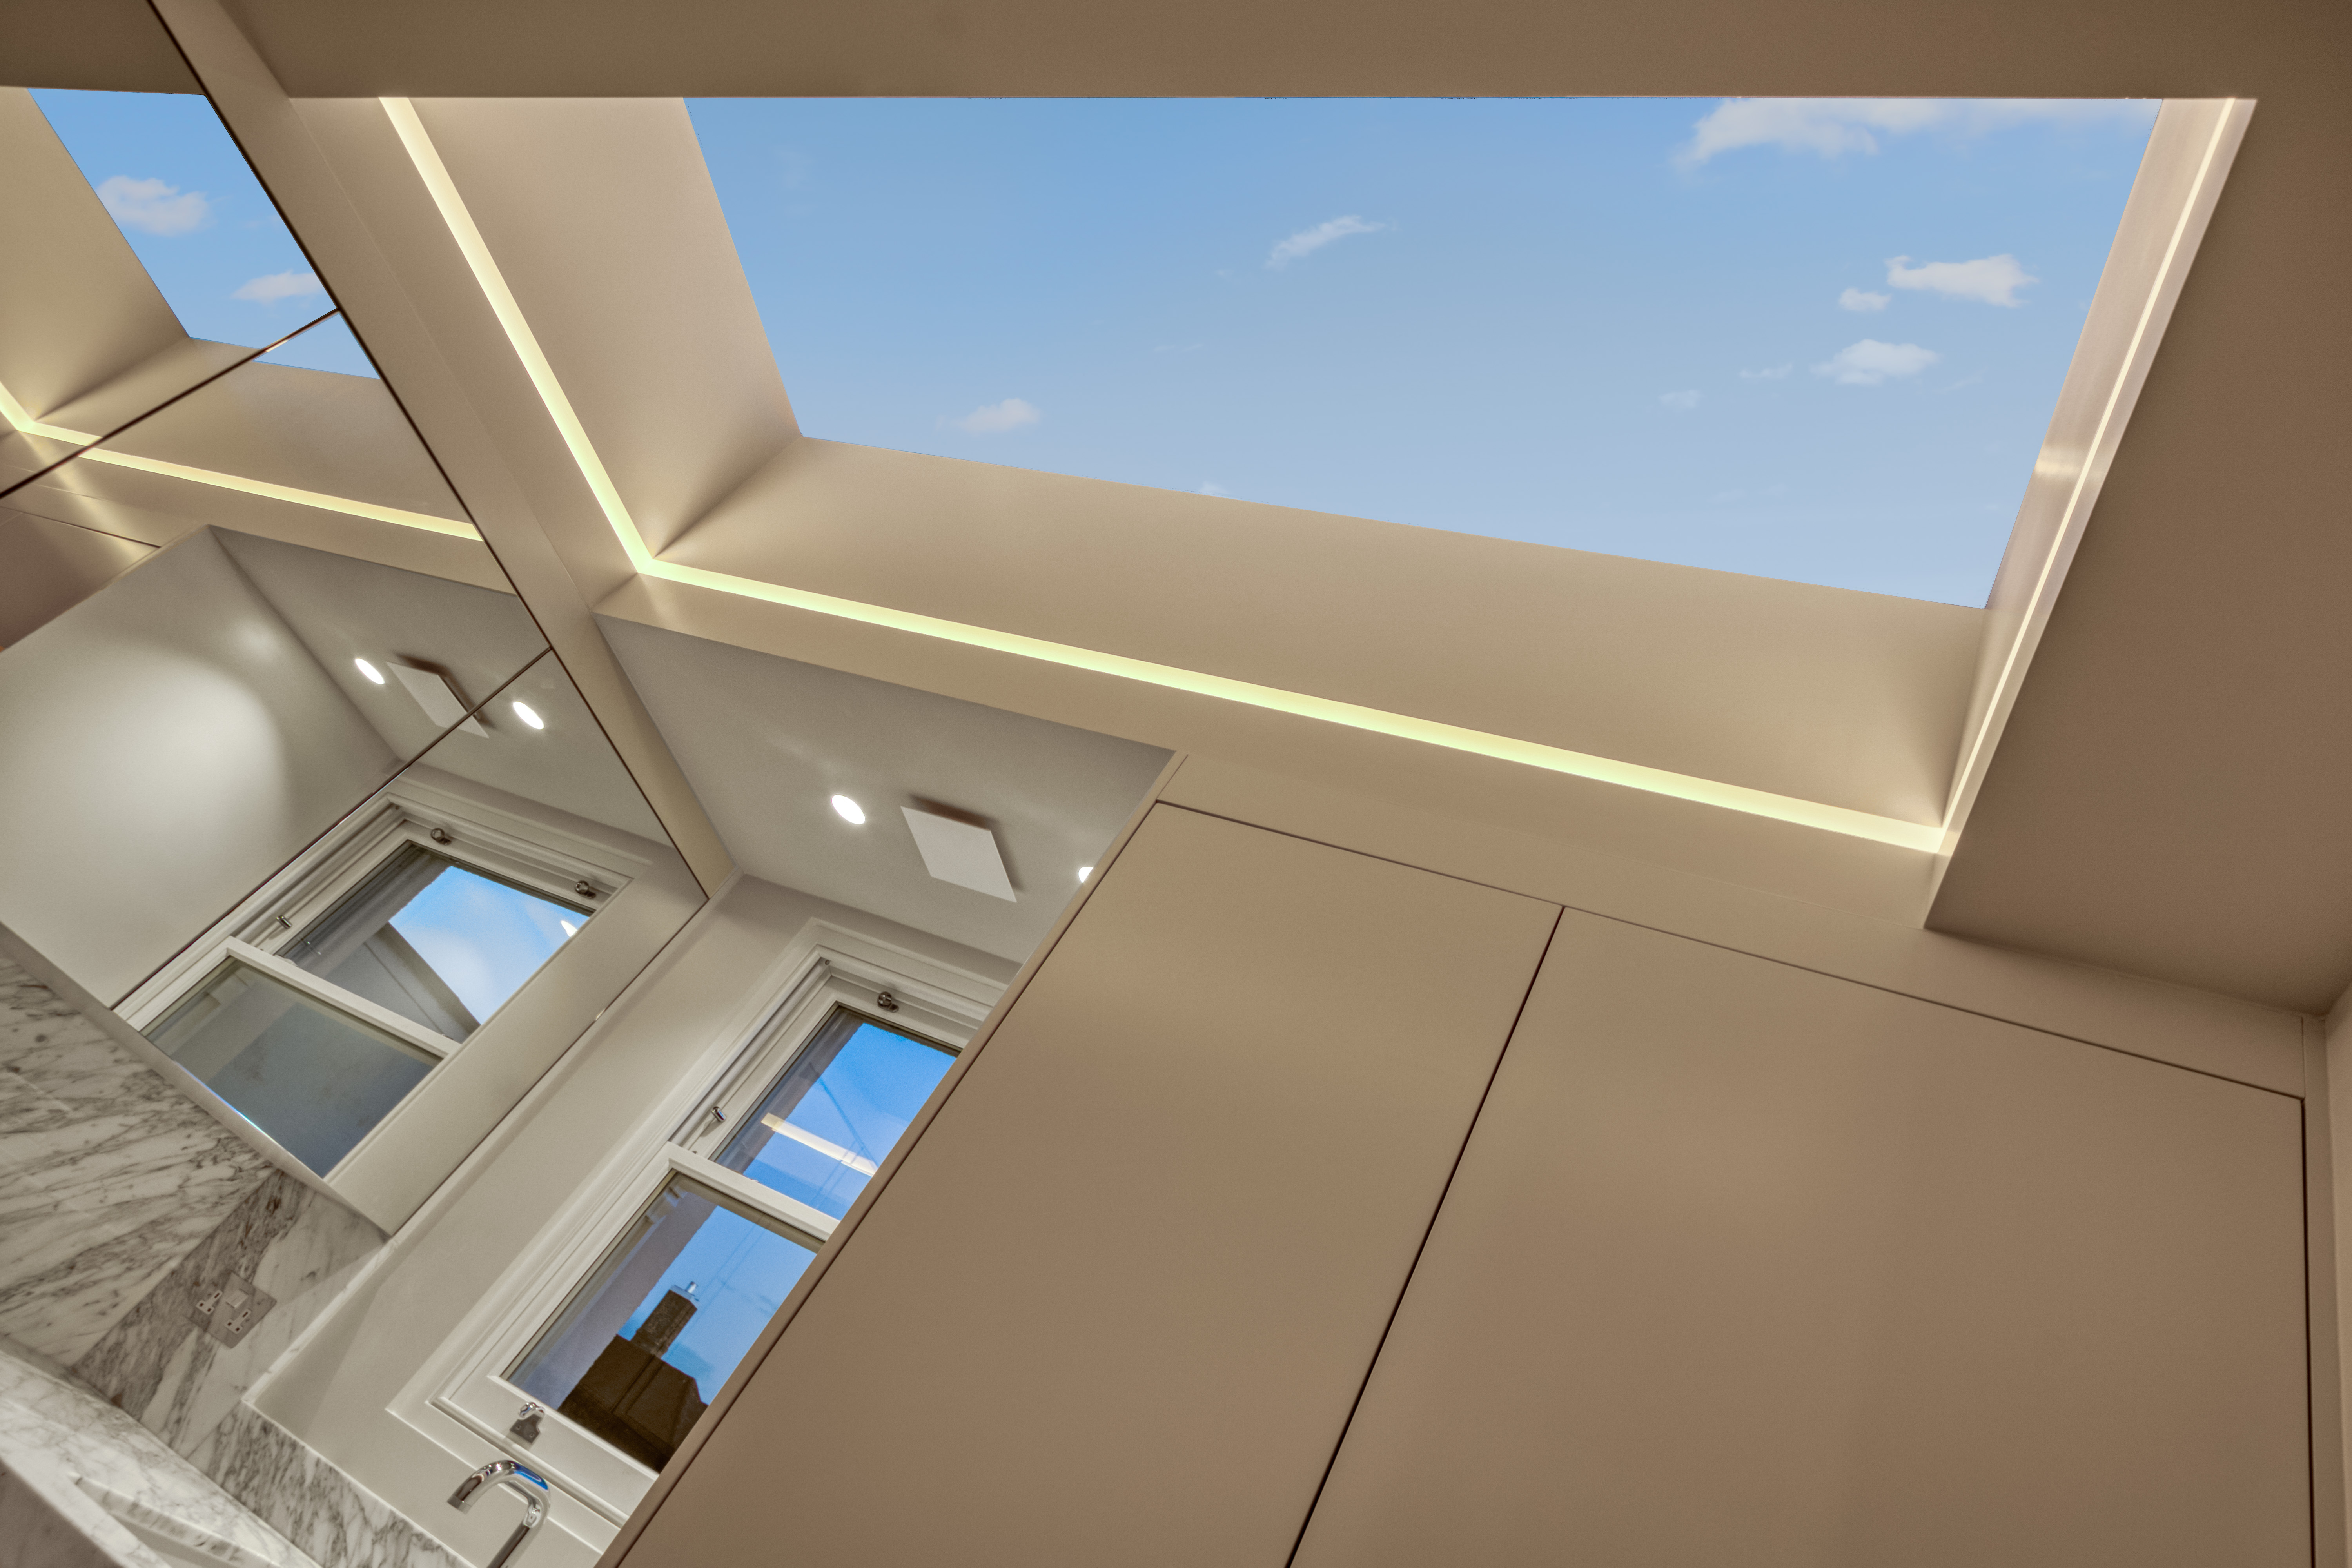
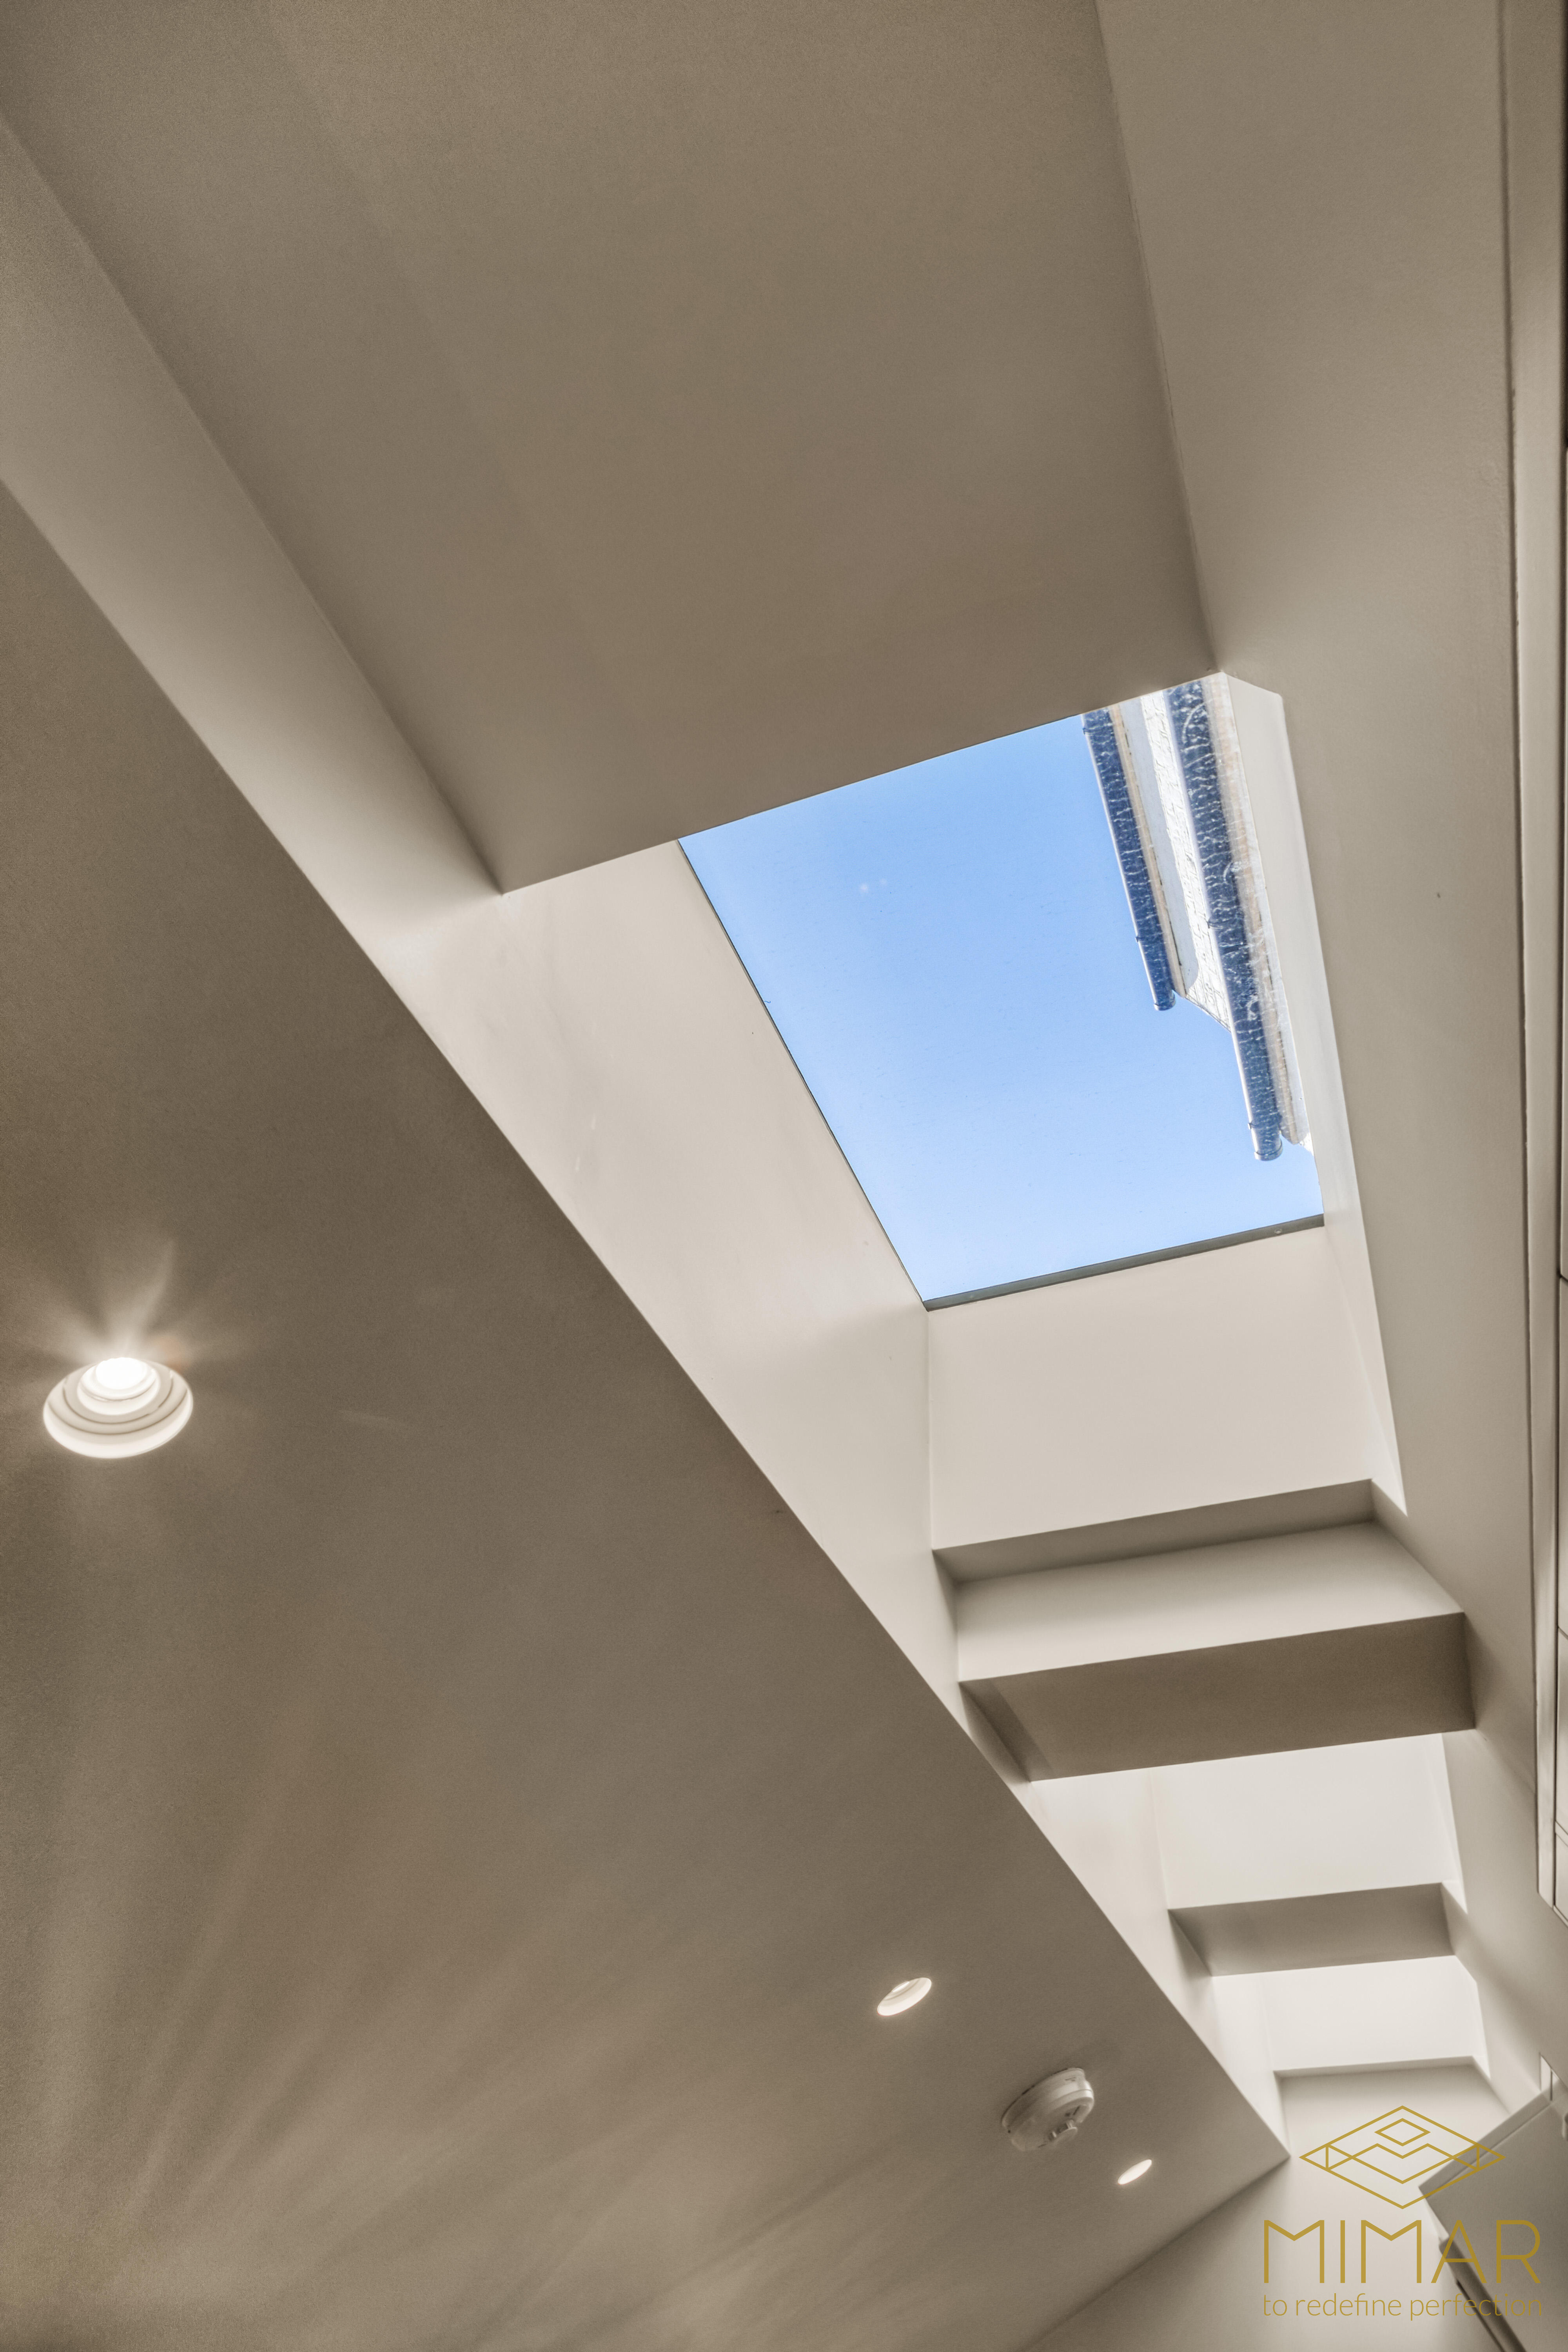
Natural light – Use roof lights, clerestory windows, and strategic glazing to maximize daylight penetration, reducing reliance on artificial lighting and creating uplifting, healthy spaces.
Acoustic performance – In London’s dense urban environment, consider how your extension’s design can minimize external noise intrusion through appropriate glazing specifications and insulation strategies.
Future Adaptability
Design your extension with flexibility in mind, allowing spaces to evolve as your needs change. Consider how rooms might serve multiple functions or be easily reconfigured. Non-load-bearing internal walls, pre-wired data points throughout, and standardized door openings all contribute to future adaptability.
When integrated with broader home remodeling plans, a well-designed extension should enhance the functionality and comfort of your entire property, not just add extra square footage. The most successful projects view the extension as an opportunity to resolve existing layout issues while creating new possibilities for living.
Regulations, Permits, and Structural Requirements in London
Navigating London’s complex regulatory landscape is a crucial aspect of any house extension project. The city’s dense urban fabric, historic building stock, and strict planning regime create particular challenges that require professional guidance.
Planning Permission and Permitted Development
Many smaller London house extensions can proceed under “Permitted Development Rights” without requiring full planning permission. However, these rights are frequently restricted in:
- Conservation areas
- For listed buildings
- Areas of Outstanding Natural Beauty
- Properties that have previously been extended
Even when permitted development applies, specific dimensional limitations restrict the height, depth, and width of extensions. These rules vary between different property types (detached, semi-detached, terraced) and can be modified by Article 4 Directions in certain London boroughs.
For clarity and security, many building contractors recommend obtaining a Certificate of Lawful Development from your local authority before proceeding with even apparently straightforward extensions. This provides formal confirmation that your project complies with permitted development rules.
Building Regulations
All house extensions must comply with Building Regulations, regardless of planning status. These cover crucial safety and performance aspects including:
- Structural integrity
- Fire safety
- Energy efficiency (Part L)
- Ventilation
- Electrical safety
- Drainage
- Access provisions
Building control approval can be obtained either through your local authority or private approved inspectors. In London’s complex building environment, this process typically involves multiple site inspections throughout the construction phase.
Party Wall Agreements
London’s terraced and semi-detached housing means party wall issues are extremely common in extension projects. The Party Wall Act requires you to notify neighbors about works that might affect shared walls, boundaries, or adjacent foundations.
This process should begin at least two months before construction starts and may require appointment of party wall surveyors if neighbors raise concerns. Professional building contractors usually coordinate this process, though specialized party wall surveyors may be needed for complex cases.
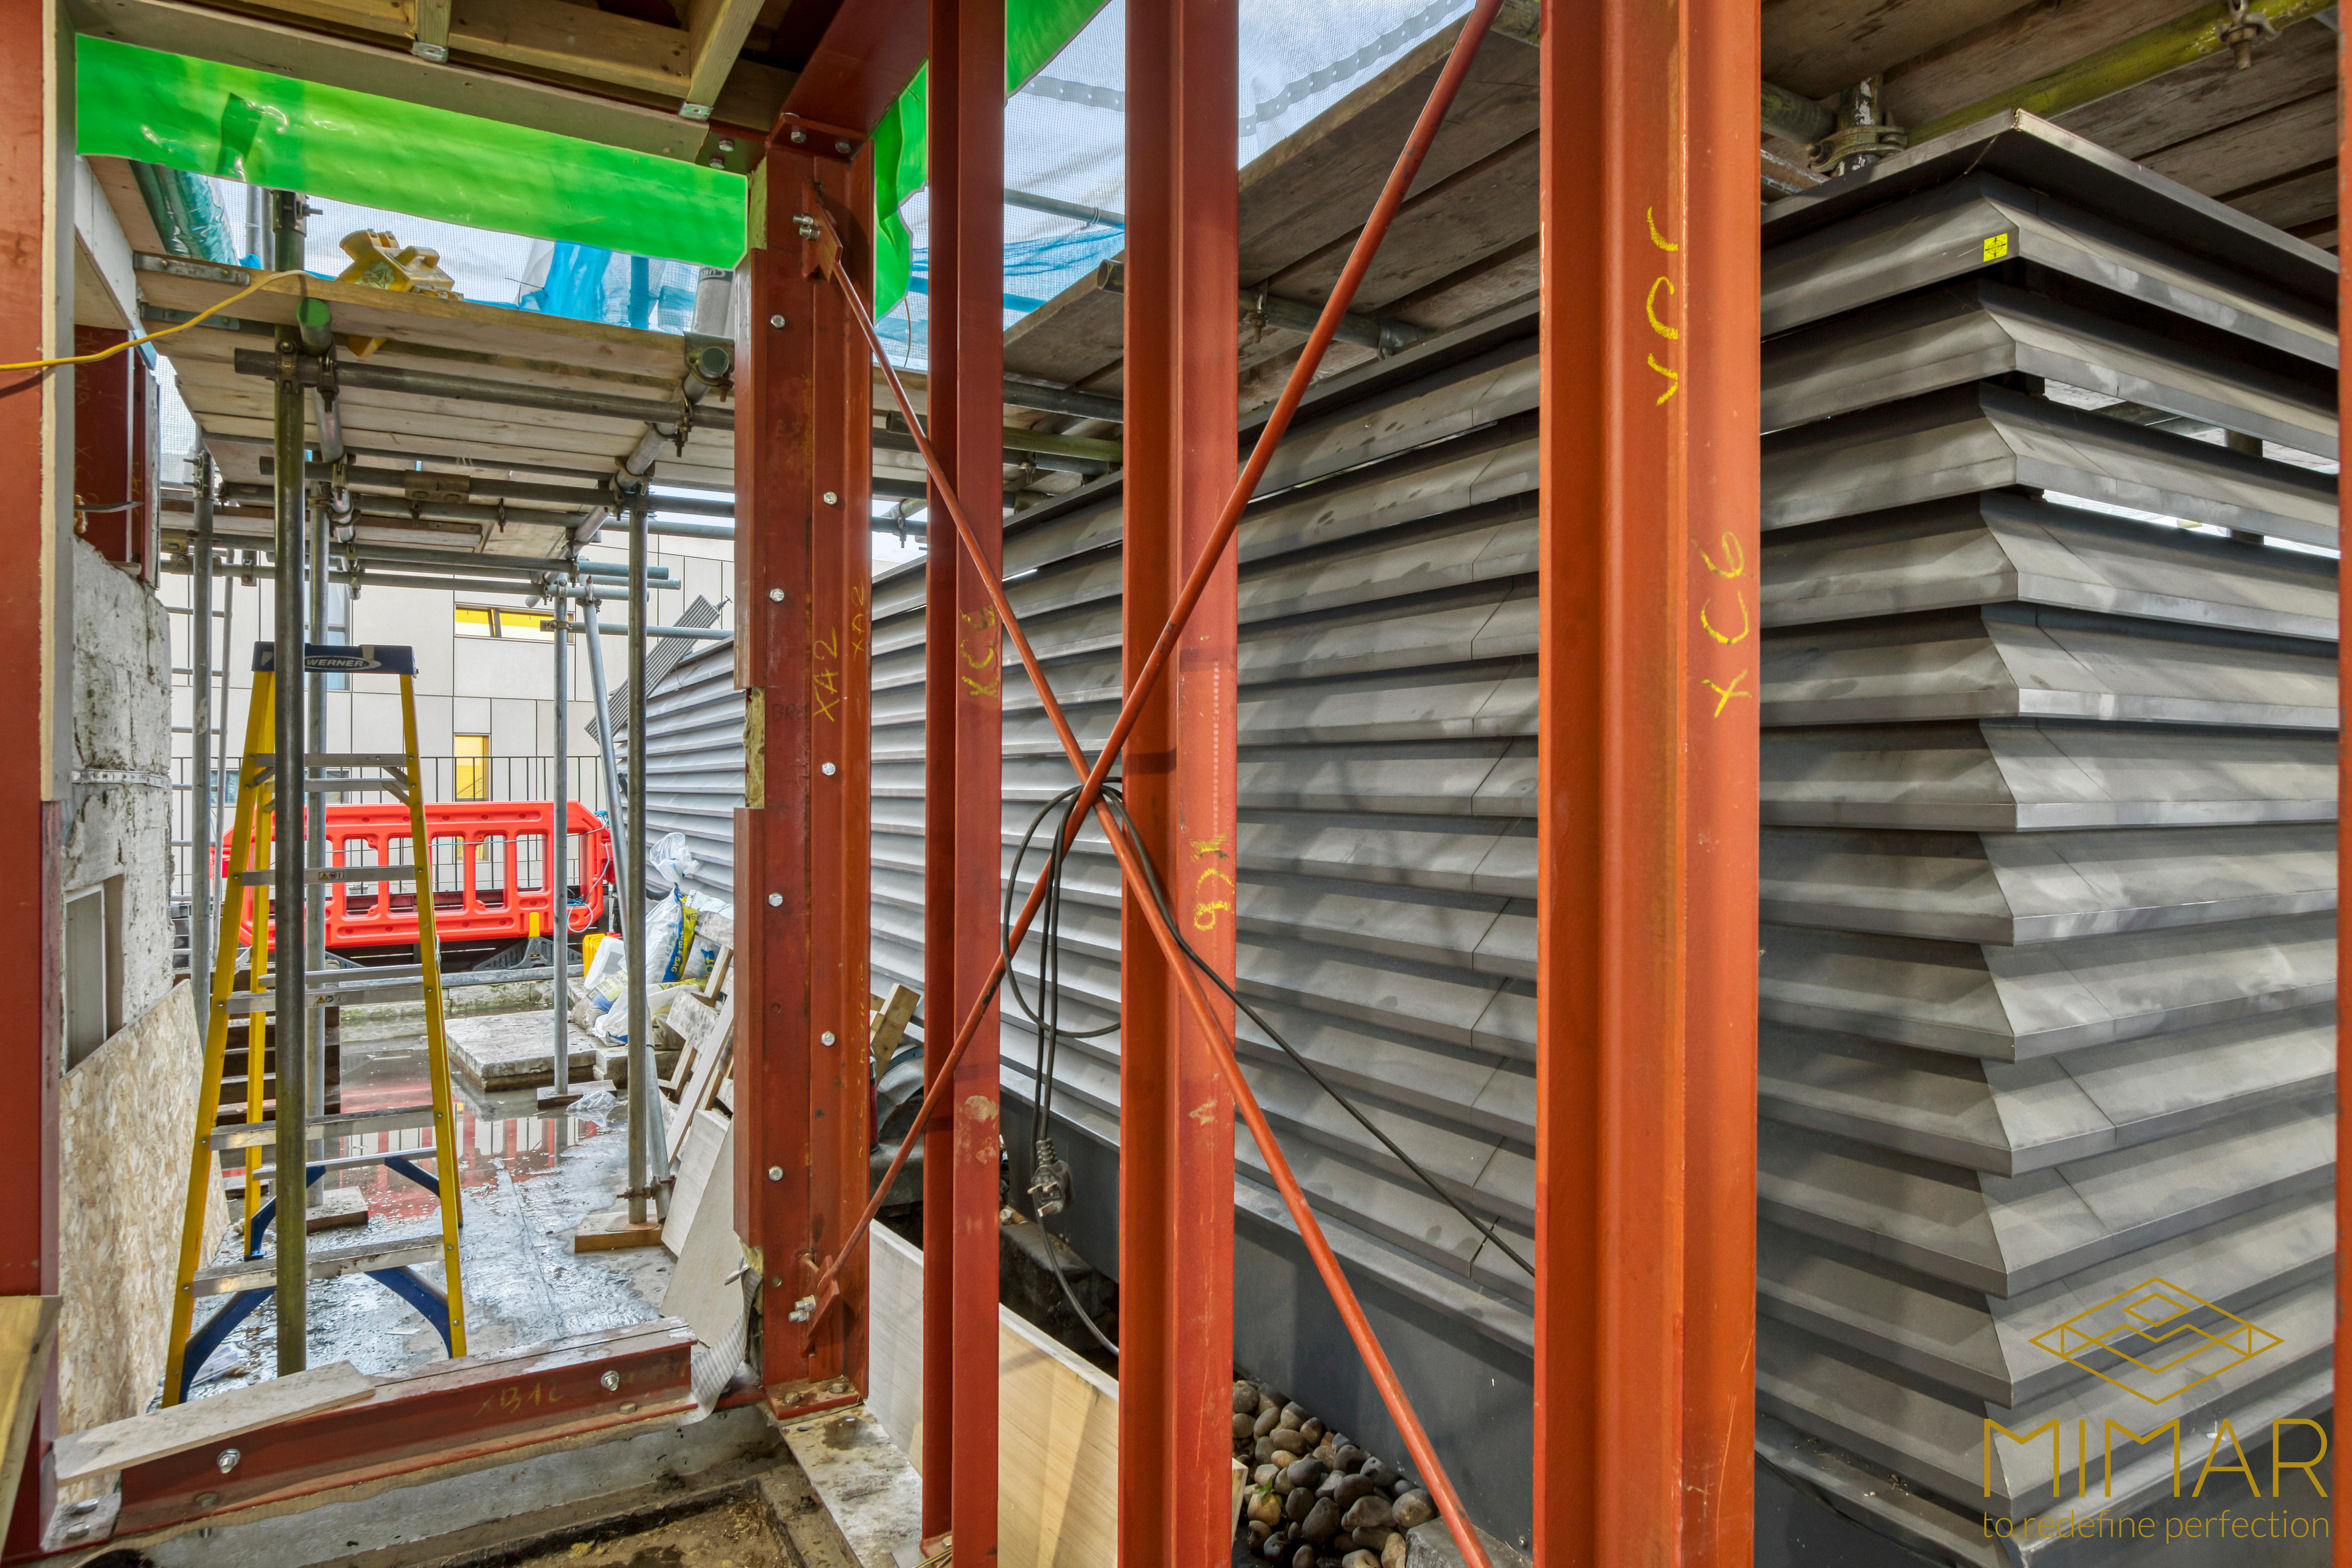
Structural Considerations
London’s varied ground conditions and aging building stock create particular structural challenges for extension projects. Key considerations include:
Foundations – London clay soils can shrink and swell significantly with moisture changes, requiring deeper foundations than in many other parts of the UK. Proximity to Underground lines or historic features may further complicate foundation design.
Existing structure – Many London properties have undergone multiple alterations over decades or centuries. Assessing the capacity of existing structural elements to support new loads is essential, particularly when removing internal walls or extending upward.
Roofline integration – Especially in conservation areas, planning authorities pay close attention to how extension rooflines integrate with existing structures. Structural solutions must balance aesthetic requirements with practical waterproofing and loadbearing capacity.
Professional building services typically include structural engineering input for all but the simplest extensions. For complex projects, specialist basement or structural engineers may need to prepare detailed calculations and drawings for building control approval.
Regulatory Guidance
Always check if your property is listed or in a conservation area before planning an extension. The Federation of Master Builders recommends starting with your local Planning Portal to understand specific restrictions that may apply to your London property.
Choosing the Right Building Contractor in London
Selecting the appropriate building contractor for your London house extension is arguably the most critical decision you’ll make during the entire project. The right contractor brings technical expertise, project management skills, and quality craftsmanship that will determine both the process experience and the final result.
Essential Qualifications and Credentials
When evaluating London building contractors, look for:
- Trade association membership – Reputable organizations like the Federation of Master Builders (FMB) or the National Federation of Builders require members to meet quality standards and provide consumer protection measures.
- Appropriate insurance – Verify they hold public liability insurance (minimum £2 million coverage), employer’s liability insurance, and contractor’s all-risk insurance.
- Local experience – Contractors familiar with London’s specific building stock, local authority requirements, and typical neighborhood concerns bring valuable expertise.
- Relevant certifications – For specialized work, look for additional qualifications like Gas Safe registration or NICEIC certification for electrical work.
Evaluating Experience and Portfolio
Request examples of previous extension projects, ideally on properties similar to yours. A quality building contractor should provide:
- Photographs showing before, during, and after stages of comparable projects
- References from recent clients you can contact directly
- Evidence of experience with your specific type of extension (e.g., side return, double-storey, etc.)
- Examples of how they’ve solved problems similar to those your project might encounter
When reviewing portfolios, look beyond aesthetics to assess build quality, attention to detail, and integration with existing structures. The most impressive extensions seamlessly blend new with old while incorporating contemporary building techniques.
Comparing Quotes and Scope
Obtain detailed quotes from at least three contractors for accurate comparison. Professional quotes should include:
- Itemized breakdown of costs by category
- Clear specification of materials and quality standards
- Timeline with key milestones and payment schedule
- Explicit statement of what’s excluded from the quote
- Terms for handling variations or unexpected issues
Be wary of quotes significantly lower than others – this often indicates corners being cut or potential for numerous “extras” to be added later. In London’s premium construction market, quality building services command appropriate fees, reflecting the skilled labor and careful project management required.
Communication and Chemistry
You’ll be working closely with your chosen building contractor for several months, so personal rapport matters. During initial meetings, assess:
- Responsiveness to questions and concerns
- Clarity of communication and willingness to explain technical details
- Listening skills and receptiveness to your ideas
- Professionalism in presentation and punctuality
- Transparency about potential challenges
Essential Questions to Ask
Before making your final selection, ask prospective contractors:
- “What similar extension projects have you completed in this London borough?”
- “Who will supervise the project day-to-day, and how often will they be on-site?”
- “What guarantees or warranties do you provide on workmanship?”
- “How do you handle changes to the agreed scope?”
- “What payment schedule do you propose, and how do you handle retention?”
- “How will you minimize disruption to our daily life during construction?”
Take time to check references thoroughly, ideally visiting completed projects if possible. For substantial London extensions, this due diligence is essential to ensure you select a building contractor capable of delivering your vision to the highest standards.
The House Extension Process – From Concept to Completion
Understanding the typical progression of a house extension project helps set realistic expectations and allows for proper planning. While every project has unique elements, most London extensions follow a similar sequence of stages.
Initial Consultation and Feasibility (2-4 weeks)
The journey begins with preliminary discussions with building contractors and possibly architects to assess the feasibility of your ideas. During this stage:
- Your property is evaluated for extension potential
- Initial budget parameters are established
- Planning constraints are identified
- Conceptual ideas are explored
This exploratory phase may involve multiple professionals, including building contractors who can provide practical construction insight alongside architectural creativity. For London properties, early identification of conservation constraints or structural limitations saves valuable time and resources.
Design Development (4-8 weeks)
Once basic feasibility is confirmed, detailed design development begins. This typically involves:
- Measured survey of your existing property
- Development of sketch designs and layout options
- 3D visualizations or models of proposed extensions
- Refinement based on your feedback
- Initial structural considerations
Architects typically lead this phase, though some design-and-build contractors offer in-house design services. For complex or heritage-sensitive London projects, specialist conservation architects may be required.
Planning and Approvals (8-12 weeks)
With designs finalized, necessary approvals are sought:
- Planning permission application (if required)
- Certificate of Lawful Development (for permitted development)
- Building Regulations drawings and calculations
- Party Wall notifications and agreements
- Any specialized permissions (listed building, conservation area)
London’s planning processes can be particularly stringent, especially in conservation areas or for listed properties. Professional building contractors often coordinate this process, working with planning consultants when necessary to navigate complex regulations.
Contractor Selection and Pre-Construction (4-6 weeks)
If you haven’t already selected a building contractor, this stage involves:
- Preparing detailed tender documents
- Obtaining and comparing quotes from multiple contractors
- Checking references and credentials
- Finalizing contracts and payment schedules
- Securing necessary insurance
Pre-construction preparations include:
- Detailed construction schedule
- Ordering long-lead items (windows, kitchens, specialized materials)
- Setting up site facilities and access
- Preparing neighboring properties (if necessary)
Construction Phase (12-24 weeks)
The main construction typically progresses through these stages:
Site preparation and groundworks (2-4 weeks)
- Setting up site protection and security
- Excavation for foundations
- Pouring concrete footings and foundation structures
- Installation of drainage systems
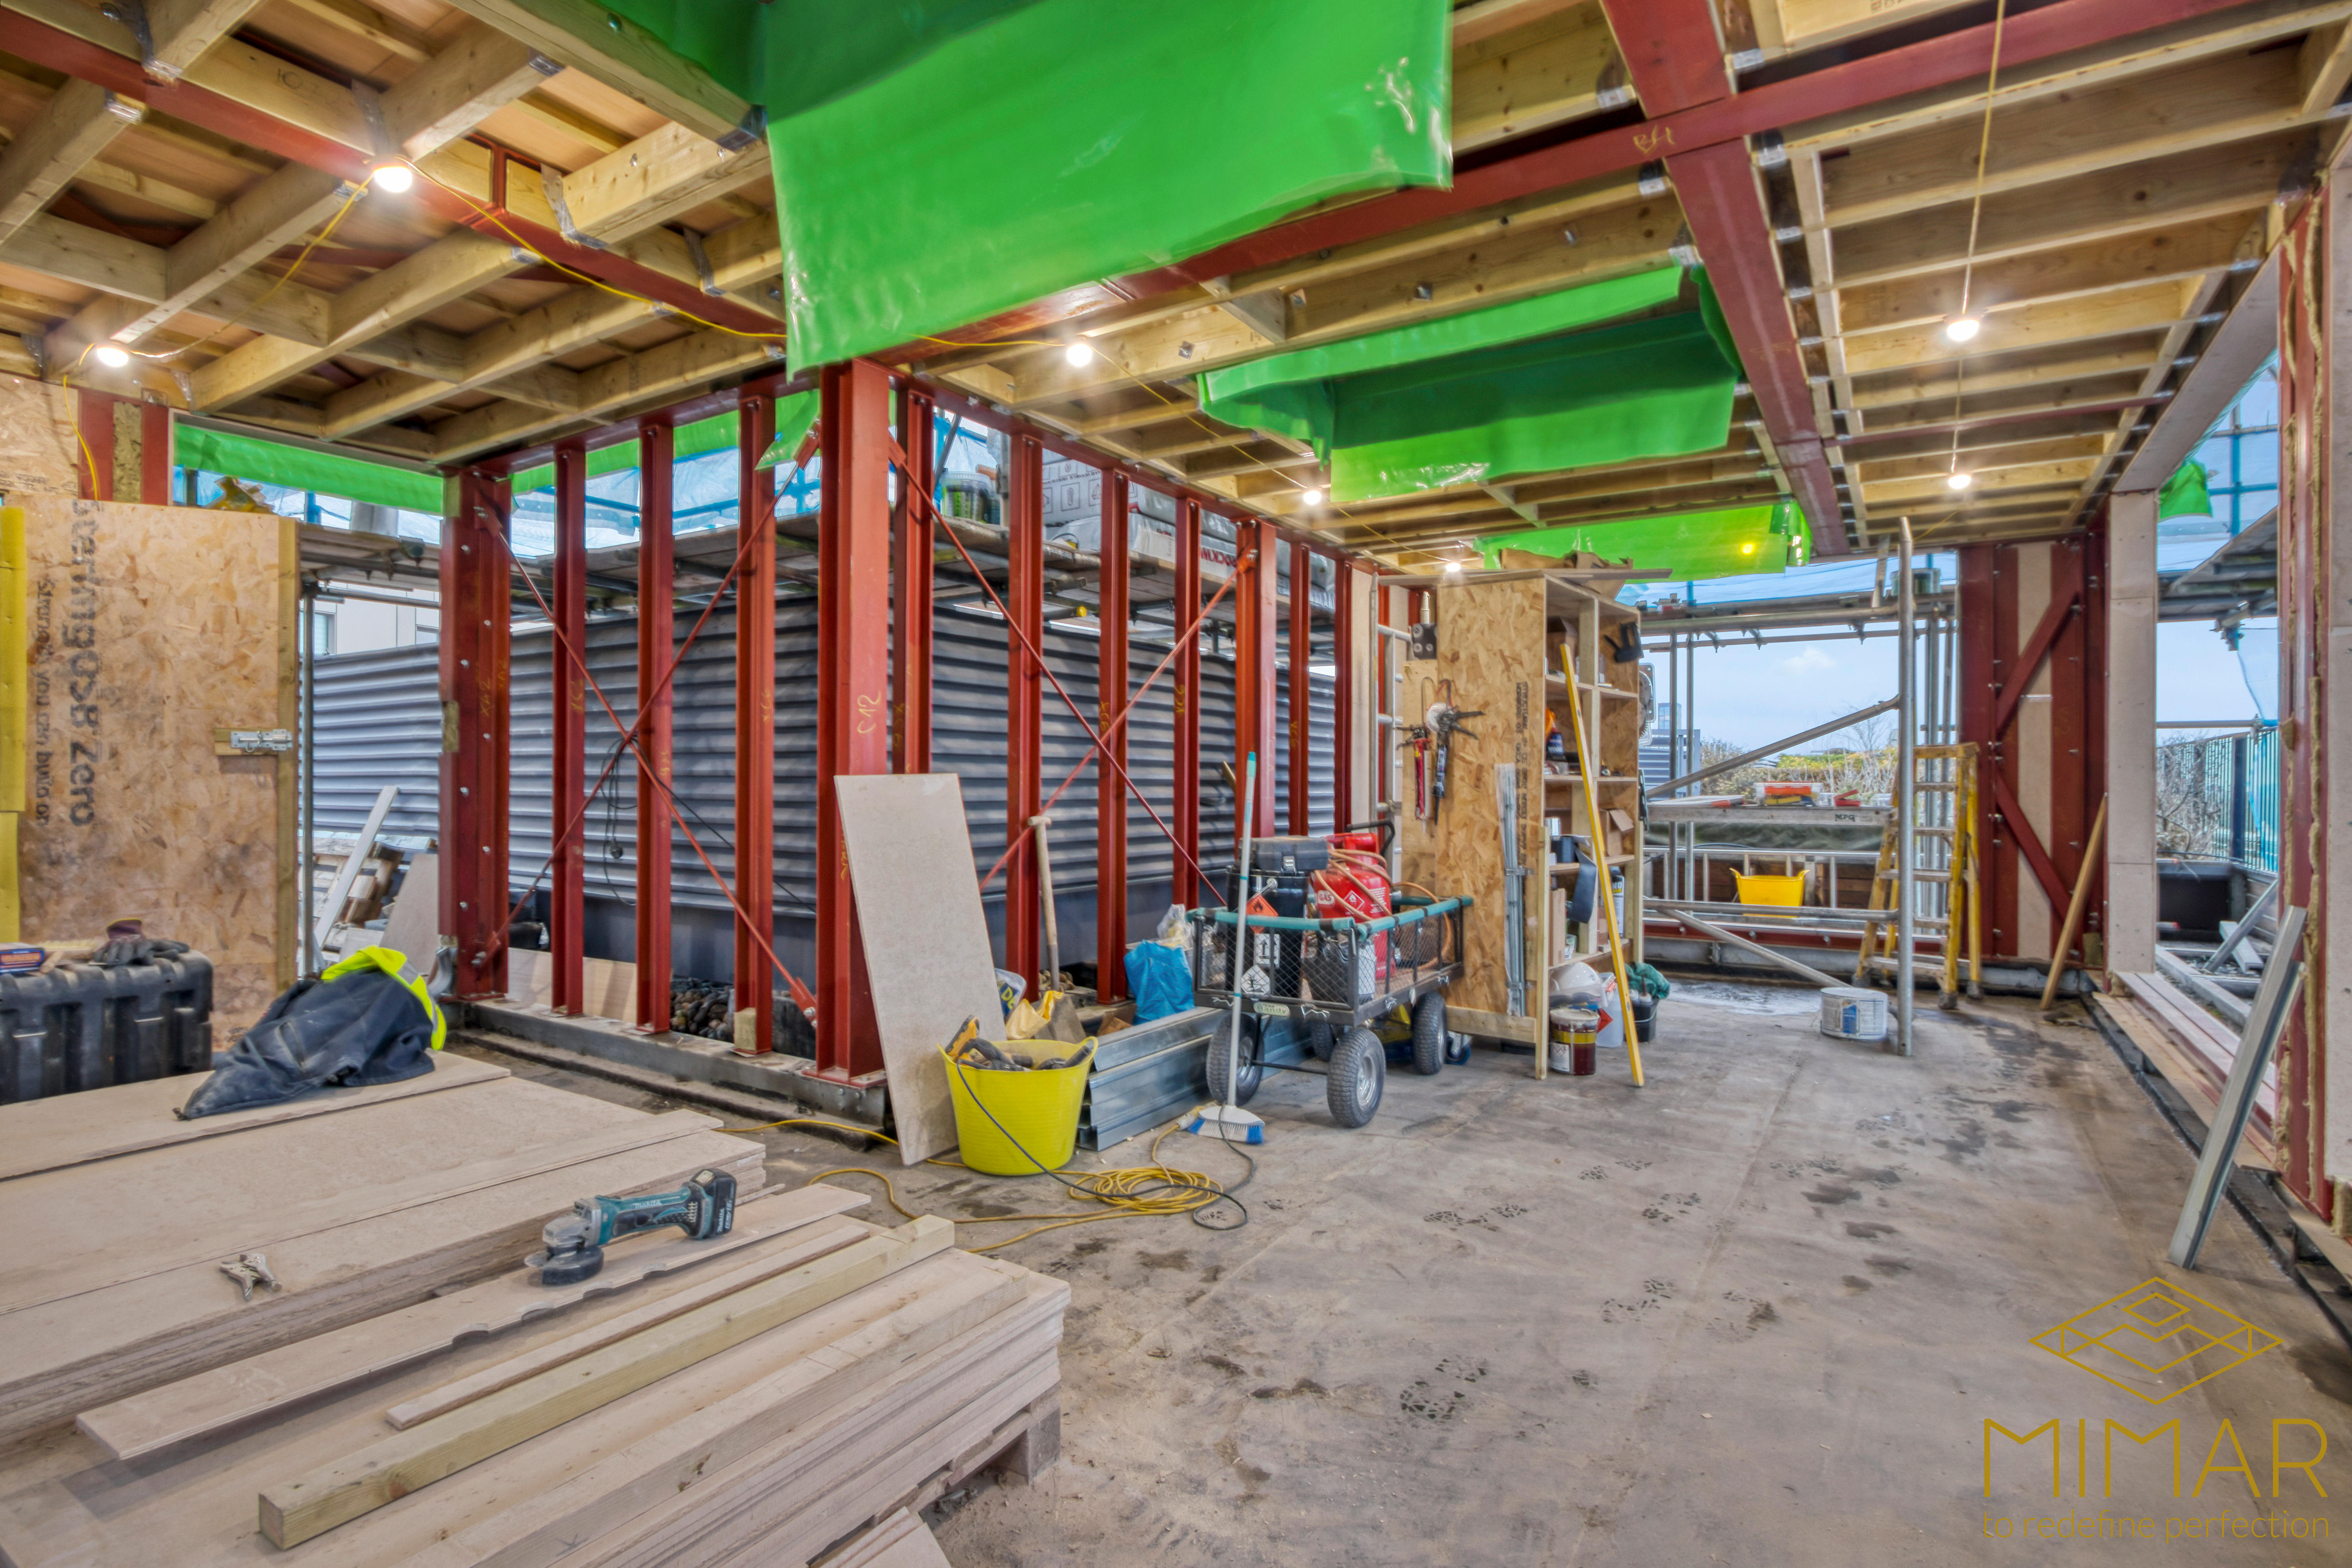
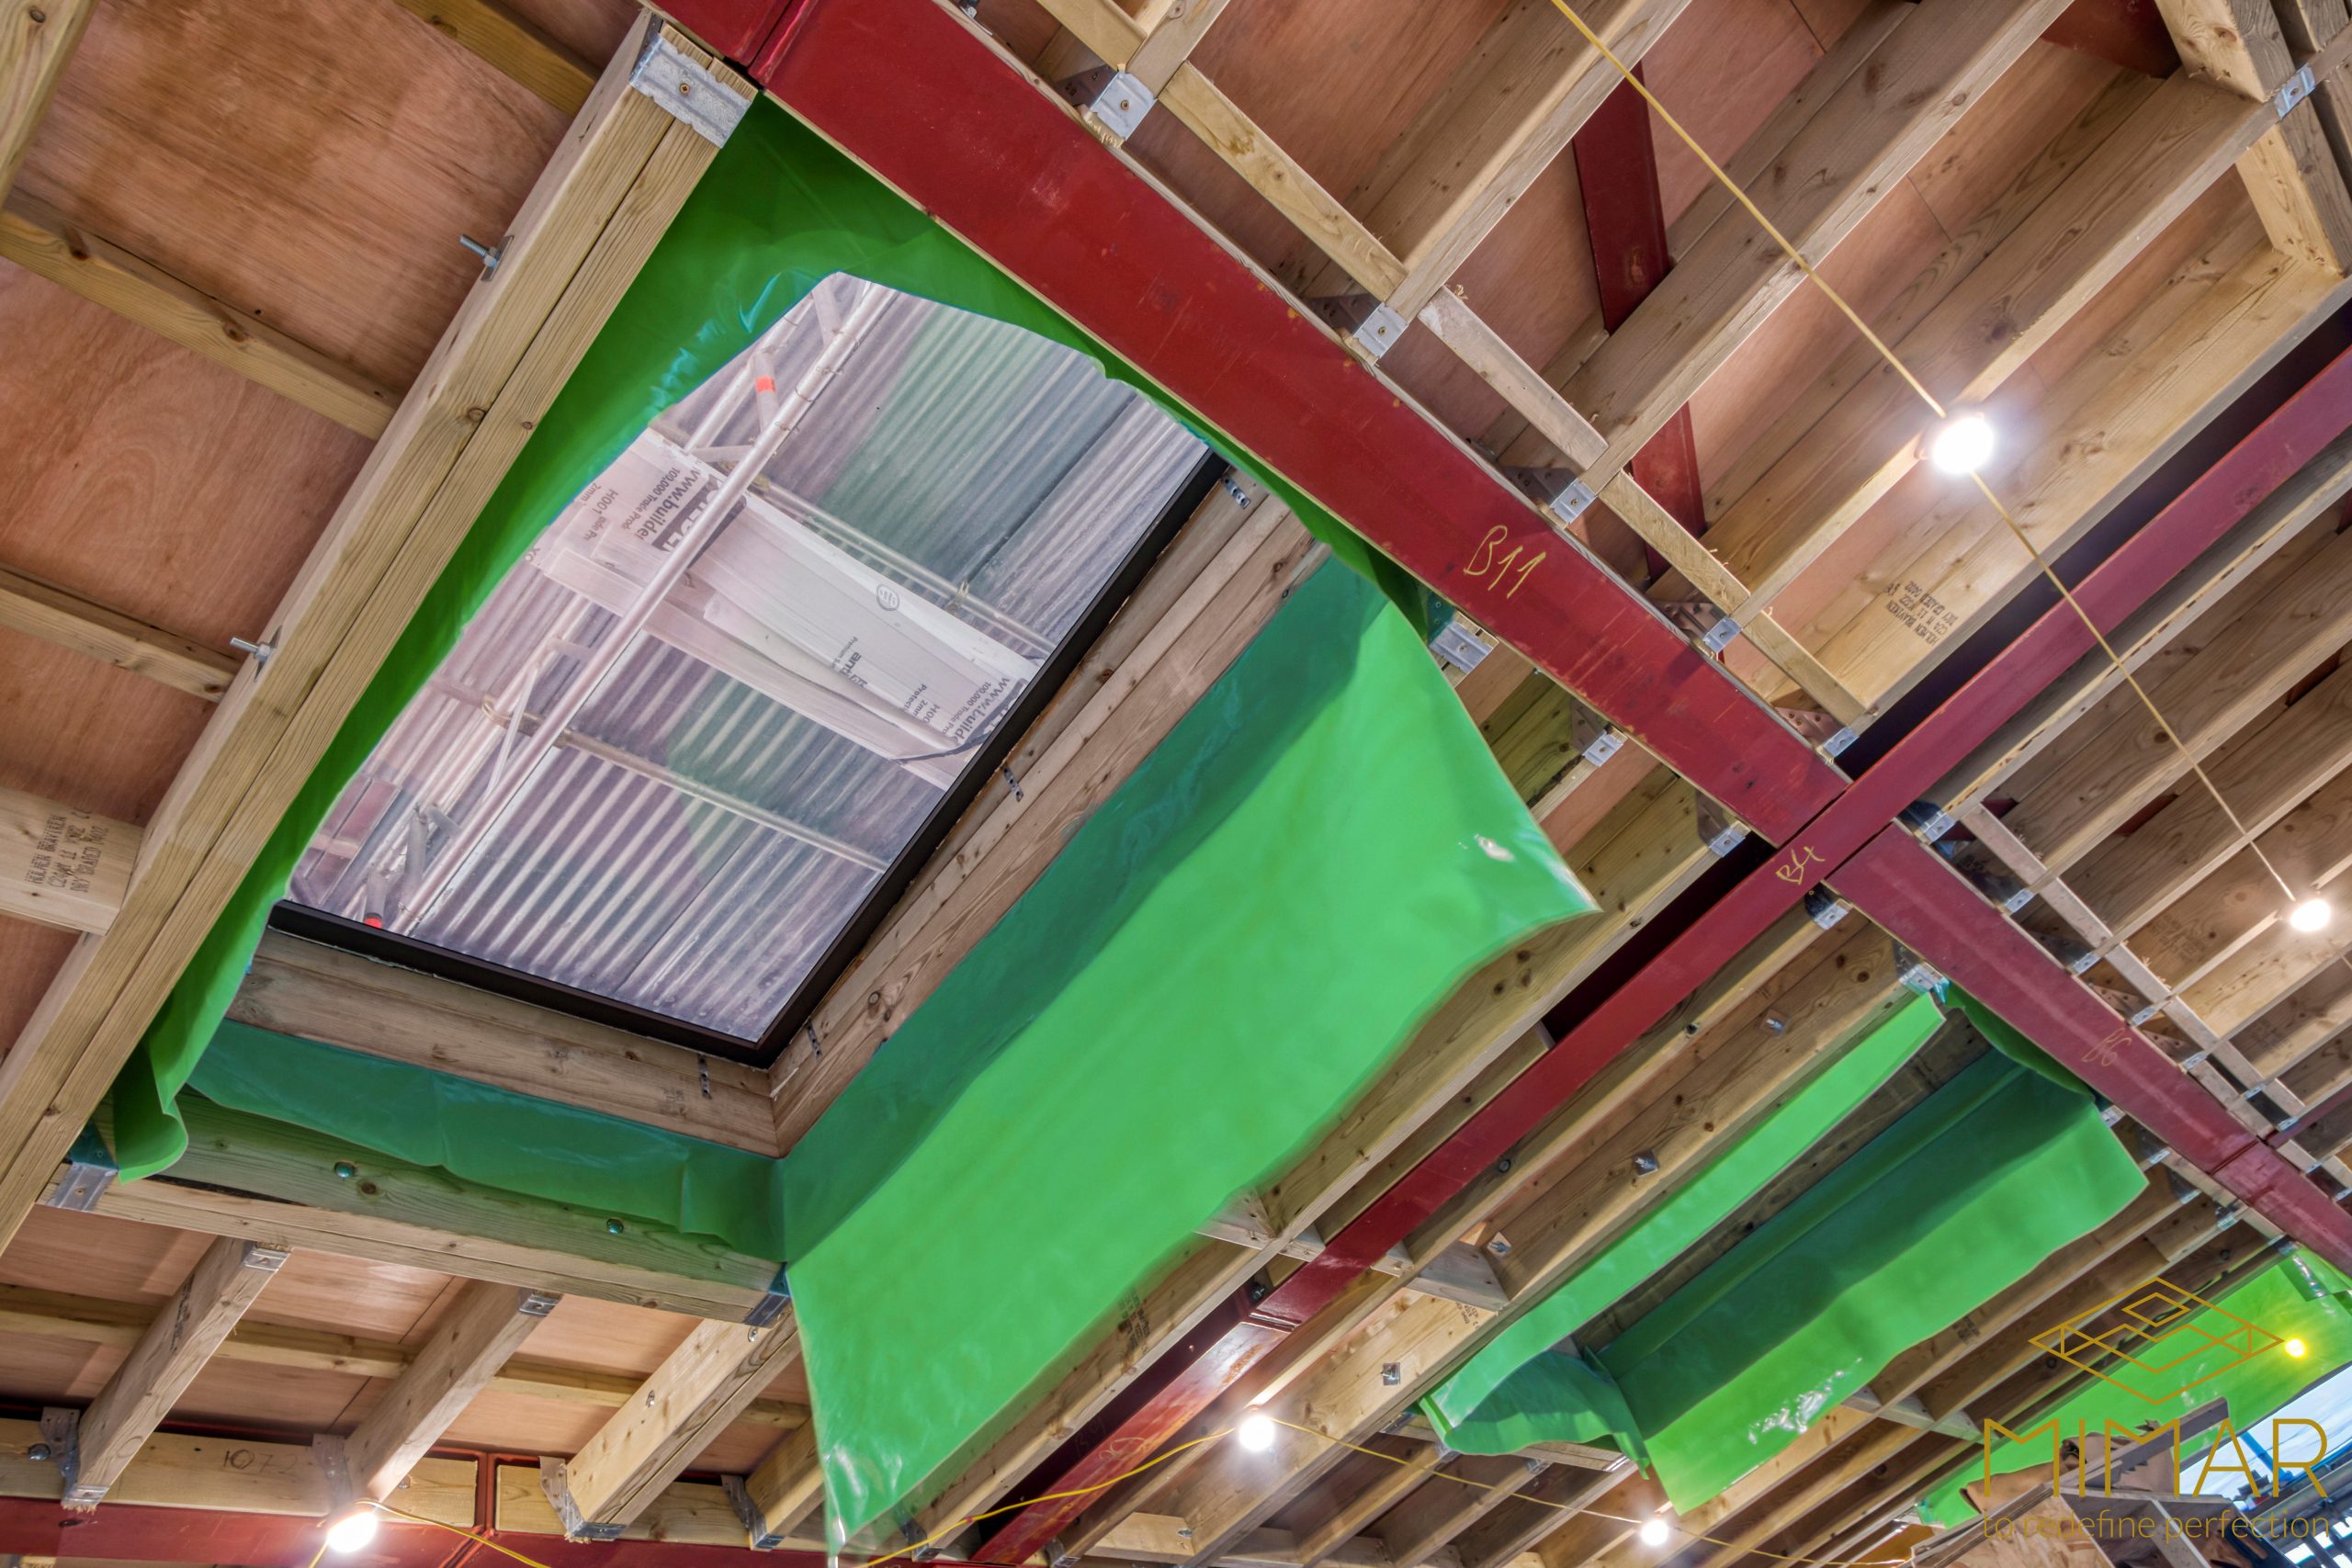
Structural work (4-8 weeks)
- Erection of structural framework
- Brickwork or external wall construction
- Roof structure and weatherproofing
- Creation of openings between existing house and extension
First fix (2-3 weeks)
- Rough electrical wiring
- Plumbing pipework
- Heating systems
- Ventilation ducting
Insulation and plastering (2-3 weeks)
- Wall and roof insulation
- Screed floors
- Plasterboard installation
- Plastering and skim coating
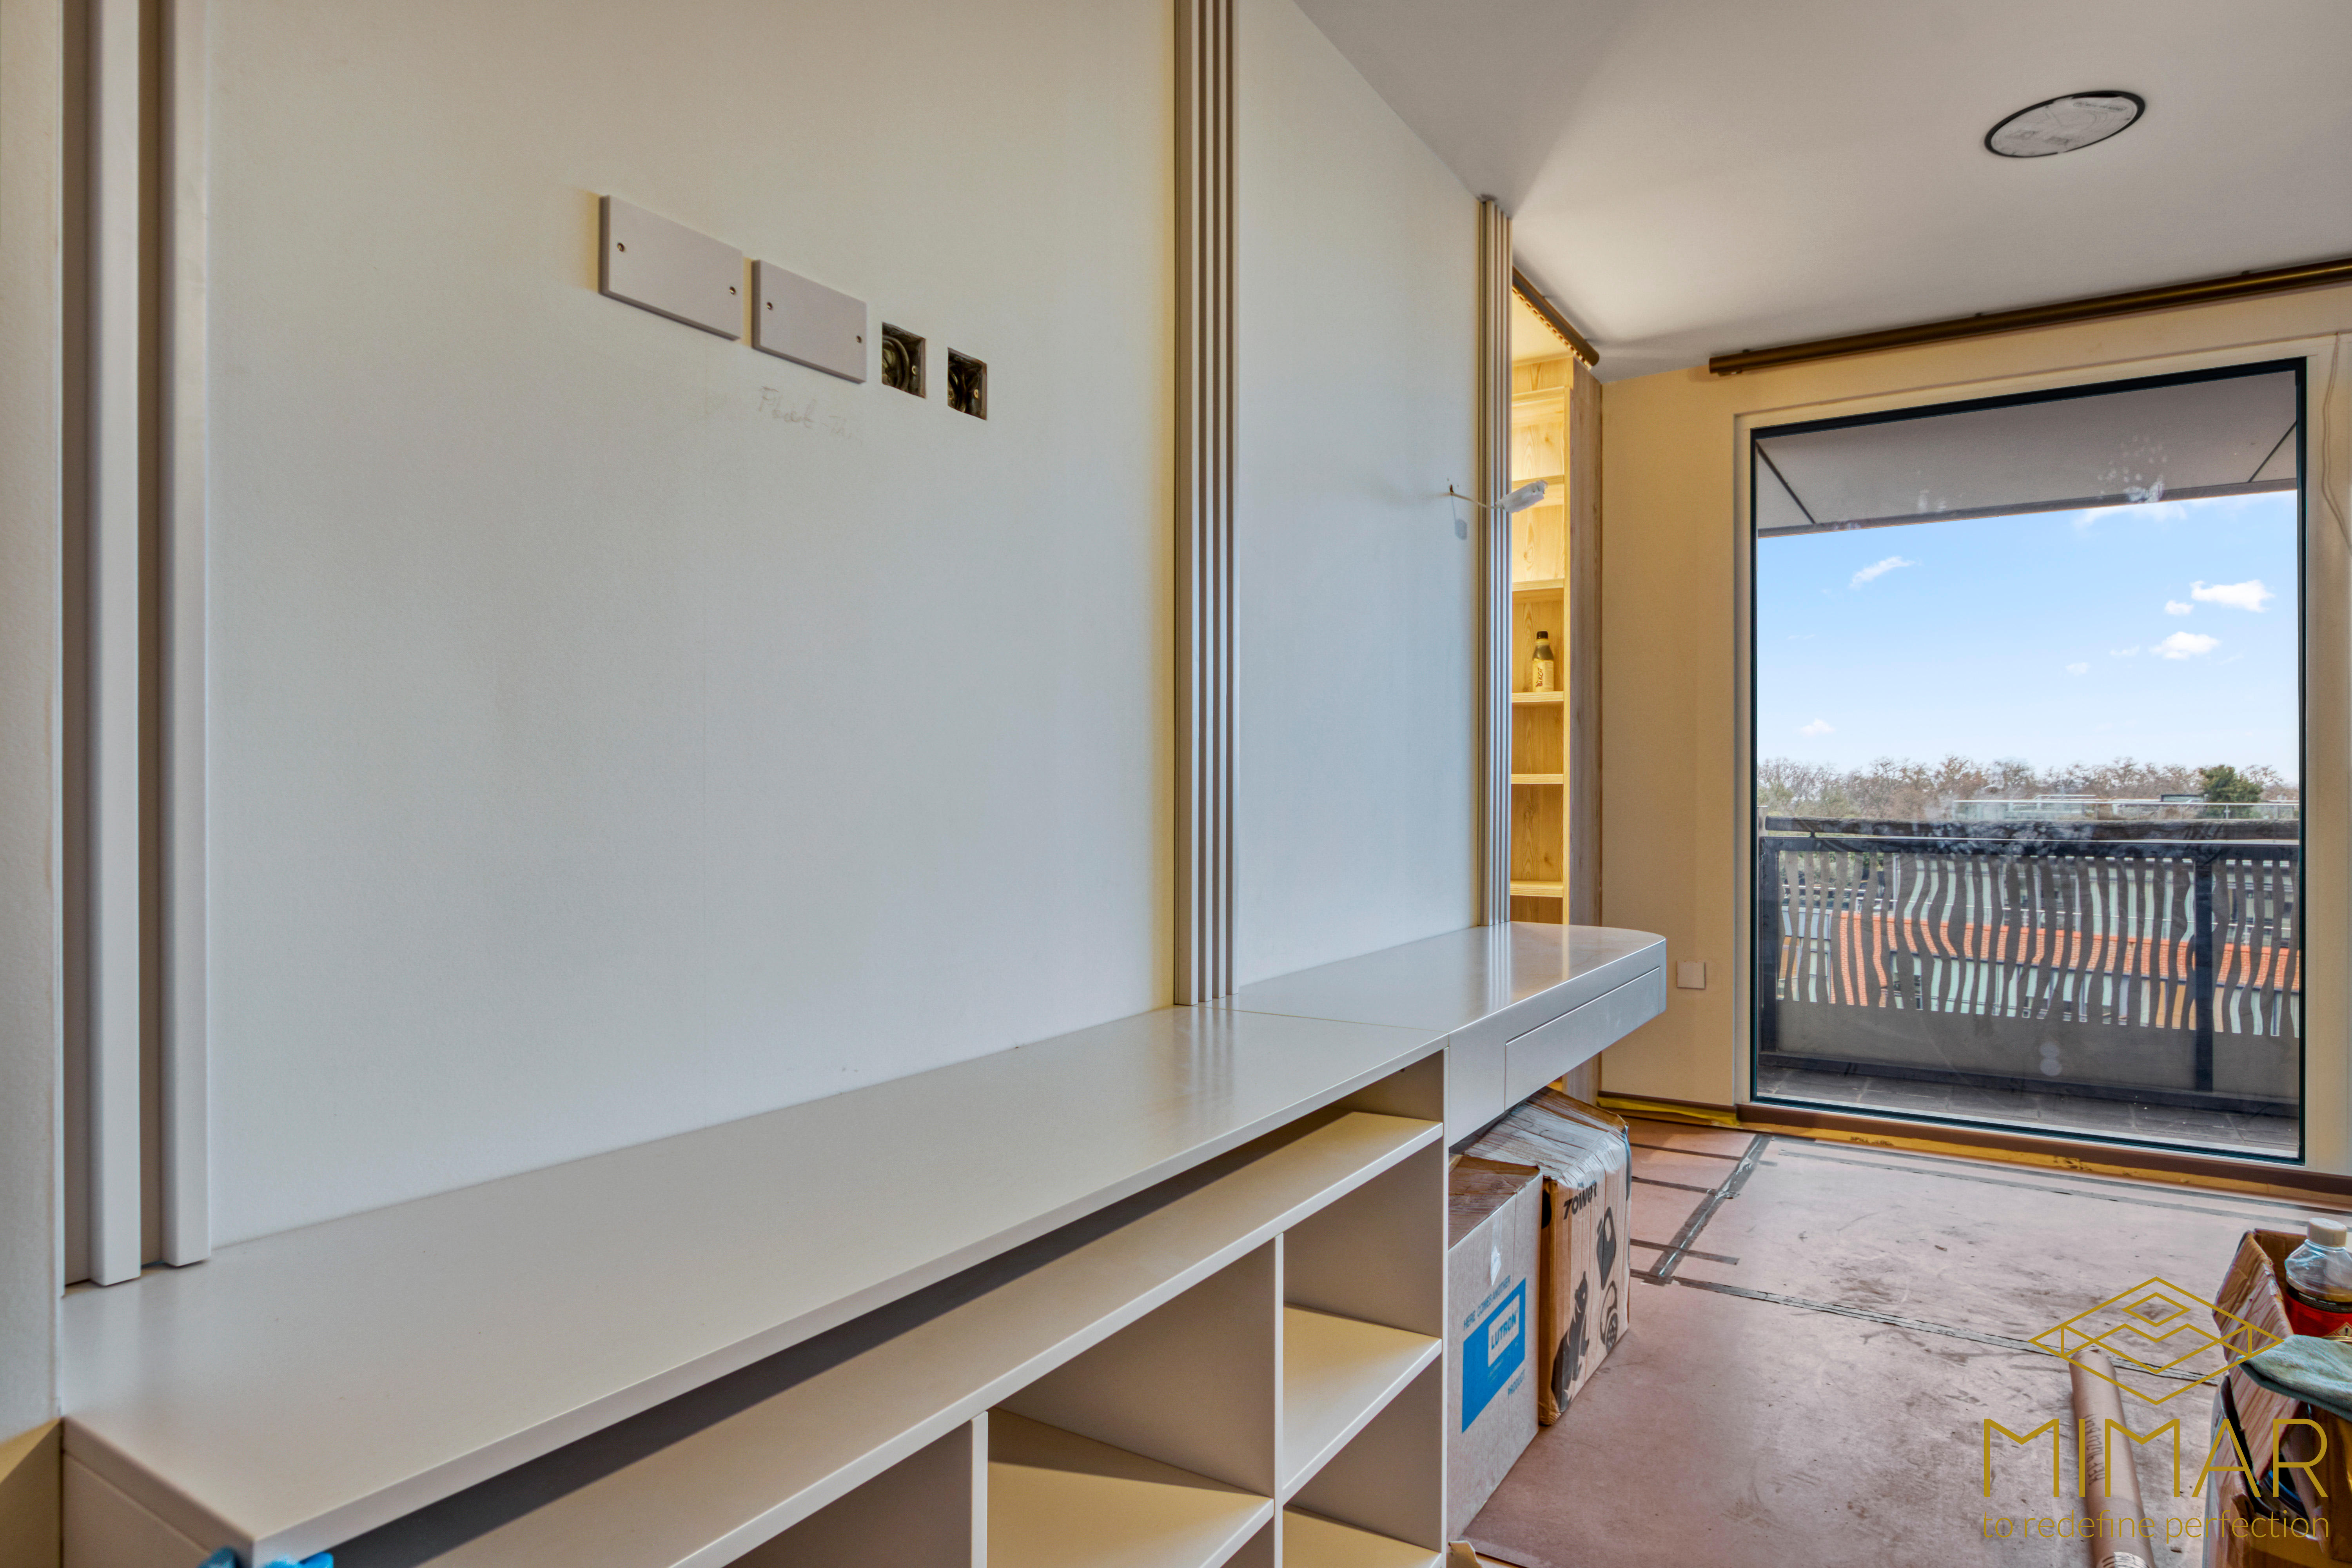
Second fix and finishes (4-6 weeks)
- Door and window installation
- Electrical fixtures and fittings
- Bathroom and kitchen installation
- Flooring and tiling
- Decorating and final finishes
Throughout construction, regular site meetings with your building contractor help maintain quality control and address any issues promptly. In London’s compact urban environment, careful management of deliveries, waste removal, and neighbor relations is particularly important.
Completion and Handover (1-2 weeks)
The final stage includes:
- Snagging (identifying and rectifying minor defects)
- Final building control inspection and certification
- System testing and commissioning
- Thorough cleaning
- Handover of operation manuals, warranties, and certificates
- Final account settlement (often with retention sum held for agreed period)
For quality London building contractors, the relationship continues beyond handover with after-care service addressing any issues that emerge as you begin using your new space.
Integrating Extensions with Home Remodeling
A house extension presents the perfect opportunity to reconsider your entire home’s layout and functionality. Rather than treating the extension as an isolated project, integrating it with broader home remodeling creates cohesive, harmonious living spaces that function better as a whole.
Holistic Space Planning
When planning your London extension, consider how it might trigger beneficial changes throughout your property:
- Improved circulation – Reconfiguring existing doorways or hallways to create natural flow between old and new spaces
- Redistributed functions – Moving kitchens to extensions can free up original rooms for dining, studies, or playrooms
- Enhanced natural light – Strategic removal of internal walls can allow light from extension glazing to penetrate deeper into existing spaces
- Rationalized layouts – Opportunity to address awkward room proportions or impractical arrangements in the original house
Building contractors with experience in London’s housing stock can suggest how best to blend old and new elements, often finding solutions to long-standing issues with period properties through thoughtful integration.
Coordinated Design Elements
Visual continuity between extension and existing home creates a sense of coherence. Consider:
- Consistent flooring materials that flow between spaces
- Coordinated color schemes and decorative elements
- Matching door styles, architraves, and skirting profiles
- Unified lighting design and fixtures
Even when the extension adopts a deliberately contrasting architectural style, these interior details can create a harmonious transition between old and new sections of your home.
Upgrading Building Services
Extensions frequently trigger or enable upgrades to entire-house systems:
Heating – Extending your central heating system might present the ideal moment to upgrade to a more efficient boiler or introduce underfloor heating throughout the ground floor.
Electrical – Rewiring for the extension can be expanded to address outdated electrical systems in the existing house, improving safety and providing additional capacity for modern demands.
Plumbing – Water pressure issues can be resolved house-wide when integrating new plumbing for extension bathrooms or kitchens, potentially including water-saving fixtures throughout.
Data/AV – While walls and floors are open, comprehensive data cabling can be installed to support smart home technologies across the entire property.
Coordinating these upgrades with your building contractor often proves more cost-effective than treating them as separate projects, particularly given the disruption involved in accessing wall cavities or floor voids.
Real-World Integration Examples
Consider these common scenarios for London homes:
Rear extension with kitchen relocation – Moving the kitchen to a new rear extension allows the original kitchen to become a utility room, downstairs bathroom, or dining area, creating a practical sequence of connected spaces.
Side return with reconfigured ground floor – Widening a narrow kitchen through a side return extension creates space for removing walls between front and back reception rooms, transforming a traditional Victorian layout into an open, flowing arrangement.
Double-storey with loft conversion – Combining these creates opportunities for master suite relocations or dedicated children’s floors, completely reimagining the home’s bedroom hierarchy and bathroom arrangements.
Efficiency Benefits
Combining extension work with home remodeling offers practical advantages:
- Single design process considering whole-house functionality
- One planning application and building control approval
- Consolidated disruption period rather than sequential projects
- Potential cost savings on preliminaries, scaffolding, and site facilities
- Consistent finishes applied throughout in one decorating phase
Working with a single building contractor for both extension and remodeling ensures coordinated scheduling and consistent quality standards across all aspects of the project.
Costs, Budgeting, and Value
Understanding the financial dimensions of house extensions in London helps ensure your project remains viable from conception to completion. While costs vary significantly based on specific circumstances, certain principles and benchmarks provide useful guidance.
Primary Cost Drivers
Several key factors determine the overall cost of your London house extension:
Size and type – Basic construction costs typically range from £1,500 to £3,500 per square meter in London, with single-storey extensions at the lower end and double-storey or basement extensions commanding premium rates.
Specification level – Finishes, fixtures, and fittings create enormous variation; basic specifications might use standard materials and off-the-shelf products, while high-end projects include bespoke elements, architectural glazing, and premium brands.
Structural complexity – Additional costs arise from complex structural work like removing load-bearing walls, integrating steel frameworks, or addressing challenging ground conditions common in London.
Site access and constraints – Limited access for materials and equipment, common in London’s terraced streets, can increase costs through requirements for specialized equipment or manual handling.
Professional fees – Architect fees (typically 8-12% of construction costs), structural engineers (1-2%), planning consultants, party wall surveyors, and project management services add 10-15% to total project costs.
| Extension Type | Typical London Cost Range (2023) |
|---|---|
| Single-storey rear extension (30m²) | £60,000 – £120,000 |
| Side return extension (15m²) | £40,000 – £75,000 |
| Wrap-around extension (45m²) | £90,000 – £180,000 |
| Double-storey extension (60m²) | £120,000 – £240,000 |
| Over-garage extension (20m²) | £45,000 – £85,000 |
These figures represent construction costs including standard fixtures and finishes but exclude professional fees, VAT, and high-end specifications that can substantially increase the upper ranges.
Creating a Realistic Budget
Developing a comprehensive budget involves several steps:
- Obtain detailed quotes from multiple building contractors based on preliminary designs
- Add all professional fees (design, engineering, planning, project management)
- Include statutory costs (planning fees, building control, party wall agreements)
- Budget for fixtures, fittings, and appliances (kitchens, bathrooms, lighting)
- Incorporate a contingency of 10-20% for unexpected issues
For London projects, the complexity of the building stock and stringent regulatory environment makes contingency planning particularly important. Older properties often conceal issues that only become apparent during construction, such as inadequate foundations, dampness, or outdated building services requiring upgrade.
Cost Control Strategies
Experienced building contractors can help manage costs through:
- Early involvement – Input during design stages identifies cost-efficient construction methods
- Value engineering – Suggesting alternative approaches or materials that maintain quality while reducing costs
- Fixed-price contracts – Providing certainty for major construction elements
- Phased approach – Structuring work to allow certain elements to be completed later if budget constraints emerge
Building in cost control milestones, where expenditure is reviewed against budget at key stages, helps prevent project drift and allows timely adjustments if necessary.
Return on Investment
Well-executed house extensions in London typically deliver strong returns:
- Average value increase of 10-20% for quality extensions, potentially higher in prime areas
- Strongest returns from extensions that add bedrooms, bathrooms, or create open-plan living spaces
- Enhanced marketability through modernized layouts that appeal to contemporary lifestyles
- Energy efficiency improvements that reduce running costs and improve EPC ratings
Beyond financial returns, consider the lifestyle value of tailored living space that precisely meets your needs, potentially for many years. For many London homeowners, this quality-of-life benefit justifies investment beyond purely financial calculations.
Budgeting Insight
When planning your extension budget, experienced contractors recommend allocating funds to quality elements that significantly impact daily experience – such as natural light sources, thermal comfort, and acoustics – while economizing on easily-upgraded finishes or decorative elements that can be enhanced later.
Managing Disruption and Living Through Construction
Construction inevitably causes disruption to daily life, but thoughtful planning can minimize the impact, particularly important in London where alternative accommodation can be prohibitively expensive. Understanding what to expect helps prepare practically and psychologically for the construction period.
Common Disruptions
House extensions typically involve:
- Noise – Demolition, cutting, drilling, and general construction activities create significant noise, often starting early in the morning
- Dust – Despite precautions, construction dust penetrates throughout the property, requiring regular cleaning
- Reduced functionality – Temporary loss of kitchen, bathrooms, or access to certain areas
- Limited privacy – Construction teams on-site throughout the day
- Services interruptions – Occasional power, water, or heating outages during connections or modifications
- External impact – Skips, scaffolding, material deliveries, and parking disruption
The extent of these disruptions varies with project scope – a small side return might allow continued occupation with minimal adaptation, while a whole-house renovation with extension might render the property temporarily uninhabitable.
Preparation Strategies
Before construction begins:
- Discuss the construction sequence with your building contractor to understand critical disruption periods
- Create a dedicated dust-free zone if possible, sealed with plastic sheeting and tape
- Remove and store valuable or delicate items that might be damaged by dust or vibration
- Establish clear access routes for builders that minimize impact on your living areas
- Prepare temporary facilities like microwave cooking stations or washing arrangements
- Inform neighbors about the project timeline and potential disruptions
In London’s dense neighborhoods, proactive communication with neighbors is particularly important, as construction activity inevitably affects adjacent properties.
Practical Coping Mechanisms
During construction:
- Temporary kitchen – Create a functional setup with microwave, refrigerator, electric kettle, and portable hob in an unaffected room
- Phased working – Ask your building contractor to complete one bathroom before demolishing another
- Dust management – Request daily cleaning by the construction team and use air purifiers in living spaces
- Communication schedule – Establish regular update meetings with your contractor to stay informed and address issues promptly
- Alternative workspaces – If working from home, identify local coworking spaces or cafes for days when noise makes concentration impossible
Many London building contractors now offer enhanced “considerate construction” approaches specifically designed to minimize lifestyle disruption, recognizing that most clients continue to live on-site during works.
When to Consider Temporary Relocation
In certain scenarios, temporarily moving out becomes advisable:
- Projects involving whole-house rewiring or plumbing replacement
- Extensive structural work that compromises security or safety
- Complete kitchen and bathroom simultaneous renovations
- When households include very young children, elderly members, or those with respiratory conditions
- During particularly invasive phases like demolition or floor screeding
Even when full relocation isn’t necessary, strategic scheduling of short breaks or weekend trips during the most disruptive phases can provide welcome relief. Some homeowners in London arrange to stay with family during the week but return at weekends when construction isn’t active.
Managing Expectations
Perhaps most importantly, maintain realistic expectations about the inevitable disruption. Construction is inherently messy, noisy, and disruptive – accepting this reality from the outset helps reduce stress. Focus on the end result rather than temporary inconvenience, and maintain open communication with your building contractor about any issues that arise.
Remember that quality building contractors understand the challenges of living through construction and will work with you to minimize impact while maintaining project momentum. Their experience managing similar projects in London homes provides valuable insight into practical mitigation strategies.
Common Mistakes to Avoid
Even well-planned house extensions can encounter problems when certain pitfalls aren’t anticipated. Being aware of these common mistakes helps you avoid costly errors and disappointment with the final result.
Planning and Design Mistakes
Underestimating budget requirements – Many homeowners start with unrealistic expectations about costs, particularly in London where construction expenses exceed national averages. This can lead to compromised quality, scaled-back ambitions, or even abandoned projects.
Neglecting natural light – Extensions that reduce light to existing rooms create gloomy, undesirable spaces. Always consider how new structures affect daylight penetration and compensate with roof lights, light wells, or strategic glazing.
Poor future-proofing – Designing solely for current needs without considering future adaptability limits long-term utility. Fixed layouts with numerous internal walls often prove less valuable than flexible open spaces that can evolve with changing requirements.
Imbalanced room proportions – Attempting to create too many rooms within limited extension space often results in awkwardly shaped or impractically sized areas. Sometimes fewer, more generously proportioned rooms provide better functionality.
Ignoring storage requirements – Extensions frequently focus on living space at the expense of storage, creating beautiful but ultimately impractical homes. Integrated storage solutions should be part of the initial design, not an afterthought.
Contractor Selection Issues
Choosing solely on price – Selecting the lowest bidder without scrutinizing experience, qualifications, and reputation often leads to quality issues, delays, and ultimately higher costs through remediation.
Inadequate contract documentation – Vague or incomplete contracts create ambiguity about scope, standards, and responsibilities, laying foundations for disputes and unexpected costs. Detailed, professionally prepared contracts protect all parties.
Poor communication structures – Failing to establish clear channels and regular updates with building contractors allows minor issues to escalate. Weekly site meetings and documented communication prevent misunderstandings.
Insufficient checking of credentials – Not verifying insurance coverage, trade association membership, or previous client satisfaction exposes homeowners to significant risks, from poor workmanship to liability for site accidents.
Project Management Oversights
Inadequate contingency planning – Failing to build financial and timeline buffers into plans leaves no margin for inevitable surprises, particularly in London’s older housing stock where hidden conditions frequently emerge during construction.
Changing scope mid-project – Significant design changes once construction begins typically incur disproportionate costs and delays. Resolve design questions during the planning phase, not on-site.
Neglecting neighbor relations – In London’s dense urban environment, maintaining positive relationships with neighbors is essential. Failure to communicate about construction impacts or address concerns promptly can lead to complaints and enforcement action.
Overlooking regulatory compliance – Proceeding without necessary approvals or failing to schedule required inspections can result in enforcement action, remedial costs, and complications when eventually selling the property.
Prevention Strategies
To avoid these common pitfalls:
- Invest in professional design and planning from qualified architects familiar with London extensions
- Obtain multiple detailed quotes based on comprehensive specifications
- Research building contractors thoroughly through references, site visits, and credential verification
- Establish clear communication protocols and regular progress reviews
- Build realistic contingencies into both budget (15-20%) and timeline (20-25%)
- Use formal contracts that clearly define all aspects of the project
- Consider professional project management for complex extensions
- Engage neighbors early and maintain regular communication throughout
Professional guidance from experienced building services providers helps navigate these potential problems. Their accumulated knowledge of London-specific challenges – from planning peculiarities to the quirks of period properties – provides valuable protection against common errors.
Real-World Extension Scenarios
Examining practical examples helps illustrate how different extension types address specific needs while navigating common constraints of London properties. These scenarios demonstrate the integration of design, building services, and construction techniques to create successful outcomes.
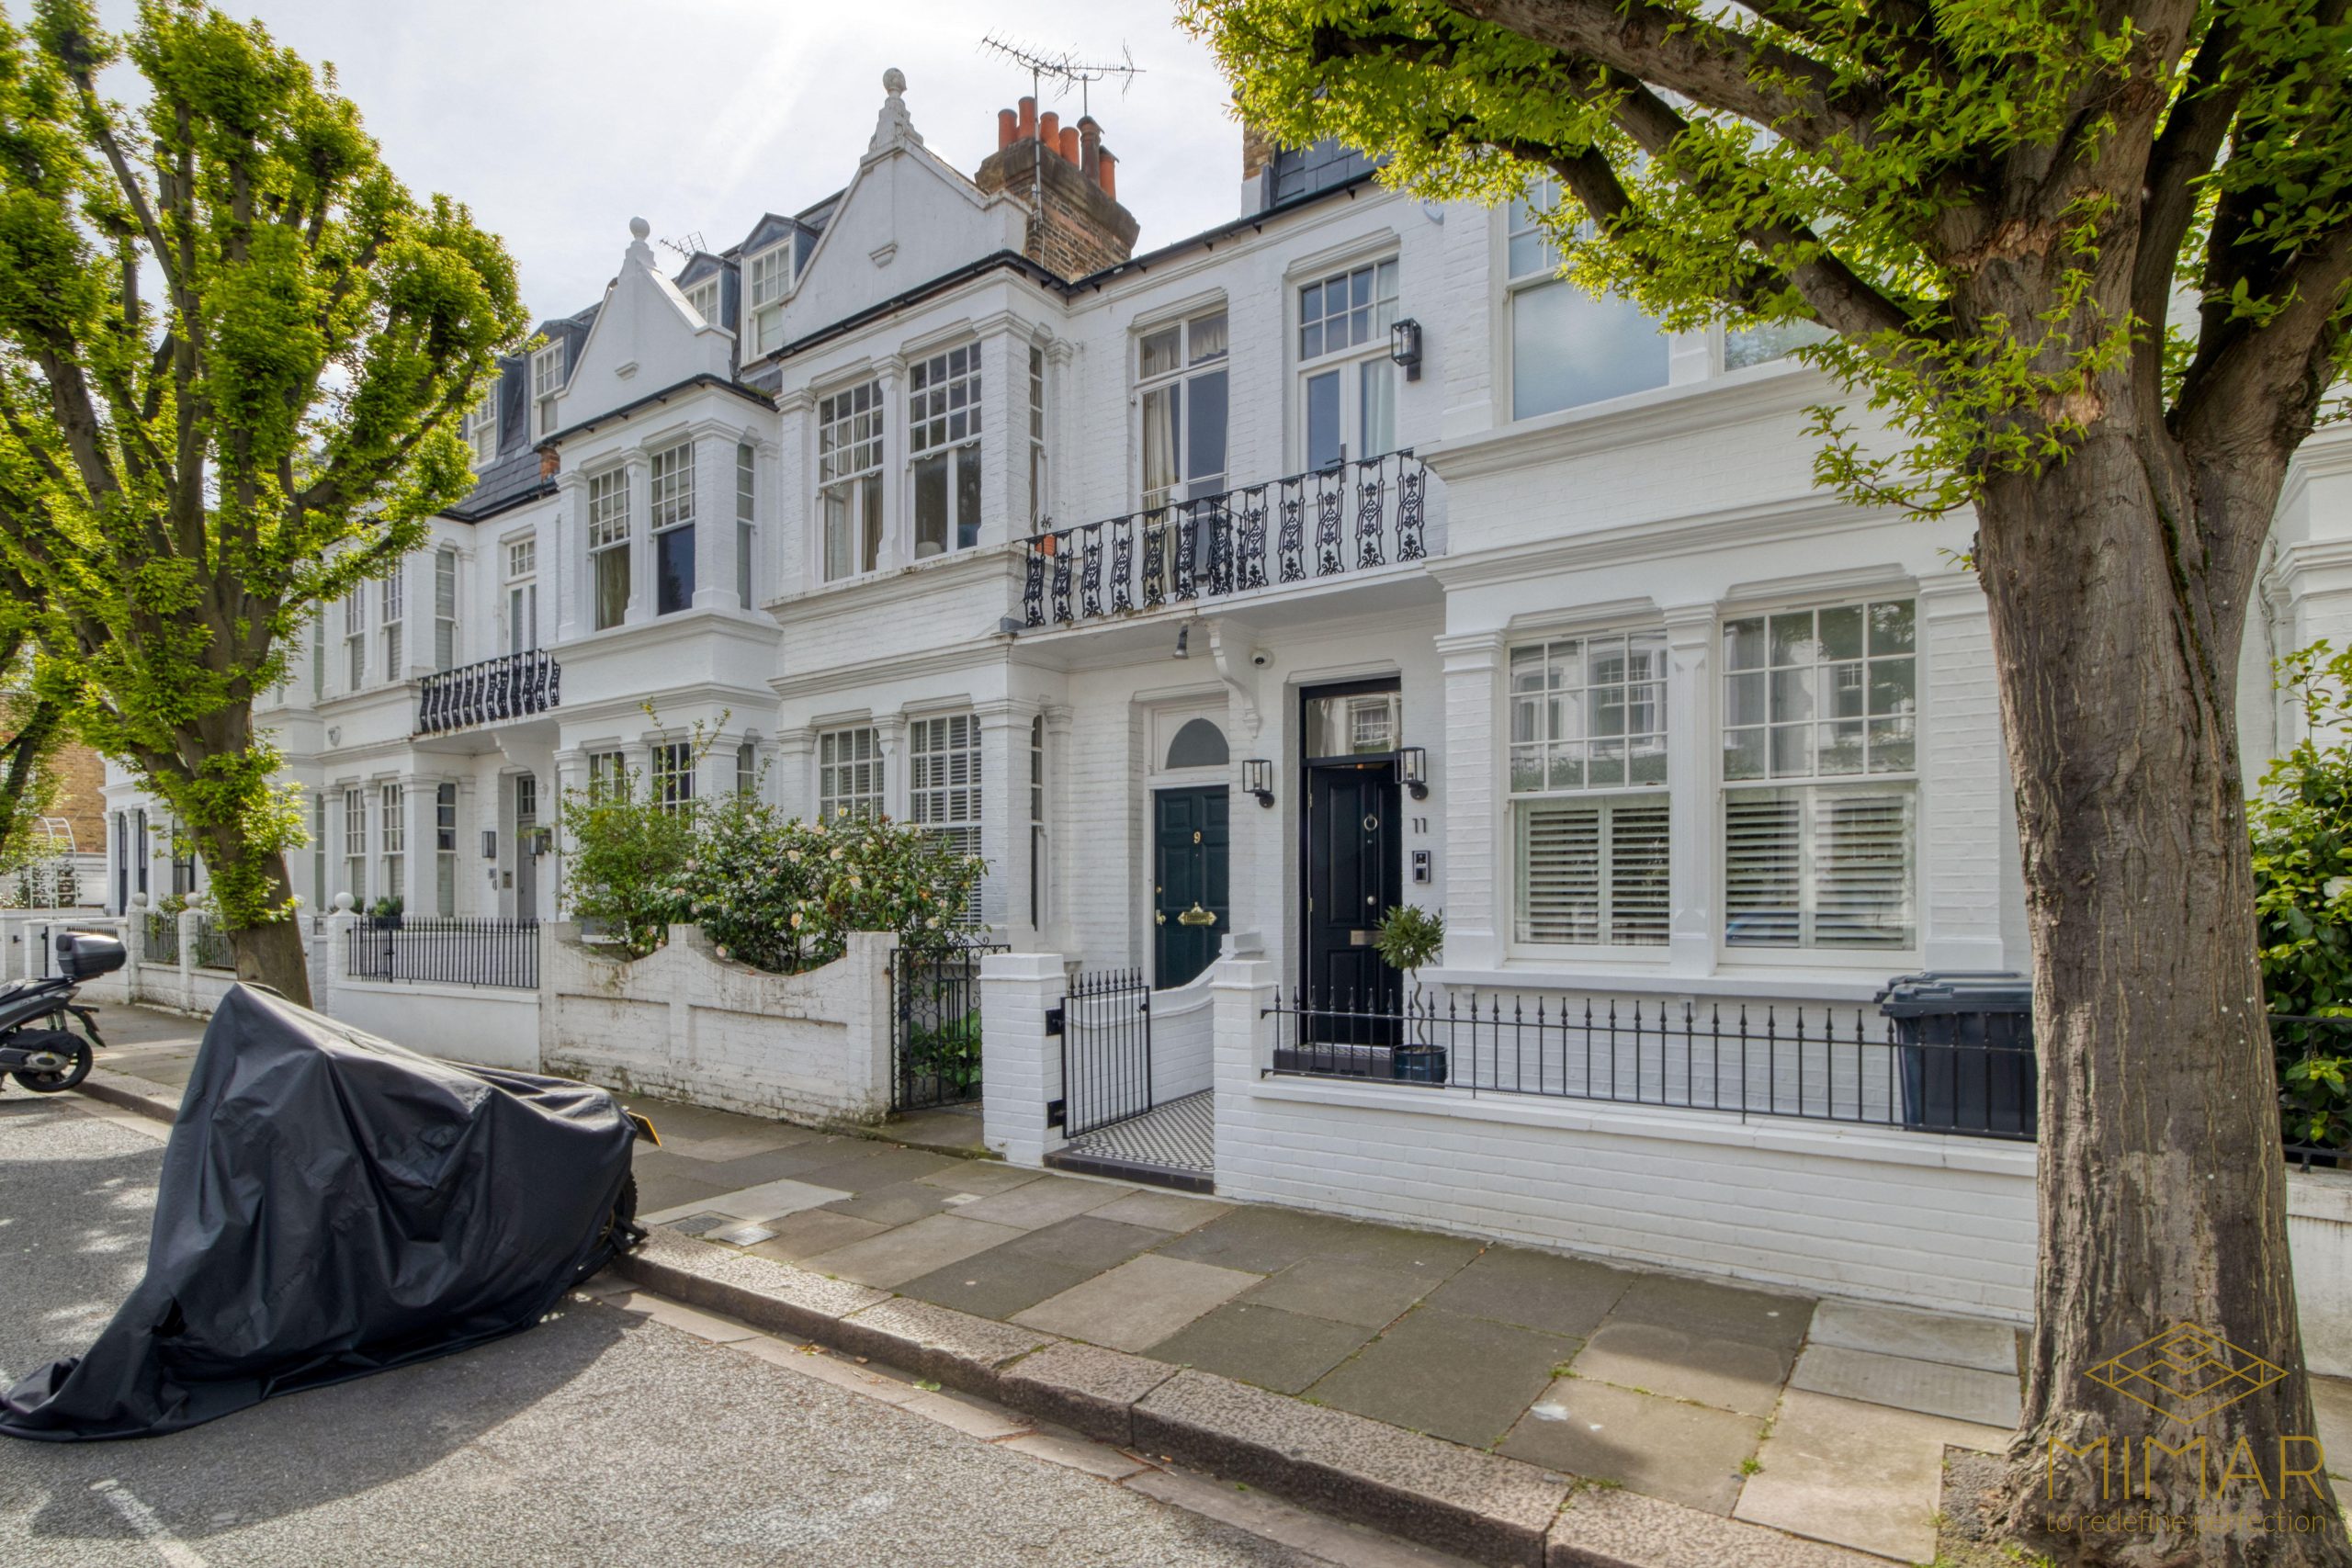
Victorian Terrace Rear Extension
Property: Mid-terrace Victorian house in North London
Challenge: Cramped, dark kitchen disconnected from garden
Solution: Single-storey rear extension with pitched roof and roof lights
The building contractor worked with the family to design a 4-meter rear extension that doubled the kitchen size while creating direct garden access. The extension featured:
- Exposed brick interior wall preserving period character
- Pitched roof with multiple roof lights maximizing natural illumination
- Full-width bi-fold doors connecting to the garden
- Polished concrete floor with underfloor heating
- Kitchen reconfiguration incorporating island unit and dining space
Construction required careful management of party wall agreements with both neighbors and coordination of deliveries in the narrow terraced street. The family continued living in the property during construction, with a temporary kitchen set up in the dining room.
The completed project transformed not just the kitchen but the entire ground floor flow, with the original kitchen area becoming a utility room and downstairs WC – addressing another functional requirement within the same project.
Suburban Semi-Detached Side and Rear Extension
Property: 1930s semi-detached house in South London
Challenge: Growing family needing additional bedroom and enlarged living space
Solution: Two-storey side extension with single-storey rear element
Working with experienced building contractors, the homeowners developed a comprehensive plan to maximize their property’s potential:
- Ground floor extension created open-plan kitchen-dining-living space
- First-floor extension added master bedroom with ensuite
- Existing bedroom converted to family bathroom and fourth bedroom
- Integrated home remodeling reconfigured staircase and landing
The construction process involved complex structural work, including:
- Removal of load-bearing walls with steel beam insertion
- Integration of new roof structure with existing house
- Installation of large-format sliding doors to garden
- Complete rewiring and heating system upgrade throughout
The family relocated during the four-month construction period, returning to a transformed home that provided both the additional bedroom capacity needed and dramatically improved living spaces, including much better connection to the garden.
Conservation Area Glazed Extension
Property: Georgian townhouse in West London conservation area
Challenge: Adding contemporary space while respecting historic fabric
Solution: Minimalist glazed rear extension with minimal impact on original building
This sensitive project required specialist building contractors with conservation experience. The design featured:
- Structural glass walls and roof minimizing visual impact
- Steel frame concealed within glazing system
- Minimal connection points to historic fabric
- Subtle underfloor services avoiding penetrations of original walls
- Limestone flooring transitioning from interior to exterior terrace
The construction process prioritized protection of the historic building, with:
- Detailed method statements for all interfaces with existing structure
- Hand excavation near original foundations
- Custom-fabricated connection details
- Conservation officer site visits at key stages
The completed extension created a light-filled dining area with uninterrupted garden views while maintaining the integrity of the Georgian architecture. This project demonstrated how contemporary additions can complement historic buildings through careful design and skilled execution.
Over-Garage Extension with Loft Conversion
Property: 1950s detached house in East London
Challenge: Creating home office space and guest accommodation without reducing garden
Solution: Combined over-garage extension and loft conversion
This comprehensive project maximized vertical space while preserving the garden:
- First-floor extension over existing garage created dedicated home office
- Full loft conversion with dormer added guest bedroom and bathroom
- Existing house remodeled to improve circulation to new spaces
- Coordinated heating, electrical and data systems throughout
The building contractor phased works to minimize disruption:
- External garage structure reinforced and extended first
- Loft conversion completed while first-floor extension was watertight
- Internal connections made only when new spaces were nearly complete
This approach allowed the family to remain in the property throughout construction, with minimal impact on daily life. The completed project transformed a standard four-bedroom house into a flexible home with dedicated work space and accommodation for extended family visits.
Extension Insight
These examples highlight how successful extensions respond to specific lifestyle needs while respecting the character and constraints of different property types. Architects and building contractors note that the most successful projects take a holistic approach, considering how the extension integrates with the entire property rather than treating it as an isolated addition.
Conclusion
A well-executed house extension represents one of the most significant investments you can make in your London home – not just financially, but in terms of lifestyle enhancement and future flexibility. By expanding and reconfiguring your living space to precisely meet your needs, you create a home that works harmoniously with your daily routines while potentially adding substantial market value.
The journey from initial concept to completed extension requires careful planning, thoughtful design, regulatory navigation, and quality construction. Success depends on making informed decisions at each stage, particularly when selecting building contractors whose expertise will translate your vision into reality.
The most successful projects approach extensions holistically, viewing them not as isolated additions but as transformative elements that enhance the entire property. This integrated perspective – considering flow, light, proportion, and functionality – yields homes that work better at every level, from daily practicalities to aesthetic satisfaction.
Whether you’re considering a modest side return to enhance a terraced kitchen or planning a comprehensive two-storey addition to transform your family home, the fundamental principles remain consistent: thorough preparation, professional guidance, quality construction, and attention to detail throughout.
As London’s housing market continues to evolve, extensions offer a pragmatic response to changing needs without the upheaval of relocation. By investing in your current property, you not only create space tailored to your specific requirements but also contribute to the ongoing adaptation of London’s housing stock to contemporary lifestyles.
With careful planning and the right professional support, your house extension can deliver that rare combination of immediate lifestyle enhancement and long-term financial prudence – truly the best of both worlds for the discerning London homeowner.