Table of Contents
- Introduction: The Renovation Revolution
- Clarifying Goals and Vision for Your Renovation
- Assessing Your Current Property
- Budgeting and Financial Planning
- Planning, Design, and Scope Definition
- Renovation vs Remodel vs Refurbishment – Understanding Your Options
- Legal, Regulatory, and Safety Considerations
- Choosing the Right Professionals
- DIY vs Professional Work
- The Step-by-Step Renovation Process
- Design Themes, Materials, and Functionality
- Common Challenges and How to Overcome Them
- Living Through a Renovation
- After the Renovation
- How Renovation Fits into Broader Trends
- Conclusion
Introduction: The Renovation Revolution
Across the UK, a “renovation nation” trend is transforming the housing landscape. More homeowners than ever are choosing to update and improve their existing properties rather than relocate. This shift reflects evolving priorities: the desire for personalized living spaces, increased property value, and sustainability considerations, all while navigating rising housing costs and limited new build options.
Whether you’re contemplating a simple home refurbishment or a comprehensive property renovation, this guide will walk you through the end-to-end process and key options available to transform your living space.
Before diving in, it’s worth briefly distinguishing between renovation and remodeling. While often used interchangeably, renovation typically involves refreshing or updating existing elements of your home, while remodeling refers to changing the structure or layout of your space. Understanding this distinction will help clarify the scope and scale of your project from the outset.

Clarifying Goals and Vision for Your Renovation in London
Every successful home renovation begins with a clear vision. Before picking up a paintbrush or calling a contractor, take time to define what you want to achieve. Are you looking to create more space? Improve your home’s layout? Boost its resale value? Or simply update its aesthetics?
The key to satisfaction with your renovation project lies in distinguishing between needs and wants. Needs are essentials that address functional problems in your home, while wants are desirable features that improve comfort or aesthetics. Using SMART goals (Specific, Measurable, Achievable, Relevant, Time-bound) can help prevent scope creep and keep your project focused.
When establishing your renovation vision, consider your lifestyle needs (family size, work-from-home requirements), long-term plans (selling soon or staying put), and neighborhood norms (to ensure your improvements align with local property values). A comprehensive property renovation in London’s Kensington might focus on preserving period features while adding modern amenities, while a refurbishment in an up-and-coming area might prioritize contemporary styling to attract young buyers.
Renovation Tip
Create a vision board of inspiration images to help communicate your style preferences to designers and contractors. Digital platforms like Pinterest or Houzz can be invaluable for collecting and organizing ideas for your home renovations.
Assessing Your Current Property
Before plunging into a remodel or refurbishment, conducting a thorough assessment of your current property is crucial. This initial evaluation identifies potential issues early, preventing costly surprises mid-project and helping determine whether you’re looking at a light home refurbishment or a more extensive renovation.
A comprehensive property assessment typically reviews four key areas:
- Structure: Foundations, load-bearing walls, roof condition
- Layout: Traffic flow, space efficiency, natural light
- Systems: Plumbing, electrical, heating/cooling
- Finishes: Floors, walls, ceilings, fixtures
While homeowners can self-assess certain aspects using detailed checklists, professional inspections are recommended for critical elements like structural integrity, electrical systems, plumbing, or when purchasing an older property. Particular attention should be paid to damp issues, which are common in London’s older housing stock, and can significantly impact the scope and cost of your renovation.
The findings from your assessment will help determine whether your project falls into the category of light home refurbishment (primarily cosmetic updates) or a deeper property renovation or remodel (involving structural changes). This distinction is crucial for budgeting accurately and setting realistic expectations about timeframes and disruption.
Budgeting and Financial Planning for a Renovation
Realistic budgeting forms the cornerstone of any successful property renovation. Without careful financial planning, even the most inspired renovation concept can quickly become a stressful experience.
The first rule of renovation budgeting is to include a contingency fund—experts recommend setting aside 10-20% of your total budget to cover unexpected issues that may arise once work begins. This is particularly important when renovating older properties in London, where hidden problems behind walls or under floors are common.
For effective budget allocation, consider the following typical breakdown:
| Budget Category | Typical Allocation | Notes |
|---|---|---|
| Labor | 40-50% | Higher in London due to skilled trade shortages |
| Materials | 25-35% | Quality varies significantly by price point |
| Permits & Fees | 5% | More for listed buildings or conservation areas |
| Contingency | 10-20% | Essential buffer for unexpected issues |
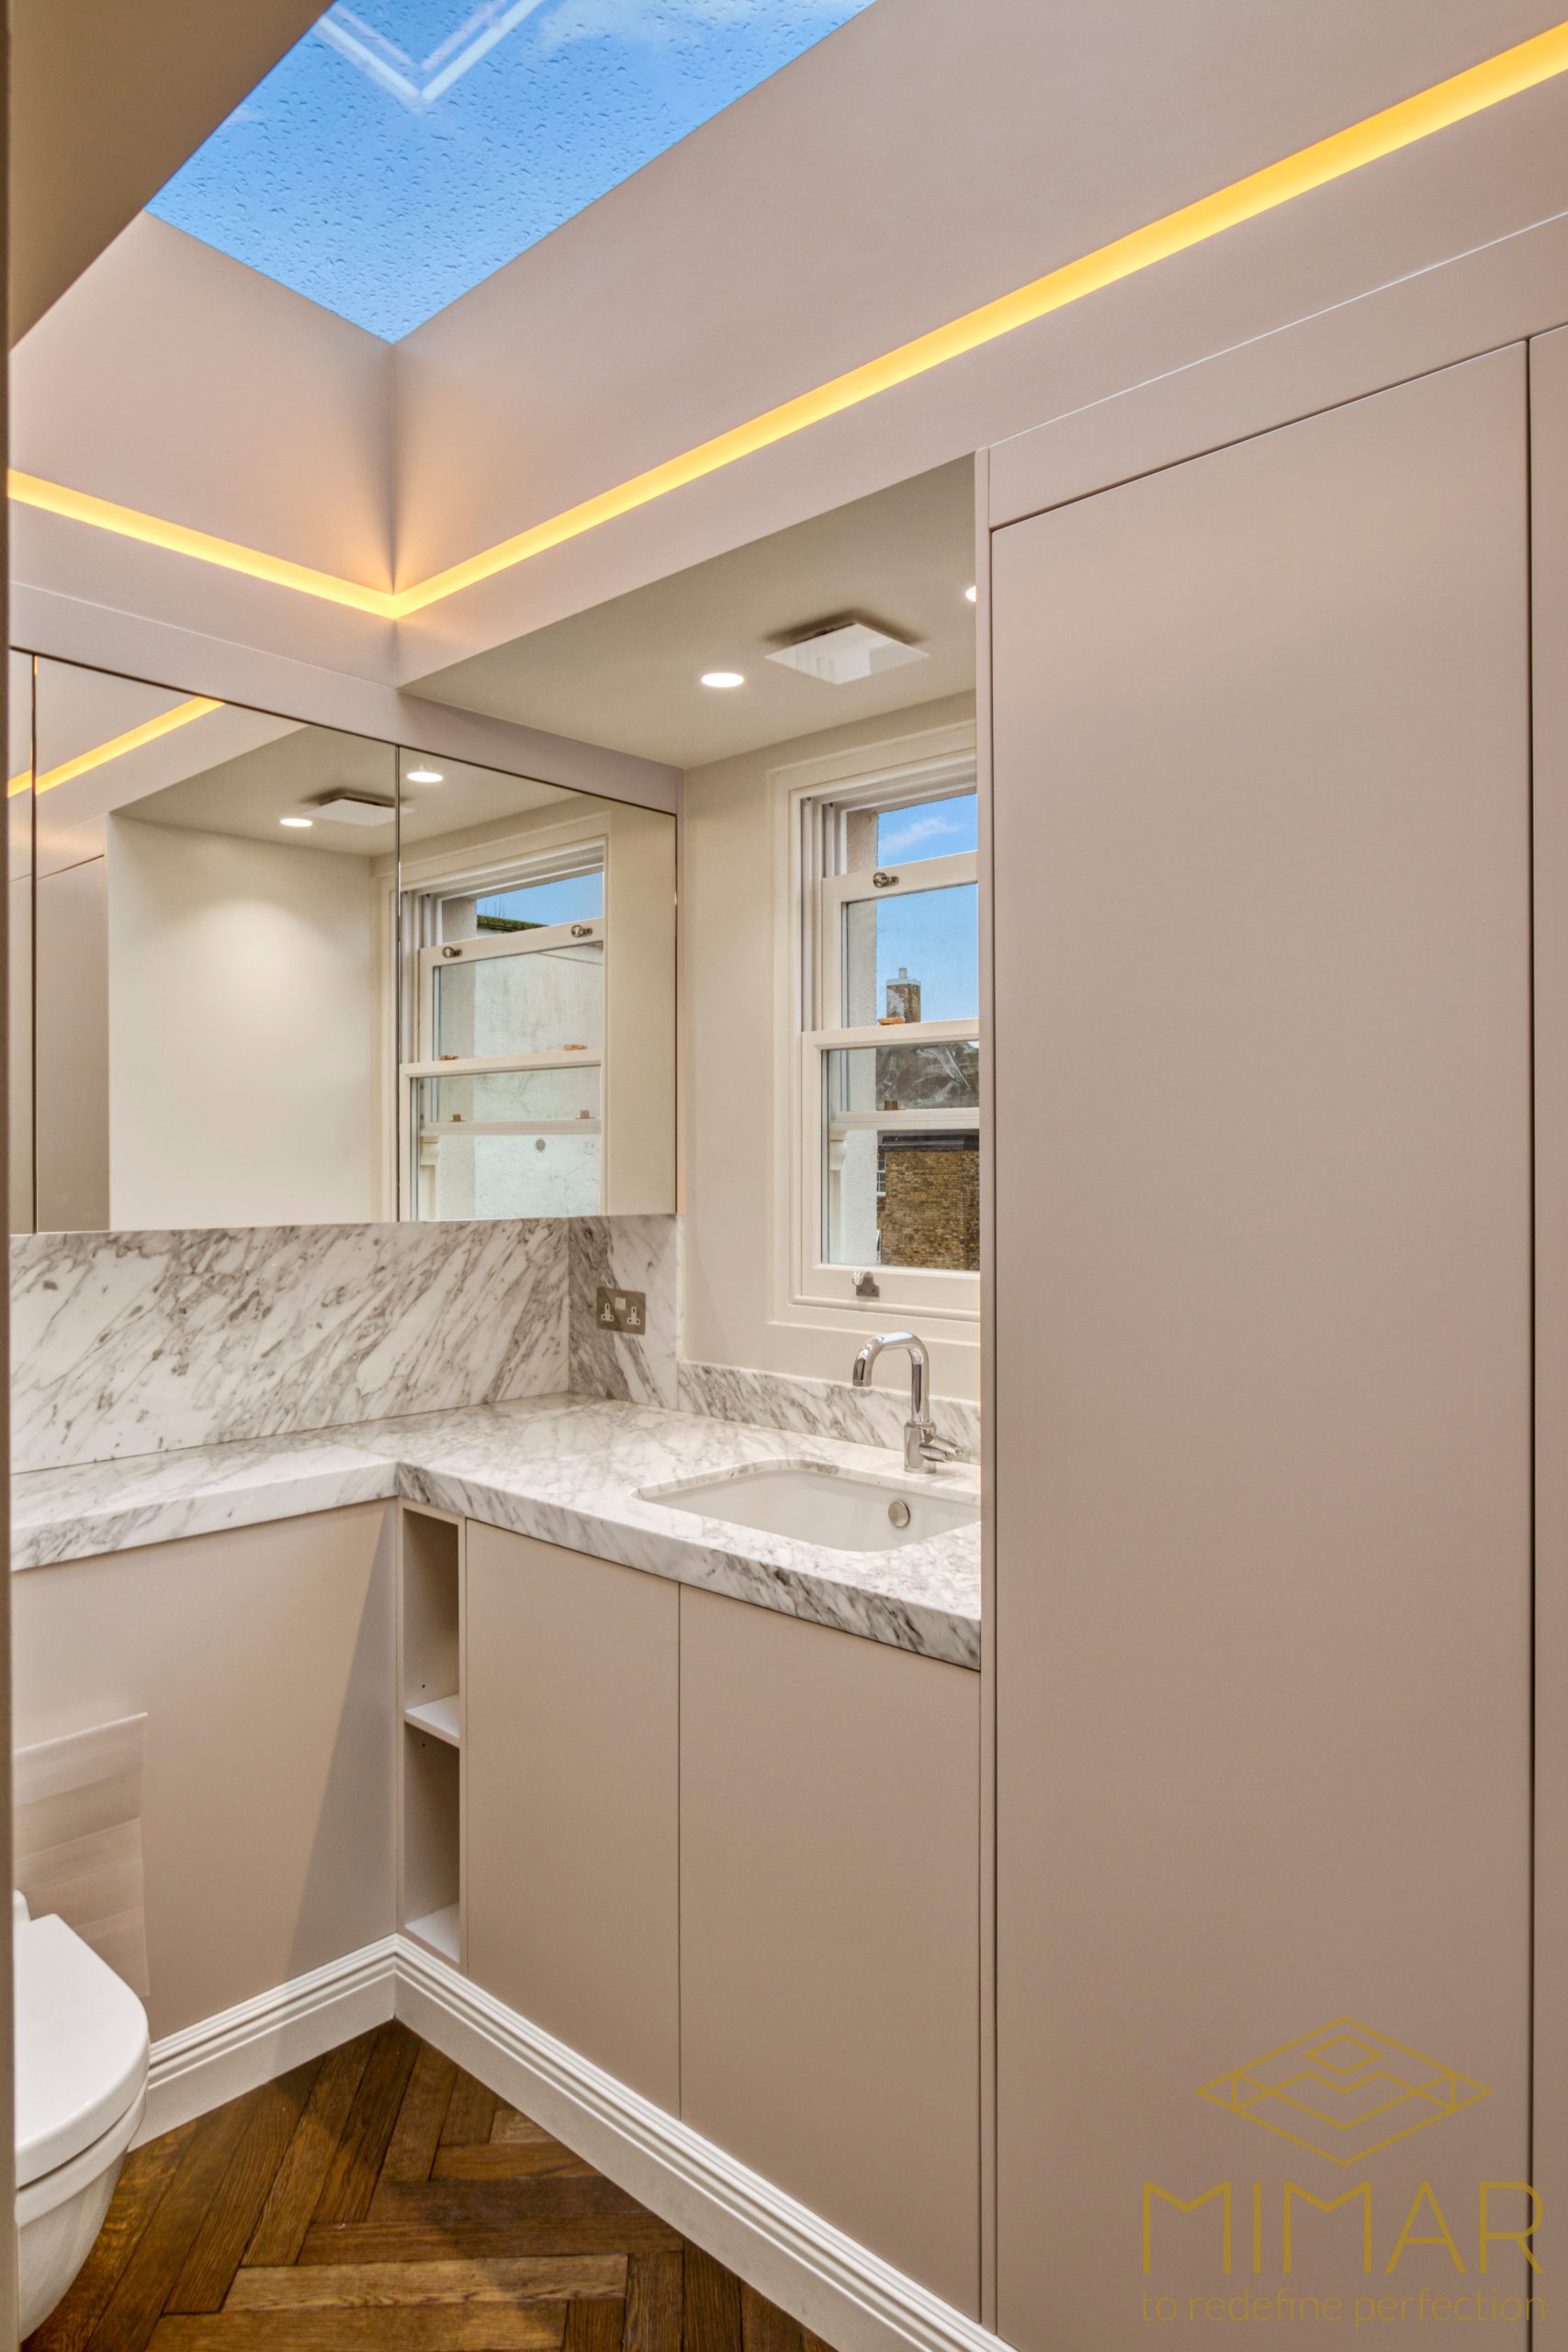
Different types of home renovations come with varying cost implications. According to market data, kitchen renovations in London typically range from £10,000-£30,000 depending on the quality of fixtures and appliances, while bathroom overhauls cost between £5,000-£15,000. A comprehensive property renovation can start at £50,000 and easily reach six figures for larger homes.
When considering financing options, homeowners typically choose between savings, home equity loans, refinancing existing mortgages, or using 0% credit cards for smaller refurbishment projects. Each option has advantages and drawbacks, making it important to consult with a financial advisor before proceeding.
Finally, it’s crucial to balance renovation goals with potential return on investment. While kitchens and bathrooms typically yield a 50-70% return, more personal or niche renovations may not add equivalent value. The London property market has specific preferences, so understanding local buyer expectations can help prioritize renovation elements that maximize resale potential.
Planning, Design, and Scope Definition
Defining your project’s scope is essential for keeping your home renovations on track, both in terms of budget and timeline. Clear scope definition means identifying exactly which rooms will be involved, the level of finish you expect (from budget to luxury), and establishing a realistic timeline.
The design phase of your renovation involves making decisions about:
- Layouts: How spaces will flow and function
- Materials: Balancing durability, aesthetics, and cost
- Styles: Creating a cohesive look that suits your taste
For simple refurbishment projects, many homeowners successfully use planning templates and basic software tools to organize their ideas. However, for more complex remodels involving structural changes, professional input becomes invaluable. Architects and interior designers bring not only creative vision but also technical knowledge of building regulations and structural possibilities.
Consider incorporating future flexibility into your designs, particularly if your needs may change in coming years. Modular solutions, multi-purpose rooms, or planning for potential extensions can extend the lifespan of your renovation investment. Similarly, taking a staged approach—renovating one room at a time—can make the process more manageable both financially and logistically.
Planning Tip
Create a detailed room-by-room inventory of all fixtures, materials, and finishes before starting your renovation. This document becomes invaluable when shopping for materials and communicating with contractors about your vision.
Renovation vs Remodel vs Refurbishment – Understanding Your Options in London
The terms renovation, remodel, and refurbishment are often used interchangeably, but understanding their distinctions helps clarify the scope, cost, and disruption level of your project.
Renovation typically involves updating existing elements of your home without major structural changes. This might include new paint, replacing fixtures, updating flooring, or modernizing outdated features. Renovations are ideal when the fundamental layout works but the space needs refreshing. In London, renovation projects often cost between £2,000-£20,000 and cause minimal disruption.
Remodel projects involve altering the structure or layout of your property. This might include removing walls to create open-plan spaces, adding extensions, or completely reconfiguring room layouts. Remodels transform how spaces function and generally cost upwards of £20,000, with significant disruption during construction. According to industry experts, remodeling projects typically take 2-3 times longer than renovations of similar-sized spaces.
Home refurbishment generally refers to cosmetic and surface-level improvements—essentially “refreshing” a space without major changes to functionality. This might include redecorating, new flooring, or updating fixtures. Refurbishments are the least invasive option, typically costing between £1,000-£10,000, and are particularly popular for rental properties or homes being prepared for sale.
| Type | Typical Work | Cost Range (London) | Timeframe |
|---|---|---|---|
| Renovation | Updating existing elements, no major structural changes | £2,000-£20,000 | 2-6 weeks |
| Remodel | Structural changes, layout alterations, extensions | £20,000+ | 6 weeks-6 months |
| Refurbishment | Cosmetic updates, decorative changes | £1,000-£10,000 | 1-4 weeks |
Many successful property projects combine elements of all three approaches for efficiency and impact. For example, you might remodel the kitchen layout while simply renovating bathrooms and refurbishing bedrooms with new paint and fixtures.
Legal, Regulatory, and Safety Considerations
Navigating the legal and regulatory landscape is a crucial aspect of any property renovation in London. Before beginning work, it’s essential to check whether your project requires planning permission, building regulations approval, or other permits.
Planning permission is typically required for:
- Extensions exceeding certain size limits (generally over 3-4 meters from the original building)
- Major changes to external appearance
- Changes to listed buildings
- Alterations in conservation areas
Building regulations approval is needed for most structural work, regardless of whether planning permission is required. This ensures your renovations meet safety standards for structure, fire safety, ventilation, and energy efficiency. Failure to comply with building regulations can result in enforcement action, requiring you to rectify the work or even remove it entirely.
The scale of approvals needed generally correlates with the scope of your project. Cosmetic home renovations often require no formal approvals, while full remodels need comprehensive planning permission and building control oversight. London’s diverse mix of housing stock, from Victorian terraces to modern apartments, means regulations can vary significantly depending on your property type and location.
Safety considerations should be paramount throughout your renovation. Electrical work must comply with Part P of Building Regulations and should be completed by a certified electrician. Similarly, structural modifications should be approved by a structural engineer, and all gas work must be carried out by Gas Safe registered professionals.
If you live in a conservation area or a property with listed status, additional restrictions may apply to what changes you can make, particularly to exteriors. Similarly, if you live in a leasehold property, you’ll likely need permission from the freeholder before undertaking significant renovations.
Choosing the Right Professionals for Your London Property Renovation
Selecting the right team can make the difference between a smooth renovation and a stressful one. For significant home renovations, you may need several types of professionals:
- General Contractors: Oversee the entire project and coordinate subcontractors
- Architects/Designers: Create plans and ensure aesthetic cohesion
- Specialists: Including plumbers, electricians, carpenters, and plasterers
- Structural Engineers: Essential for projects involving load-bearing modifications
When evaluating professionals for your property renovation, look for credentials such as membership in professional bodies (like Checkatrade or the Federation of Master Builders), comprehensive insurance coverage, and a portfolio of similar projects. For London-specific expertise, professionals familiar with the unique challenges of the capital’s housing stock—from period features to party wall agreements—will be invaluable.
Always request at least three detailed quotes for comparison. Focus not just on the total cost but on the breakdown of labor, materials, and time estimates. The cheapest quote isn’t necessarily the best value if it excludes important elements or uses inferior materials.
Once you’ve selected your team, clear contracts are essential. These should specify scope, timeline, payment schedule, and how variations to the original plan will be handled. Regular communication is crucial throughout the project—many successful renovations use dedicated project management apps to keep everyone informed and document decisions.
Hiring Tip
Ask potential contractors for references from clients whose projects were completed at least a year ago. This gives insight into not just the quality of the initial work but how well it has stood the test of time.
DIY vs Professional Work in Home Renovations
The decision between DIY and professional work depends on your skills, available time, and the nature of the renovation tasks. While taking on certain aspects yourself can save money, it’s important to recognize which elements of home renovations are suitable for DIY and which demand professional expertise.
Tasks generally considered DIY-friendly include:
- Painting and decorating
- Minor tiling projects
- Simple flooring installation (laminate, vinyl)
- Cabinet hardware replacement
- Basic landscaping
Tasks that typically require professional skills include:
- Electrical work (legally mandated in many cases)
- Plumbing beyond simple fixture replacement
- Structural modifications
- Gas installations or modifications
- Complex tiling or flooring
The trade-offs between DIY and professional work extend beyond cost savings. DIY projects often take significantly longer and may not achieve the same quality as professional work. While you might save 20-30% on labor costs, this needs to be weighed against time investment, tool purchases, and potential for costly mistakes.
A balanced approach that many homeowners find effective is to hire professionals for specialized, critical, or structural work, then take on finishing touches like painting or decorating themselves. This partial DIY approach can be particularly effective in larger property renovations, allowing you to control costs while ensuring quality where it matters most.
Remember that DIY work still needs to comply with relevant building regulations, particularly for structural, electrical, or plumbing modifications. Improper work can void insurance policies and cause complications when selling your property.
The Step-by-Step Renovation Process in London
Understanding the typical sequence of a renovation project helps set realistic expectations about timelines and disruption. While every property renovation is unique, most follow a similar pattern:
- Pre-construction (2-4 weeks): Finalizing designs, obtaining permits, selecting materials, and securing contractors. This phase involves planning and paperwork rather than physical changes.
- Demolition (1-2 weeks): Removing unwanted elements such as old fixtures, flooring, or wall coverings. This is typically dusty and noisy, making it one of the most disruptive phases.
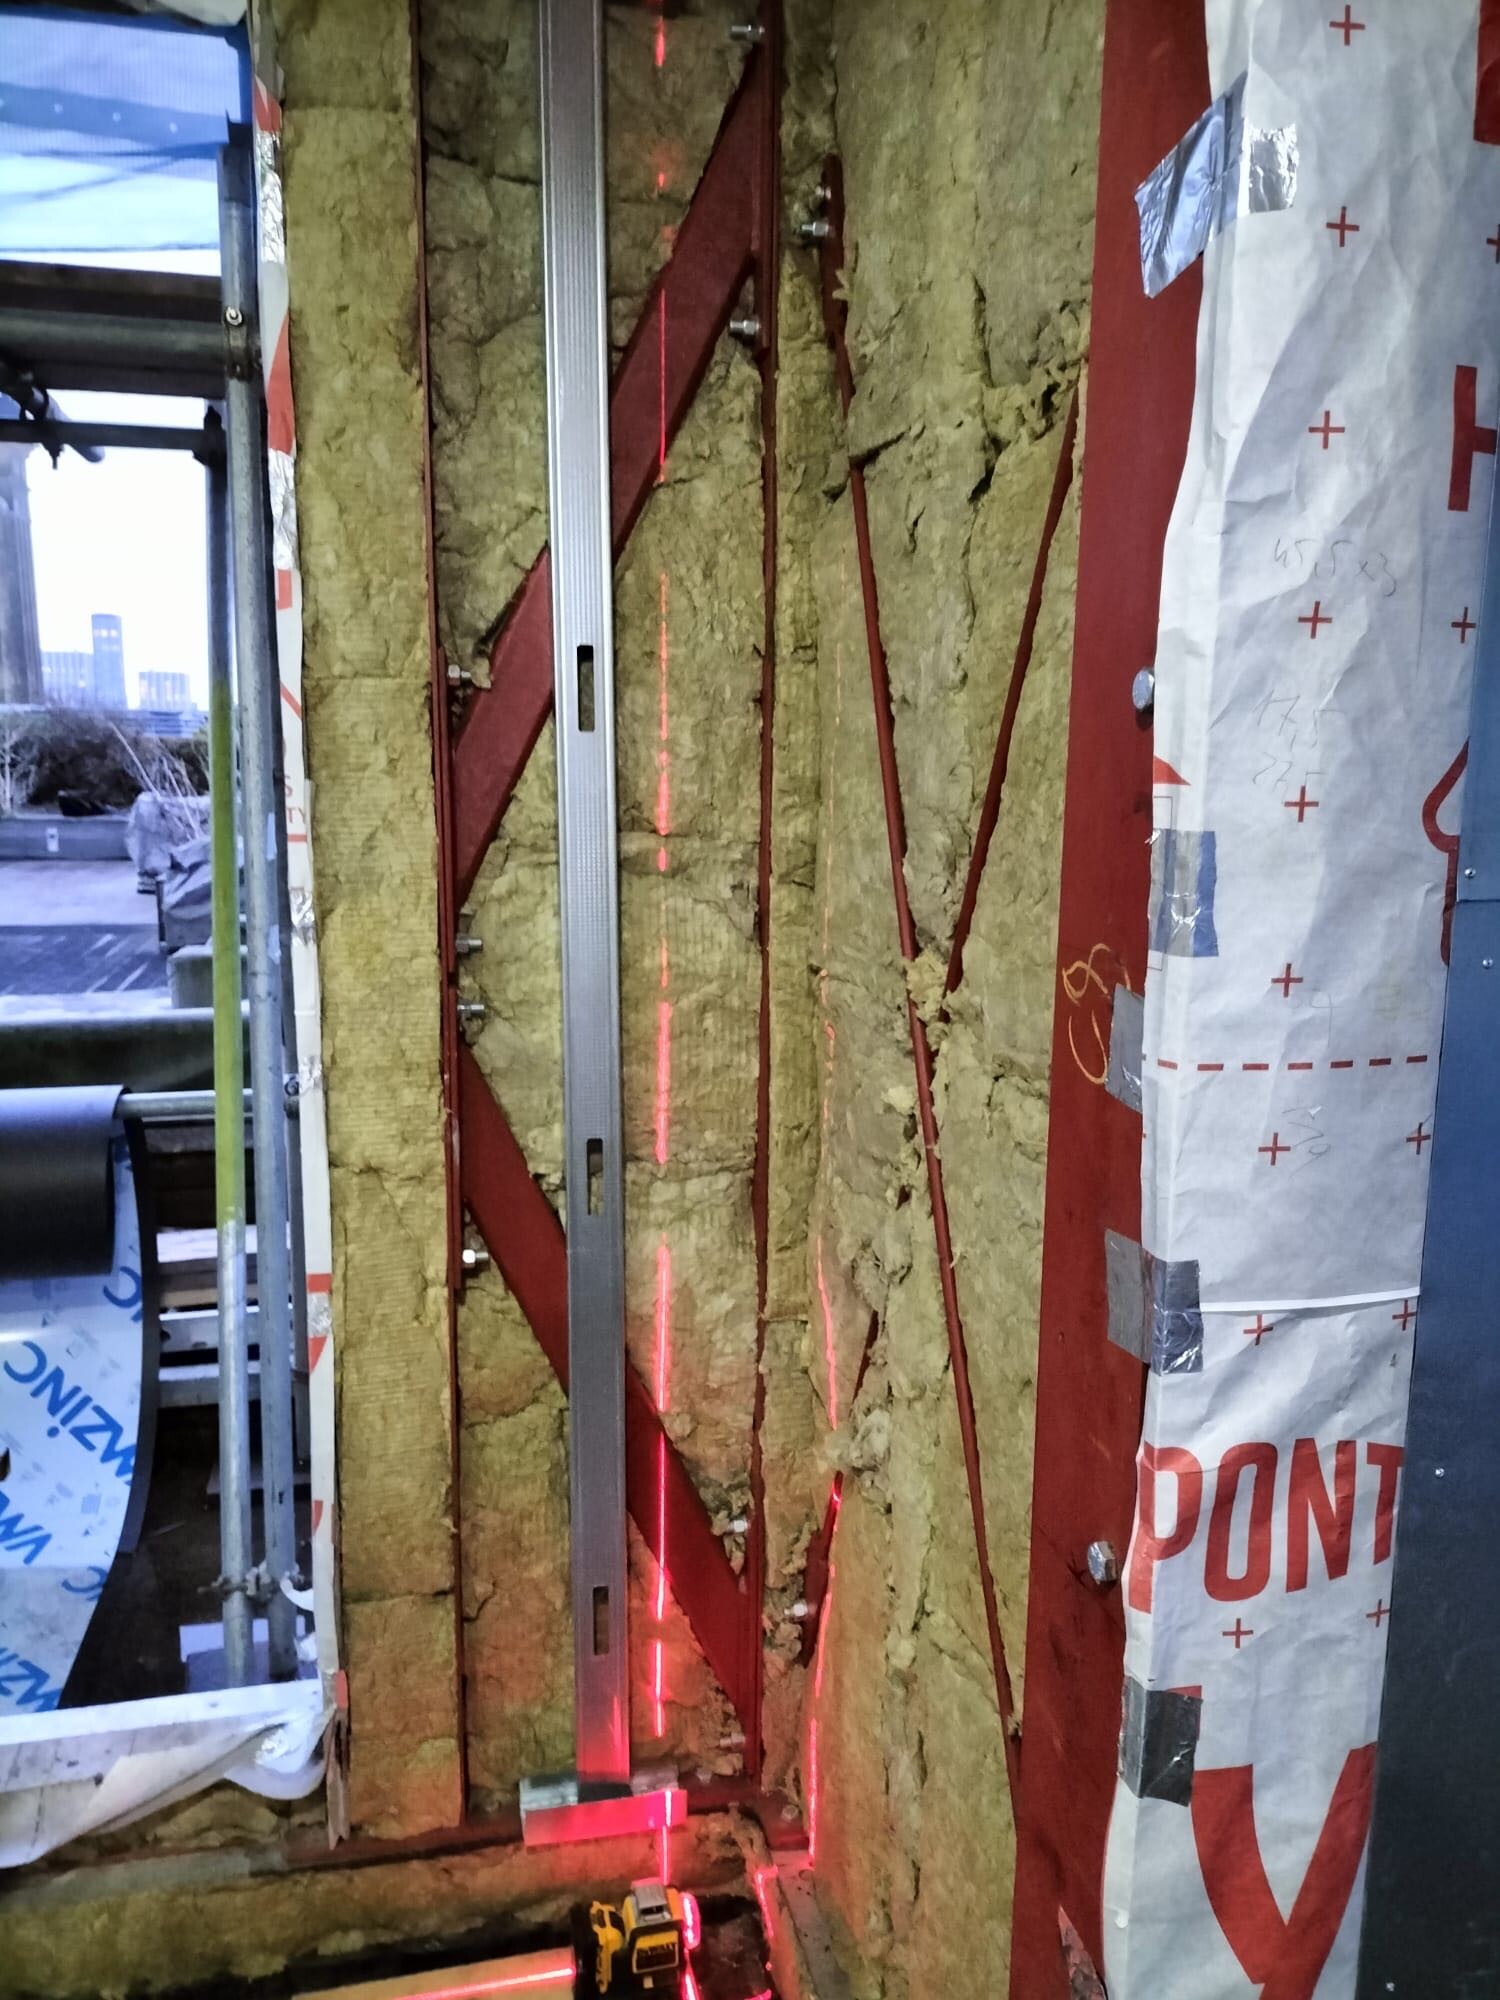
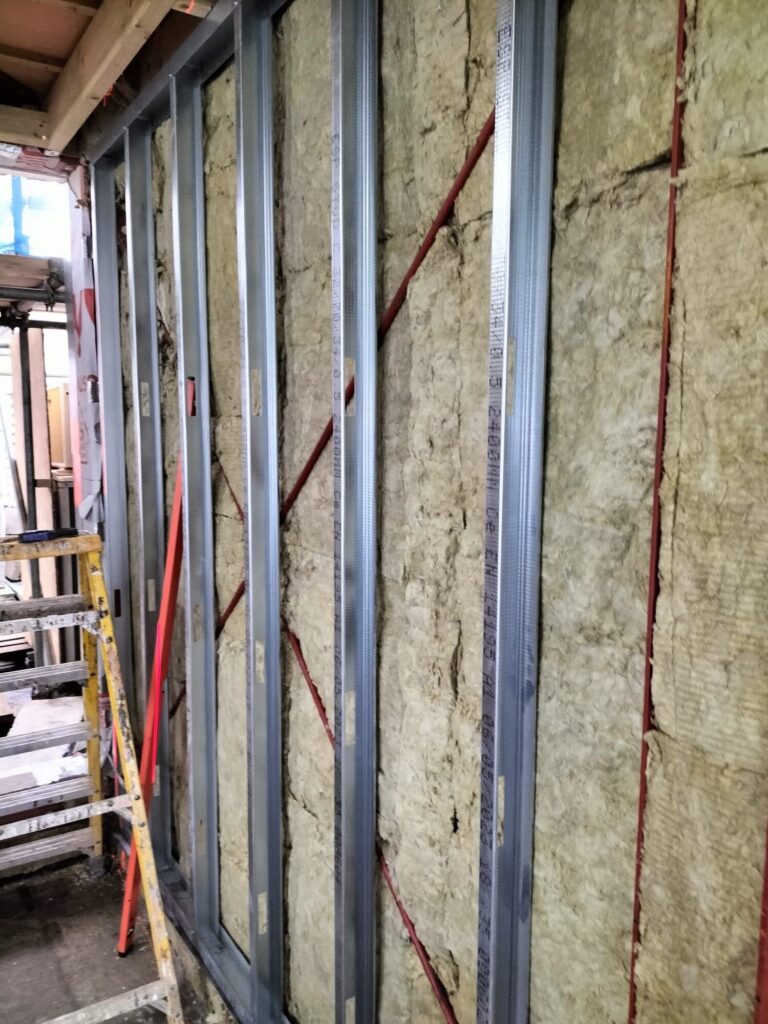
- Rough work (2-6 weeks): Installing or modifying structural elements, plumbing, electrical systems, and HVAC. This is when the “bones” of your renovation take shape behind the scenes.
- Finishes (2-4 weeks): Adding drywall, plastering, painting, installing fixtures, cabinetry, flooring, and other visible elements. This is when your space begins to look like the finished product.
- Cleanup and inspection (1 week): Final touches, thorough cleaning, and official inspections. This phase transitions the space from a construction site to a livable home.
The timeline and disruption level vary significantly based on project scope. Small home refurbishments might take just 1-4 weeks with minimal impact on daily life, while full property renovations can extend to 3-12 months with major disruptions to normal routines.
London renovations often face unique challenges that can affect timelines, including parking restrictions for deliveries, limited working hours in residential areas, and the complexities of working in older buildings with non-standard dimensions and hidden surprises. Planning for these contingencies in advance helps keep projects moving smoothly.
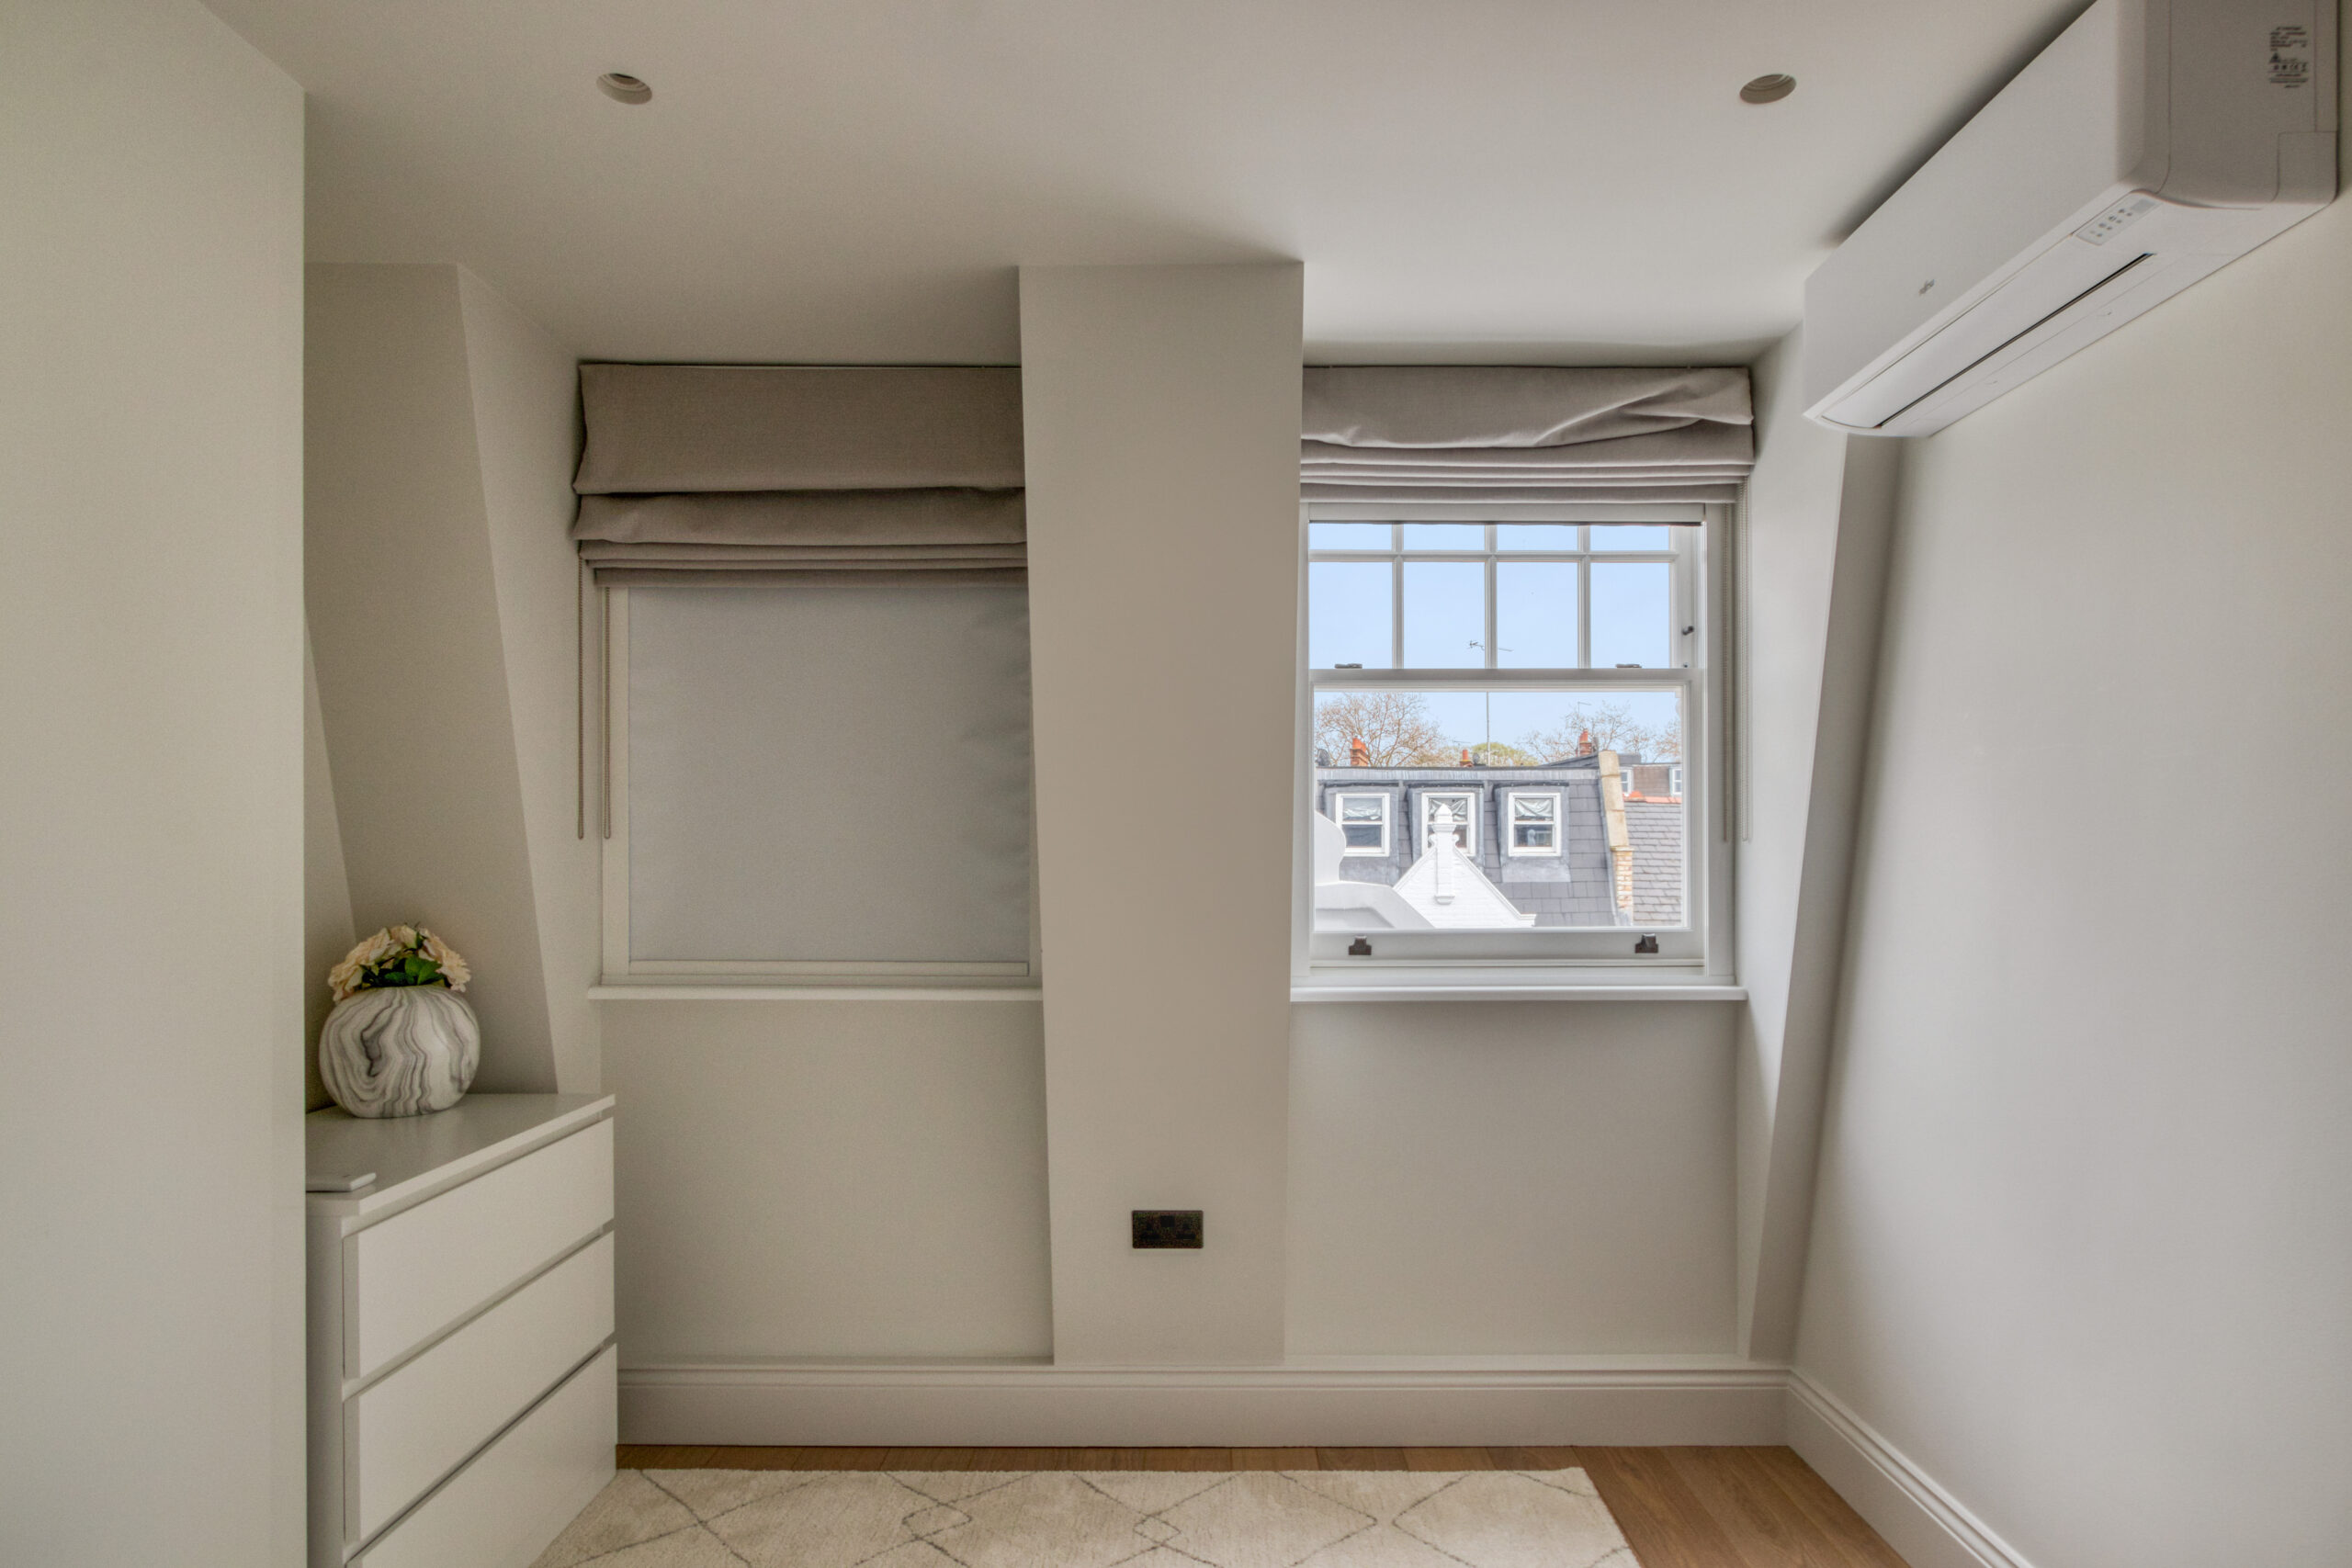
Design Themes, Materials, and Functionality
Creating a cohesive design across your home renovations enhances both aesthetic appeal and property value. Whether you’re undertaking a full property renovation or a focused remodel, consistency in color schemes, materials, and styling creates a polished, professional result.
When selecting materials and finishes, consider the balance between:
- Durability: How well materials will withstand daily use and time
- Maintenance requirements: The ongoing care needed to keep elements looking their best
- Energy efficiency: How choices impact heating, cooling, and lighting costs
- Sustainability: Environmental impact of materials and production methods
In London’s property market, certain design choices consistently add value. Neutral color palettes with strategic accents appeal to the broadest range of potential buyers. Smart home technology—from heating controls to security systems—increasingly features on buyers’ wish lists. Quality fixtures in kitchens and bathrooms typically yield the strongest return on investment, with potential property value increases of 5-10% for well-executed renovations.
Consider how your design choices will age over time. Trend-driven design elements may feel dated quickly, while classic approaches tend to maintain appeal longer. This is particularly relevant in London’s period properties, where blending contemporary functionality with heritage character often creates the most desirable results.
Design Tip
If budget constraints mean prioritizing certain areas, focus on spaces where quality is most noticeable—typically kitchens, bathrooms, and main living areas. Secondary spaces can use more cost-effective solutions without significantly impacting overall impression.
Common Challenges and How to Overcome Them
Even the most meticulously planned home renovations encounter challenges. Being aware of common pitfalls can help you navigate them effectively when they arise.
Scope creep—the gradual expansion of project goals beyond the original plan—is perhaps the most prevalent issue in property renovation. This often happens incrementally (“while we’re at it, let’s also…”) but can increase costs by 20-50% and extend timelines significantly. Combat this by documenting your original scope clearly and evaluating any proposed changes against your budget and timeline before approving them.
Under-budgeting is another frequent challenge, particularly when contingency funds are inadequate or omitted entirely. Industry experts recommend maintaining a contingency of at least 15% for renovations and 20% for remodels involving structural work or older properties.
Poor planning—including unrealistic timeframes or scheduling dependencies—can cascade into delays across an entire project. Mitigate this risk by using detailed project templates, building buffer time into your schedule, and ensuring materials are ordered well in advance of when they’re needed.
When unexpected issues are discovered during a renovation (such as rot, outdated wiring, or asbestos), the best approach is to pause, consult relevant professionals, and reassess your plan. While this may feel like a setback, addressing these issues properly is invariably less expensive than dealing with their consequences later.
Communication breakdowns between homeowners, contractors, and subcontractors frequently lead to misunderstandings and mistakes. Establish clear communication channels from the outset, document all decisions in writing, and schedule regular progress meetings to keep everyone aligned.
Living Through a Renovation in London
The practical realities of daily life during a renovation require careful consideration. The impact varies widely depending on project scope—a full house remodel creates substantially more disruption than a focused home refurbishment.
Typical disruptions include:
- Noise and dust throughout the property
- Limited or no access to certain rooms
- Temporary loss of utilities (water, electricity, heating)
- Reduced privacy with contractors present
- Limited cooking facilities during kitchen renovations
Homeowners typically have two options: stay in the property during works or relocate temporarily. Staying in place is more economical but requires flexibility and tolerance for disruption. For major renovations in London, temporary accommodation costs (hotels, Airbnb, or short-term rentals) should be factored into your budget if you choose to relocate.
If staying during the renovation, consider these strategies to minimize disruption:
- Sequence work strategically (leaving kitchen functional until last possible moment)
- Create sealed work zones using plastic sheeting and tape
- Establish a dust management protocol with contractors
- Set up temporary kitchen facilities in another room
- Schedule noisy work during times when you’re typically out
London’s compact living spaces can make living through renovations particularly challenging. Many London homeowners find creative solutions like working from cafés during the day, using neighbors’ facilities temporarily, or even scheduling renovation work during planned holidays.
After the Renovation
The final phase of any property renovation is ensuring everything is completed to standard and properly documented. Before making final payments, conduct a thorough inspection and create a “snag list” of items needing attention. Common snags include uneven paint, imperfect tiling, non-functioning fixtures, or incomplete cleanup.
Once these items are addressed, collect and organize all relevant documentation:
- Building control certificates and approvals
- Electrical and gas safety certificates
- Warranties for new appliances, materials, and workmanship
- Before and after photographs (valuable for insurance and potential future sale)
- Final receipts and proof of payment
Establishing a maintenance plan helps protect your investment in home renovations. This might include scheduling routine checks of new systems, understanding care requirements for specialty materials, and budgeting for ongoing maintenance costs.
Consider updating your home insurance after significant renovations to ensure your coverage reflects the improved value of your property. Similarly, if you’ve increased your home’s square footage or made substantial improvements, you may need to notify your local council for council tax purposes.
After-Renovation Tip
Create a digital “home manual” with all warranties, maintenance schedules, paint colors, and contractor contacts. This becomes invaluable for future maintenance or if you eventually sell the property.
How Renovation Fits into Broader London Trends
Individual home renovations connect to wider trends reshaping London’s housing landscape. The “renovation nation” phenomenon reflects shifting priorities toward improving existing properties rather than building new ones, driven by sustainability concerns, limited developable land, and the unique character of London’s historic housing stock.
Property renovation and home refurbishment projects increasingly emphasize energy efficiency, with improvements like enhanced insulation, smart heating systems, and high-performance windows. These updates not only reduce environmental impact but also deliver tangible financial benefits—studies indicate that proper insulation alone can cut energy bills by around 20%.
As remote and flexible working becomes more established, renovations increasingly focus on creating functional home offices, multi-purpose spaces, and better indoor-outdoor connections. London’s premium on space makes clever remodeling that maximizes functionality particularly valuable.
The preservation and thoughtful modernization of period properties—from Victorian terraces to converted warehouses—continues to be a hallmark of London’s renovation landscape. Projects that successfully blend heritage character with contemporary convenience command premium prices in the capital’s competitive property market.
Conclusion
Embarking on a property renovation journey requires careful planning, realistic budgeting, and informed decision-making. Whether you’re considering a light home refurbishment, a targeted remodel, or a comprehensive renovation, the principles outlined in this guide provide a roadmap for success.
Remember that the most successful home renovations balance three key elements: clear goals that reflect your lifestyle needs, realistic budgets that include contingency planning, and quality professional support where needed. By approaching your project systematically—assessing your property thoroughly, defining your scope clearly, and selecting the right team—you can transform your living space while managing costs and minimizing stress.
As part of the UK’s “renovation nation” trend, your property investment contributes to the sustainable use of existing housing stock while creating a home that better meets your needs. Whether you’re updating a London terrace, renovating a suburban semi, or refurbishing an urban apartment, the satisfaction of seeing your vision realized makes the renovation process ultimately rewarding.
With this comprehensive guide as your foundation, you’re well-equipped to navigate the complexities of home renovations and enjoy the benefits of your transformed living space for years to come.